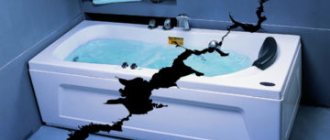
Any, even the most reliable and high-quality bathtub, over time can become covered with cracks and roughness, turn yellow or rust. It is almost impossible to avoid this - even the mildest detergents and household chemicals lead to thinning and wear of the surface coating. In this case, the bath owner is faced with the question of purchasing and installing a new bowl. However, this is a rather expensive solution, which, moreover, entails the need for repairs to the premises. Therefore, it is better to restore the bathtub - it will not require large expenses, and the work can be done independently.
Do-it-yourself bathtub restoration
There are three main methods that allow you to restore the appearance of old plumbing: applying a new enamel coating, restoration with self-leveling acrylic and using a special liner. It is better to choose a specific method taking into account your own financial capabilities, the materials from which the bowl is made, as well as its condition.
Restoration process by staining
In addition, it should be taken into account that such a solution has a number of disadvantages, since a bowl with a new coating will not have the same performance characteristics as one that was manufactured in an industrial environment.
- The materials that are used to restore plumbing fixtures are less durable and not as strong, so the surface requires more careful and gentle care.
- When enameling a bathtub or restoring it using liquid acrylic, you may encounter the following problem: the original color of the bowl will shine through the new coating (especially if the layer is too thin), changing its shade.
- During use and cleaning, the color of the bathtub may change under the influence of chemicals.
- Sharp or bulky objects will damage the new coating even if they fall from a small height, and dyes (such as hair dyes) can leave permanent stains.
- Those who like to smoke in the bathroom will have to give up their habit, as a cigarette can leave an unsightly burn on the surface.
However, restored plumbing fixtures are repairable, and their properties directly depend on the quality of materials and the accuracy of the work.
Bath after restoration
Photo of a restored bathtub
Method number 1. Applying new enamel
Despite the growing popularity of modern polymer compositions, steel and cast iron plumbing fixtures with enamel coating are often found in modern houses and apartments. Metal is a strong and reliable material, but the enamel coating wears out quite quickly. Restoring an enamel coating is a fairly simple process that does not require special knowledge or skills.
True, this method of restoring the appearance of bathtubs has one significant drawback. Cracks that appear on the surface grow very quickly, the enamel begins to peel off, water accumulates underneath it, which leads to the appearance of an unpleasant odor, dampness and mold. In addition, this method is not suitable for bathtubs with a large number of small defects - they can be noticeable even after applying the coating.
How to choose a composition for restoring enamel?
In order for the new coating to be strong and reliable, you need to choose a composition for restoring bathtubs. There are not many options, so to make the right choice you need to know the basic characteristics and properties of the compositions.
| Name | Manufacturer | Durability of the coating | Features of work |
Epoksin 51 and 51C | Russia, Germany | On average 5 years (subject to the conditions of application and operation, the figure can reach 7-9 years) | A two-component enamel with a hardener that hardens completely in 48 hours. Fills all minor defects of the bathtub surface well. It is quite difficult to work with the solution, since it is very thick and “sets” in about 60 minutes |
Stakryl | Russia | 6-8 years | Two-component mortar with epoxy resin. It can be used when there are no noticeable defects or damage on the bathroom. Requires quick work as it hardens in about 70 minutes. In liquid form it is toxic and can cause allergies |
Reflex-50 | (Russia, Finland) | 10-15 years | One of the highest quality but most expensive compounds for restoring plumbing fixtures. Working with the solution is quite simple, but the bath will be able to be used for its intended purpose in at least a week |
"Fantasy", "Svetlana" | , Russia | 6-8 years | Bathtub restoration kits, which include a two-component bowl coating, hardener and surface preparation products |
Stakryl
reflex 50
Damage Prevention
To prevent damage it is necessary:
- do not put cutlery, construction tools and other sharp objects in the bathtub;
- use plastic basins for hand washing, and place heavy metal containers on a special stand that rests on the sides of the bathtub;
- do not let children jump on the bottom of the acrylic bowl while swimming;
- When washing animals, place a thick, soft towel on the bottom;
- during repairs, remove the bowl from the bathroom or cover it with several layers of paper, film and fabric;
- when using strong acids and alkalis to clean pipes, pour them strictly into the drain hole;
- wash the bathtub with soap or mild detergents at least once every 1-2 weeks to eliminate the need for treatment with acids and abrasives.
If there is defective enamel and the thickness of the acrylic bowl is less than 2-3 mm, cracks, chips and peeling can occur even with minor impact. To avoid repairs, you should carefully inspect the bathtub when purchasing.
Method No. 2. Filling bath
This method of restoring plumbing consists of the following: liquid acrylic is poured into a bowl, which subsequently hardens and forms a new coating. Compared to surface enameling, which is described above, it has a number of advantages.
- Acrylic is a thick and viscous substance, thanks to which it lays on the surface in a thick, even layer, hiding all the defects and unevenness of the bathtub.
- The composition does not leave smudges, streaks or bubbles on the surface.
- To restore the bathtub, you do not need to remove the tiles or dismantle the bowl.
- The process takes less time than enameling or restoration using an inlay.
- Acrylic creates a film on the surface that repels dirt and plaque.
- Applying the mixture does not require special knowledge and skills.
- Most materials used for bathtub restoration have virtually no unpleasant odor.
The method was called “Pour-in bath” due to the special method of application.
The result of this restoration method will be a smooth, glossy surface that perfectly retains heat and does not retain dirt. As with enameling a bathtub, before you begin, you need to think about the choice of material. It is important to note that neither for the sake of economy nor for any other purpose can you use ordinary acrylic, which is sold in hardware stores, for the restoration of bathtubs. According to its characteristics, it differs from sanitary acrylic, which is used specifically for the restoration of plumbing fixtures, so you can completely ruin the bathtub and harm your health. The choice in this case is made between glass and liquid acrylic.
Glass or liquid acrylic?
Bathtub restoration kit
Today, two types of materials are used for the restoration of bathtubs: glass acrylic and poured acrylic (the market leader in the production of such materials is the Plastall company, which is why liquid acrylic is often called plastol). Many consumers believe that they are no different from each other, but in fact this is not the case.
Self-leveling acrylic
Stakryl appeared in stores about 10 years ago and has already proven itself well. It fits well on any surface and is cheaper than plastol, however, restoring bathtubs with its help can be quite difficult for beginners, since the composition sets quite quickly. Working with plastol is much easier, since it is less demanding to use and does not have a pungent odor. In addition, this material retains its properties even after freezing.
Stakryl
The Plastall company offers consumers who want to restore their bathtubs themselves a whole line of materials.
| Name | Drying time | Peculiarities |
| "Plastol" classic | 36-48 hours | An easy-to-work material that spreads well, has increased ductility and good adhesion. It has no pungent odor, does not require the addition of thinners or other substances, and forms a smooth and fade-resistant film. The mixture retains its properties for 90 minutes |
| "Plastol-24" | 24 hours | A new material based on an improved classic formula. Applied in one layer, the surface does not turn yellow, does not crack or peel, and is resistant to mechanical damage and abrasion |
| "Plastol-M" | 36-48 hours | A budget solution with an optimized formula, so the result of using the material is no different from restoring bathtubs using more expensive products. Does not have a strong odor, does not cause allergies, the mixture retains its characteristics for 90 minutes |
| "Plastol-Super" | 16 hours | The “fastest” liquid acrylic that hardens in a matter of hours. Does not form bubbles or streaks, does not require the addition of solvents or other components, but the mixture is “viable” for only 45 minutes |
When choosing a material, it is important to pay attention to the price - a good product cannot cost less than what is indicated on the manufacturer’s website, and counterfeits do not provide the required quality of the finished coating. For those who do not yet have experience in restoring bathtubs, it is recommended to buy acrylic with a reserve so that it is enough to cover the entire surface.
We repair chips
Chips on an acrylic bathtub are a common occurrence. They are formed as a result of careless use, accidental impacts with massive metal objects, etc. The choice of repair method depends on the size of the chip.
If it is minimal, try to solve the problem of restoring the surface by simply polishing. Before performing this, the chip must be rubbed with coarse sandpaper, and then polished with fine-grained sandpaper. You can speed up the work by using a drill equipped with a polishing attachment. Having completed polishing, you need to remove dust and wash the restored area of the coating with a soap solution.
ABRAforce sandpaper, fabric 100mm x 5m, (P60), art.500024839
If the size of the chip is significant, then again you cannot do without a repair kit. When restoring chips, you need to proceed in the same way as when eliminating cracks. First, the working area is cleaned with sandpaper of different grain sizes, after which the chipped area is washed and degreased. Then follow the same steps as when sealing cracks. Liquid acrylic must be applied carefully and just enough to level the surface. Excess applied restoration mass must be removed immediately, avoiding the formation of a tubercle at the chip site. The restored bathtub should be dried for 6-12 hours, depending on the temperature and humidity in the room, after which the working area is polished and washed off with water.
Method No. 3. Restoration using an inlay
Restoring bathtubs using acrylic liners is also called the “bath-to-bath” method. The liner is a structure made of acrylic, plastic or silicone, which is an exact copy of the bowl. You can buy it in a specialized store, having previously taken all the necessary measurements of the bathtub, and then glued it to the old bowl.
The most popular today are acrylic inserts - they are much more aesthetically pleasing and durable than plastic or silicone ones. This design is ideal for old bathtubs that cannot be restored with a new layer of enamel or liquid acrylic. In addition, the surface of the liners retains heat perfectly, its surface is absolutely smooth, but at the same time does not slip at all.
Bath liner
This is the most reliable way to restore a bathtub (the service life of a high-quality acrylic liner is approximately 15-20 years) and, contrary to popular belief, it does not reduce the interior space of the bathroom.
Advantages of a bathtub updated with a liner
However, this method of bathtub restoration also has its drawbacks.
- Difficult to install. Installation of an acrylic liner is a rather complex and time-consuming process. The liner is placed so that it covers the edges of the bathtub, and if the bowl is installed close to the wall, you will have to additionally remove the side and break the tiles.
- Possibility of water getting between two baths. If the installation was performed incorrectly, or due to wear and tear or the use of poor-quality materials, water may get between the liner and the bottom of the bowl. This will lead to dampness, mold and an unpleasant odor.
- Inconveniences during operation. Sometimes manufacturers make liners that are too thin, which is why they can sag underfoot and eventually become deformed or burst.
- Inserts are made for standard bathtubs only. As a rule, bathtubs are divided into two types - 1.5 m and 1.7 m, and if the bowl has non-standard sizes or shapes, choosing a liner will be very difficult, and sometimes impossible.
- Quite a high cost. Compared to new acrylic bathtubs, liners are inexpensive, but for the same price you can buy a new steel bathtub.
How much does a bathtub liner cost?
To reduce the risk of such problems, you need to buy only high-quality designs, and also strictly adhere to all stages and rules for installing liners.
Choice of acrylic liner color
How to choose an insert?
To avoid making mistakes when purchasing an insert, you need to take the following measurements:
- the width of the bowl along the inner surface, and measurements should be taken on both sides;
- length along the inner and outer surfaces;
- depth of the bowl at the drainage point.
To avoid making a mistake that will entail hassle and additional costs, you can invite a professional measurer.
Measurements
Another important criterion is the shape of the bath, rectangular or rounded. Based on these parameters, you can select a suitable liner. As for the quality of the product, here you need to pay attention to its surface (it should be smooth, without roughness, protrusions and other defects), as well as thickness. High-quality earbuds that can serve owners for a long time have a thickness of at least 6 mm.
How to choose a bath liner
It should be noted that most modern stores sell products with a thickness of 3 and sometimes 2 mm - such liners are very short-lived, and it is not recommended to use them for the restoration of bathtubs. In the best case, the structure will last about 5 years, after which it will have to be dismantled and replaced.
Which is better: an acrylic liner or a “fill-in bathtub”?
Elimination of cracks up to 0.1 cm
To remove minor damage, specialized enamels are used. The composition is selected taking into account the color of the bath.
Repairs are carried out in the following sequence:
- Clean the surface from dirt. For cleaning, use fine-grain sandpaper.
- Remove dust with a jet of compressed air. The surface must be dry before application. This will improve grip.
- Degrease the repair area. You can use white spirit, acetone, alcohol, etc.
- Apply the enamel with a paint brush or sponge. In this case, the layer of the composition is made even and thin.
- Wait for the enamel to dry completely.
- Polish the area.
After repair, a smooth surface without cracks is obtained. The bath is kept dry for 24 hours.
Step-by-step instructions for restoring a bathtub with a liner
Stage one. Preparing the bath and available products
To install acrylic liners, polyurethane foam and silicone sealant are used. It should be noted that to perform the work you need to use only tools specifically designed for these purposes. Simple foam, which is used in repair work, will not work in this case - it has a low density and expands too much. To improve these characteristics, additional components are added to the foam - this is the material used for installing acrylic liners. In addition, in this case, a plumbing sealant is used, which is waterproof and mold resistant.
Preparing a bathtub for restoration with a liner is a rather long and labor-intensive process, which, in the absence of appropriate skills, is best left to specialists.
Remove old harness
Remove the old siphon
Apply sealant around drain holes
| Step, no. | Description |
| Step 1 | Release the sides of the bathroom, if necessary, remove one or two bottom rows of tiles. There is no need to remove old enamel, but it is recommended to clean the surface with an abrasive material - as a result, it will become rough and will adhere better to other materials. After this, it is good to clean the bowl of debris and crumbs, degrease with acetone or alcohol |
| Step 2 | Disconnect the bathtub from communications by removing the upper and lower drains. The crosspiece also needs to be removed, and you should not use a hammer or other similar materials for this purpose, so as not to damage the drain. Before proceeding with installation, it is better to check the condition of the pipes - if they are too worn out, it is better to take care of replacement |
| Step 3 | Try on the acrylic liner - the structure should fit easily or with little effort. Under no circumstances should you hammer it in using improvised tools. |
| Step 4 | Cut holes in the acrylic for the plums. The most convenient way to do this is to plug the bathtub with a stopper and lubricate it with some substance that leaves marks on the surfaces. Treat the second drain hole in the same way. Place the liner in the bowl, press it in the drainage areas and remove it - marks should be imprinted on the bottom of the structure. After this, all that remains is to mark the centers and drill holes of the required diameter. To avoid injury to the skin from the sharp edges of the cuts in the future, they should be thoroughly cleaned. |
| Step 5 | Determine the slope that is needed for good water drainage - usually it is 1.5-3% in the direction of the drain hole |
| Step 6 | Once again it is good to degrease the surface of the bathtub. Apply sealant to the upper drain hole, screw on the adapter, onto which sealant is also applied. After this, it should be applied to the drain hole, the width of the strip should be 2-3 cm, and the height depends on the tightness of the liner to the bowl |
Stage two. Installing the liner
The basic rule that should be remembered when installing an acrylic liner is that all work should be done quickly enough (in about 4-5 minutes), otherwise the adhesive composition will harden and will not “grab” the materials well.
| Step, no. | Description |
Step 1 | Apply polyurethane foam to the bottom and sides of the bathtub. Its quantity also depends on the tightness of the structure, but usually it is applied in stripes with an interval of 4-5 cm, and on the sides the stripes should be vertical and stretch from the bottom to the very top |
Step 2 | Install liner |
Step 3 | It’s good to press down the sides of the liner with your hands, then stand with your bare feet in the place where the drain is located and move towards the opposite edge - this way the liner will fall into place and press firmly against the surface of the bowl. After this, press down the walls of the structure well with your hands. It is not recommended to put pressure on the liner with any hard objects or hit it, otherwise you can damage the acrylic during the installation process |
| Step 4 | Connect the bathtub to the communications, using sealant if necessary |
Step 5 | Plug the bathtub with a stopper and fill it with cold water so that its surface is 1-2 cm below the top drain hole. Leave the bath for 5-6 hours, then drain the water and wait another 12-13 hours |
After the materials have completely dried, the seal between the bowl and the walls should be restored and the tiles should be put back in place.
Ceramic border will prevent water from getting behind the bathtub
Surface preparation
Before you begin removing damage, you must prepare the surface.
First you need to clean it of dirt, because scratches and chips often collect dirt. What do we have to do?
- rinse the bathtub with warm water;
- Apply the cleanser to the damaged area and leave for 5 minutes;
- Use a soft sponge or cloth to wipe the area you are going to restore in a circular motion;
- Rinse thoroughly with water and wipe away excess drips.
Now the coating is clean, but it still needs to be degreased to make it easier to work with polish. You can use alcohol for this. Read more about surface degreasing in a special article.
Repair of serious defects
Damage that leads to a leak in the bathtub and water constantly appears in the room after taking a shower is considered serious. To fix the problem you need fiberglass. Proceed as follows:
- The edges are cleaned with a knife.
- The problem area is sanded with sandpaper.
- Treat with an alcohol solution.
- Epoxy resin is applied.
- Wait for the layer to harden.
- Treat the area again with sandpaper.
- The smooth coating is wiped with alcohol.
- Polish is applied.
Damage that leads to a leak in the bathtub and water constantly appears in the room after taking a shower is considered serious.
What materials to use for repairs
When restoring an acrylic bathtub yourself, the correct choice of repair materials is very important. If you use substances for this that are similar in appearance to acrylic, but differ in technical characteristics and performance properties from the material used to make the bathtub, then all efforts will be unsuccessful. Very quickly, the repaired defects will appear again, cracks will begin to grow, and the new coating will peel off and chip.
The main factor that dictates the choice of material for carrying out restoration work on the surface of an acrylic bathtub is its production technology. Manufacturers of this type of plumbing use two technologies:
- vacuum-type molding from acrylic sheet;
- spraying an acrylic coating onto a base made of ABS plastic.
Determining how your bathtub was made is very simple. If upon purchase it was wrapped in a protective film package, then it was made by molding. If there is no polyethylene protective film, then you are dealing with acrylic-coated plumbing fixtures. If you didn’t buy the bathtub, then you can use another method to determine the technology for its manufacture. To do this, carefully inspect the cut of the side, especially the white top layer. If its thickness is 5-6 mm, this indicates that the bathtub is molded from an acrylic sheet. If the layer of white coating does not exceed 2 mm, your bathtub is made of ABS plastic. After clarifying these technological features, you can take care of the materials for the restoration. For a molded bathtub you need to buy liquid acrylic; for a sprayed bathtub you need to use a special repair kit, which can often be included with the sanitary ware when sold.
Toothpaste
The easiest way to remove shallow scratches on acrylic. Toothpaste polishes the surface due to the small abrasive particles it contains. The procedure is as follows:
- Apply a little (see photo) toothpaste to the scratches;
- Polish them with a sponge or rag;
- Rinse off any remaining paste;
- Repeat if necessary.
This amount of toothpaste is enough to remove such a large abrasion.
Helpful information
Tips for removing scratches:
- If a scratch has just appeared, it can be treated with a camouflage pencil with a waterproof compound. They are sold in online markets and cost about 170 rubles.
- You should begin removing any defects immediately after they are discovered. This will avoid their increase in size and complex repair work.
- If there are a lot of scratches, restoring the bathtub will be problematic. It is much easier to call specialists who restore bathtubs with liquid acrylic. You can find many similar advertisements on the Internet. The average cost of such services is 2,500 rubles.
All the most important and useful information about cleaning the bathroom is collected in this section of the site.