The final stage of apartment renovation - finishing work is carried out from top to bottom, unless this is a spot repair of the cladding. Repairing the ceiling in an apartment is carried out first, not because it is the most visible of the enclosing structures, but due to the inevitable contamination of all bases located below in the process of finishing it. However, the finishing design of the ceiling base often becomes unusable before the cladding of the walls and floor - the ceiling, although not subject to abrasive effects like floor coverings, clearly shows on its surface the consequences of other negative factors - deformations and vibrations of the building, leaks from above, pollution. Therefore, renovation of ceilings in an apartment is sometimes carried out more often than finishing other enclosing structures, that is, not as part of a large-scale renovation of the interior of a home, but as an operation that can be performed independently - when installing protection against damage to the cladding of walls and floors. Accordingly, the need to frequently perform this type of work forces us to do the ceiling repairs ourselves in order to save money.
Let's look at how to repair a ceiling in the most common situations and in the most affordable ways.
Types of ceiling finishing in residential premises
High-quality and effective repair of the ceiling in an apartment with your own hands is carried out in different ways and is necessary for its restoration.
To fully equip the ceiling, various techniques and technologies are used, but the most popular repair options remain the following:
- painting the ceiling with preliminary surface treatment;
- applying whitewash and constantly updating the applied decor;
- wallpapering, full or partial ceiling covering;
- arrangement of a suspended ceiling using different materials;
- installation and installation of a stretch ceiling using PVC film.
Affordable building materials and the ease of implementation of all measures for their use make it possible to carry out repairs on our own.
What tools will you need?
The set of tools and materials depends on which finishing method you choose.
But at the preparatory stage you will definitely need the following:
- film - to protect furniture that cannot be removed from the room, floors, doors and windows;
- scaffolding or stepladder;
- spatula - for removing paint and fragile plaster from the surface;
- sandpaper - to remove small irregularities;
- spray or roller - moistened old coating is easier to remove;
- brush – for applying primer to a cleaned surface;
- light bulb or flashlight - to identify poorly visible irregularities in the ceiling;
- construction glasses and a respirator - to protect the eyes and respiratory organs from fine dust.
Do you need repairs?
We have already renovated more than 500 apartments, we will be happy to help you too
Find out the cost of repairs
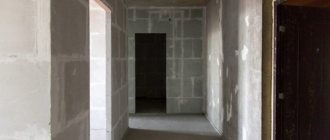
Preparing the ceiling for upcoming repairs
Repairing the ceiling in an apartment with your own hands without involving outside specialists requires the mandatory implementation of certain procedures.
Repair work can be carried out immediately after construction or included in a complex of cosmetic and major repairs, which makes it possible to properly prepare the surface.
Application of adhesive boards
The basis of the material is polystyrene. The texture in this case determines the appearance, as well as the smoothness and presence of relief. Surfaces can look like facing stone, a cut of wood, or the cold shine of metal.
Protection against possible contamination is provided by laminated film. It is not difficult to carry out such repairs yourself in a relatively short period of time.
Installing such tiles will help provide excellent sound insulation and prevent heat loss.
The work is carried out in the following sequence:
- The surface is completely cleaned and primed;
- The tiles begin to be laid from the central part. For gluing, you can use special glue or use liquid nails;
- The edges are masked with cornices. Only in this case a completed look is achieved.
Exposure to direct sunlight is contraindicated for polystyrene. This has a bad effect on the durability of the material.
Ceiling cleaning
Before carrying out repair work, the surface should be thoroughly cleaned of any remaining building materials and any coating already applied.
Note!
Do-it-yourself vegetable garden: new interesting garden crafts for the street at your summer cottage (photo/video review)
DIY ceiling installation: step-by-step description of how to make a ceiling. Review of modern structures and ideas for their design (105 photos)
Do-it-yourself garage doors - a detailed description of the construction of various types of garage doors (120 photos)
Preparatory stage: cleansing
If the ceiling repair is being done in a building that has recently been put into operation, then this step can be safely skipped.
But in an old room you will most likely have to remove the previous covering. If it is whitewash, then the cleaning method is very simple and will not take much effort and time.
- Take a regular roller and moisten it with warm water.
- The surface is divided into small sections and processed until completely wet, each time increasing the pressure and pressing water into the coating.
- Then you need to take a spatula and remove the layer of old coating to the concrete base or underlying putty layer.
Note You can determine whether it is worth removing the old layer of putty by first checking it for strength: if it holds well and “sits” tightly, then you should not touch it, but if the putty peels off freely and crumbles, then it is necessary to remove these loose parts.
The process will be much more complicated if the coating consists of water-based or oil-based paint. You will have to put in a lot of effort and patience during prolonged scraping with sandpaper or a spatula.
The best option would be to soak the paint layer with a special remover and leave it for 10-12 hours.
After this, the softened paint will be easily separated from the surface. You can also use a construction heat gun or hair dryer for this purpose. If there is old wallpaper on the ceiling, you need to wet it with hot water. This will make removing them much easier with a regular spatula.
Surface primer
After removing the topcoat and decorative design elements, you need to begin applying primer to the surface of the ceiling.
Particular attention is paid to existing cracks and gaps between the concrete floor slabs, which are filled with new cement mortar, and the primer is applied with a roller or brush.
Pasting with plastic panels
The last considered method of how to repair the ceiling in a room is pasting with slabs. This method is much simpler than the wallpaper method, because you can do it yourself, without anyone’s help. The tools you will need are a mounting gun, paint cord and a knife for cutting panels.
The main steps to perform such a procedure are as follows:
- After completing the preliminary work, it is necessary to determine the center of the surface. To do this, diagonals are drawn from opposite corners, and the place of their intersection is marked as the center of the room.
- Then the gluing process itself begins from the intended center. We apply an adhesive mixture to the edges and center of the panel and attach it to the ceiling. The corner of the first tile should be located clearly at the corner of the intersection of the diagonals.
- Next, following the work already done with the first tile, we attach the others. At the junction of the panel and the wall, it is necessary to adjust them to the required size.
- As a final step, we glue the ceiling plinth or molding around the entire perimeter to further hide unevenness and create an ideal surface.
Putty and plaster
Plastering is not a mandatory preparatory procedure; putty provides greater shrinkage and reduces the usable area of the room.
With the right choice of further finishing, you can only use a primer to decorate the ceiling, which will help you avoid wasting extra time and effort.
Note!
Insulate the foundation with your own hands - a step-by-step description of the use of the best materials and technologies (90 photos)
- Do-it-yourself pergola on a summer cottage: step-by-step instructions with photos and descriptions
Laying laminate flooring with your own hands: a detailed description of how to lay laminate flooring. Laminate calculation, step-by-step description and installation secrets (105 photos and videos)
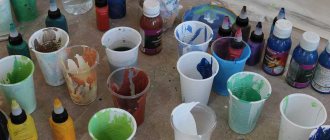
Selection of materials for ceiling decoration
Modern do-it-yourself ceiling repair ideas involve the use of modern and highest quality materials.
Their correct choice will help carry out repair work quickly and efficiently, maintaining a unified interior composition and creating an atmosphere of coziness and comfort in the room.Wallpaper for pasting
For the ceiling, it is recommended to select wallpaper in neutral colors and without large prints, with a strong and wear-resistant base of good quality.
A durable base guarantees increased quality of the coating and allows you to guarantee a good and stylish design of the ceiling surface and the ability not to update it for a long time.
Suspended structures
The proposed videos of do-it-yourself ceiling repairs make it possible to visually assess the complexity of the work being carried out.
Thanks to the video material, you can independently carry out repairs and install suspended structures for further securing plasterboard, PVC panels, and other finishing materials.
Stretch ceiling
Repairing a suspended ceiling with your own hands is very difficult due to the need to carry out a whole range of work to replace the canvas.
If necessary, you can install new structures for stretching the film, or invite specialists with equipment to restore the integrity of the tension structures.
Installation Tips
These tips apply to any type of ceiling and are universal. Let's start with the stages:
- Dismantling, cleaning. Be sure to remember the large number of necessary tools. Hats, goggles, respirators and gloves are a necessity. With them you do not put your health at risk. Next, take care of the sawhorse and portable scaffolding, creating a sturdy structure that can make the whole process easier. It is necessary to cover the floor, cover all interior items, and even better, get rid of them. Next, we moisten the surface and remove the old coating. A spatula is needed for cleaning wallpaper and old whitewash. We use the cleaner if the ceiling has been painted. Ceiling joints also need to be cleaned. If any of the elements in the ceiling system begins to work poorly, this trouble must be eliminated, as well as all drips, mold, and mildew must be removed.
- Preparatory work. They are quite simple. It is necessary to use a level to understand the slope of the ceiling. If the structure is bent, then special marks are made for further correction. Cracks or joints of ceiling tiles, unevenness, all need to be repaired using plastic compounds. Also do not forget about priming and drying.
- Alignment. Plastering and filling works. Everything is simple here, if you are going to whitewash, paint, lay wallpaper, then you need to level the surface with a plaster mixture. You will need a level as well as other tools. Primer, putty, smoothing, re-primer. After all the processes, you can start gluing textured wallpaper or polystyrene boards.
- Installation, frame installation. In suspended or suspended ceilings there is no need to go through the leveling stage. We destroy all the disadvantages of the ceiling and begin sealing the seams, then treat the ceiling with special compounds. After this, it is necessary to install battens for the false ceiling. A metal profile or wooden lath always acts as a frame in a future structure. If the master has chosen wood, then it must be treated with special fire-resistant coatings.
- Sheathing, facing works. Several standard panels need to be cut and suitable plasterboard blanks must be created from them. They should completely match your ceiling. A frame is created, you need to use fasteners for further installation. The structure is primed, then it is puttied and installed.
- Whitewashing, painting. This type of ceiling treatment is one of the easiest and most complex at the same time. You can paint anything, even a drywall surface. But you should understand that this can only be done after high-quality surface preparation. Be very careful with working solutions. Any contact with the eye can impair your vision, even to the point of losing it. You'll have to see a doctor. Therefore, it is imperative to wear safety glasses.
It is also worth saying a few words about creating lighting, strengthening the entire structure and adding decorative details. Always focus your attention on the option you want to get in the future. Don't think about the price. Create the ceiling of your dreams in your head and only then think about how much it will cost you. This approach will allow you to quickly determine what you want.
You shouldn’t strengthen the structure or create lighting without the help of professionals. Especially in the case of stretch ceilings. This is an overly complex design and any mistake can lead to the loss of large funds. It is worthwhile to competently approach the issue of safety, as well as creating all the necessary conditions for fast, uninterrupted work.
DIY ceiling repair photo
Please repost
0