Home / Ceiling design / Design solutions / How to make OSB lathing on walls?
OSB or OSB - oriented strand board, is one of the new popular materials for finishing a wide variety of surfaces or used as the main structural material for building houses. There are a lot of applications for it, and in this article we will consider only one of the ways to use such panels - interior wall decoration. At the same time, the most important point in this situation will be how the sheathing is assembled under the OSB slab for attaching it to the wall.
How to lay linoleum on OSB
In order to correctly lay any linoleum on OSB boards, you need to know well how to prepare the base and how best to glue this material.
General operational requirements, recommendations for choosing the type of base, underlying layer, coating are prescribed in building codes and regulations (SNiPs 3.04.01-87 and 2.03.13-88).
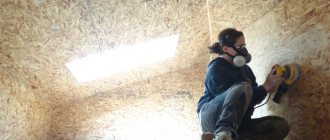
Preparing the surface of OSB boards for laying linoleum
Like any base base, an OSB board floor is prepared for finishing. To do this you need:
- Carefully check the condition of the surface of the sheets for damage. Use elastic dispersion putty to fill indentations from self-tapping screws, chips and cracks in the material.
The use of leveling mixtures allows you to smooth out large defects in OSB boards and obtain a flat surface for laying linoleum.
Leveling screed on OSB board
Finally, the surface must be thoroughly cleaned of debris and vacuumed. The resulting dry and clean base is ready for laying linoleum on it.
How to glue linoleum to OSB board
Despite existing opinions about the possibility of glue-free (dry) laying of linoleum on OSB boards, professionals clearly recommend gluing the coating over the entire floor area. The consequences of simplifying the work technology may be displacement of the canvases and the formation of folds on unfixed material.
One-component water-dispersion emulsions of a universal type adhere well to wood-based materials. Their compositions may be based on:
- Acrylic copolymers.
- Polyvinyl acetate (PVA).
- Styrene latexes with the addition of chalk (bustilate).
- Bitumen.
- Rubber and latex (humilax).
Acrylic adhesive works well with concrete and wooden bases and is widely used for laying PVC coverings in high-traffic areas.
Acrylic glue
PVA is a universal adhesive mixture. Its thick consistency has good adhesive properties. The glue is environmentally friendly, does not have a sharp unpleasant odor, and does not lose its fluidity and adhesive properties when temperatures change. Coverings glued with this composition can be easily dismantled.
PVA glue
Bustilate is one of the most time-tested multifunctional adhesives. There are many varieties of this glue that have been improved for fixing linoleum. In terms of its performance characteristics and scope of application, it is similar to PVA, but is stored longer and has slightly better adhesion.
Bustilat
Bitumen mastic has high adhesive ability and is widely used for laying linoleum on a fabric basis.
Adhesive bitumen mastic
Gumilax has high peel strength. High-quality fixes heavy thick PVC coatings and marmoleum on OSB.
All these mixtures have a paste-like consistency.
What and how to seal the seams?
It's no secret that all wood materials react to temperature changes.
And oriented strand board is no exception in this case. When heated, these panels expand noticeably, which can lead to their deformation. Based on this, it is necessary to leave compensating gaps of about 3 mm between them when laying them. At the same time, a 15 mm indentation is made along the perimeter. These gaps should perform their functions throughout the entire life of the coating, but at the same time not affect its appearance. Taking into account all of the above, it became necessary to find a material for grouting joints
It is important to consider that the materials must be elastic and at the same time perform a moisture-proof function. When choosing what exactly to cover the cracks between OSB sheets, you should consider a number of factors
First of all, external conditions (external or external work), as well as the type of surface finishing are taken into account
At the moment, most often used to fill joints:
- acrylic-based putty;
- parquet varnish;
- silicone or acrylic sealant.
Sawdust is added to the varnish solution, which allows you to completely close the seams and make them almost invisible. After the mixture has dried and been thoroughly polished, the joint areas are difficult to determine visually.
In this case, it is necessary to pay attention to some important points
- If decoration is intended, the panels are cleaned of the paraffin layer. They are then coated with an antifungal primer.
- After the primer has completely dried, cover the edges of the sheets at the joints with masking tape.
- The varnish solution and putty are rubbed into the seam using a spatula. The cracks are filled with sealant using special guns.
- Excess grout is carefully removed before it hardens.
- After complete polymerization, remove the masking tape.
- The sealed joint is sanded to level it with the plane.
If the width of the gaps is 5 mm or more, then they should be pre-reinforced with serpyanka. In such situations, only putty is used to fill the gaps between the slabs. As a rule, this is relevant in places where the OSB adjoins the perimeter walls. In the absence of reinforcing tape, cracks may appear after the composition hardens, and it will begin to fall out over time.
In addition to the traditional grouting methods listed above, in some cases it is necessary to resort to alternative options. For example, when the temperature drops to +5 degrees, sealant and putty cannot be used. A rational solution could be:
- autoplasticine;
- two-component automotive putty;
- rubber-based mastic.
If we are talking about the interior decoration of unheated premises, then the use of substances that have a pungent odor and toxic emissions is unacceptable. In such situations, balsa wood, characterized by elasticity, can be used as a filler for compensating gaps.
However, this option has a number of significant disadvantages, which is why many experts prefer liquid cork used when installing laminate flooring. Another, albeit less common, method is to cover the cracks with thin wooden slats. To do this, you will have to make gaps of equal width using a hand router.
For information on installing OSB boards on the ceiling, watch the video.
Installation of lathing under OSB
Regardless of whether it will be covering a wall from the inside, an attic from the outside, a veranda in the country, creating a floor covering or a base for a soft roof (bitumen shingles), at the preliminary stage you should take care of the base for the panels. In this case, we can talk about two options:
- lathing made of bars with a small cross-section and slats;
- frame, which can be either wooden or made of metal profiles.
The main selection criterion in this case will be the condition of the base surface. The greater the differences present, the more complex the structure will have to be erected.
The next step is marking, taking into account the fact that all load-bearing elements of the future sheathing or frame must be located in the same plane. Today, the optimal tool is a laser level. In its absence, plumb lines, building levels and cords are used. To correctly and as accurately as possible make markings on the wall, you must:
- identify and mark the attachment points of the slats along the top;
- using a plumb line, duplicate the marks below;
- a cord or thread is stretched diagonally between the marks;
- slats, profiles are aligned in one plane using special mounting plates or any other pads;
- if necessary, the base for laying OSB panels can be strengthened as much as possible by installing additional transverse jumpers between the main elements of the sheathing.
After completing the work related to fixing the sheathing, attention should be paid to communications
It is important to remember that all kinds of mortgages, as well as wiring and pipelines, if any, are located and fixed at this stage, if this has not been done previously
When arranging a floor covering made of OSB panels and the base for them, it is necessary to take into account a number of important nuances. Let's consider the algorithm of actions in such situations.
- Removing the existing coating, if any, as well as debris and dust.
- Timber layout. All elements of the future structure should be located parallel to each other with an interval of 0.8 m. It is also necessary to retreat from the walls by 10 mm.
- Applying a mark on the wall 10-20 mm above the beam.
- Drilling a hole through the timber and wedges for the dowel.
- Fixation of sheathing elements.
- Fastening the edged board.
The last point deserves special attention. So, if the room in which work on installing OSB floors is being carried out has ceilings up to 2.4 m, then it is better not to install the board. This will avoid reducing the height of the walls in the end
This will avoid reducing the height of the walls in the end.
Now the described sheet material is widely and successfully used in roofing work. It is necessary to install the sheathing and then lay the panels themselves subject to a number of rules.
- Continuous sheet covering is performed on roofs whose slopes have an angle of 5 to 10 degrees.
- If the slope angle is from 10 to 15 degrees, then installation of a sheathing made of timber measuring 45x50 mm is required. In this situation, the structural elements are placed parallel to the cornice line with a pitch of 45 cm.
- A beam of a similar cross-section is used for sheathing on roofs with slopes at an angle of more than 15 degrees. The difference is that there should be 60 cm between the bars.
How OSB boards are calculated
There are mainly 2 standard sizes of slabs: 2440*1220 mm (American standard) and 2500*1250 mm (European).
There are OSB in other sizes, but they are much less common and are produced mainly to order. To calculate the quantity, the easiest way is to draw a wall plan on checkered paper, taking the size of the box to be 250 for European standard slabs or 300 mm for American ones. Then draw OSB boards on the plan and count their number. It is better to arrange the sheets in a checkerboard pattern. In this case, you need to take into account how the surface will be finished in the future. If you plan to cover, for example, with siding on the street or gypsum board indoors, joining with non-factory cuts is allowed, but if painting is planned, try to join the slabs with factory cuts. It is advisable to reduce the number of joints to a minimum. For example, it is better to sew up a fragment of a wall measuring 2.4 m by 1.2 m with one sheet, rather than 3 pieces of 0.8 * 1.2 m, because it is quite difficult to make a perfectly straight cut, and even a slight deviation from straightness will create a gap. To the received amount of OSB you need to add several sheets as a reserve in case of defects or errors during cutting. An easier way is to divide the surface area by the leaf area. In this case, “in reserve” it is necessary to take at least 20% of the quantity. Round the resulting number up.
What are DSP and OSB?
CSP (cement particle boards) are manufactured at Russian enterprises from a mixture of cement and wood chips. Chemical additives that help strengthen the chip mass give this material particular strength.
OSB (oriented strand board), or OSB (Oriented Strand Board), is not produced in Russia. The raw material for OSB is coniferous wood chips with a length of 6 to 9 cm. An OSB sheet consists of three layers with different directions of such fibers. The components of the board are impregnated with resins and waterproof waxes.
DSP and OSB panels are used for both internal and external construction work. They are used for cladding residential buildings, as well as industrial and utility buildings: hangars, bathhouses, change houses, sheds, etc. The characteristics of the materials allow them to be used for the construction of walls and roofing.
For what purpose is OSB used on the roof?
There are reasons for the popularity of using OSB sheets (they are OSB and OSB boards) as a roof element:
- Resistance to moisture and temperature changes;
- Relatively low manufacturing cost compared to expensive plywood;
- Speed of work, ensured by a large overlapped area and correct geometry;
- The ability to quickly complete construction and not overpay contractors for their labor;
- The technology, developed over the years, divides a complex process into simple operations that can be performed by non-professionals;
- The slab creates a monolithic surface - an excellent basis for insulation and the use of soft roofing on top of it;
- Unlike edged boards, it does not change its geometry when drying, which is a guarantee against deformation of the roofing surface and the appearance of leaks;
- Application of SIP panels for frame houses;
- Strong tying of rafters with OSB sheets increases the pitch between heavy load-bearing beams and reduces the overall weight of the roof and the load on the supports.
Oriented strand board combines well with materials that create a continuous cover on it that does not require the use of hardware. These include all types of soft roofing - soft tiles, waterproofing and roofing felt, awning materials, as well as seam coverings.
Application area
The properties of OSB allow this material to be used as a construction or finishing material. Here are the types of work it can be used for:
- Covering frames and walls inside and out.
- Leveling the floor and ceiling.
- Laying rough or finished floors along joists.
- Removable formwork when working with concrete.
- Continuous sheathing for metal tiles, slate,.
- Production of SIP panels and thermal panels.
There is constant debate among developers about how safe OSB board is. Its production uses resins that emit formaldehyde. Manufacturers claim that the release of this substance does not exceed 1%. Materials with such formaldehyde emissions are considered absolutely safe. Wood releases approximately the same amount of this substance. Therefore, such materials are allowed for the construction of children's furniture. In addition, OSB boards with emissions of 0.5% appeared. They can be distinguished by two criteria: the name contains the prefix Bio or Green and they are more expensive.
Please note that the level of formaldehyde emission must be controlled. Each batch of material must be checked and actual parameters indicated in the accompanying documents
Despite all the arguments, not everyone considers this material safe, preferring to use natural material - boards. They are, without a doubt, an environmentally friendly material, but the boards take longer to work with and are more expensive. In general, everyone decides for themselves whether to use OSB boards or not.
How to make lathing for a soft roof
Important! The installation of a soft roof involves the installation of a roofing cake consisting of steam, heat and waterproofing, counter battens, lathing from individual elements (boards and bars), underlayment and final covering. The materials used must be compatible with each other
Their fixation is carried out in a certain order after preliminary calculation and development of the scheme.
The sheathing is performed in the following sequence:
- The rafter frame is checked. If necessary, rotted elements are replaced. All parts are additionally treated with antiseptic and fire retardant.
- A waterproofing material is fixed, which is a vapor-permeable membrane. It is fixed to the rafters with a sagging overlap using a construction stapler. This will prevent the waterproofing from breaking if a leak occurs.
- Counter battens, the thickness of which is from 30 to 40 mm, are attached to the top of the waterproofing material. The design allows you to create a gap for ventilation. The distance between the sheathing and the waterproofing must be at least 50 mm.
- The sparse sheathing is fixed. It is created from boards fixed perpendicular to the rafters. The sheathing pitch should be in the range from 300 to 500 mm.
- Sheets of OSB or plywood are fixed to the sparse sheathing. The gap between them should not exceed 3 mm. In this case, the thickness of the OSB depends on the pitch of the rafters. If it is 600 mm, then a 9 mm slab is taken. When the pitch is 900 mm, then in this case the thickness of the OSB should be 12 mm.
- The lining carpet is laid on the created solid base. It is on this that the soft roof will subsequently be mounted.
Note! It is necessary to strictly follow the roof preparation technology, since the durability of the bitumen roof depends on this.
The dangers of formaldehyde
This element is toxic and irritates the eyes, skin and respiratory system. It also has a negative effect on the nervous system, causing fatigue, depression and headaches. At high concentrations, asthma may occur.
The reason for the release of formaldehyde in OSB boards
The slabs are pressed at a temperature of 200 degrees, the wood chips are impregnated with adhesives, as a result, their molecules disintegrate and formaldehyde is released. For uncoated OSB, adhesives containing formaldehyde are used, but there are also certain standards. Each plywood material is made differently and meets certain requirements, for example, chipboard should contain no more than 14 milligrams of formaldehyde, and OSB no more than 8, this number indicates the degree of safety. After drying, the chips are mixed with glue of synthetic origin, small shavings are removed, so the amount of glue is reduced by 3% when compared with other materials. For example, in chipboard the resin content reaches 14% and therefore has a high formaldehyde inclusion. In Germany, Sweden and Finland, the E1 standard was established, strict requirements were applied to it, which take into account the effect of various substances on human health, so you need to purchase materials to comply with this standard, as they will be safer.
Lathing a roof from OSB yourself: how to carry out the work depending on the type of roof
Installation of the roof rafter system is an important part of the installation of the roofing carpet. Lathing is only a small part of this process, but plays a significant role in the service life
It performs functions for fastening roofing materials, ventilation of insulation, preventing the formation of condensation, protecting the roofing carpet from damage in winter due to snow load and ice formation. Therefore, the better this type of work is done, the longer your roofing will last without additional repairs.
We suggest that you lath the roof from OSB - oriented strand board, and do it yourself. The difference between this product is its absolutely flat surface, which is most suitable for roofing.
There are two types of lathing:
- solid is when the gap between the bars does not exceed 1 cm;
- The rarefied gap is several centimeters.
OSB is a universal material for the construction of roof sheathing for any covering. The special arrangement of the chips in the slab contributes to increased hardness, so the created structures are durable. The large sizes of the sheets make it possible to quickly install the roof area, with a minimum number of joints and seams.
With our help, you can arrange your roofs in the best possible way. The main thing is to know what type of sheathing should be created for certain roofing materials. And you will learn about this from the further text.
Useful video
Oriented strand board or OSB is an indispensable attribute of any modern construction site. The material is used for both exterior and interior decoration; it can play the role of a load-bearing or connecting element, for example, in a roofing pie, or it can be an independent solution, say, as interior partitions or ceilings.
The type of screws used to fasten OSB depends on the design features of the structure and the location of direct installation of the particle boards.
The versatility of OSB is truly unmatched. It is used with equal success at any stages and cycles of construction.
In order to consider all possible options for fastening OSB boards, it will be convenient to divide their installation into several main groups:
- roofing;
- wall;
- floor.
Methods of fastening OSB for roofing work
Installing OSB boards as one of the layers of the roofing pie requires increased attention to the strength characteristics of both the material itself and the fasteners used in the work.
Considering the significant wind and snow loads on the roof plane, as well as the fact that roof structures are not a static, rigid structure, experts recommend paying attention to the following points:
- when laying OSB on the roof, priority should be given to special “ruff” or ring nails;
- phosphated self-tapping screws used in OSB installation are more fragile and have less strength when the structure moves;
- the final choice of which screws to attach the OSB to the frame is up to the craftsmen and depends on the climatic conditions in the construction area;
- the length of nails or self-tapping screws used in roofing work is calculated using a simple formula: OSB sheet thickness + minimum 40-45 mm for the fastener entry into the frame;
- that is, if OSB sizes of 9 mm, 12 mm, 15 mm are considered standard, then, therefore, the length of the screw will be in the range of 50-75 mm;
- The fastening map looks like this: along the rafters, the pitch of the screws is 300 mm, at the joints of the slabs - 150 mm, along the eaves or ridge cut - 100 mm and the distance from the edge of the sheet is at least 10 mm.
Vertical or wall method of OSB installation
What screws are used to secure OSB in case of wall mounting? The question has an unambiguous and very specific answer. If the recommended standard thickness used for vertical installation of OSB sheets is 12 mm, then, accordingly, adding to this value the minimum screw body required by the rules of 45-50 mm in a rack or frame, we get the answer -50-70 mm.
The fastening map is the same as the roofing one: in the middle of the sheet, the fasteners go in increments of 300 mm, at the joints of the plates the increment is reduced to 150 mm, the sides adjacent to the ceiling or floor are fastened at 100 mm intervals. The standard distance from the edge is 10 mm.
The choice of the shape of screws for vertical installation is determined by the need to hide the head flush with the plane of the wall. That is why, on the facades and external planes of buildings, self-tapping screws with a disc-shaped head are used, which, when tightened, not only sits in the pocket, but also does not chip the wood, maintaining the appearance of the wall.
Installation of OSB sheets in a horizontal plane: floor/ceiling
There is no need to dwell in detail on the choice of self-tapping screws for installing OSB on the ceiling. The pattern, number and size of self-tapping screws used for these purposes repeats the above examples exactly.
The choice of self-tapping screws and fastener pattern for floor installation of OSB are determined by the base on which the material is laid.
If it is a beam or slatted frame, then phosphated self-tapping screws with a body length of at least 50 mm and a countersunk head are the ideal choice.
When laying OSB on a rough, solid floor, galvanized self-tapping screws with double threads are suitable. The procedure for determining the optimal length is indicated above.
If you read the article carefully, you have already noticed that regardless of where the OSB is installed, the fastener map remains the same. Accordingly, the number of screws required for the job will generally be the same.
The average consumption of self-tapping screws when installing OSB is about 30 pcs. per m². Accordingly, to install a standard sheet you will need about 75-100 pieces. self-tapping screws
Now you know which screws to use to fasten OSB for high-quality and durable use of the boards in combination with other construction and finishing materials.
Advice! When purchasing, do not chase low prices and check the quality of the screws. There are enough cases of marriage. And there are no trifles at a construction site!
Arrangement of a pitched surface using OSB
There are only two ways to attach oriented strand boards: directly to the rafters and to additional sheathing. Both options are very widely used in practice. It cannot be said that any of them is better or worse, but each method is optimal for its specific conditions.
Fastening OSB on the roof directly to the rafters.
This option is used in the presence of powerful OSB sheets, in attic-type houses, when the roof is not insulated.
- a small number of construction operations at height;
- significant savings - no additional wood is required for sheathing, no money is spent on insulation and waterproofing;
- fast completion date.
- the top floor (attic) in the house remains cold;
- it is required to use thicker OSB sheets;
- if it is decided to use insulation, then it is advisable to use non-flammable polystyrene foam and additional sheathing with OSB sheets on the bottom of the rafters.
Some builders are trying to install it on the rafters using mineral wool insulation and layers of vapor barrier, without a ventilation gap . Over time, such an error leads to deterioration of materials due to destruction due to stagnation of excess moisture.
The procedure for installing OSB on rafters:
- Previously, rafter beams and sheathing sheets are treated with an antiseptic to protect against fungus, mold and wood-boring insects.
2. Installation is carried out in dry weather, with the prospect of covering the wood with a roof before the rains. If precipitation is expected, and the work is not yet completed, then a protective awning will be needed.
3. Safety is thought through - temporary shelves are arranged for moving, safety ropes for people and fixing belts for tools are secured.
4. Fastening is best done with jagged notch nails, 70-100 mm in size (depending on the thickness of the material). The use of nails speeds up the process and makes the connection more durable.
5. The lower edges of the slopes are sheathed with purlins, which are not so afraid of getting wet. They provide a level starting ledge to prevent the slabs from slipping.
6. Using construction marking thread, transverse control lines are drawn on the supports according to the dimensions of the existing sheets. Hemming must be done strictly according to the markings. You can read about how marking is applied with a marking thread (also known as a breaker thread) in the article: breaker thread - types and use.
7. OSB panels are placed across the supports. Laying begins from the middle of the row, with the expectation that the last panels in the row will be cut in half. The cut halves will be suitable for laying the next row to move the joints in the row to the next support. Cutting and trimming is done on site using a circular saw. The remaining material with an oblique cut is not thrown away - they are ready-made blanks for the top row.
8. A compensation gap of 3 mm is left between adjacent sheets.
9. Step for driving hardware: 15 cm - at the joints, 30 cm - on the supporting rafters, 10 cm along the edge of the roof.
10. For reliability, additional clamps are installed between the rows of OSB sheets.
11. If the angle of inclination of the roof is large, temporary support bars are attached with self-tapping screws for walking on them.
12. Lastly, the area of the upper ridge is hemmed with the remaining strips of material.
The technology requires that the pitch between the rafters be a multiple of the OSB dimensions. And when laying, the sheets must mate with each other exactly in the middle of the beams with an overlap of 5 cm (or more) on the beam.
You can clearly see the technology of hemming rafters in this video:
Fastening OSB on the roof to the sheathing.
This option is used to create ventilation gaps if it is necessary to insulate the roof slope or the oriented strand board (OSB) sheets are too thin and additional support is required.
- creation of high-quality reliable sandwich panels that will make living on the upper attic floor comfortable;
- savings on the purchase of OSB sheets - now you can use 9 mm thickness;
- large amount of work and consumables;
Fastening OSB boards to the wall over insulation using lathing
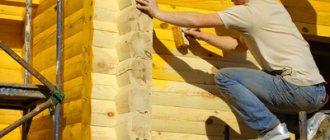
The slab is fastened to the wall using lathing, which is made from a wooden block or metal profile. The technologies for installing OSB boards on a wall with wooden sheathing and sheathing made of metal profiles are not fundamentally different. When choosing a block, it is advisable to choose a dry, planed block of 40-50 mm, then it will not twist or move after drying, which will have a positive effect on the evenness of the entire wall.
To attach the bar and profile to the wall, special metal plates (hangers) are used. Before attaching the hangers, it is necessary to draw vertical stripes on the wall, the distance between which should be half the width of the sheet, which will subsequently ensure the joint of the slabs right in the middle of the bar or profile and will make it possible to fix the OSB slab in the center along its entire length. After the lines are drawn, hangers are attached along them in increments of 30-40 cm.
A metal hanger is used to secure the sheathing.
Suspensions are attached along the marked lines. Hangers allow you to secure the sheathing over the insulation.
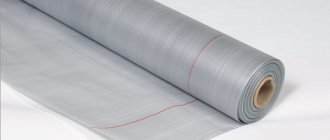
After this, the insulation is laid and covered with a membrane that protects the insulation from moisture, after which the sheathing is installed.
It should be noted that a vapor barrier is not needed on the outside of the building, since it prevents moist air from entering the insulation from inside the room, and from the outside of the building, excess moisture should freely escape outside.
Wall with sheathing. Insulation is laid between the sheathing and the wall.
After securing the sheathing, you can begin installing the OSB boards. For wall cladding, a slab with a thickness of 9 to 12 mm is most often used. If a facade is not mounted on top of the slab, then the slab must be moisture resistant. OSB slabs are attached to the wooden beam sheathing with nails at least 2.5 times longer than the thickness of the OSB sheet. For metal profile sheathing - use metal screws 10-15 mm longer than the thickness of the OSB sheet.
With this installation, the sheathing weighs above the insulation and does not create cold bridges in the insulation between the wall and the OSB boards. Thanks to this solution, maximum efficiency of the insulation is achieved. In addition, between the sheathing beams there is an air gap through which moisture is removed from the insulation, which also improves its performance. More detailed information about ventilated facade technology can be found in the article: ventilated facades, types of ventilated facades.
Which side to mount OSB sheets
All sides of OSB sheets do not differ in composition. But there are differences in the surfaces. Often one side is smooth and the other is rough. In this case, when installing slabs on walls on the outside of a building, it is better to mount the sheets with the smooth side out. With this orientation, rainwater will not accumulate in such quantities in the uneven areas of the slab. Water helps accelerate the destruction of the slab. Protecting sheets from water penetration helps increase their durability.
When installing slabs on the roof under the roof, in turn, it is recommended to place OSB sheets with the rough side up so that they are not slippery to walk on during roof installation work.
When installing OSB boards in places protected from moisture, the choice of their orientation does not have a significant impact on subsequent operation.
Selecting a base
To install smallpox, you can use two types of fastening: lathing and a full-fledged frame made of metal parts or wooden blocks. If the differences in heights and unevenness on the floor are small, you can get by with a simple sheathing, but if the defects are significant, it is better to use profiles or bars on hangers.
It is easier to assemble the lathing and such work will take much less time, however, the frame has its advantages in the form of an emerging ceiling space and the ability to place soundproofing materials or thermal insulation there. In addition, the frame will allow the installation of recessed types of lamps.
Main nuances and lathing scheme
The lathing scheme for flexible tiles can be of two types:
- with gaps - for installation of hard coverings, for example, metal tiles, slate or corrugated sheets;
- laid in a continuous layer - for laying a soft roof.
It is noteworthy that the installation of continuous sheathing for laying soft roofing is carried out in two layers. First, a lath or board is placed on top of the rafters at intervals, and then a continuous layer of sheathing made of solid OSB boards for a soft roof or plywood with moisture-repellent impregnation is attached to them. By the way, this finishing layer serves as additional sound and heat insulation.
Installation of double continuous sheathing
Double sheathing is a two-tier structure, the first layer of which is boards laid in rows, the second continuous layer is flooring made of boards, OSB, or plywood. Double lathing is considered more effective and reliable than single-layer lathing, which is why it is recommended when installing modern soft roofs.
The structure can be assembled only from boards (sometimes bars) or from their combination with OSB and plywood.
Option #1 - double sheathing of boards
For the base under a soft roof, you can use only one type of material - boards. Both layers of sheathing are constructed from them.
Requirements for materials:
- Boards of the first (sparse) layer: thickness – at least 25 mm, width – 100-140 mm. Boards can be replaced with bars 50x50 mm or 30x70 mm.
- Boards of the second (solid) layer: thickness 20-25 mm, width – 50-70 mm.
- The lumber is pre-coated with antiseptic compounds.
Installation of the sheathing is simple and is carried out according to the following algorithm:
- First, boards or bars are nailed parallel to the ridge (perpendicular to the rafter legs) with a step that prevents bending of the boards of the second layer, on average 200-300 mm.
- From above, onto the sparse sheathing, boards of the second layer are nailed at an angle of 45° (diagonally). Not close, but with a gap of up to 3 mm, which can absorb thermal deformations of the wood. The sheathing is carried out in the direction from the ridge to the cornice.
A similar base is usually used when laying roofing felt. For flexible tiles, it is recommended to construct a combined version.
Option #2 - combined double sheathing
The combined design combines several materials. The first layer is boards or bars, the second layer is plywood or OSB.
Traditionally, the combined sheathing is assembled as follows: boards or beams are fastened perpendicular to the rafters, and sheets of plywood or OSB are placed on top of them. This technology is used, as a rule, when constructing a cold attic (without insulation cake and waterproofing film on the roof).
If insulation takes place, then another version of the sheathing is used, more complex. Counter battens are placed along the rafters, and on top of them, perpendicularly, are the boards of the first layer of sheathing. The entire structure is completed by plywood or OSB panels. This option differs from the previous one in the presence of a counter-lattice, which forms a ventilation gap between the large-panel flooring and the waterproofing.
Material requirements:
- Counter-lattice bars: smooth bars with a cross-section of 25x30 mm or 50x50 mm.
- Sparse layer boards: thickness - 25 mm, width - 100-140 mm.
- Plywood or OSB-3: thickness 9-12 mm.
- Materials must be pre-antiseptic.
In order to build a combined continuous sheathing, perform the following steps:
- If there is a heat-insulating cake with a waterproofing film, counter-lattice bars are installed. Their cross-section can be in the range of 20-50 mm, most often 25x30 mm. The bars are secured on top of the rafter legs, along them. The counter-lattice serves not only to form a ventilation gap, but also to fix the waterproofing film, which is laid on the insulating material. If we consider the installation work in stages, then first heat-insulating mats are laid between the rafters, a waterproofing film is stretched over the rafters and mats, which is nailed on top with counter-lattice bars. If a thermal insulation cake is not expected in the roof, skip this point and immediately proceed to attaching the sparse sheathing.
- The sheathing boards (width - 100-140 mm, thickness - 25 mm) are fixed to the counter-lattice bars (if any) or to the rafters perpendicularly. The fastening step with nails (screws) is 200-300 mm.
- Sheets of OSB-3 or plywood are placed along the ridge, with the long side across the rafters. Installation is carried out with a breakdown of seams, that is, in a checkerboard pattern. A compensation gap of 2-3 mm is left between the shields. Fastening is carried out on each rafter, using self-tapping screws or rough nails for fixation. The spacing of the fastenings on the rafters is 30 cm. The slabs are laid so that their edges are sure to rest on the supports, they are joined there and also fixed with fastening elements, but with a more frequent spacing of 15 cm.
To make it clearer, look at what it looks like during the construction process:
The technology is not complicated; to understand all its nuances, just watch a short video:
Selecting OSB for the roof (thickness, dimensions, classes)
Only OSB-3 is suitable for use on roofing. This class of material balances price, strength and moisture resistance. It corresponds to the European standard EN-300 and the American R1 and R2.
The main thing you should pay attention to when purchasing is the presence of markings on all sheets in the pack, so that unscrupulous manufacturers do not slip the second class instead of the third (they cannot be distinguished by appearance). Instead of inscriptions in Russian, there may be stamps in Latin, then you should look for the text: “Exterior Winder”, “Exterior Tyre Winder” or R1, R2 (roof - roof).
In addition, there are specialized OSB-3 roofing panels, which are structurally designed for such purposes. They have a rough surface that does not slip and has good adhesion, as well as grooved edges for convenient and high-quality installation.
All slabs that are used to make roof slopes must have a standard structural size (1250x2500). Such dimensions are large enough to quickly increase the plane and are still convenient - they make it possible to carry them individually by one person.
More information about the types and classification of OSB sheets can be found in the article: OSB - types, classes, characteristics and applications.
The remaining parameter, the sheet thickness, is selected based on the pitch between the rafters, according to the table.
However, it should be remembered that it indicates the smallest permissible dimensions for pitched roofs. In practice, roofers do not use 9 mm sheets at all - the technology allows starting work with 12 mm materials. And the indicators for flat roofs should be increased to 18 mm. In our climate zone, this need is dictated by additional calculations for snow load in winter.
Only then will the tabular indicators be correct if transverse step lathing is placed on the rafters.
Features of flexible roofing
Soft roofing is also known as asphalt shingles. It was first introduced to the building materials market about 30 years ago. This elastic material is made from fiberglass or polyester, which are impregnated with bitumen compounds. The result is a water-resistant, durable yet flexible material that is ideal for roof finishing.
Flexible tiles
Flexible tiles Ruflex MINT
The surface of flexible tiles is always covered with a special coating - fine crumbs obtained during the processing of various minerals. And the bottom layer has an adhesive base that allows you to glue the tiles to the roof. This type of tile is used when arranging roofs with slope angles of at least 11-12 degrees.
Flexible tiles
Due to their softness, such tiles require a special base. It can only be laid on a crate made in a certain way.
Installation of flexible tiles
Arrangement of the final roofing covering
To form a high-quality, reliable and durable roofing covering, the surface formed by OSB is most often covered with soft tiles.
Other types of roofing materials are not as reliable or their use is not advisable in these conditions.
Work order:
- A drip and drainage system along the edges of the roof is thought out and installed. It is done using cornice strips and gutters.
2. A waterproofing carpet is laid. At large angles of inclination, over 18 degrees, it is allowed to lay it only in places of inflection: ridges, valleys, lower and gable borders of the roof. Waterproofing rolls have a self-adhesive layer covered with polyethylene film. For additional fixation, bitumen mastic and nails for roofing felts are used.
3. Laying is done in horizontal stripes from bottom to top, the lower limit of the laying is the cornice strip (5 cm from the bend), the overlap of the joints between the strips of 10-15 centimeters is coated with mastic. Particular attention is paid to ridges, valleys, pipe outlets and gables.
4. Mark the roof with a waterproofing carpet laid. This is done using a marking thread. The resulting lines will serve as a guide for laying bitumen shingles.
5. Soft tiles are laid on bitumen glue with additional fastening with nails along the upper border of each element. The upper element of the tile covers with its petals the driven nails on the lower one.
6. The rows of tiles are oriented according to the markings, starting from 5 mm below the edge of the waterproofing carpet, shifting each new row half a petal upward.
7. The finished roof can be equipped with aerators to improve layer ventilation.
The following video presents the entire technology from the first to the last step:
General rules for installing OSB boards
Fastening OSB can be summarized by several rules:
- Surface preparation: surface leveling, antiseptic treatment, marking.
- The choice of sheet thickness depends on where it will be attached: to the wall, to the ceiling or to the roof.
- The choice of material that will be a component of the frame: metal profile, wooden sheathing.
- Fastening the frame to the surface using additional elements, hangers, dowels or self-tapping screws.
- The need to use stainless steel connecting elements (galvanized or stainless steel) when installing load-bearing structures.
- Recommendations on how to fasten OSB: the distance between the screws in the middle of the slab is no more than 300 mm, installation of thin slabs should begin from the middle and continue fastening down and to the sides to avoid sagging of the slab, self-tapping screws should be selected 2.5 times longer than the thickness of the slab .
OSB-3 boards and roofing work
The material has its advantages in roofing work
Roofing work is a very popular way to use materials such as OSB boards. By the way, to cover the roof with OSB-3 slabs, a material thickness of 0.18 cm is sufficient.
In order:
- Products can have both a locking edge and a straight edge. The first option is more preferable;
- The distance between the load-bearing beams should not be more than 609 mm - this applies to both the organization of sloping and flat roofs;
- Whether the slabs are capable of expanding is of great importance. It is customary to leave a gap for each linear meter: 2 mm is quite enough (believe me, this is enough);
- When laying slabs with smooth edges, the gap is made a little larger - 3 mm. Leave it around the perimeter of each slab - this is the only way to achieve optimal results;
- Nails are used to attach OSB to the roof. Attached to supporting supports. There should be a distance between them: 10 cm or even more;
- The finishing of OSB boards is attached with nails - they should have a length that exceeds the thickness of the board by two to two and a half times (or even more) - this is quite normal.
Frame construction is in full swing - slab cladding is in place
If the interior decoration is done using OSB panels, the following can be noted: a slab made of polished panels will look better if appearance is very important in your space. To finish such slabs, it is better not to use ceramic tiles or wallpaper - this is what the manufacturers themselves recommend. And it’s best to listen to their opinion!
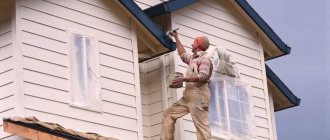
Choosing siding for OSB wall cladding
When choosing a cladding option, their technical and aesthetic characteristics are taken into account. The final decision is made in conjunction with an assessment of the complexity of installation and the cost of the chosen option. In practice, when finishing walls made of OSB sheets, the following types of siding are used.
Plastic.
Vinyl or acrylic polymer is the basis of non-flammable, moisture-resistant siding. The thicker the profile, the longer the service life; usually this parameter for plastic is 0.8-1.2 mm. The panels do not crack over time, but do not withstand impacts. Fragility increases in severe frosts. As temperatures change, plastic siding expands or contracts slightly.
Vinyl siding.
To avoid bends and breaks due to vinyl panels being fastened too tightly, gaps are left when installing them.
Acrylic panels do not allow play at the attachment points and are 10 times more resistant to solar radiation than vinyl panels. There is a huge selection on the construction market of plastic profiles of various colors and textures with imitation of the relief of stone, brick, and wood.
Acrylic siding.
Most buildings are finished with vinyl panels, since acrylic ones have a high price. Most often, the joy of the low price of acrylic is overshadowed by its low quality.
Metal.
Coated on the outside with polymers, thin sheets of galvanized steel, iron or aluminum have a textured or smooth surface.
To finish OSB walls, vertical metal siding is used, which does not create a maximum load on the slabs with the frame and its weight.
Metal siding.
All fastenings of the panels when installing the cladding are made from the inside, so that the external walls look like a monolith. It is necessary to leave small ventilation gaps when installing such siding. To avoid corrosion of steel and iron sheets, scratches and chips should be treated in a timely manner. Aluminum, which is not subject to rust, does not require special attention.
Metal siding does not retain heat; this quality must be taken into account when choosing wall insulation. When it rains, the panels create little noise. It is easy to protect against it during installation by putting special rubber washers on the screws. You can purchase metal panels with noise protection against hum. The high price is compensated by the best performance and durability of the finish.
Ceramics.
Japanese engineers invented these excellent panels not long ago. The main material in them is clay, to which all sorts of natural substances are added. In terms of their quality characteristics, such profiles can be compared to durable ceramic tiles.
Ceramic siding.
Ceramosighting belongs to the middle price category, but is a difficult material to work with. This is the case when panel cutting and installation professionals are required. Ceramic siding breaks easily without special tools and skills in working with it.
Fiber cement.
The best option for finishing a country house. Siding consists of a mixture of cement, sand, reinforcing fibers, mineral natural or synthetic fillers. The surface has a specific texture that imitates wood.
Fiber cement siding.
It is easy to install, but requires special protective measures for the lungs and facial skin when cutting, as it emits harmful dust. The panels do not have locks; they are assembled overlapping. Fragile profiles should be protected from impacts. Fiber cement siding can be painted a new color, easily changing the appearance of your building.
Types of underlay carpets
Large manufacturers of asphalt shingles usually traditionally produce underlay carpets, adapting them to the branded roofing material. Thanks to this adaptation, the coatings are in good contact with each other, so it is best to choose soft bitumen shingles and the underlayment carpet for them, made by the same manufacturer.
The most common size of lining rolls on sale is 15,000 mm long and 1,000 mm wide.
The underlay carpet is divided according to the methods of fastening to the continuous sheathing of the roofing system. To understand the characteristics of each type of this material, it is necessary to consider them in more detail:
The cheapest and, therefore, apparently the most common option is when the lining carpet does not have an adhesive layer and is fixed to the sheathing with nails or staples.
A standard underlay carpet does not have an adhesive layer and, of course, no protective film for it. This covering option is fixed to the sheathing using galvanized nails with a large head diameter, or with staples driven in with a stapler. In this case, the overlap of the canvases on each other is coated with bitumen mastic. The size of such overlap should be at least 100÷150 mm.
Another option is that there is a self-adhesive strip designed specifically for sealing the overlap of adjacent panels.
Combined lining sheets are fixed to the surface of the sheathing with galvanized nails along the upper edge and with a self-adhesive strip along the lower edge. The self-adhesive strip is protected by a film, which is removed when laying the canvas. This option for fastening the canvases greatly simplifies their installation on a continuous sheathing. In some particularly difficult places, the canvas is additionally nailed to the base.
Despite the apparent simplicity of installation, self-adhesive materials for underlay carpet are perhaps the most difficult to install for an insufficiently experienced craftsman
Carpet with self-adhesive backing. Fixation of canvases completely covered with an adhesive layer is more reliable than the above options. However, their installation is more complicated, since the film is removed as the material is glued to the sheathing, and it is necessary to fix it in such a way that folds and air pockets do not form on the carpet. Along the edges, as well as in complex coating units, self-adhesive sheets are in some cases additionally nailed with galvanized nails.
Using this type of material, the master has the opportunity to create a solid waterproofing layer. When installing self-adhesive sheets in the cold season, it will need to be heated to improve the adhesive properties of the adhesive layer.
Prices for a construction stapler
construction stapler When fusing the lining carpet, the coating becomes almost airtight. But the process itself using an open flame on a wooden roof structure is very unsafe!
Welded version of lining fabrics. The bitumen layer applied to the bottom surface of this type of material is heated using gas burners before laying it. Moreover, the welded sheets stick well to the plywood surface. This option creates a monolithic waterproofing coating that will reliably protect the structure of the entire house from moisture at any time of the year.
True, when hot work on a wooden roof structure always requires increased care and caution. And if you have no experience, it’s still not worth taking risks.
It is necessary to clarify that on complex roofs several types of underlay carpets can be used. For example, on large flat areas of slopes it is convenient to use self-adhesive sheets, and at the joints of sloped surfaces a standard underlay carpet is most often used, the edges of which are fixed to bitumen mastic applied to the continuous sheathing, and then nailed with galvanized nails. Instead of mastic, “Katepal K-36” adhesive-sealant, intended for similar roofing and other waterproofing works, is well suited for fixing the edges of the lining carpet.
What is better to put on the floor - plywood or OSB?
Based on the table above, we can conclude that OSB still reacts more strongly to water and will deteriorate faster than plywood in a damp room. In such a room it is better to lay plywood sheets. The thermal conductivity of the materials is almost the same, but the strength is much higher for plywood. By the way, it is the latter that will cost more than an OSB board. And plywood is a more environmentally friendly material than OSB board.
It is not easy to cut such slabs
OSB does not crack, and plywood does not deform, OSB does not delaminate, and plywood does not shrink. We can talk a lot about the pros and cons of materials, however, thanks to the information described above, the following conclusions can be drawn:
- OSB board can be installed in any room where there is no strong humidity. Where it is present, it is better to put plywood;
- Where the use of durable material is required, it is advisable to lay plywood. Although OSB has higher strength under mechanical pressure;
- in a shaped room it is easier to use OSB, since it comes in different sizes. However, plywood is easier to cut, and therefore, if the room has non-standard corners, it is advisable to use it;
- plywood is better attracted to the base, which will allow it to be laid as tightly as possible;
- In a children's room, from an environmentally friendly point of view, it is better to install a rough layer of plywood than OSB.
Using plywood to level the floor
Both plywood and OSB can serve as an excellent subfloor for a floor if you select them correctly in accordance with the operating conditions. When repairing, it is recommended to use a minimum of scraps - it is better to use whole sheets. In a place where traffic is maximum, a whole sheet must be mounted. Both plywood and OSB can be installed on either a wood floor or a concrete base. And also for logs, but depending on the thickness of the material used. During installation, glue or self-tapping screws can be used.
Alternative use of particle boards in frame construction
Using OSP for a subfloor
The subfloor can be constructed from OSB boards. If a preliminary concrete screed is made, the thickness of the sheets used can be no more than 10 mm.
When using logs, use a more voluminous OSB - 15-20mm, if the logs are located at a distance of half a meter from each other. As the distance between the joists increases, the thickness of the slabs increases. The joints of the slabs are reinforced with tape and leveled as much as possible before the finishing floor covering.
OSB roof installation
OSB can also be used for arranging a roof under a soft roof. To perform the work, it is recommended to use third-class slabs, which are resistant to moisture and have high mechanical strength. Laying OSB can be done directly on the rafters, the pitch of which should be within 50-60 centimeters.
Details
Type of OSB
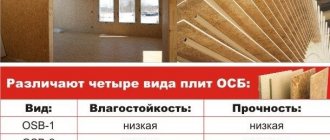
The following types of OSB panels can be distinguished:
- OSB-1 - such boards have low mechanical strength, and they are used only for structures that will not bear a load-bearing load. These will include interior items inside a frame house, and the panels are also used for finishing walls in a dry room.
- OSB-2 - this type of material can be used inside a dry room for wall or ceiling decoration.
- OSB-3 – panels are used indoors where there is high humidity.
- OSB-4 - they have increased mechanical strength, and they can be used inside and outside buildings.
In frame houses, OSB-3 and OSB-4 are used.
Comparison with CBPB and plywood
Is it possible to finish a frame house using OSB panels? This will be a pressing question among users who build this type of building. Professionals strongly recommend using such products for finishing buildings, as they have a number of advantages over other similar products.
Plywood
So, OSB sheets and plywood have similar characteristics, but there are certain differences between the materials. The main difference between the products will be the manufacturing method. For OSJ, wood chips are used, and plywood is made from several layers of veneer. This will make the panels a cheaper material to build. For the same reason, OSB cladding of a frame house is done much more often. In terms of characteristics, such a product will be inferior to plywood. It is not the most durable and resistant to moisture, and therefore will wear out more quickly, especially in harsh climates.
Cement particle boards
OSB has common characteristics with cement-bonded particle board. Such building materials will be in the same price range. But OSB panels are inferior in certain indicators, and CBPBs are environmentally friendly and also an extremely safe material that is resistant to negative environmental influences and has increased mechanical strength. The downside of the product will be its enormous weight. OSB boards are several times lighter than such a material, and cement-bonded particle boards are inferior to OSB also in that when edging and fastening these panels, flaws may appear on them. For such reasons, the installation of OSB on a frame house is completed much more often, since the material is light weight, affordable and has excellent characteristics.
Methods for installing flexible tiles
Fixing a soft roof can be done using various fasteners, it all depends on the type of roof base.
Roofing nails
Fastening with roofing nails is the most common method and is used when the base is made of moisture-resistant plywood, boards or OSB. If the under-roof space is insulated, the tips of the nails will be hidden, so the possibility of injury while in the attic is eliminated. In this way, you can attach starter, row and ridge tiles, as well as underlayment and additional elements.
Roofing nails must be driven strictly perpendicular to the surface of the flexible tiles
Installation of flexible tiles is carried out using nails 25–40 cm long with a head diameter of 8 to 12 mm. It is recommended to use galvanized nails rather than ordinary steel ones, as they have a significantly longer service life. They are hammered in strictly perpendicular to the sheathing, the cap should be adjacent to the tile. It is bad when the cap is recessed into the roofing material, and it is not good if there is a gap between it and the soft tiles.
To install flexible tiles and all additional elements per 100 square meters of roofing, you will need 10 kg of nails.
To hammer nails, you can use a nailer - a pneumatic nail hammer. It may have a drum or rack design. Nickel-plated nails are used and they also have a wide head.
The use of an automatic nailer (nailer) significantly speeds up the process of fastening the roof covering
Self-tapping screws with press washers
Roofing screws are not as common an option for soft roofing as nails, but in some cases there is no alternative. They are used for fixing flexible tiles to a laminated plywood base. In this case, plywood also serves as the interior decoration of the attic. Typically this method is used when creating a roof on a terrace or gazebo. You cannot use nails, as they are difficult to drive into this material - they can destroy it.
Using self-tapping screws, the tiles are usually attached to a laminated base on a gazebo or terrace, where it also acts as an interior decoration
When choosing self-tapping screws, it is necessary to take into account that their length should be slightly less than the thickness of the plywood. Self-tapping screws with press washers should also be used when the base is made of thin boards, since nails can split them.
Staples
It is recommended to use staples in the same cases as self-tapping screws, but it should be kept in mind that they do not fit well into a laminated surface. This option is suitable for installing tiles on a gazebo, shed or doghouse, but it is better not to use it for the main building, since it is not a very reliable fastening.
It is not recommended to fasten flexible tiles using staples on a residential building, since this method does not provide a sufficient degree of reliability
Construction hair dryer
Fusing with a construction hairdryer is used in cases where nails or screws cannot be used. Typically, such installation of a soft roof is used when covering forged canopies or other surfaces, when a sheet of metal or thin plywood serves as the base. A construction hair dryer can only be used for those flexible tiles that have a self-adhesive base.
A construction hair dryer can only be used to attach tiles that have a self-adhesive base.
Installation of flexible tiles using a heat gun is a complex and time-consuming process that requires professional skills and experience.
Tool for installing a shingle roof
In order to begin work, you need to purchase all the necessary materials and tools:
- starting, row and ridge elements;
- lining;
- mastic;
- putty knife;
- sealant;
- fastening elements: nails, screws or staples;
- metal scissors for cutting additional elements;
- cornice and pediment strips;
- valley carpet;
- roofing knife for cutting flexible tiles;
- measuring instruments;
- tapping cord or chalk;
- construction hairdryer
Before starting work, you need to make sure that all materials are compatible and have the same shade.
What is lathing, its types
Sheathing is an element necessary for every roof, which is a system of boards and beams onto which the roofing material is attached. It comes in different types, the choice among which is made depending on what roofing material is used. For example, if the roof is covered with slate or corrugated sheets, then the sheathing may be sparse, that is, there will be gaps between its elements (a certain pitch). If soft coverings are to be installed on the roof, then the sheathing should be continuous, without gaps. To lay bitumen shingles, you will have to use a continuous type of sheathing.
Installation of continuous sheathing
On a note! The lathing can have two layers at once - sparse and continuous. Due to this, it will be possible to achieve good ventilation of the roof, install thermal insulation and improve the quality and reliability of the roof as a whole.
Continuous sheathing device
The sparse lathing is always laid perpendicular to the roof rafters (parallel to the ridge), the solid one is fixed on top of the mounted sparse one. At the same time, do not forget about laying heat and waterproofing materials.
Roofing a house made of flexible tiles
High-quality and correctly installed sheathing for a soft roof must meet the following criteria:
- be durable;
- do not bend under the weight of the roofing material;
- remain resilient even under the influence of environmental factors;
- be level - do not have any bumps, protrusions, or irregularities, all sharp elements are removed from it, the heads of nails and screws should not protrude above the level of the horizontal surface of the boards;
- should not have large gaps between individual elements (maximum step - 1 cm).
Roofing pie for flexible tiles
On a note! Sometimes solid lathing is laid directly on the rafters, without using sparse lathing - the so-called single-layer flooring. This is done to speed up the construction process; usually the option is used only for houses that do not need enhanced insulation and waterproofing.
Drip installation method
The technology for installing drips involves some nuances:
- the main part of the drip is fixed on the sheathing board, while its lower section should be directed into the drain;
- adjacent sections of steel droppers are laid overlapping each other;
- additional protection of the edge of the sheathing is provided by front strips;
- at the next stage, they begin installing the roofing carpet, not forgetting to coat its edges with mastic so that it adheres better;
- soft roofing covering is laid over the drip edge.
Recommendations for material thickness and lathing pitch
So, the sheathing is a very important element that allows for high-quality installation of soft roofing.
General recommendations for its installation look like this:
- For a soft roof, two layers of sheathing are required, combined into a single structure.
- The surface of the continuous sheathing should not contain differences in height or defects.
- To avoid damage to the soft covering, all protruding sharp edges and bends must be rounded.
- As a rule, edged boards with a width of 14 cm are used.
- To prevent moisture from seeping into the space under the roof, the board should be laid with the tray facing up.
- As well as sharp edges, the ends of the outer boards must be rounded so as not to damage the roofing material.
- Antiseptic treatment will protect wood from pests and rot.
- The strength of the wind in a particular region, as well as the slope of the pitched roof, affect the pitch of the sheathing for soft tiles. As wind strength increases, the distance between the boards decreases.
- Moisture-resistant sheets of plywood or particle board under a soft roof should be laid with an indentation of 1 cm so that when the material swells from moisture, it does not crack.
- The drip cap will help protect wooden cornices and sheathing from precipitation.
Why do you need a drip line on the roof?
The drip edge is one of the required components of the sheathing. Its function is to protect the cornice from water leakage. This is important because these are the places where wooden structures are most susceptible to rotting. The internal angle of the drip can vary between 100-130º depending on the steepness of the slopes. These elements are mounted on the edges of the roof, making sure that the water flows strictly vertically through them directly into the drain. In addition, the drip edge gives the entire roofing structure a more finished look.
- such parts are produced from galvanized sheet steel with a polymer coating, which provides additional anti-corrosion protection;
- the color scheme of the drip should match the color of the main coating so as not to create dissonance;
- drippers must be installed along the entire perimeter of the roof in order to equally protect the roof and façade from water leakage;
- This element reduces the windage of a pitched roof, which helps protect the structure from the wind.
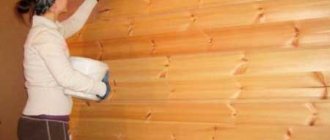
Decoration
First of all, after fixing, you will need to finish the walls from OSB.
Since sanded and varnished OSB, as such, looks extravagant and does not require additional processing.
For preliminary finishing of walls, OSB is the most worthy type in addition to other building materials. And if we consider them as an element of interior decor, then it’s unlikely that anything can compete with them. Random finishing in combination with the warm color of the wood will give the exterior appearance a touch of comfort and uniqueness.
However, if suddenly it becomes a matter of additional finishing, that is, painting or wallpapering, then initially it will be necessary to cover the slabs with primer and putty. Since paint and wallpaper will not stick to the surface well enough.
Putty is the most common decoration technique. It allows you to seal all gaps at joints to prevent moisture penetration. Moreover, after filling, the slabs are ready for the next stage of decoration, varnishing or painting.
If painting is chosen, then it is done either with acrylic paint, which has the ability to transmit water vapor, or with a more environmentally friendly water-dispersion paint with water-repellent qualities.
If the average person wants to use varnish, then it should be noted that it is suitable for rooms with high humidity. The varnish will give the surface smoothness while maintaining the natural appearance of wood texture. Typically, matte texture varnish is used due to visual fatigue due to excessive shine. The walls are painted with varnish in three layers, allowing each of them to dry thoroughly.
Construction of a frame system and laying of thermal insulation material
Wall cladding from the inside begins with the installation of a frame system. The main components of the sheathing can be metal profiles or wooden beams. In this case, the first option is more preferable because it is simpler and more convenient to use. The creation of the frame is carried out in accordance with the following scheme:
- The CW or UW guide profile is fixed to the ceiling and floor according to the markings. Its purpose is to fix vertical posts. It is fastened every 40-60 cm. In this case, depending on the material of the initial surface, various fastening elements are used. Dowels are used to work with concrete and brick, and installation on a wooden base is carried out exclusively using self-tapping screws.
- The first profile is the most important, since it is the one that sets the direction of the future plane. It is carefully measured using a plumb line and level. The exposed rack is installed in the grooves of the lower and upper profile, and after that it is additionally fixed with brackets in the middle.
- At a distance of 50 cm from the first rack, a second profile is installed, which is also carefully leveled. Its fastening is carried out according to a similar pattern - first at the top and bottom points, and then in the middle. The pitch between the central parts of the racks at any point in the profile should be 0.5 meters.
- All subsequent profiles are mounted in the same order to the opposite wall. To increase the load-bearing capacity, cross members are installed between the profiles. They are made from an ordinary CD profile and are designed to additionally connect the structure.
The finished frame is an ideal basis for creating an OSB wall. When creating partitions indoors, the sheathing can be left uninsulated and immediately sheathed with particle boards. However, if we are talking about finishing walls facing the street, it is better to use the inter-frame space to good effect by filling it with thermal insulation material. Most often, mineral wool is used to insulate frame systems, which is sold in the form of a solid roll or in the form of square mats.
The standard width of any type of material is 60 cm. It is laid close to the wall so that the initial plane is completely closed and does not contain gaps. All seams are adjusted and sealed as much as possible. A vapor barrier is installed on top of the insulation layer, designed to protect it from the effects of the smallest particles of moisture.
Related article: Thickness of a brick wall of an individual house
Materials for making lathing
Sheathing for soft tiles can be made from several types of materials. The main requirements for them are strength, reliability, durability and evenness.
Materials for continuous sheathing
Plywood is most often used to create sheathing for soft tiles. This is an environmentally friendly material, multi-layered, quite wear-resistant, inexpensive, easy to use and durable. The main thing is to purchase a moisture-resistant option for the roof - ordinary plywood cannot be used here. The most suitable brand is FSF plywood. It has the qualities necessary for creating sheathing - fracture strength, ductility, low density, light weight, and is not afraid of fungus. This plywood is resistant to moisture, which means it will not rot. In the process of its production, residues from the processing of coniferous wood are used.
FSF coniferous plywood
Another good and suitable material for creating sheathing is OSB board , a slightly improved version of the chipboard familiar to many. It has a high level of moisture resistance, is dense and durable, is not afraid of snow loads, is very smooth and does not deform under the influence of moisture. It will ensure that there are no differences in height and will make the sheathing perfectly level. The material is quite simple to install and does not require the use of any special tools.
Oriented Strand Board (OSB)
The sheathing for a soft roof can be made from edged or tongue-and-groove pine boards . The material should have low humidity - no more than 20%. The width of the boards used should be 140 mm. The main disadvantage is the tendency of the boards to deform; due to moisture, they often warp and bulges and cracks form on the surface of the sheathing.
Lathing made of boards for a soft roof
Important! Before using wood in construction, it must be treated with antiseptic compounds, as well as drugs that increase the fire resistance of the material.