Oriented strand boards are widely used in modern construction. In the English abbreviation they are designated OSB. Among our craftsmen, they are more commonly called OSP, or, to Russify the original abbreviation, OSB. This does not change the essence - the slabs have gained well-deserved popularity due to their technical and operational characteristics and quite affordable price. They are made from large wood chips, which make up at least 90% of the total volume, and binders - formaldehyde resins or polyurethane compounds with paraffin-wax impregnation.
What and how to paint OSB
OSB is commonly used as a structural material. It is generally accepted that they are suitable only for rough surfaces that require subsequent covering with one or another finish. But this is not true at all. It turns out that OSB surfaces lend themselves well to painting, and if desired, they can be turned into a real work of design art. Information on what and how to paint OSB when decorating the interior of a house or apartment will be given in this article.
Preparation and application of coating
The real difficulties begin precisely at this stage - the entire area of the floor has to be processed before further actions. Before coating with varnish, careful sanding of the entire surface to be treated with sandpaper is necessary. If OSB-3 panels are used, then they immediately have well-polished front sides and additional processing will only be required at the joints of the parts.
All seams and joints should first be sealed with special sealants suitable for wood. It is advisable to use acrylic compounds. The sealed seams are sanded. Next, the required number of layers of varnish are applied with intermediate drying of each and final polishing. It will be better if you use oil- or acrylic-based varnish for a ceiling assembled from OSB - these compositions do not cause swelling of the material.
With coloring, everything is a little more complicated. You will need to pre-treat the entire surface with primer mixtures, and only after they have dried, apply the first layer of the finishing coat. Before priming, all joints or seams between adjacent structural elements are also treated with sealant and sanded.
When applying varnish or paint, special attention should be paid to the edges and adjacent areas of the panels. They need to be rounded, removing sharp edges and filling the resulting depressions with putty.
After puttying and sanding, it is necessary to prime the entire surface again and only after that begin painting.
If the plane is uneven, then you will need to not only putty the seams, but also treat the entire area of the future ceiling structure with putty. The technology for applying putty and sanding it is carried out using the same technology as when working with conventional bases. Applying a thick layer of putty mixture involves using a paint mesh to strengthen the coating.
Unusual dyeing methods
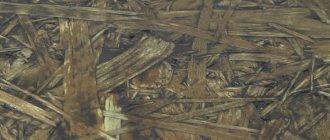
No matter how carefully you polish the surface of the slabs, it is very difficult to completely mask its characteristic pattern using ordinary paint.
This type of finish is not suitable for every interior. Therefore, there are several ways to perform decorative painting.
Imitation of stone surface
This technology will require a lot of time and patience, as it involves multi-layer painting.
- First of all, draw or download from the Internet an image with the desired stone pattern. Do not choose too intricate textures, they will be difficult to reproduce;
- Determine how many colors you will need and paint the desired surface with a base color primer paint. Usually the lightest shade is used as the base shade. Please note that the surface does not need to be sanded. To ensure that the paint is evenly distributed over an uneven surface, it is best to apply it using a spray gun;
- After the paint has dried, lightly clean the surface to emphasize the relief and make it deeper;
- Using a pencil, transfer the outline of the stonework from the image to the floor surface;
- Now paint the outline with a thin brush and darker paint;
- After this, individual “pebbles” can be additionally tinted with other colors to add volume;
- After this, update the outline in the right places;
- After the paint has dried, the result is secured with varnish.
Painting with plaster effect
This method does not require the performer to have artistic talent.
- First of all, the surface needs to be sanded. The purpose of sanding is only to remove the layer of wax protective coating;
- Padding;
- Application of pigment primer. The color should be chosen based on personal preferences;
- To obtain a pattern like in our photo example, a white primer was used;
- After the soil has completely dried, the surface is ground again, but using a wheel with a finer grain;
- Removing dust from the surface;
- Next, you can apply a composition with the effect of mother-of-pearl or patina, or you can do both, but in turn. Each composition must dry before applying the next. Patina will give an aging effect. After applying it, you need to wait 5-7 minutes and walk over the surface with a block of sandpaper;
- Clean the surface from dust;
- Secure the result by applying clear or tinted varnish.
The article was written for the site.
Tags: Enamels and paints
Laying OSB on a wooden floor
How to finish an OSB slab on the outside
Wooden floors have unevenness, crookedness, and generally become unattractive over time. If you are a wood lover, there is no point in restoring such a floor, as this is fraught with costs, both financial and physical, if you decide to finish it yourself.
Therefore, almost every person prefers to lay floor finishing using modern materials.
Preparing a wooden floor for laying OSB is a very important criterion.
What is OSB
OSB is a particle board consisting of compounds of wood chips and an adhesive mixture, pressed into shape in the form of flat sheets of specified sizes and thickness.
A smart technology for gluing several layers of sheets consists of laying them transversely, which makes this product durable.
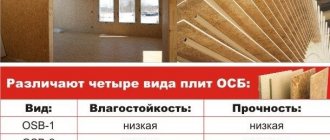
In order not to be mistaken with the choice of flooring, we will consider three types of OSB
OSB 1 is the lowest density material, and it is not difficult to cause wet damage. This type of board is mostly used in the furniture industry.
The components of the OSB 2 list are sheets of pressed chips intended for use in dry rooms. When OSB 3, on the contrary, is resistant to moisture and is suitable for finishing floors in the bathroom and kitchen.
OSB 4, whose thickness is 25 millimeters for less suitable flooring, is applicable in the construction of load-bearing structures.
Leveling a wooden floor
Leveling wooden boards of an old floor is done using various materials and you can choose any of them.
When compared with chipboard and fibreboard, OSB is quite durable boards, as thick as possible in width, based on the product category.
So, correcting the curvature of a wooden floor with your own hands will not be a difficult task. They are very convenient and easy to install and do not require any equipment.
Otherwise, fungi and mold will continue damaging processes under the new floor covering. Do you need it?
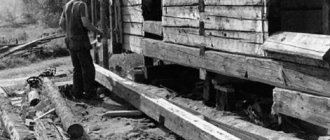
Before such a procedure, it is necessary to dismantle the old coating, leaving only the logs and laying thicker OSB.
After preparing the floor, begin laying OSB. You should start from the flattest corner of the room. To achieve a clear fit of the material, it is better to trim the slab on one or several sides at once.
OSB is fastened using nails and self-tapping screws, taking into account a distance of 35–60 cm between them. To achieve a better quality coating, then fix the material not along the perimeter, but also diagonally of the product.
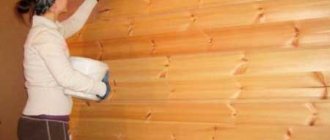
Preparing for painting
Painting sheets of shavings
Before you begin to apply the coloring product to the material indoors, it is prepared. The adhesion of the paint and the durability of the structure depend on the quality of the preparation.
Prepare the already assembled elements in the following sequence:
- Sanding with sandpaper or a sanding machine to eliminate unevenness and mask the recognizable texture of OSB. OSB-3 and OSB-4 sheets are especially carefully sanded, where the wax (varnish) protective coating must be removed. By skipping this step, there is a risk of chips and large chips peeling off
- Blowing wood dust from seams after sanding
- Leveling in places of fastening with self-tapping screws using putty mixtures based on glue and oil, “liquid nails”
- Cleaning dried putty with fine sandpaper to obtain a smooth surface
- Treatment with specialized emulsions that give the material additional resistance to moisture, combustion, fungi, and mold
- Primer with a mixture of alkyd varnish with water or white spirit (in a ratio of 1 to 10). An adhesive primer is also suitable, which will not allow the essential oils in the structure of the slab to bleed through the light pigment. If OSB-3 and OSB-4 are primed, then choose compositions for applying decorative plaster or mosaic
- The perimeter of each element is painted with a brush in 3 layers, the internal space is worked with a roller in 1 layer in one direction.
- Allow the paint to dry completely and apply a second coat.
If the material is coated with water-dispersion compounds, then only 1 layer is placed over the entire surface of the slab - this way the slab will swell evenly.
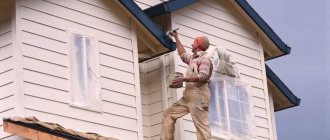
How to paint the panels outside
Finishing stone for walls inside an apartment: maximum effective use
Painting slabs outside
For external finishing work - finishing the facade, installing partitions and floors - oriented strand boards are coated with impregnations, varnishes and paints:
- alkyd
- oil
- water-based
- acrylic
- latex
When choosing a material for painting, it is better to choose compositions that contain special additives that protect the slabs from exposure to UV radiation.
The coating must also be vapor permeable, otherwise mold will form on the slabs. An impermeable coating can cause warping of sheet building materials.
Alkyd paint
Alkyd paint
Alkyd paint
It contains plant resins, film formers (glyphthalic or pentaphthalic), pigments, purified kerosene, fillers and antiseptics. After coating and drying, a film remains on the surface of the material, which provides additional strength to the OSB.
Dries quickly, is non-toxic, creates a waterproof layer, protects against temperature changes. However, it has a pungent odor and is prone to fire.
If such a composition is applied to the slab before it dries completely, bubbles and peeling will form on the surface. This coating significantly reduces finishing costs, because the alkyd composition eliminates finishing impregnation with varnish.
Water-based mixture
Water-based paint
Water-based mixture
The two-phase mixture includes water and acrylic, fillers, film formers, pigments and a number of functional additives. After drying, the water evaporates, and the polymer layer gives the slab improved performance characteristics.
In addition to such advantages of paint as quick drying, non-toxicity and lack of a strong odor, the advantages include:
- low price
- variety of colors
- high resistance to fire and moisture
- ease of application
- service life up to 10 years and above
External work is carried out at a temperature not lower than +5. In the cold the composition becomes unusable.
For finishing, water-dispersion relief paint with the addition of marble dust or fine chips is also used. Its cost is higher than that of traditional water-based paint, but due to the relief it produces a beautiful decorative look.
Latex composition
Latex composition
Latex composition
A type of water-based paint, but instead of acrylic, the binder is a latex additive (based on vinyl, polyvinyl, silicone). The composition is elastic, viscous and durable, giving the surface characteristics of resistance to moisture, aggressive chemicals, UV radiation and temperature changes.
The paint is non-toxic and has no unpleasant odor. Using latex, you can get both a smooth and textured coating.
Acrylic based coating
Acrylic copolymer paints
Acrylic based coating
Such raw materials cover the unevenness of the structure well and give a uniform tone. It consists of polymers, water and dye, and after drying it leaves a durable film on the surface of the material. It can be matte or glossy; there are many colors in the assortment that do not require additional tinting.
The acrylic composition does not spread, does not fade, dries quickly, has the ability to allow steam to pass through, but is resistant to moisture. It is often used for interior work because it is non-toxic and does not emit harmful substances into the atmosphere when heated.
Oil paint
Oil paints
Oil paint
Raw materials using drying oil are rarely used due to their high toxicity and long drying time.
The oil composition leaves a lot of streaks and unevenness, while the coating does not last long, quickly crumbling and peeling off from the surface.
Doors for wardrobes: step-by-step instructions for calculation, assembly and installation with your own hands (Photo & Video)
Advantages and disadvantages
Pressed chip sheets
Oriented strand boards are superior to other building materials made from wood products in some performance characteristics:
PROS:
- Show higher fire resistance than fiberboard, chipboard, non-flammability
- They do not have defects in the material structure (delaminations, air voids, knots) unlike solid wood
- Less time-consuming compared to other types of finishing
- Provide high heat and sound insulation
- Cost less than other wood chip materials
- Externally they differ little from wood
- Not affected by wood-boring insects
- Easy to process (drill, cut, glue and paint)
- Lighter than cement bonded particle boards/
MINUSES:
- However, OSB does not provide vapor permeability.
- When heated, it can release harmful substances (due to the phenolic-formaldehyde resin in the composition).
- When used in interior decoration, sheets must be painted or covered with other decorative material.
Coloring and its advantages
How to paint plaster on a ceiling with what
Painting OSB has the following advantages:
- paint protects the material from moisture;
- hides the OSB texture;
- prevents cracking and deformation of products;
- It is simple and inexpensive.
The layer of applied paint does not allow moisture to penetrate into the thickness of the finished material. Without moisture, the slab does not warp. The chips used to make the slab are quite large. You can hide them with dyes. This is much cheaper and easier to do than using decorative panels. But the painting method can only be used indoors. After painting the OSB surfaces, they are varnished. The varnish protects the paint from fading.
For quality work, you need to choose good paints and varnishes. The best of them consist of organosoluble pigments. Such compositions are able to penetrate inside the panel. Oil paint is considered the best option. It creates a reliable protective layer on the surface. But you can use oil compositions only when there is no need to rush, since it takes quite a long time to dry. An alternative option is alkyd enamel. It penetrates deeply into the slab and creates a strong and durable coating. This coating does not need to be varnished.
You can treat the slabs with Valtti Color Satin impregnations produced by Tikkurila, if there is no need to hide the texture. These products can create a matte or semi-gloss film on the surface.
There are fire-retardant paints Polistil, Ognelat and some others. They cannot be used to protect OSB panels, since they are intended for metal. The best protection against fire are antipyretics Vuprotek, SPAS and others intended for wood.
The quality of painting work largely depends on the preparation of surfaces for finishing. For preparation and painting itself, it is necessary to use special tools and materials:
- brushes;
- rollers;
- putty knife;
- spray gun;
- compositions for painting;
- putty;
- sealant;
- sandpaper.
If possible, painting is done before installing the slabs. Their surface needs to be sanded, especially OSB-3. All irregularities and places where screws are screwed in are smoothed out using putty based on oil and glue. The seams between the plates are hidden with the same putty or sealant. But experienced craftsmen advise hiding them with decorative strips. Then the slab is primed with Aqua-Filler varnish. Other varnishes can be used. After this, all surfaces can be painted.
The paint is applied with a brush along the perimeter of the surface. Then take the roller in your hands and apply a full layer of dye. After 8 hours you can apply the next coat of paint. The strokes of this layer are applied across the previously applied ones.
Using the described scheme, you can give OSB products an original appearance. Various wallpapers and other means are suitable for finishing.
Suitable paints for OSB
The panels consist of several perpendicular layers of pressed wood chips, connected with synthetic resins. Before painting a material with a similar structure, you need to know several of its features: compatibility of OSB and paint and varnish products. Due to the presence of synthetic resins in the panels, water-soluble paints will not be able to properly paint the surface. For OSB, it is better to choose polymer compounds, for example, acrylic; OSB texture. The surface of the material consists of many rough wood shavings. To paint, you need to use more paint and prepare the surface in advance; age of the material. Slabs with an unprotected surface that have been standing outside for more than 12 months are not suitable for finishing. Before painting, such panels require preliminary cleaning and sanding.
Recommendations for laying OSB
Two types of installation are used: on logs and using point support. The steps are not complicated, you can do it yourself. Logs are wooden beams laid from one wall of the room to another, in one direction. Point fastening is the installation of small blocks, in the form of a grid across the entire floor, with a cell size of up to 35 centimeters. With a sheet thickness of 20 millimeters and above, you can increase the distance of the slabs to 40 centimeters. The frequency of the supports will provide resistance to dynamic stresses on the surface.
Installation of OSB to joists
Holes are made in the floor sheets in the corners of the room to allow air to pass under the floor and prevent mold from occurring. All joints with walls and between panels, as well as air duct openings, must be sealed with gauze and PVC glue so that insects living under the floor do not pass upward.
Painting nuances
Wide brush
To apply each coating, it is better to use a separate tool suitable for the characteristics of viscosity, relief and absorbency.
You can apply coloring compounds using:
- roller
- wide brush
- spray gun
Recommended combinations of paint and tools are shown in the table.
| Paint type | The better to apply |
| Water-based | Roller with pile from 1.5 cm and above |
| Alkyd | Felt roller or fine-pore foam tool |
| Relief water-dispersion | Hair roller |
| Latex | Wide flat synthetic bristle brush |
| Embossed | Spatula with blade width 500 mm |
Tips for the dyeing process:
- When using alkyd paint, the roller is first dipped into the solution and then rolled out on a horizontal surface so that the mixture is evenly distributed.
- The recommended path of the roller along the wall is in the shape of the letter W: a vertical strip from top to bottom, two strips at an angle of 20 degrees and again a vertical strip from bottom to top.
- When painting with silicone paint, the primer should also be silicone-based for better adhesion
- Relief paint is applied with a spatula, but distributed over the surface with a roller. The thickness of the paint layer and the nature of the relief depend on the forces applied to press the roller.
- The edges of the building material absorb more paint than the front surface, so they need to be covered very carefully
- Structural elements made of OSB are painted at a humidity of no more than 60%
- When using transparent paints, it is better to choose those that contain inhibitors
- It is preferable to apply 2-3 thin layers of paint rather than 1 thick one.
OSB processing for finishing
When you have received an answer on how to level an OSB floor, you can think about finishing. Processing must take place in strict accordance with technology. The simplest option is to coat the existing sheets with varnish, place skirting boards along the perimeter of the walls and enjoy the natural appearance of the material. But still, in most cases, when they think about how to level a concrete floor with their own hands, they subsequently lay the floor covering. The specific treatment depends on the type of coating, as well as the desired result.
Ceramic tiles on the floor. The base structure should not move or move. This applies to a greater extent to the floor on the joists. The surface should be sanded with a wire brush or sandpaper. The work uses only special glue that can connect wood and ceramics. Only in this case will you get excellent leveling followed by tiling. Clean finish. As mentioned earlier, the surface is not covered with anything. But at the same time, you should think about carefully protecting the slabs from external influences. To do this, several layers of varnish or other special products are applied to the top. They will create a barrier against wear and destruction. Special components in the covering elements prevent the appearance of various insects and especially the bark beetle. Laminate is a durable and tough material. It can also be used to cover the OSB leveling layer. In addition, the laminate has special fastenings that allow you to forget about many other requirements for the subfloor. The result should be a flat surface. The interior will not only be beautiful, but also durable. Linoleum. There is an alternative to this floor covering - carpet
For their flooring there is a very important requirement - the base of the floor must be perfectly level. Otherwise, over time you may encounter serious defects.
In addition to performance characteristics, height differences will negate the appearance and attractiveness. Stepping on such a surface, you will be able to feel every defect (cracks, crevices, gaps, bulges, screws, etc.). One level will allow you to get the scraping process, which will need to be done before laying the floor covering.
Using OSB boards to level the base of the floor in any room allows you to obtain a flat surface on which you can subsequently lay almost any type of floor covering. Compliance with technology will lead to a positive result. The main thing is to wisely choose the specific type of stove to work with and follow the instructions.
Video:
https://youtube.com/watch?v=YulWPO9abjE
Fire protection
Soppka paint and varnish material
In addition to making the slabs decorative, painting can also be aimed at improving the performance characteristics of OSB. When ignited, particle boards emit caustic phenolic smoke, which is dangerous to humans, so it is important to cover the material with fire-retardant solutions.
Soppka paint is produced specifically to increase the resistance of particle boards to fire. The composition also prevents the development of mold in poorly ventilated areas.
The paint is much more viscous and thick than conventional antiseptics, and creates a protective transparent film on the surface of the material. The mixture is evenly absorbed into the OSB, despite the presence of resins in it, and is not washed out by rain over time.
Non-specialized but high-quality façade glaze Valtti Color Satin from the manufacturer Tikkuril is also suitable for fire bioprotection. It has high hiding power, does not fade in the sun and prevents wood from rotting.
Laying on a concrete base
If it is necessary to level the floor with an OSB slab, you should carefully prepare the base for work. Fill all possible cracks and potholes, get rid of defects as much as possible. There should be no garbage. After all, the mounting adhesive must have excellent adhesion to the base. It would be a good idea to cover the concrete floor with a primer to create a dense film on the surface. During operation, this will relieve the screed from dust.
The next steps are to lay out the sheets over the entire surface of the room. Along walls and other structures, slabs should be cut to size. The reverse side of the slabs is covered with parquet glue, which is based on rubber. To ensure that the glue is applied evenly across the entire width of the material, a notched trowel is used. After this, the sheets are glued to the concrete floor.
To ensure the reliability of the entire structure, the OSB board is fixed with driven dowels. To ensure that everything here is strong, the fasteners are located at a distance of 20-30 cm from each other. The exception here is a flat floor and a dry room, when dowels only in the corners of each of the slabs will be sufficient.
There should be an expansion joint between the plates, about 3 mm wide. There is also a seam between the wall, but slightly larger - 12 mm. These gaps will help compensate for the expansion of the slabs under the influence of temperature changes and changes in humidity. No swelling of the entire structure will occur during use.
The final stage is to clean the surface from dust and debris. Any seams along the walls in the room are sealed with polyurethane foam. The entire “cake” will dry in about 3-4 hours. More accurate data is shown in the instructions from the manufacturer. If there is excess foam, it should be cut off with a sharp knife. In the future, you can carry out finishing and flooring work.
Features of the material influencing the choice of paint
OSB boards can be called a specific material due to the pronounced texture of individual chips on the surface and some other features.
Before you start choosing a particular type of paint,
consider the following points:
- Without preliminary surface treatment, the paint may adhere poorly or unevenly to the base. This occurs due to poor adhesion or because the slabs are treated with special impregnations, which in turn form a film on the surface;
- It is not recommended to choose water-based compositions due to the fact that excess moisture can lead to swelling of the surface;
- A rough surface will require more paint;
- If the slabs are poorly painted even after careful preparation, it means they were stored incorrectly. Material that has been lying outside for more than one year must be thoroughly cleaned of dust and other contaminants, sanded and treated with antiseptics;
- At the ends, the slabs have a more porous structure; accordingly, they will require more paint to fill the voids. To avoid excessive consumption, it is recommended to pre-treat the seams.
Assembly of the structure
The greatest number of difficulties arise when the subfloor made of OSB boards is assembled on joists. Here it is necessary to take into account all the above nuances. In addition to this, there are other recommendations:
- The components of the coating are fixed in such a way that cross-shaped joints and joints do not form. To do this, it is necessary to mount adjacent rows of sheets with an offset of about forty centimeters. You can make an offset by half the length of the sheet.
- A gap of 5–10 millimeters is needed between the wall and the edge of the sheet to compensate for temperature deformations of the coating.
- The elements themselves are not mounted closely, but with a minimum gap of three millimeters - this is necessary to avoid surface deformations.
- The upper side of the logs on which everything will be mounted is always leveled in one horizontal plane.
- The sheets must be fastened to the joists using self-tapping screws or nails with the heads recessed into the surface.
- If a particularly durable surface is needed, the sheets can be laid in two layers, perpendicular to each other.
The rest is not so difficult
It is only important to correctly maintain the level of the upper side of the bars and the distance between them. In this case, you can take sheets of smaller thickness - 8 or 10 millimeters
But it is important that the total thickness of the structure is not less than the thickness of a standard OSB sheet. Otherwise, there is no point in all the work - it is easier to assemble the subfloor on logs from OSB boards of standard thickness in one layer.
general information
Material Details
Oriented Strand Board (OSB) is a composite material made from wood chips glued together using various resins, adhesives, polymers, etc. As a rule, OSB is made from aspen waste, but panels made from other materials are also found.
To protect the composite from moisture, it can be impregnated with a water-repellent composition or painted.
Depending on the characteristics of the chemical composition (impregnations, fillers, protective coatings, etc.), these products are classified into:
- OSB-1 - used for interior decoration of rooms with minimal humidity. They practically do not contain moisture-protective components.
- OSB-2 - used in rooms with normal humidity.
- OSB-3 - used for finishing walls and ceilings where there is a risk of getting wet or where there is increased background humidity.
- OSB-4 is the most durable and moisture-resistant variety. Such slabs should be purchased for the construction of load-bearing structures.
As a rule, panels of the second and third categories are used in finishing work. These are the ones we will focus on in our painting recommendations.
Benefits of painting
Finishing oriented strand materials using paints and varnishes has a number of advantages:
- Firstly, a layer of paint on the surface acts as an additional protection against moisture. Water does not penetrate into the thickness of the slab, which means the surface is not deformed.
- Secondly, the use of modern paints makes it possible to disguise the texture of OSB, formed from fairly large chips.
- Thirdly, this technique is less labor-intensive and expensive than cladding with decorative panels.
Protective painting technologies are used both in everyday life and in industry.
As a rule, after painting, the treated slab is covered with a layer of varnish. This will protect the pigments from fading, and the base itself from damage.
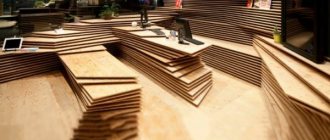
What are wood boards
Wood boards are composite materials made from wood with various binders and additives. Synthetic, mineral and natural resins can be used as binders, and the choice of additives is determined by the required operational and technological characteristics.
Sawdust, fibers of various fractions and wood flour are held together with binders and compressed at high pressure and temperature. Formaldehyde resins and glue are most often used as a binder in such composites. Due to the tightening of European legislation regarding the release of volatile substances, manufacturers had to look for an alternative to traditional phenol-formaldehyde resins and reduce the phenol content.
Pressing waste from the woodworking industry turned out to be such a successful technology that the development of wood chip production is intensively moving towards optimizing the shape and size of wood particles, searching for fillers and environmentally friendly adhesive compositions. Thus, lignin, one of the components of wood, is increasingly used, that is, the formaldehyde content in such materials is zero.
All types of wood-based panels differ from each other in their production method and in their operational and consumer characteristics.
Briefly about the material
Oriented strand board (OSB) consists of 90% natural wood in the form of large chips.
Crushed wood chips are joined together by gluing with different types of resins, polymers and adhesives. The result is a dense and hard material. But, as you know, natural wood is afraid of moisture and can swell under its influence. To protect the boards, they are impregnated with various chemical impregnations. The marking of the slabs depends on the type of impregnation used. Surely you noticed that the abbreviation OSB also has a number in the name. What does it mean?
- OSB-1 – has a minimum level of moisture-proof impregnations in its composition, therefore it is suitable for use only in dry, heated rooms.
- OSB-1 can withstand only short-term and minor exposure to moisture;
- OSB-2 – intended for finishing indoors with an average level of humidity;
- OSB-3 – able to withstand high levels of humidity, and even short-term wetness;
- OSB-4 is the most moisture-resistant category of material. Recommended for outdoor use.
Benefits of OSB
All the strengths of OSB can be divided into two parts:
- advantages over plywood and chipboard;
- before other materials.
Let's start with the first ones:
price. Of course, wood is cheaper than other finishing materials. Compared to its counterparts, chipboard is cheaper. But, alas, the quality in this case corresponds to the price; strength. Thanks to their multilayer structure, the slabs boast high strength characteristics. True, plywood has approximately the same indicators. But chipboard cannot boast of strength; resistance to moisture. OSB performs well in conditions of high humidity. The same can be said about plywood. But chipboard is destroyed under its influence; environmental friendliness. The material contains synthetic resins, but in small quantities
An important point: the products are labeled indicating the level of environmental friendliness; You need to pay attention to this when purchasing. By the way, according to this indicator, OSB is considered safer than chipboard and plywood
Based on the above, we can conclude that oriented strand boards are better than their closest analogues. Now let's move on to the second group of advantages:
- light weight. The slabs weigh from 15 to 40 kilograms, which makes them easier to install on walls;
- ease of processing. OSB lends itself very well to sanding, cutting, painting and other actions;
- no need to buy special tools for installation;
- large selection of sizes. So, you can choose fairly large slabs to reduce the number of joints to a minimum.
Manufacturers and prices
Finishing building materials
The most widely used chipboards on the market are those produced in Germany, Romania, Canada and Russia. The main brands with prices per 1 sheet are presented in the table:
| Brand name | Manufacturer country | Price for 1 sheet |
| Glunz | Germany | from 1200 rub. |
| Arbek | Canada | from 800 rub. |
| Norbord | Canada | from 1000 rub. |
| Egger | Romania | from 1000 rub. |
| Talion | Russia | from 500 rub. |
| Kronospan | Austria | from 550 rub. |
| Kalevala | Russia | from 600 rub. |
German sheets from Glünz are considered the highest quality (but also the most expensive); Canadian products have proven themselves well: Arbeck and Norbord. Among Russian-made building materials, OSB brands Kalevala and Talion are popular.
Which varnish for OSB board to choose
If you are thinking about the question of how to cover an OSB board on the floor, then you should remember that it is better to avoid oil-based varnishes. Their disadvantage is the long varnishing process and the complexity of the work. You should also not purchase turpentine varnishes, since they will last only a few months on the floor. But alcohol-based paints and varnishes are suitable for OSB. They do not give off a strong odor, which will completely disappear as the alcohol evaporates.
If you still haven’t decided for yourself which varnish to coat the OSB board on the floor, then you should pay special attention to alkyd compounds, which are excellent for this purpose. They are made on the basis of pentaphthalic or glyphthalic resins, which are soluble in organic substances
The coating will take a very long time to dry, and the second layer can only be applied 36 hours after applying the first.
Urethane varnishes are also suitable for OSB; they allow you to create a wear-resistant and durable coating on the surface. If you prefer a pure urethane varnish, then it will have average wear resistance, which the manufacturer sacrifices for the sake of increasing the elasticity of the film. Therefore, the canvases acquire the ability to withstand sudden and frequent changes in humidity and temperature.
Acrylic varnishes can also help in the process of improving OSB. However, the load on the surface must be small, and the requirements for the microclimate are very high. Therefore, installation of OSB boards on the floor, which you subsequently want to cover with acrylic varnish, should be carried out in bedrooms or other rooms where the base will not be used so intensively.
The best paints for OSB
Toplazur
Paint and varnish materials that are best suited for painting OSB boards with their performance characteristics:
- Cetol Filter 7 Plus from Sikkens is a transparent paint for exterior use based on alkyd resins. The composition includes inhibitors and additives that enhance the moisture resistance of the material. Drying at 20 degrees Celsius and 65% humidity occurs in 15–16 hours
- Toplazur from Belinka is a thick-layer coating with natural wax in its composition. Suitable for both indoor and outdoor use. Dries completely within 10–12 hours after application. When updating, you only need to sand the surface from dirt and dust, and then cover the old layer of glaze with a new one
- Drevolak is a water-based protective acrylic varnish. Elastic, antiseptic and moisture-resistant, imparts dirt-repellent properties. To achieve the desired consistency and viscosity, the composition is diluted with water.
- Oil paint MA-5 from Lakra is a coating based on linseed oil. Dries completely in 24 hours, consumption for a single-layer coating is 1 liter per 10 m2. Characterized by high abrasion resistance, high adhesion
- Facade silicone paint from Southern Accent LLC is a water-dispersion paint that combines the performance characteristics of acrylic and silicate coatings. Reduces the effects of mold, mildew, UV radiation and moisture on particle boards
- Facade latex Element F-8 is a coating based on acrylic copolymers. Weatherproof, consumption is 1 l per 8 m2
Classification of particle boards (chipboards)
There are several types of particle boards, namely:
- 1st grade - characterized by a dense, uniform structure and aesthetic appearance without defects. There should be no protrusions, depressions, stains of resin or paraffin on the surface. It is also not allowed for the edges to be chipped or the corners to be chipped;
- 2nd grade - has lower quality characteristics. On the surface, edge chips are allowed within the limits of deviations in the width or length of the slab; in addition, there may be grinding defects, but not more than 10% of the entire area. Also, in comparison with the 1st grade, a large fraction of chips and bark may be present on the surface in a larger volume;
- Chipboard without grade is of the lowest quality.
Sheets come with different numbers of layers:
- Single layer;
- Double layer;
- Multilayer.
Sheets are distinguished by type of surface treatment:
- Polished;
- Unpolished;
- Laminated;
- Laminated.
To create a laminated surface, a sheet of chipboard is lined with a paper-resin film based on thermosetting polymers. First, the paper is impregnated with melamine resin, and then it is connected to the chipboard using a press. The advantages of such a coating include: a large selection of colors and a variety of textures, good resistance to heat and mechanical damage.
Sheets are divided into classes, depending on the formaldehyde content per 100 g of sawdust:
- Class E1 – less than 10 mg of formaldehyde;
- Class E2 – within 10 – 30 mg of formaldehyde.
Based on strength, hardness and water resistance, sheets are divided into grades:
- P-A - has high quality, as well as good tensile and bending strength, has a low percentage of swelling, roughness and warping;
- P-B - has lower characteristics than grade A.
For the production of sheets, different types of pressing are used:
- Flat;
- Extrusion.
There are 3 types of chipboards available with different densities:
- Small - up to 550 kg/m3;
- Average - within 550-570 kg/m3;
- High - from 750 kg/m3.
According to the type of structure, the slabs are divided into:
- Coarse-grained;
- Fine-grained.
According to the degree of water resistance, wood chip sheets are:
- Normal durability (they are mostly used);
- Increased durability (in the marking it is designated by the letter “B”) - used to create kitchen countertops, bathroom furniture or special construction tasks.
To make the chipboard waterproof, melted paraffin or paraffin emulsion is added to the chip mass before pressing. Water resistance is determined by the degree of thickness swelling of the sheets over 24 hours. For example, water resistance indicators are:
- for P-A grade chipboard - 22%;
- for P-B grade chipboard - 33%;
- for waterproof chipboard - up to 15%.
Methods for decorating slabs
Flexible stone cladding
In addition to simple painting with a single-color color, you can use the following methods for decorating oriented strand sheets:
- Coloring with an artificial aging effect. They use acrylic varnish, which is coated with a patina using an airbrush and then sanded.
- Using primer paint. Looks decorative on the facades of frame buildings, applied using a fur roller
- Application of liquid wallpaper. Reduces the emission class of the slab and extends the life of the finish
- Covering with a layer of decorative plaster. With its help you can create relief, patterns and designs on the surface of the slab
- Creating bas-reliefs using polyurethane foam or putty
- Flexible stone cladding
Each owner should decide which paint or varnish to coat OSB boards based on the nature of the work (internal or external) and the conditions of use. When choosing a paint and varnish material, you should pay attention to its composition, performance characteristics and consumption rates per 1 m2. It is also important to consider the structure of the particle board and environmental factors.
Experts talk about different methods of decorative finishing of oriented strand boards in the video:
Different methods of decorative coating of OSB panels
How and how to paint OSB: choosing reliable paint and coating method (Photo & Video) + Reviews
Users share their own experience of painting and long-term operation of painted OSB in the video:
Criterias of choice
The retail chain offers standard pox boards for renovation of premises, as well as laminated ones, which have different performance characteristics and have different effects on people’s health. When making a purchase, adhere to the following recommendations:
Pay attention to the presence of a certificate from the manufacturer, guaranteeing the environmental safety of the purchased products.
Modern technologies can ensure the production of any slabs, but there are certain sizes
- Use floor boards of the third design (OSB-3), which are most common in specialized stores and are used to form a reliable floor surface due to their high degree of protection from moisture and increased density.
- Use slabs with a thickness of 1 cm when eliminating minor defects in the concrete floor.
- Install material 1-1.5 cm thick to ensure flatness on surfaces that have significant unevenness.
- Mount products 1.5–2.5 cm thick on the joists, depending on the interval between the support bars.
- Calculate the required amount of material to complete the repair, focusing on the most common product dimensions of 1.22 x 1.44 m. Consider the size of the room and the dimensions of the base, focusing on the minimum amount of possible waste.
- Choose a texture and color scheme by purchasing laminated boards, which will allow you to fit harmoniously into the interior.
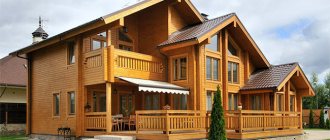
What are the advantages of painting?
The use of properly selected paints and varnishes will give the owners of a house lined with OSB boards the following advantages:
- less effort and time when compared with traditional wall decoration;
- the ability to mask the texture if it is created by large enough chips;
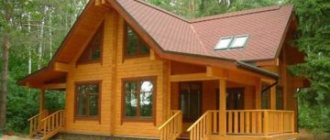
- protection from moisture – the surface does not suffer from deformation, because water does not penetrate inside.
Painting OSB for interior decoration is used only for interior decoration, because the outside of the slabs will experience serious influence from the environment. The base will require more serious protection. This should be remembered by everyone who is interested in how to paint OSB boards inside houses.
How to prepare OSB boards for painting
The technology for preparing facades made of OSB boards for painting is the same for all types of paints.
Pore filling
First of all, it is necessary to fill the pores that the OSB board has. Each tree contains hundreds of microscopic pores per square centimeter for the passage of water and nutrients. After the OSB board is formed and pressed, the sheets are polished. After grinding, microscopic pores open, and not only moisture can get into them, but also spores of mold and putrefactive fungi.
If the consumer wants to leave the natural appearance of the OSB board and cover it with a transparent wood varnish, then a special filler varnish must be used.
Grinding
After the first application, the surface is sanded. This is a required step.
Sanding is done because the varnish raises microscopic fibers and the surface becomes like a hedgehog. These fibers are removed by sanding.
After the first layer of filler, apply the second. To obtain a high-quality surface, each subsequent layer of enamel or varnish is sanded. If such quality is not required, then grinding the primer or filler does not need to be done.
Before painting OSB, you need to select a primer. Its purpose is to fill pores in wood and create a preparatory layer for painting.
Primer
The industry produces five types of alkyd primers, and only glyphthalic is suitable for OSB. It is universal and suitable not only for wood, but also for concrete, glass and other materials. Glypthal primers (GF) can be used indoors and outdoors. They are liquid and easily penetrate into pores.
Their use not only significantly extends the service life of OSB boards, but also makes the painted surface water-repellent. Apply GF primer with a brush or roller. Drying time at room temperature is at least 24 hours.
Glypthal primer is fire hazardous and toxic. It is recommended to use it outside or in a ventilated area; a respirator will not help here.
OSB boards must be primed several times with intermediate sanding of each layer until a flat and smooth surface is obtained. Why do you need to sand each layer? The fact is that the soil, filling the pores, creates a waviness that is invisible to the eye. And although these waves are measured in hundredths of a millimeter, in the sun, due to light and shadow, the OSB surface receives spots visible to the eye.
Painting slabs indoors
The process can be performed in two ways, depending on preference. But preliminary preparations are carried out, almost similar to those for external areas. The only difference is that moldings are not used to hide seams inside the house, unless provided for by the interior design.
Classic method
This method involves simply applying OSB paint to the wall surface. After preparing the base, the decorative mixture is mixed and applied evenly and sequentially in several layers to all treated areas. If putty was previously used, the painted surface will be uniform, but if it is absent, a strong or weak texture will be observed, depending on the amount of material applied.
Painting OSB without prior puttying allows you to preserve the texture of the material
It is much easier to treat the floor: after sanding, it is prepared and covered with 4-5 layers of clear varnish.
Decorative method
To decorate the base of oriented strand panels beautifully, you can use various techniques. For example, aging of the coating. Instructions:
- The slabs are carefully sanded and primed until smooth.
- Acrylic patina is being prepared. It is quickly applied to the desired areas or the entire surface. The longer the mixture sits on the base, the richer the color becomes.
- The solution is wiped off with a rag.
- Next, you need to paint the material with a light shade to highlight the darker areas.
An alternative method would be to simply layer several colors, but each subsequent layer should be “softer” than the previous one.
How to paint OSB
Preparatory work
Before painting, the slabs must be prepared. This is necessary so that the paint adheres well and sticks to the surface.
If you plan to cover the walls and ceiling with strand boards, then it is easier to carry out the preparatory work even before installing the boards on the sheathing.
Depending on the chosen painting technique, it may be more profitable to do it in advance, before installing the sheathing. This is due to the fact that some of the decorating methods involve several stages of cleaning and painting.
- So, the first step is to clean the entire surface using a hand-held sanding machine, onto which a sandpaper attachment is attached.
Cleaning the OSB surface from the protective layer.
If you plan to preserve the textured pattern of the OSB, then an sanding attachment with a medium-sized grain (approximately P120) is selected for sanding to free the surface from the protective layer of binders. If the slab needs to be leveled to smoothness for continuous painting, then the cleaning is carried out first with coarse grains (P80), and then with fine grains (P200 and higher).
After removing the top protective layer, the primer or paint will easily penetrate into the structure of the material.
If OSB-3 or OSB-4 boards are purchased, then their cleaning should be carried out most carefully, since they have a more reliable varnish coating on the surface.
The screw caps must be recessed into the wood by 1÷2 mm. The seams between the laid sheets are puttied.
- The second step in preparing the slabs is to mask the seams and screw heads. Various means are used. This, for example? It can be ready-made parquet on an oil-adhesive basis or a special elastic putty. A sealant or special elastic tape is used.
Elastic putty for joints between OSB boards.
If the joints and holes from the screws need to be completely hidden, preserving the natural color or making it several tones darker, then sawdust should be added to the putty, which will remain when cutting the sheets. In this case, the gaps must be filled very carefully, without going beyond them. And if necessary, after the putty mass has hardened, the seams are cleaned with a grinding machine with an emery attachment.
Durable and airtight “RAPID CELL” tape for sealing seams between OSB boards.
If the surface should be smooth and uniformly colored, then elastic tape is used to mask the seams.
- The next step is to apply a primer to the slabs under a solid monochromatic painting, which can be polyurethane-acrylic, acrylic or alkyd varnish. The choice of composition depends on the paint base that will cover the surface. When using water-based varnish as a primer, it must be diluted in a ratio of 1:10 with water.
Priming the surface with diluted varnish
When choosing an alkyd varnish, “White spirit” is used as a thinner.
Besides these options? For preparatory work, adhesive primers are used, for example “Aqua Filler”. This type of primer is designed to isolate wood from paintwork. Such compositions are especially suitable for coating slabs made from coniferous wood, since the primer will prevent the resin from bleeding onto their surface.
The sequence of preparatory work for decorative painting using primer paint.
In addition to the primers listed above, a special primer-paint can also be used to pre-prepare OSB for painting.
OSB painting
So, OSB boards can be painted in one color, maintaining the texture or leveling the surface to smoothness. This type of painting is not difficult to do - it is not particularly different from the usual application of paint on any other base.
When painting large areas, it is most convenient to use a paint roller
The painting process will go quickly if you prepare the slabs correctly. However, there are other techniques that can change the slabs beyond recognition, reliably hiding the joints and fasteners.
Agree, the painted surface does not look very presentable
This is what the slab will look like if you simply apply paint to it with a roller or brush. This option is unlikely to be suitable for residential premises. Therefore, some home craftsmen and professional finishers are developing and putting into practice more creative options for painting OSB boards.
There are several available options available.
The first option for decorating OSB
In this case, the floors are finished using multi-layer painting technology. Achieving this effect will require a lot of time and patience.
To paint the floor, you need to prepare several tones of the same color. The work occurs in the following order.
Option for painting OSB floors - imitation stone surface
- The first thing we recommend doing is drawing up a sketch of the future floor design. Moreover, it is advisable to execute it in two versions - graphic and color. The sketch will clearly show what the finished coating will look like and will also help in further work.
- The slab is completely painted with primer paint of the base color. The lightest shade of the selected color should serve as the base. To apply paint you must use a spray gun. This application will ensure that the paint gets into all the recesses of the textured surface, while maintaining the surface relief.
- To emphasize the depth of the relief, the floors can be lightly sanded with a sander.
- Now the entire painted surface is divided into fragments shaped like stones or other elements. The marking is carried out based on the drawn up sketch, first with a simple pencil. And then it is “raised” with a brush and paint 4-5 tones darker than the base color.
- The next step is to paint each fragment of the coating with paint of a different tone, which must be prepared in advance.
- Next, each of the fragments is cleaned. At this stage, it is not necessary to process the entire surface; you can clean one or two sides of the stone, simulating its volume.
- Then the contours of each of the stones are drawn again.
- After drying, the surface is coated with varnish, the base of which is selected depending on the type of paint.
This coloring option is only available to a creative person who knows how to work with paints.
Second option for decorating OSB
If you don’t want to come up with the shape and size of the stones, you can go another way. Specifically, lay out a covering of small square slabs. Adjacent panels are laid so that the direction of the laid chips is perpendicular to each other.
Mosaic laying of square slabs in a checkerboard pattern will somewhat “revive” the floor surface
This option will allow you to create an original textured pattern of the floor covering and well disguise the joints between the slabs.
If the OSB has a color that satisfies the home owner, then the coating can simply be coated in several layers with varnish or epoxy, having previously cleaned the surface. If the shade is not completely satisfactory, it can be changed using stain or the technique suggested below.
However, it must be taken into account that the slabs will have to be cut into separate fragments, the edges of which must be perfectly smooth. In addition, this type of flooring will look aesthetically pleasing only on a perfectly flat base.
The third option for decorative painting of OSB
This method of painting slabs is accessible to anyone, even an inexperienced craftsman. The main thing in this process is to follow the instructions provided by the professionals.
Some try to achieve this or a similar effect on the walls using decorative plasters. But it turns out that a surface made of OSB sheets, paint and a little effort is quite enough.
The photo shows an example of painting OSB, which is used to cover the walls inside the house. In this case, two colors of paint were used for decoration. But if desired, more of them can be used, depending on the desired result.
How the process of decorating OSB is carried out using this technique will be presented using the example of small sections of slab in the instruction table.
To work in this case, the tools used were a Kremlin HTI spray gun with a 1.8 mm nozzle, a sanding machine with sanding attachments having grains of different sizes, and a special sponge with an abrasive surface.
| Illustration | Brief description of the operation performed |
| So, the first step is sanding the surface. A grinding machine with an emery attachment with P180 grain installed on it is used. The process is carried out without strong pressure, since only the protective layer needs to be removed from the stove. | |
| Since paraffin or wax, as well as resins, are used in the manufacture of OSB, the surface of the board must be coated with a barrier primer. It will delay the penetration of resins and paraffin on the decorated floor covering. In this case, barrier soil FI M 194 is used. Soil consumption will be 50÷60 grams per 1 m². The primer is applied using a spray gun. The drying time for this layer is one and a half hours. | |
| The next step is to apply a pigment primer to the entire surface of the slabs, which will become the basis for creating the color scheme of the finishing material. In this case, white polyurethane primer is used. The consumption of pigment primer will be 90÷100 grams per 1 m². The time required for the coating to dry under normal conditions is 3÷4 hours. | |
| When the soil is completely dry, the part must be sanded again using sandpaper with a grain size of P320 on the sanding machine. After sanding, the surface must be thoroughly cleaned of dust using a vacuum cleaner. | |
| To create the effect of a delicate shine, the next step is to apply the “Mother of Pearl Effect” composition to the surface. The consumption of the wet applied layer will be 100÷120 grams per 1 m². And then 40÷60 minutes are given for the composition to dry. | |
| Patina paint is sprayed on top of the mother-of-pearl layer, also using a spray gun, which will give the effect of “noble aging.” The consumption of this composition is 60-80 grams per 1 m². | |
| 5-7 minutes after spraying the patina, its excess must be removed with an emery sponge (block) with P320 grain. Then the entire surface must be thoroughly cleaned of dust with a vacuum cleaner. | |
| This photo shows the result of the work done. He is already quite capable of becoming the final option. But if you wish, you can continue decorating. | |
| The next step is to spray tinted acrylic varnish mixed with stain over the slab. Instead of stain, another painting composition can be used. The main thing is to take into account that the composition of all the solutions used for coloring were organically combined with each other. In this case, a zero-gloss varnish was used. Its consumption will be 80÷100 grams per 1 m². This layer should dry for one and a half hours. | |
| As the varnish coat dries, the color may change slightly, and its dullness will increase. This factor must be taken into account when composing the shade of stain or paint. | |
| The finishing coating can be matte, glossy or soft touch. “Soft-touch” literally translates as “soft to the touch.” This is a special rubber-like elastic matte paint coating. This option is perfect for wall surfaces. |
When choosing this coloring technique, great opportunities for creativity open up. It’s quite possible to come up with your own options that will please the eye.
* * * * * * *
As can be seen in the examples shown, in any case, the specific surface structure of oriented strand boards can be “played up” for the benefit of the overall decorative effect of the coating. That is, painting OSB may well be considered a full-fledged finishing technology.
At the end of the publication, there is a video that demonstrates another easy-to-do-it-yourself method of original painting of an OSB surface.