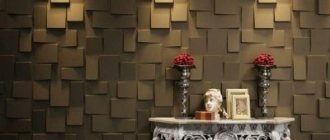
Decorative coating is a material that is gaining popularity, which is quite simply applied to the surface, creating an interesting effect. But the time comes and you want to change the decorative finish to a new type of plaster, hang wallpaper or simply paint the walls. To do this, you need to remove the decorative coating. Smooth paint and silk-effect paint for walls under embossed plaster simply need to be cleaned with sandpaper, primed and can be repainted immediately.
When you only need to change the color of previously applied textured plaster (Intonachino Minerale, Marmorino Classico, Marmo Antico, Canalgrande, Concrete Art, Rilievo), you can leave the texture and paint it with paint, pearlescent paint Cadoro or matte paint Armonia is suitable.
If the relief plaster is changed to smooth, the old coating is completely removed and here you cannot do without the recommendations of professionals.
What tools will you need?
Before removing decorative plaster from the walls, you need to stock up on tools. You can get the job done as quickly as possible using a sanding machine . Thanks to the rotating serrated rollers, which are located on its “sole,” you can quickly remove even thin layers of finishing materials.
In the absence of specialized power tools, you can use a spatula/scraper , vibrating and grinding machine . If the processing surface is large and you don’t have any electrical equipment in your home arsenal, rent it for the required period.
Preparatory work
Before removing decorative plaster from the walls, you need to do a little preparation. It consists of generously wetting the surfaces with hot water. The hot liquid will perfectly soften the material and reduce the amount of dust in the future. During the entire process of stripping walls, we recommend that you regularly use heated water.
After moistening, tap the walls with a hammer. Loosely attached materials will fall off on their own. You will have to “fight” others in the following ways.
Is it possible to apply bark beetle to an uneven wall?
This question is often asked by customers who want to save money on preparatory work - leveling. The answer is simple - you can
, but the appearance will differ significantly from what the customer saw on the samples.
Interesting materials:
Electrolyte or distilled water, which is better? Electronic license esd what is it? Electronic stabilization system - what is it? What is electronic insurance? Electronic compulsory motor liability insurance - what is it? Electronic MTPL what is it? Where is electronic compulsory motor liability insurance better? Emmc flash what is it? Emui Huawei what is it? What is an energy drink?
Methods for removing decorative plaster
The removal method depends on the tool used:
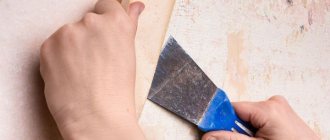
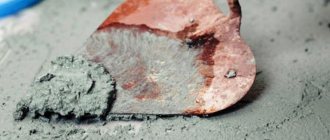
- Roughing spatula (unlike the traditional “competitor”, it has a thicker blade). Apply its blade to Venetian or any other decorative plaster, holding it at an acute angle and using a scraping motion to remove the finish. Move the blades from one area to another. The option does not require a lot of money and does not create clouds of dust. But if the processing area is large, it will not be suitable. Since the speed of work is minimal. Another important point: using a spatula and a scraper can only deal with loose coatings;
- Roughing and grinding machine . For very thin and strong plasters, you should stock up on the specified tool. Choose a medium speed setting and, applying force to the machine, press it against the wall and move it slowly and slowly. Important! When using a power tool, a lot of dust will be generated. You cannot do without a respirator that protects your respiratory tract.
- Chisel and hammer drill . Select medium speed and hold the tool at an 80 degree angle. Proceed in the same way as above. But keep in mind that a hammer drill can cause damage to the base. So take your time and work slowly. In general, the use of a hammer drill is recommended for removing ordinary plaster materials, rather than decorative materials;
- Vibrating machine (also for decorative coatings from 3 mm thick). It is distinguished from a roughing and grinding tool by its operating principle: the vibrating working element quickly moves in one plane from side to side. Lean the device against the wall at a minimum angle, and move slowly in a certain direction.
As a rule, silicate plasters are easier to deal with than decorative gypsum compounds. Venetian and textured finishes are easier to remove.
Basic methods for removing decorative plaster
When deciding how to remove decorative plaster quickly and efficiently, it is worth considering that there are several methods of dismantling:
- Force method. To implement this method, you will need the simplest set of tools: an old axe, a hammer, a chisel. This option is considered the fastest in terms of execution. But if you apply a little more force in the wrong place, it is easy to significantly damage the wall surface.
- Sedimentary method. In this situation, you will have to be patient, since the plaster will be removed layer by layer. To complete the work, you will need a grinder or grinder with an abrasive disc.
- Technical method. To remove strong compounds from a solid wall, you should choose a hammer drill with a special attachment.
It is sometimes difficult to remove old plaster, so it is worth using a combined method in certain areas.
How to determine that the plaster needs to be removed?
Before making such an important decision, you need to carefully examine all the walls and ceiling. This will help determine the extent of removal. Perhaps a partial cleanup can save the situation.
You can evaluate coverage in the following ways:
- The first gentle assessment is carried out with a spatula or you can take any scraper, for example, a trowel. If, after passing them over the surface, small areas slightly crumble, then complete removal of the plaster will not be necessary. It can be saved with putty;
- when, when removing old wallpaper, the plaster drags behind the canvas, falling off in large pieces, there is no point in restoring it. Even if some areas remain intact, they must be tapped with a trowel handle or a hammer. A dull sound will indicate those places where the surface layer does not have an adhesion to the wall and must be removed;
- There are situations when the old plaster is very durable, but a damp spot has appeared on its surface. Do not try to dry this place. The layer of this area will already be weakened and will fall off over time anyway. There is only one way out, the damp coating must be removed, plus 500 mm of dry area around it. The situation with a greasy stain is similar. The plaster must be cut down to the base of the wall;
- Durable plaster with cracks should not be removed. Minor repairs can be done here. It is enough to widen and deepen all the cracks until you get a V-shaped groove, moisten them and seal them with fresh mortar.
Repairing cracks in plaster
A correct assessment of the condition of the plaster will help to avoid unnecessary unforeseen work.
Preliminary preparation of plastered walls
Sometimes it is difficult to imagine how to remove decorative plaster from walls quickly and efficiently. In fact, the progress of the work is influenced by the preliminary preparation that is carried out at the initial stages.
Related article: DIY mirror panel on the wall
How to remove plaster from a wall?
- You should first remove the surface finish. This could be wallpaper, wood, plastic, paint.
- Depending on what material is under the plaster, wet the surface.
- Tap the surface to identify areas where the plaster is loose or blistered. Identify them as priority options for dismantling.
- Prepare the necessary tools that will correspond to the type of wall and method of work.
Next, the plaster is mechanically dismantled, which requires certain tools.
Determination of coating material
It must be taken into account that surfaces can be plastered with various compositions. Before removing the coating, you need to determine the base material:
- Clay-based products. Indeed, this has been quite a popular option in the recent past. Currently, it is found mainly in private houses, which were previously made of wood and lined with brick. But such coating can also be used in areas adjacent to fireplaces or stoves. This material is not able to withstand heavy loads on the walls when facing with new decorative products - tiles or stone.
- Gypsum compositions. A very popular option, which was used to level the internal floors of apartments. Currently, this component is also included in plaster mixtures along with special additives. It should be taken into account that when leveling the surface with cement mortars, the gypsum-based layer needs to be completely removed. If there is minor damage, repairs to the cleared areas can be carried out.
- Cement mortars. Dismantling of cement-based plaster occurs due to a violation of the installation process: the creation of too large a layer and the lack of reinforcement.
- Polymer mixtures. A modern option that has excellent qualities. Removal of such a coating can be justified only by the fact that due to violation of installation conditions, the layer has completely lost its characteristics.
You can determine the type of plaster by the appearance of the coating.
On a note! There is also so-called decorative plaster, which does not act as a basis for subsequent cladding. Often it is with this variety that the most problems arise.
Features of dismantling plaster from drywall
Drywall is a very fragile building material that can be easily damaged when the plaster is removed. It is worth taking this nuance into account when choosing a dismantling method and selecting tools.
To remove decorative plaster from drywall without damaging the base, you must proceed as follows:
- To simplify the process of removing plaster, it is worth slightly moistening the surface. The degree of water treatment depends on what type of drywall is under the plaster. If too much moisture is applied to the decorative layer, this can lead to deterioration of the drywall itself.
- Next, it’s worth identifying the weak points of the plaster by palpation. Use your fingers or palm to press onto the wetted surface. In weaker areas, the applied layer may lag. A characteristic of weakness is the sinking of the palm, reverse deformation.
- Using a metal spatula or scraper, begin removing the plaster from the weak spots. Then move on to more difficult areas.
- If the plaster is firmly fixed, then you can beat it off using a small chisel and a hammer: drive the chisel under the base of the plaster and lightly tap it with a hammer.
This type of work must be carried out carefully so as not to damage the drywall.
Preparation of the plane using technology
Before applying decorative bark beetle plaster, the wall must be cleaned of dirt and greasy and rusty stains treated with special solutions. Then the surface is primed. Important! If colored bark beetle plaster is used, the same color is added to the primer. To finish a large area, special beacons are attached. They are profiles with a protruding middle part (layer thickness) and perforated side surfaces.
It is better to buy inexpensive plastic structures. Metal ones are purchased by craftsmen who work to order. Beacons using plumb lines are attached strictly vertically to the wall at a certain distance using self-tapping screws or plaster mortar. Such devices allow you to achieve an even layer.
How to remove decorative plaster yourself using a grinding machine
To find out the secret of how to remove decorative plaster from a wall with your own hands, you need to contact a specialist. An experienced builder will definitely recommend using a grinding machine in this situation.
The tool has many advantages compared to manual work:
- Does not require much physical effort.
- It will take less time.
- Can't damage the wall.
- Dismantling will be done carefully.
The principle of working with a grinding machine is quite simple. It is enough to purchase a disc with an abrasive coating and protective clothing. You should definitely buy safety glasses and a respirator.
It is worth pre-wetting the surface of the plaster to reduce the amount of dust during the process of removing layers of decorative coating. After sanding the walls, you need to re-clean the surface with a wire brush.
The scraping method for removing decorative trim
Knowing how to remove decorative plaster from walls correctly, you can avoid many problems with further work. Experts recommend carrying out an initial sanding of the top surface of the plaster.
For the scraping process you need to choose the right tool. Cycles are used more often. It is advisable to choose a tool with a length of no more than 150 mm, so as not to damage the surface of the wall itself. It is necessary to install the scraper at the correct angle, then this operation will become easier for the worker and more effective for the coating.
A similar tool for scraping would be a metal spatula and a small hammer. First you need to soften the decorative coating with hot water. Wait a few minutes. Lightly tap the surface with a hammer. Weak areas of the plaster will fall off on their own, and the rest will have to be cleaned more painstakingly.
Economical plaster removal
It is worth knowing a few secrets on how to remove decorative plaster from walls in order to save some money. There are only 2 secrets that will be useful during the dismantling process:
- It is necessary to remove only the plaster that does not adhere well: bubbles, the area around cracks.
- Treat the bottom layer with a cheap compound, and the top layer with a higher quality and more expensive one. This already applies to secondary finishing.
If you do the dismantling carefully, this will also save money on repairs, since the internal parts of the walls will not be damaged. Savings are possible during the work itself. To spend even less money on the process of removing decorative coating from walls, you need to use available tools.
Video and photo tips on how to remove decorative plaster from walls
Sometimes during the renovation process it is discovered that it is not possible to carry out a fine finishing on the old plaster. Well, or the new one is made very poorly and needs to be removed. In such cases, we are faced with the question “how to clean the walls from plaster?”
This article will help you understand how to remove coatings from surfaces. Here we will consider working with a spatula, a simple and roughing one, a hammer drill, as well as a grinding-grinding and grinding-vibrating machine.
Adviсe
- Never apply gypsum plaster over cement-sand mortar. The different composition of these materials causes a chemical reaction and their subsequent separation from each other.
- Before starting dusty work, cover furniture and other objects with cellophane film - you won’t have to clean them for a long time later.
- To quickly remove debris after dismantling the outer covering, lay a 1.5 meter wide cellophane film on the floor. After completion of work, the film is disposed of along with the garbage. We recommend that you periodically remove the generated waste into bags or bags.
- If you decide to carry out cosmetic repairs, it is not necessary to completely clean the wall of old plaster. It is necessary to leave areas that are difficult to clean. In place of the removed coating, you can safely apply a fresh composition of the same material.
- Crumbs from old gypsum plaster can be used to create walkways.
High-quality preparation of walls for finishing becomes the key to many years of operation of any room.
vote
Article rating
How to remove plaster from ceilings and walls
The choice of method for removing the coating depends on the quality of the latter: gypsum from a brick or concrete wall can be removed manually, but with cement, most likely, you will have to work with a power tool.
Related article: DIY reed walls
How to remove old plaster from walls: gypsum and cement
The easiest way to knock down gypsum coatings. If they are small in thickness, you can get by with a scraping spatula. It differs from a simple one in that it has a thicker blade. You can remove the coating like this: lean the spatula at an angle of 90 degrees. to Wall; We begin to apply light blows with a hammer to the end of the handle; As the blade sinks into the finishing layer, we tilt the tool, gradually reducing the angle between it and the wall. At the same time, move the spatula to remove one and move on to the next section. In a similar way, you can remove old cement plaster that has lost its strength. We only replace the roughing spatula with a chisel.
How to remove the coating: using a scraping spatula
To the question “how to remove plaster from walls if it is made of cement, new and made with high quality?” There is only one answer: a hammer drill + a chisel attachment. We turn on the tool at medium speed, place it on the surface at 80 degrees; As the chisel deepens into the thickness of the finish, we reduce the angle of inclination of the hammer drill and bring it to approximately 30 degrees. We remove the coating in chiseling mode.
Please note: it is very easy to damage the base with a hammer drill. Therefore, you need to remove the plaster carefully, slowly. It’s better to go back and clean the surface again than to damage it and then have to repair it.
How to remove old plaster from walls: using a hammer drill
Removing decorative coatings
How to remove decorative plaster from the walls, since it is thin and cannot be used with a hammer drill? In this case, you can use a spatula/scraper, grinder and vibrating machine. With a spatula, everything is simple: we lean the blade against the surface of the Venetian or other mineral finish at an acute angle and remove the composition with scraping movements.
Move the tool to another location and repeat the removal. This method is the most budget-friendly and does not produce a large amount of dust. However, it is suitable for processing small areas, since due to the low speed it will not be possible to remove much in one working day. In addition, a trowel and scraper are only good for loose coatings that are easy to remove.
How to remove decorative plaster from walls and ceilings: you can use a regular spatula
Very thin but strong plasters can be removed with a sanding machine. Its working disk removes the decorative layer with serrated rollers located on its underside. The work is not difficult: with the machine turned on at medium speed, we press it firmly against the surface and move it slowly. We work in small sections, moving from one to another as we clean the surface. And don’t forget about personal protection - a lot of dust is generated during the process, so you need to protect yourself with a respirator.
How to remove old plaster from walls: video about the operation of a stripping and grinding machine.
Decorative plasters with a layer of 3 mm or more are easier to remove with a vibrating grinder. It differs from roughing and grinding in the principle of operation: in a vibration type, the working element quickly moves from side to side, in one plane. It is easy to work with: we lean the tool against the base at a slight angle and slowly move it in the desired direction. It is not difficult to remove gypsum compounds in this way, but you will have to tinker with silicate compounds.
Please note: removing plaster with these power tools is much easier than using a spatula or scraper. However, you will have to spend money on purchasing a car or worry about finding a place where you can rent it.
How to remove old plaster from walls: using an orbital sander
How to remove cement and gypsum plasters: process features
Sometimes cement-sand plaster is difficult to remove even with a powerful hammer drill. That is, it can be removed, but very slowly, with great physical effort. In such cases, the coating must be weakened by cutting into sectors. This is done using a grinder with a diamond blade. The size of the sectors can be arbitrary, but the smaller they are, the easier it is to remove them with a punch.
Please note: under the influence of acids, gypsum becomes friable. This property of the material can be used if you need to remove plaster based on it. Half an hour before starting work, you should thoroughly wet the coating with water acidified with vinegar. This will make it easier to remove the finish.
How to remove plaster from walls: cutting the coating into sectors
What to consider when choosing a paint removal method?
Before starting labor-intensive and time-consuming work, it is necessary to understand what we are dealing with and try to choose a method that will still prove to be most effective with the least amount of labor and time. To do this, you need to pay attention to five determining factors:
- Decide how much money you are willing to spend on purchasing the necessary tools or solutions, and whether you are ready at all;
- What time do you have? After all, it happens that the worker whom you hired to lay the same tiles suddenly gets released earlier than the agreed time and is ready to begin work at your home within a day. Then you will have to prepare the walls at a very fast pace;
- An important role is played by type of base. It can be plaster, cement, brick or concrete;
- Type of paint – acrylic, water-based, oil or enamel. Of course, it is very difficult to do this by visual inspection, but it is still possible to distinguish the oil composition from others. Let’s say right away that the hardest part will be removing oil paint from a concrete base;
- And the last thing - number of layers paint coating. A thin layer can sometimes be much more difficult to remove than a thick layer, which breaks off in plates upon impact due to its own rigidity.
It’s best to “test it by the teeth” and try to remove a fragment of paint on a small section of the wall using each of the methods in turn, starting with the simplest ones.
How to remove old decorative coating from walls - advice from professionals
Decorative coating is a material that is gaining popularity, which is quite simply applied to the surface, creating an interesting effect. But the time comes and you want to change the decorative finish to a new type of plaster, hang wallpaper or simply paint the walls. To do this, you need to remove the decorative coating. Smooth paint and silk-effect paint for walls under embossed plaster simply need to be cleaned with sandpaper, primed and can be repainted immediately.
Related article: Installation of lintels in aerated concrete walls
When you only need to change the color of previously applied textured plaster (Intonachino Minerale, Marmorino Classico, Marmo Antico, Canalgrande, Concrete Art, Rilievo), you can leave the texture and paint it with paint, for example, Armonia.
If the relief plaster is changed to smooth, the old coating is completely removed and here you cannot do without the recommendations of professionals.
How to remove decorative plaster from walls: brief instructions
To efficiently remove the old coating, you should follow some tips and instructions that will determine the progress of the work. First of all, you need to:
- stock up on personal protective equipment (respirator, gloves, goggles);
- cover the floor with plastic film to prevent dirt from spreading;
- clarify what type of plaster was used, the degree of its strength and the approximate thickness of the layer;
- choose convenient tools and tools;
- start with simple methods and move on to more complex ones, combining them if necessary;
- Sharpen your tools while working to get faster results.
Before you begin removing the decorative covering, be sure to remove all switches or sockets, as well as all lighting fixtures. If all the tools and materials are prepared, you can start working.
Necessary tool for removing plaster
The type and number of tools needed depends on how the old plaster is removed. Since decorative plasters are a very broad concept that contains materials of different thickness and structure, the difficulty of removing them will vary. To cover all possible options, we list the most popular devices. It can be:
- chisel, preferably with a long handle;
- hammer;
- spatula/scraper;
- scraper (a tool for removing old textured finishes and other paints and varnishes);
- metal brush;
- perforator;
- machine for removing plaster.
In addition, you will need plastic film, a bucket of water, a damp cloth, and a spray bottle, since during the entire process you will have to wet the walls with water, and at the end, wipe the walls from dust and remnants of decorative plaster.
Sanding decorative coatings and methods for doing it
To effectively remove plaster, it is better to choose a scraper with a length of 130-150 mm. Pressing lightly, it is passed along the wall at the correct angle of application. Using light movements, cycle the finish, starting from a small part of the surface, moving to a large one. At the same time, wipe the wall with a cloth soaked in water. Instead of a scraper, you can use a hammer and spatula. Before starting work, the decorative finish is moistened with hot water to reduce dust and soften the putty. Next, they tap the wall with a hammer, so that poorly adhering parts of the plaster will fall off on their own. Other parts need “help”.
A grinding machine with abrasive discs is an effective method and solution to the problem of how to remove Venetian plaster from walls. For example, Gracelo di Calce, Stucco Veneziano, Marmorino Classico. This tool does not knock down, but rather erases the plaster. To completely remove it, you need to walk over the surface with a wire brush. It also helps remove sand-effect decorative wall paint well.
Other coating removal methods
When the coating to be removed is strongly strengthened on the surface, you can use a grinder with special attachments, which has greater power. This tool works faster than a sander. But here you should work carefully so as not to damage the wall. If a coating, including Venetian plaster, was applied to the paint, an industrial hair dryer, which softens the paint, will help remove it. Next, use a spatula to remove it and the coating.
Chemical methods
Methods for removing old coating using chemical reagents can be called the least labor-intensive. You just need to carefully distribute the product on the surface, let it act on the paint for the recommended time, and then remove the softened coating.
No. 9. Ready-made paint remover
The time interval is always indicated on the packaging, as well as recommendations for use, which we advise you to strictly adhere to.
- All chemical compounds have pungent, unpleasant odors and are very aggressive. Be sure to work with gloves and a respirator, and while the solution is working, it is better to leave the apartment altogether, opening the windows for ventilation;
- Also, after completing the work, you cannot simply take and pour the remaining solution into the sewer. Chemicals are very caustic and must be disposed of properly. This is also mentioned on the packaging or in the instructions;
- The cost of can also be intimidating , but believe me, after you try to remove paint with a spatula, an ax or a grinder and none of the above gives the desired result, you will not want to save. Often, one liter of solution is enough to remove paint from the walls of a standard-sized bathroom and toilet;
- Please also note that some compounds may be intended for use only on horizontal surfaces.
Depending on the component of the base, ready-made compositions are:
- Acidic - based on hydrochloric or phosphoric acid;
- Alkaline - based on salts of various origins;
- Organic - which does not contain any salts or acids.
For removing old paint from stone surfaces, the most suitable .
According to the release form, solutions can be in the form of:
- Liquids - alkaline or acidic concentrates that must be diluted;
- Gels – have a milder effect and are produced on the basis of organic compounds. More convenient for use in enclosed spaces, as they do not have such a strong odor;
- Powders - used both in the form of solutions and independently;
- Aerosols - designed for working with small areas and are very convenient.
Selecting a composition for a specific type of paint is not difficult. In order not to make a mistake in choosing a remover, it is better to purchase universal solutions that are suitable for removing any type of paint. For example:
- Wash "Fail-5" — designed specifically for removing old paint and dissolving even powder compositions. It begins to act a few minutes after application. You will see how the old coating begins to become covered with small cracks;
- “Anti-paint” is a universal fast-acting remover suitable for removing paint not only from walls, but also from the floor, floor, metal, wood, plastic;
- “Docker S4” is a general construction remover used to remove all types of paintwork.
No. 10. How to make a wash with your own hands?
Still, you can try to save money and prepare paint yourself:
- You need to mix 250 ml of ammonia with a liter of cold water. The alcohol must be 10%. Add 2 kg of regular chalk to the resulting liquid and mix thoroughly until a paste-like mixture without lumps is formed. The resulting slurry is applied to the wall in an even layer. After a couple of hours, you can start removing the paint. Such a composition should not destroy the paint layer itself, but disrupt the strength of its adhesion to the base material;
- Another popular method is to mix 1.2 kg of quicklime with 400 g of soda ash, then add water. The mixture should resemble thick sour cream in consistency. It is applied to the wall for at least 12 hours;
- You can use liquid glass. It is applied in a thin layer over the old paint. After drying, a thin silicate film is formed, which should peel off along with the paint.
Typically, the above methods work well for either removing recently applied or worn-out coatings. For strong layers of paint, it is better to use ready-made, special washes.
Some features of removing textured paints and Venetian plasters
Textured surfaces are obtained not only using decorative plasters, but also using paints with special fillers (quartz sand, sawdust). Removing textured paint is quite difficult, since it has good adhesion to the surface. As with removing Venetian plaster, you can use a scraper rather than a wide spatula. You can also clean the surface to be removed with a regular metal brush or coarse sandpaper. In any case, it is necessary to use personal protective equipment for hands, eyes, and respiratory organs (protective uniform, respirators, goggles, etc.). Before starting work, you should consult with familiar specialists who can share their secrets. Also watch the training video.
