There are different ways to combat freezing of the ceiling in your home in winter. One of the most effective options involves insulating the ceiling with foam plastic. There are many opinions about the use of polystyrene foam for thermal insulation. Many experts and craftsmen give conflicting assessments as to whether it is possible to insulate the ceiling with polystyrene foam. But what cannot be taken away are the excellent thermal insulation characteristics, thanks to which the material is one of the three most highly effective means of insulating the ceilings and walls of any building.
Why is foam plastic dangerous?
In many cases, customers and home owners deliberately refuse or limit ceiling insulation with foam plastic from the inside. There are only three reasons for such a radical attitude towards foam material:
- Rodents love foam insulation, so mice or rats are sure to settle in the house;
- Danger of a flame front appearing on the ceiling in the event of a fire or localized ignition, for example, a short circuit in the electrical wiring;
- If you insulate the ceiling with foam plastic from the inside, then there is a risk of damage from toxic volatile substances used in the production of foamed polystyrene.
Added to this is the fear of getting burns and poisoning from combustion products when ceiling and ceiling elements ignite.
Is it possible to insulate the ceiling with polystyrene foam?
It's actually not all that bad. Firstly, rodents and pests settle in the structural cavities of the ceiling with any insulation option, if you do not take special protective measures, use nets and a protective U-profile. Polystyrene foam on the ceiling in this sense is no better or worse than mineral fiber, sawdust or granules.
Secondly, for insulation of residential premises only special brands are used, for example, PSB-S, PSV-S. Index “C” indicates the presence of fire retardants in the foam, thanks to which the fire-fighting characteristics of the material have dramatically improved:
- The flammability group from “G3”, the category of normally flammable, has changed to “G1” - low-flammability;
- The ignition of foam ceiling insulation occurs at a temperature not lower than 430°C, while for wood and most finishing materials the ignition limit is below 350°C;
- The insulation layer extinguishes in 4-5 seconds upon contact with fire. Under a layer of additional cladding, foam insulation does not burn up to 850 ° C, when most of the finishing and building materials of the walls and ceiling of the house begin to collapse.
For ordinary polystyrene foam and expanded polystyrene, everything is much worse. When a fire occurs, the insulation melts and rains fire into the room or onto the floor beams. Therefore, insulating the ceiling with polystyrene foam without a concrete screed is unacceptable. At best, you can cover up the stone walls of the facade.
Therefore, before insulating the ceiling with polystyrene foam, you need to make sure that the purchased brand of material fully complies with safety criteria. The same applies to the styrene content of the foam material. Products from well-known manufacturers do not contain aromatic compounds, and a cheap Chinese semi-handicraft polymer can cause serious illness.
For your information! Low-density foam used for insulation has vapor conductivity at the level of wood.
That is, with proper organization of thermal insulation, water vapor will go outside the room and automatically remove everything that has accumulated in the open pores of the foam. Is it possible to insulate the ceiling with foam plastic? Without any doubt.
Advice! It would be right not to immediately purchase a batch for ceiling insulation, but to purchase a sample. Light the burner strip outdoors. If the flame front goes out after four seconds, as the PSB-S manufacturers claim, then it is quite possible to insulate the ceiling with foam plastic from the inside of the room.
This is the most effective way to insulate the floor. If the material has already been purchased, but there is no desire to take risks, then it is quite possible to install ceiling insulation with foam plastic from the outside of the ceiling.
Installation process
At the beginning of insulation, all joints between logs or beams should be checked. If the insulation material is uneven, renew it and fill the voids with installation foam
. Next, boards are nailed vertically to the wall surface so that their outer surface is located at the same level as the wall surface. If necessary, this will require cutting down some logs. At the very center of these boards, strips are nailed that will serve as a frame. The installation pitch of the slats should be 5 millimeters less than the width of the heat insulator.
Next, polystyrene foam is placed into the frame, starting from the bottom. If the frame distance is maintained correctly, the material will be held in it due to tension. If the sheets fall out, they must be secured with polystyrene foam wedges or nails
It is fixed with a stapler, and the joints are glued using tape. Then you can cover the wall with selected finishing material.
Insulation from outside
Choosing a laying scheme in favor of external thermal insulation has only one advantage - the insulating material on the ceiling does not lead to a decrease in the height of the ceilings. In terms of efficiency, this method of insulation is inferior to the internal scheme. Cold bridges form along the floor beams, and a large amount of condensate accumulates on the surface, which can penetrate into the insulation. On the other hand, there is no need to look for a way to attach foam to the ceiling. Insulation slabs are simply laid and fixed between the floor beams.
Laying on a wooden sub-ceiling
The easiest way is to lay foam insulation on a bed of boards. The warm layer on the ceiling is laid out using classical technology:
- A hydrobarrier film is laid out on the padding boards. The vapor barrier is sewn onto the ceiling and beams as a continuous carpet, with the edges overlapping by at least 10-15 cm;
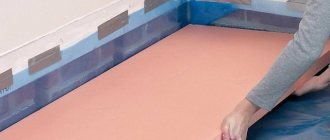
- The next step is to cut out foam plastic slabs that are several millimeters wider than the pitch between the supporting beams;
- Thermal insulation is laid in the space between the beams, the sides and joints are foamed with polyurethane foam and tightened with an additional layer of vapor barrier so that a gap of 10-15 mm remains between the foam and the film for the release of water vapor.
For your information! If the rough filing of the floor is made of plywood or OSB, then before laying the insulation you will need to sew a sheathing of wooden slats that are stuffed onto the lower ends of the beams.
This scheme ensures normal ventilation of the lower plane of the foam and vapor barrier; as a result, condensation and most of the water vapor will be removed without harm to the ceiling. Next, film and foam blocks and a layer of hydrobarrier are laid on the sheathing, after which everything is sewn up with boards or plywood.
We insulate the floor
If the lower surface of the floor is accessible, say, a basement under the entire house, we insulate it from below, calculating the thickness of the foam using the wall method, but using R for the floor. In this case, the work can be completed by attaching the foam with fungi.
If floor insulation with foam plastic has to be done from the inside, then three methods are effective, the first is without replacing the screed:
- We lay 30-40 mm EPPS on the screed.
- Using EPPS, we make lathing on intersecting mortise wooden logs with a cell of 300-400 mm from 40-60 mm beams.
- We put PPS-15 or PPS-20 into the cells of the sheathing.
- Along the sheathing we make a rough flooring from 16-20 mm plywood, and on it - a decorative one from laminate, marmoleum or cork.
Second, if the screed is less than 150 mm:
- We make a vapor barrier on the base floor as usual.
- Instead of expanded clay, we lay 30-40 mm EPPS.
- Next - reinforcing mesh and concrete screed, as usual.
- Flooring - on wooden lathing with EPS in cells, as described.
If there is more than 150 mm in height under the screed, then we make a vapor barrier using a dry screed from aerated concrete (not foam concrete!) blocks or foam concrete with a thickness according to thermal design. Then - reinforcing mesh, screed along the beacons, sheathing with insulation, flooring, see again above. This method is good because in a dry screed you can arrange channels for hidden communications.
Re-installation of ceiling insulation
There is also a reverse scheme for laying insulation, when foam blocks are mounted on beams from the inside of the room, followed by filing of boards. In this case, foam plastic slabs are initially installed with staggered seams. The next step is to add a layer of foil foam.
To prevent the canvas from being pressed through the rough ceiling, the material is sewn onto the beams with wooden slats.
A plywood sheathing is mounted on the slats.
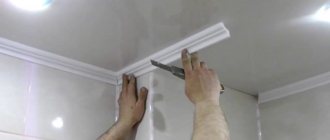
Methods for gluing ceiling tiles
So, we have determined where to start laying tiles, now we will look at what gluing methods exist. Everyone chooses the most convenient for themselves.
Snake
For this method, each subsequent row is laid around the previous one, as if entwining the central elements. The first fragments are glued in the center.
Crisscross
In this case, the panels begin to be laid crosswise. First, glue the first four squares in the center. Then straight lines are formed perpendicular to each of the walls. At the last stage, the resulting quarters are filled.
Rows from the corner
The first tile is placed in the far corner from the door. Next they move along the wall. After this, glue the next row parallel to the first. Work begins from the place that is best viewed upon entering the room. If you start working from the doors, you may find that in the most visible part of the room there will be an unsightly thin strip of scraps.
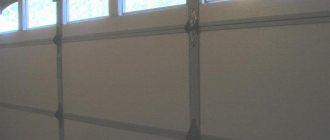
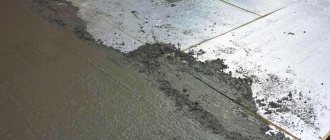
Laying foam insulation on a concrete floor
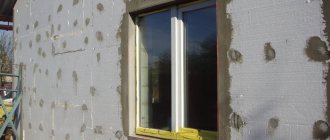
Insulation of reinforced concrete floors often causes difficulties; the process of laying slabs is simple and is not much different from finishing walls or subfloors. The problem arises with how to secure the foam to the ceiling. Insulation material can be installed in many ways, but in practice only two are used:
- Apply insulation sticker to the prepared surface;
- Attaching foam plastic to the ceiling mechanically.
The use of a specific method depends on the condition of the concrete and the degree of surface moisture. For residential premises with normally dry ceilings, it is possible and necessary to glue insulation material. For buildings in which rooms are heated with a large gap in time, or there are cracks in the ceiling, the best way is to lay the slabs using fungal dowels.
Polyurethane adhesives in bottles
Penosil is a one-component polyurethane foam sealant in aerosol packaging. It is convenient because it does not need to be prepared before application. One can of aerosol is enough to glue ten squares of foam board. The work is carried out according to the instructions. The glue can be applied in strips. After this, the foam is pressed to the surface for several minutes. The use of spray adhesive is an economical and convenient option for fixing foam. At the same time, the glue hardens quickly, in just 30 minutes.
Foam adhesive Gun Penosil Prem polystyrene FixFoam 877 A3781 (750 ml)
Glue Titan Stiro 753 is a one-component polyurethane adhesive in cylinders, characterized by water and heat resistance. Using this composition you can glue polystyrene foam to polystyrene foam. It is durable and can withstand mechanical loads. Dries quickly, the boards can be secured with dowels in two hours.
Polyurethane adhesive foam Titan Styro (Titan Styro) 753 750 ml.
Special adhesive foam Ceresit ST 84 “Express”, suitable for polystyrene foam, contains polyurethane, propane and butane. It can be used for repair work at temperatures from -10 to +40 ºС. Suitable for installing slabs on brick, concrete, cellular blocks, OSB panels.
Adhesive foam Ceresit CT-84 Express (Ceresit ST 84) 750 ml.
Special adhesives “Master” and “Dragon” are used for gluing foam boards to a flat surface.
Polymer universal adhesive Dragon
Liquid nails are also versatile; they dry instantly, so they are best suited for insulating ceilings using foam plastic.
Adhesive for foam plastic liquid nails Moment Installation express decor white
Options for gluing foam to the ceiling
For fastening foam plastic boards, builders recommend two types of compounds:
- Facade adhesive mass based on cement, acrylic, finely ground quartz and adhesive additives;
- Mounting polyurethane foam in cylinders.
If the layer of foam plastic on the ceiling is less than 50 mm, and the ceiling insulation is carried out in a living room with constant humidity and air temperature, then it can be glued with any other adhesives - “Liquid Nails”, “Dragon”, “Titanium”. The exception is materials based on alcohol, acetone, or any other base that can dissolve polystyrene.
However, in this case it is recommended that before attaching the foam to the ceiling, pierce the insulation board at several points with a sharp awl to speed up the setting process and the release of water vapor.
The simplest means for gluing is regular polyurethane foam; for precautionary purposes, you can buy red fireproof foam. To insulate a floor with an area of 15-16 m2 it will take one 0.75 liter cylinder. The foam is laid on the foam board in dots or a zigzag line.
Before gluing the foam to the concrete on the ceiling, the surface of the concrete is vacuumed or brushed to remove dust, and lightly moistened with water from a spray bottle. After applying the glue dots, the panel is pressed against the ceiling, a small piece of plywood 20x20 cm is placed on the slab and supported with a rigid lath.
Additional support is needed to ensure that the expanding foam does not peel off the insulation from the base. In the same way, laying is carried out on any other adhesive masses.
Features and characteristics of the material
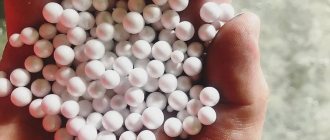
Polystyrene foam is a building material made from plastics by foaming with the addition of ingredients to impart certain performance characteristics. The material has a porous structure and low density, since the main volume is filled with air. Thanks to this, polystyrene foam has good thermal insulation properties.
Advantages
- Minimal hygroscopicity (the material practically does not absorb moisture). The use of polystyrene foam does not require additional waterproofing or vapor barrier. However, it should be borne in mind that in wooden houses a vapor barrier is desirable (instead of a vapor barrier layer, you can treat the joints between the slabs with sealant or construction foam).
- Foam plastic retains its shape and does not deform, unlike mineral wool. This eliminates the appearance of cold bridges, and the thermal insulation properties are maintained throughout the entire service life.
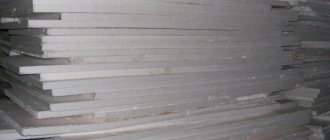
- To insulate the ceiling, a layer of foam plastic 5 cm thick is sufficient, which is much less than the thickness of mineral wool.
- The material is resistant to temperature changes and chemicals. Insects, fungus and mold will never appear in the foam.
- Has excellent soundproofing qualities.
- Polystyrene foam is easy to install, lightweight, and easy to cut.
Flaws
- Relatively short service life. The maximum service life declared by the manufacturers is only 20 years. If the installation is carried out in violation of the technology, the insulation will have to be replaced after 10 years.
- Polystyrene foam is dangerous in a room with a poor ventilation system. Since the material does not allow moisture to pass through, it begins to accumulate inside the room in the form of condensation. This leads to the appearance of fungus and mold, which negatively affects people’s health (primarily children, people with allergic reactions and asthma are at risk). The solution to the problem is the organization of supply and exhaust ventilation.
- During combustion, foam releases toxic substances. The material emits black smoke, which contains toxic substances that can cause paralysis of the respiratory tract.
Features of foam
- Foam plastic is a fairly dense material; as a rule, installation is carried out quickly and without problems. The only caveat is that the material should not be severely deformed.
- If it is impossible to lay the material without gaps, the cracks and joints are treated with special fillers (sealant, polyurethane foam) and sealed with mounting tape.
- Many people do not use polystyrene foam in repair and construction work, as they consider this material harmful to health. This opinion is wrong. Polystyrene foam created in accordance with the technology provided does not pose any health hazard.
- Polystyrene foam is a flammable material, and given that during combustion it emits toxic smoke, this is a serious argument against.
- It should be noted that small rodents often make their homes in polystyrene foam. As a result, the material loses its thermal insulation qualities.
Fixation by fungi
Installation of insulation on mushroom dowels can be used as an independent fastening, or as an additional fixation, for example, if foam plastic boards are laid on concrete using facade glue.
The only limitation is the drilling depth of the concrete slab. For reliable retention, four points per slab are sufficient; the distance between the fungi must be at least 50 cm. The drilling depth of the ceiling is limited to 30 mm.
Craftsmen advise that in order to prevent the material from crumbling, burn holes in the foam board with a hot rod in advance, without using a drill or a drill. The concrete surface must be primed.
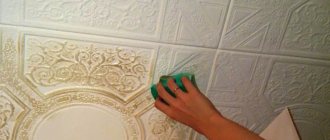
Recommendations for caring for ceilings made of foam boards
The white color of the slabs fades over time or acquires a yellowish tint. To prevent this undesirable effect, exposure to UV rays should be prevented, i.e. sunlight.
However, there is another option - after the seamless ceiling is ready, it is recommended to paint it with water-based paint.
This will not only extend its service life, but will also create a unique style in the room.
Caring for a foam ceiling is quite simple if it has a laminated coating, i.e. waterproof. Accordingly, a sponge and a damp cloth are enough for cleaning. If there is no such coating, then you only need to remove the foam with a vacuum cleaner.