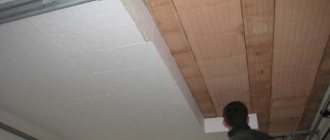
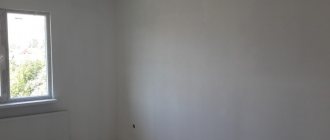
Today, foam plastic is quite actively used as a building material for thermal insulation of buildings. It is also used for interior surfaces. This is what raises the question of how to glue the foam to the metal on the ceiling. Initially, its area of application was the transportation of equipment and furniture, where it acted as a seal. Today, foam plastic is installed on various surfaces, including metal. This choice is justified, because polystyrene foam is durable, it can retain its shape for 25 years, as for external use; but if you install it indoors, it will last for half a century. However, ultraviolet radiation and exposure to moisture can shorten the service life of the material. These factors shorten the life of almost any building material.
Expanded polystyrene is completely resistant to fungus and mold, so it can be used even in a damp environment, such as in basements. Insulation granules almost do not absorb water, but foam plastic sometimes attracts rodents, where they make burrows. Polystyrene foam does not support combustion, it is many times safer than wood. In order for it not to catch fire, the temperature must be twice as high as in the case of wood. When burning, it releases less heat. The material is completely safe for the environment and human health.
However, this thermal insulation has disadvantages, they are expressed in low strength, because the material breaks easily even with a slight impact. For this reason, its surface after installation needs mechanical protection; for this, various mixtures are applied to the base that protect against ultraviolet radiation. Having familiarized yourself with all these features, you can begin gluing the insulation to the metal surface, but it is also important to choose the right composition that will be the most effective.
Preparing tools
If you are concerned about the question of what kind of glue to glue foam to metal, then you can first start choosing the composition. Depending on which one you choose, you may need:
If you prefer a dry mixture, you will need a drill with a mixer attachment. To apply this glue, you can use a spatula in the form of a comb, but you will need a small spatula as a handy tool for work; with its help you can remove excess glue.
Technical characteristics of penoplex material
Let's consider what useful qualities this extraordinary product has. Here are some features of penoplex:
- resistance to chemicals;
- reduced thermal conductivity;
- poor moisture absorption ability;
- fire resistance provided by the fire retardant included in its composition;
- the product is absolutely not susceptible to aggressive biological factors.
It is obvious that due to its beneficial properties, this insulation material is exceptional.
Preparatory work before installation
If you are thinking about how to glue polystyrene foam to metal with polyurethane foam, then it is important to know that this material can be fixed to almost any metal. Among other things, you can use almost any glue or putty. However, you cannot purchase a composition whose ingredients contain gasoline, acetone or any other solvent. The slabs will collapse.
Another mistake that craftsmen often make is not using enough adhesive. Such compounds must be applied to the back side of the slabs; this must be done in 5 places or more. First, the mixture is applied in the corners, and then in the center. Before gluing foam plastic to metal, you need to remember that saving is inappropriate here. To do this, some apply the composition only in three points; this is incorrect and violates the technology.
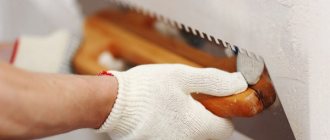
Before gluing metal and foam plastic, the surface should be prepared; it should be cleaned of dust, old paint and varnish coatings, dirt and rust. You can use an oscillating or belt sander for this. After such cleaning, the base is degreased with any convenient means. Gluing is not such a quick process; sometimes it is necessary to ensure that the material is fixed until the glue hardens. At first, the thermal insulation may slide under its own weight, so it must be supported from below with a board or plywood.
Mounting features
Izolon (penofol) is covered with aluminum foil, which allows for the best possible retention of heat. Its adhesion to the surface of the insulation can be chemical or physical, that is, cross-linked. Izolon may have additional characteristics such as thickness or color. If you are looking for win-win insulation for your home, then this option will be the best choice. It is also perfect for insulating elements of air conditioning systems, pipelines, and production mechanisms. Foamed polyethylene is used for both external and internal work. The material has quite significant advantages.
Among them are:
- small thickness;
- ease of installation;
- environmental cleanliness.
Installation of insulation is possible without the use of special tools. Working with foamed polyethylene does not require additional protection of the respiratory tract and skin. The material is so light that the load-bearing capacity of the glue will not be critical.
Choosing adhesive for foam plastic
If you are faced with the question of how you can glue foam to metal, then you should consider several methods, each of which involves certain material investments. The most budget-friendly option is the one that involves the use of PVA glue. If you have previously carried out repair work, then you may still have this composition. In this case, you do not have to purchase additional glue; you can use the leftovers. The secret to using PVA is to use burlap, which is soaked in the mixture, laid on metal, to which foam boards are then glued. In this case, it will be possible to achieve high adhesion, so that in the future it will be possible to apply a sufficiently thick layer of plaster.
How to prepare the surface
No matter what adhesive is used, the preparation process is always the same. If the metal is not properly processed, then no glue will provide reliable fastening of the foam.
Materials and tools for work:
- Metal brush . Used to clean the surface and remove rust and old paint residues. Instead of a hand tool, you can use a power tool - a drill or grinder with a special metal brush;
A special wire brush will help you quickly remove rust and paint from the metal surface.
- Paint remover . It is used if there are several layers of old paint on the surface, which does not adhere very well and may peel off later. The composition is easy to apply, but is toxic and requires compliance with safety measures;
Paint remover in aerosol packaging is very convenient to use
- Solvent. Used to degrease surfaces. Personally, I use the P-646 composition; it is inexpensive and well suited for preparing metal for further processing;
Solvent R-646 is used for cleaning and degreasing metal in preparation for insulation
- Composition “3 in 1” for metal surfaces . A special composition consisting of paint, primer and anti-corrosion treatment. After application, the surface will be reliably protected from rust for many years. If you have metal without pockets of corrosion, then you can use ordinary primer for metal, its price is much lower;
Special paints with anti-corrosion additives are the best preparation of metal for insulation
- Brush or roller . Used for applying paint. For large, flat areas, a roller is more suitable. For designs with many curves and angles, it is better to use a brush.
The brush should have thick bristles to ensure high-quality application of paint or primer to metal
Metal surface preparation:
The paint can be applied with a sprayer if available, but you can also use a brush.
Using polyurethane foam
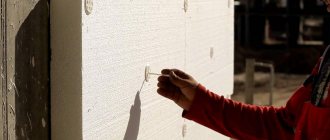
If you are thinking about how to glue foam to metal, you can purchase polyurethane foam. It not only seals and insulates, but also has adhesive qualities; it can be used to glue material in places where there is no need to achieve super-strong adhesion. The foam is sold in convenient containers; in addition, not much of it is required. But you need to work quickly, since the material hardens almost instantly. If you are just faced with the need to glue foam plastic for the first time, then this option cannot be considered the most convenient.
Disc dowels are durable for a long time
The use of disc-shaped dowels is justified in the case of a large insulation area or uneven façade surfaces. For fastening to dowels you need: a hammer drill (impact drill), a drill of the appropriate diameter and length, and a hammer. Holes are drilled with a recess of 50-60 mm into the base. The holes are filled with polyurethane foam. Then the dowel is driven in with a hammer so that the dowel fungi do not protrude above the surface of the slab. It is best to use dowels in combination with metal screws to increase the reliability of the connection. Installing 5 dowels per slab is sufficient. Adjacent sheets are fastened with one dowel. It must be installed in the seam between the slabs.
Using polyurethane glue
When thinking about how to glue foam plastic to metal, the consumer quite often chooses polyurethane glue; it is the most suitable for carrying out this work. The mixture is available in convenient cylinders, but you will also need a mounting gun. If the work is single, then it is best to purchase a cheap tool, because it will not be used constantly.
If you decide to resort to this technology, then you must follow a certain sequence of actions. The adhesive is applied to the surface of the thermal insulation in dots or strips; the distance between individual dots should be approximately 7 cm or less. After waiting a few minutes for the dots to dry a little, the plate must be carefully pressed against the metal surface. This is exactly the case when the slabs need to be supported with plywood or boards. After just 20 minutes, the support can be removed.
Installation technology
Before starting work, you need to check that you have all the necessary tools that may be needed throughout the entire foam installation process.
Below is a minimal list of what may be useful when working:
- Gloves and cloth material; It is better to have rubber or cloth gloves; the use of cellophane gloves is unacceptable.
- An industrial knife that will be used to separate sheets of foam.
- Tape measure for precise area measurements.
- Several spatulas.
- A piece of wood or plywood to support the foam boards.
- A grinding machine that thoroughly cleans metal.
- Surface degreasing agents: white spirit, gasoline or any other detergent.
- An adhesive solution that was selected in accordance with operating conditions.
- The required number of foam sheets.
First, you need to especially thoroughly clean the metal surface from any dirt, rust or paint residues on it, and then completely degrease the entire area of the metal surface with any available means. The modern construction industry offers a huge number of adhesive materials, the use of which mainly depends on the personal desire of the installer. They all have both positive and negative sides.
Using polyurethane foam
Polyurethane foam is quite convenient and easy to use and does not require any special skills to use it. It adheres to absolutely any surface, but it dries quickly enough, so delay is unacceptable when working with it.
The foam is produced in small cylinders that have a convenient outlet tube. This helps to apply it quickly and ensures high quality installation. Polyurethane foam is the simplest material for working with foam and metal.
Application of polyurethane glue
This type of glue has become the second most popular for home use in small quantities. The form of release of polyurethane glue is identical to the form of release of polyurethane foam - small cylinders with a guide outlet tube, however, to work with polyurethane glue you need a special gun that squeezes the mixture onto the desired surface.
Polyurethane adhesive is usually applied in dots or stripes over the entire surface of the foam sheet.
Liquid nails for gluing foam to metal
Liquid nails have lower surface bonding strength than the previous option, but after the first contact of the surfaces there is no need to provide support for the foam sheet.
Tips for using liquid nails
“How to glue foam to metal?” - This is a question that home craftsmen often ask. Experts advise them to use liquid nails; with their help, they can achieve high speed of work. The composition will almost instantly fix metal and plates, but the adhesion strength will be slightly less than in the case of a polyurethane mixture. You can combine materials; for this it is recommended to purchase liquid nails and polyurethane glue. The latter allows you to achieve strong adhesion, while liquid nails guarantee speed of work. In this case, you can refuse to use supports.
What is the best way to glue foam?
What glue should I use to glue foam? The classification below will help you understand this.
- 1) Water-based preparations - characterized by a long drying period and the inability to work at subzero temperatures.
- 2) Mixtures containing epoxy, polyester, elastomer and silicone. Characterized by accelerated hardening.
- 3) Liquid nails - when attached to a point, they firmly and reliably adhere to the surface.
- 4) Foam adhesive for polystyrene foam is used for express installation. It is recommended to use preparations based on a rapidly evaporating solvent.
- 5) Universal glue.
Adhesive for installing foam in extreme temperatures
Quite often, craftsmen wonder how to glue foam to metal in winter. To do this, you can choose the WEBER THERM S100 composition, which can be used to work at temperatures ranging from -10 to +20 °C. The material is waterproof and can be used in any region of Russia. The mixture is a dark gray powder, and the average density of the solution is 1.4 kg/m3. Per kilogram of mixture you will need 0.26 liters of water. After mixing, the mixture must be used within one hour, the deformation shrinkage of the solution is 0.03%. If you are deciding what is the best way to glue foam to metal, then you can choose this particular composition, the adhesive strength of which is 1.4 MPa. The vapor permeability of the mixture is 12 mg/(h*m*Pa), while frost resistance, which is expressed in the number of cycles, is equivalent to 75.
How to glue foam to metal: useful tips
Today, foam plastic is quite actively used as a building material for thermal insulation of buildings.
It is also used for interior surfaces. This is what raises the question of how to glue the foam to the metal on the ceiling. Initially, its area of application was the transportation of equipment and furniture, where it acted as a seal. Today, foam plastic is installed on various surfaces, including metal. This choice is justified, because polystyrene foam is durable, it can retain its shape for 25 years, as for external use; but if you install it indoors, it will last for half a century. However, ultraviolet radiation and exposure to moisture can shorten the service life of the material. These factors shorten the life of almost any building material. Expanded polystyrene is completely resistant to fungus and mold, so it can be used even in a damp environment, such as in basements. Insulation granules almost do not absorb water, but foam plastic sometimes attracts rodents, where they make burrows. Polystyrene foam does not support combustion, it is many times safer than wood. In order for it not to catch fire, the temperature must be twice as high as in the case of wood. When burning, it releases less heat. The material is completely safe for the environment and human health.
However, this thermal insulation has disadvantages, they are expressed in low strength, because the material breaks easily even with a slight impact. For this reason, its surface after installation needs mechanical protection; for this, various mixtures are applied to the base that protect against ultraviolet radiation. Having familiarized yourself with all these features, you can begin gluing the insulation to the metal surface, but it is also important to choose the right composition that will be the most effective.
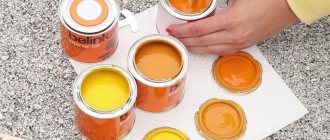
Types of adhesives
What composition is used to glue penoplex to the surface of a wall or ceiling? There are many options, but you need to choose the product carefully. This glue will hold not only the material itself, but also the entire insulating structure. If the quality of the glue is poor, it will not hold the insulation.
There are several types of adhesives depending on the composition:
- mineral;
- polyurethane;
- polymeric;
- waterproofing.
The first type is used to work with a dry surface, because at high humidity the mineral components immediately harden. It is better to carefully study the advice of the glue manufacturer before purchasing. This will allow you to choose the appropriate composition. It should not contain caustic, aggressive components, because penoplex is a capricious material, its structure is easy to destroy.
Self-tapping screws are cheap and cheerful
Fastening with self-tapping screws using a screwdriver is permissible when insulating a wooden wall over a previously installed sheathing. In this case, it is recommended to install a washer under the screw head to avoid surface destruction and increase the reliability of fastening.
The most widely used method of fastening is the use of bitumen (adhesive) compounds and disc dowels.
The resulting insulation layer is airtight, able to withstand large mechanical loads and has an increased insulation coefficient.
After installing the insulation, a reinforcing mesh is installed followed by cladding.
Now you don’t have to think: “How to glue penoplex? How to mount it correctly? The use of materials specifically designed for penoplex to the walls will allow you to avoid unnecessary waste of effort, money, time and get a durable layer of thermal insulation made by yourself.
Video on the topic:
Polyurethane-based compositions
For the installation of penoplex such products are often used. Most are sold in cylinders, so they are convenient and easy to use even for a beginner. The products are ready for use, they do not need to be mixed, and the consumption is economical. The most popular composition of the series is “Insta-Stik”. It is sold in 750 ml cylinders, the consumption when gluing is 12-15 sq. m, setting time - 20 minutes. Pull-off force – up to 400 kPa. The disadvantage is that it is not frost-resistant - you cannot glue penoplex to walls at temperatures below 0 degrees.
Another well-known glue is Titan Stiro-753. Its consumption is approximately the same (about 14 sq. m). The product has a high peeling force (600 kPa), and the setting time is even shorter (15 minutes). Penosil Fix&Go Montage is frost-resistant; it is used at -65...+130 degrees. Using the described means, it is easy to connect foam sheets together, stick them on wood, attach them to a brick wall, or to concrete.
Adhesive foam Penoplex Fastfix
This foam with adhesive properties is widely used for attaching thermal insulation made of extruded polystyrene foam to all kinds of substrates - ceramic tiles, concrete ceilings, floors and walls, plasterboard, aerated concrete, brick. Adhesive foam Penoplex Fastfix (“Penoplex Fastfix”) is produced in 750 ml cylinders, the product itself is light blue.
If necessary, the adhesive will provide adhesion to most building materials. Among them are plaster, stone, wood, expanded clay concrete blocks, metal, cork, cellulose. If the material had to be foiled, this product is incompatible with it. Foam is also not suitable for polyethylene, silicone, and Teflon. Here are the main characteristics of the material:
- drying – 10-12 minutes;
- complete hardening – 24 hours;
- possibility of cutting – within 30-40 minutes.
The product is used both for external work and for internal thermal insulation indoors; it is suitable for insulating loggias and balconies.
Is it advisable to use foam?
With the help of foam, you can simplify and speed up working with foam several times over. It is perfect for those cases when you need to do everything quickly and efficiently. It features high technical characteristics and low consumption. Sold in cylinders, making it easy to transport and use. Compared to simple dry mixtures, it is more expensive, but it pays off, because... 1 cylinder is enough for an average of 20-25 square meters.
The main advantage over aerosol adhesives is that you do not need to use water, electricity or any special equipment to work with foam. During the insulation process, it is possible to save up to 50% of time compared to other popular compounds.
There is no need to take technical breaks, there is no need to install a layer of reinforcement or drive in dowels, you can work even in cold weather. The foam is characterized by excellent adhesion to polystyrene foam. Resistant to fire and high humidity. Does not support combustion and does not emit substances harmful to human health.
Mineral adhesives
Mineral-based adhesives contain cement, gypsum, and alabaster. They harden very quickly and must be applied immediately. The adhesives are mixed in small portions. Only cement compositions are usually used outside the room; products with gypsum components are suitable for interior work. The setting time is long, up to 1.5-4 hours, so it is possible to correct flaws.
The disadvantage of the compositions is that the base must first be well primed and wait until it dries completely, otherwise the connection will not be strong. Another disadvantage is the need for dilution; to obtain a high-quality homogeneous mixture, you need a construction mixer.
The most popular brands of mineral adhesives:
- Ceresit CT 83 - used directly for gluing penoplex, suitable for any substrate, pull-off force - 500 kPa, high frost resistance class.
- “Atlas Stopter K-20” – has an increased tearing force (600 kPa), is viable for 4 hours, consumption – 4.4 kg/sq.m. m, contains special reinforcing fibers.
Rating and review of the best brands
You can purchase several brands of puzzle glue in specialized stores. They differ in the quality of the adhesion and the appearance of the glued elements.
Step puzzle
Step puzzle glue is odorless, dries in 2 hours, 80 ml is enough to glue 1000 puzzle pieces. It is poured onto the front surface of the painting in two layers with a break of 1.5 hours. A thin transparent film is formed. If the parts were a little torn, thanks to Step puzzle they are neatly connected and become even. You should strengthen the picture on the back side by applying another layer of glue to it.
Ravensburger Puzzle Conserve
The glue is convenient to use because it comes in a can designed for 4000 elements. The liquid comes from it through a foam nozzle, which does not dry out and remains in working condition for a long time. Ravensburger dries in an hour, leaving a shiny film on the surface of the puzzles. After application to the front side, the painting does not need to be turned over, since the final quality of the connection is high.
KSK-M
Using a bottle of synthetic glue KSK-M, you can assemble a mosaic with an area of at least 0.4 square meters. After applying several layers to the front surface, its drying time is about 2 hours. Until this happens, it can be washed off with a soap solution.
Educa
Glue for fixing puzzles is produced in a bottle, in the upper part of which there is a sponge, the composition is squeezed onto it and applied to the outer surface of the picture. The glue dries in an hour and leaves no marks or streaks. One can is enough to fix 5000 elements.
"Ginger cat"
The bottle of Red Cat glue has a dispenser through which the composition is squeezed onto the finished picture or onto a small piece of sponge. With light movements it is distributed over the surface of the assembled puzzles. Two hours after drying, the painting is placed on the base and in the frame.
Fix Puzzle Conserver Permanent
Using this brand of glue, you will not need a brush, since the bottle is equipped with a sponge spout. The picture made from puzzles is wiped and the composition is applied to the front part so that it gets into all the gaps and crevices. Shake the bottle first.
Polymer adhesives
Is it possible to fix penoplex with adhesives in small cans? Typically, polymer adhesives are sold in such containers; they are ready for use on any surface. Bonding by this method is practiced if it is necessary to attach penoplex to metal. It is better for beginners not to buy such compositions - they set instantly, and it will be impossible to correct defects.
A good product for slabs is Moment glue. It is resistant to humidity and temperature changes, and is produced in convenient packaging of 0.25-1 liters. Consumption is low, even a small pack is enough for 4-5 square meters. m. Another product is “Emphikol 225”, its technical characteristics are similar. After use, you should ventilate the room well for 2-3 days, but it is ideal to work with it in the air.
What varieties are suitable
In order to reliably connect puzzles into a single picture, various gluing means are used. Both special glue and those intended for other household purposes are used.
Specialized
Along with a set of puzzles, special glue is often placed in the box. It has a liquid consistency and is able to penetrate between elements and firmly connect them. The glue is odorless and colorless; it can form a glossy layer on the front side, after which the picture does not need to be varnished.
PVA
The properties of special glue and PVA are not very different. To reliably connect the assembled puzzles, PVA is applied to them along the front side with a brush, filling all the joints and gaps. After drying, white stains will become transparent and form a matte film on the surface of the glued picture.
Wallpaper for vinyl coverings
Elastic adhesion of the elements can be obtained after using glue for vinyl wallpaper. The advantage of the composition is the ability to prepare glue of different thicknesses.
Waterproofing compounds
This group of materials that will glue penoplex includes adhesives based on bitumen, acrylic, rubber, they are produced in the form of mastics. You can’t buy simple ones, they corrode the material, just like waterproofing agents with petroleum products. The best way to glue penoplex is Bitumast XPS. The mastic does not include solvents, sets in 2 days, and has a high peeling force of 500 kPa.
Acrylic adhesives can easily attach penoplex to wood, concrete, brick, connect penoplex to penoplex, and glue penofol to penoplex. They are suitable for interior and exterior work and have very low consumption. Bitumen mastics have the most pronounced waterproofing properties and are resistant to low temperatures.
The nuances of proper gluing and reinforcement of polystyrene
If you plan to glue products made of extruded polystyrene foam and conventional foam, the following nuances of the technology should be taken into account:
- polystyrene is processed using a needle roller for better adhesion;
- It is recommended to cover the foam with long-fiber paper.
If you need to solve the problem of how to increase the strength of a structure based on foamed polymers after gluing, you should use the following recommendations:
- in the case of interior decor or crafts made from foam plastic, the solution is to create an external reinforcing frame made of paper;
- if it is necessary to reinforce structural elements, it is advisable to use fiberglass.
Also, polystyrene foam can be “armored” using gypsum or acrylic plaster.
Instructions for gluing penoplex
When you have chosen what to attach the material to, you can proceed directly to work. It is important to properly prepare the surface of the base; you can do this yourself. It should be cleaned of debris, dirt, and dried. If the manufacturer recommends, you must first prime the surface. Next, you should cut out the necessary pieces of the base material. How to cut penoplex? For this purpose, a stationery knife or jigsaw is used.
Installation technology
After drawing up an installation plan, you can begin gluing the product to the floor, walls or ceiling. Mineral wool is often used under penoplex.
There are several ways of gluing with glue:
The dot method is more often used, in which liquid glue is applied with a spatula 100-200 mm wide. Then you should wait a certain time and press the material to the surface. After complete drying, the joints are sealed with polyurethane foam or the same glue. The second option is much more expensive.
Glue consumption
All useful information for the user, including material consumption, is always indicated on the packaging. The usual figure is 3.5-5.5 kg/one standard layer of material (for mineral mixtures). Glue in cylinders is more economical and consumes less (from 10 sq. m per cylinder).
Puttying penoplex
After the glue has completely dried, you can additionally fix the penoplex with dowels, this is more reliable. Next, puttying with finishing materials is performed. The putty must be applied smoothly, layer by layer, and the putty must be smoothed evenly. After the first layer, a mesh of metal, plastic, and reinforcing is attached. The thickness of the first layer is up to 1 cm, the second – slightly less. 2-3 layers are performed as desired, with the third layer usually done by spraying and up to 5 mm thick.
External foam protection
For external protection, special glue is used. Which one is used in this case? A product with high adhesion to the surface is suitable; you can choose the brands “Ceresit”, “Master”, “Polymin”. Some professionals prefer to use “Gyprok”, a plasterboard-like insulation material.
Gluing stone and tiles to penoplex
After the final stage of work, you need to think about finishing. Most often it is recommended to glue ceramic tiles, porcelain stoneware or artificial stone. This is done with tile adhesive with frost-resistant qualities; with its help you can easily and quickly finish floors and walls. It is imperative to apply several layers of plaster, preferably Ceresit ST 85 with reinforcing mesh. It is recommended to make a cement screed on the floor indoors, and then create a decorative covering.
The principle of installing penoplex with glue
The process of gluing insulation to glue is simple, so this step is often carried out independently, this saves money. Installation should be done as follows:
- Surface cleaning.
- Prepare a schematic plan for installing the material.
- Prepare the adhesive mixture and dilute it with water according to the instructions.
- The solution is applied. It can be applied using 3 methods: stripes, spot distribution, continuous method, when the mixture is applied with a spatula over the entire slab.
- When the master has decided on the method and the solution is ready for work, it is applied to the slabs, then pressed to the surface, and they wait a little for the composition to set.
The joint areas should also be covered with a compound; it is more economical to choose polyurethane foam for this purpose than to use the same glue.
The joint areas should also be covered with the compound.
An adhesive solution for installing penoplex can create a strong connection that will last a long time, but it is better to additionally secure the slabs with dowels after gluing. Particular attention is paid to the selection of the product so that it meets the requirements necessary for specific operating conditions. We can say that foam glue is a more convenient product to apply, and their cost is low.
Questions and answers
There are a number of questions that concern users regarding the use of penoplex.
How to glue penoplex to penoplex?
There is no difference between how to glue two sections of penoplex and this material to other surfaces. But experienced builders claim that when fastening the slabs together, it is better to use a continuous method of applying glue, and you can do without a primer. In this case, dowel-nails are not required, and any glue listed above will do.
Is it possible to glue the material onto polyurethane foam?
You can glue penoplex to the foam, the adhesion will be strong. On the floor, this type of work is carried out on a self-leveling concrete screed. But gluing onto polyurethane foam is very expensive. It also tends to expand, so you will have to constantly press it until the process is completed.
Is it possible to glue penoplex to liquid nails?
You can use liquid nails, but it’s not very convenient. It should take up to 7 minutes before applying the slab in place, otherwise the glue will not set. In addition, the price of work will increase significantly.
Does air temperature matter?
This depends on the type of adhesive composition. Some lose their properties at low temperatures. Others allow work in the cold. All data must be clarified in the instructions.
Houses are different, and they need to be insulated in different ways.
The use of various technologies and materials in construction leads to the fact that it is impossible to give a universal answer to the question: what to consider when attaching penoplex to the walls of a house? Methods for fastening and preparing surfaces have been developed for different surfaces and operating conditions. You need to know this in order to control those who insulate the house. And even more so for those who insulate the house with their own hands, using their potential.
Houses can be made from stone and wood building materials. Already at the stage of surface preparation, peculiarities in the work begin to appear.
When preparing concrete and brick surfaces, you must:
- clean the walls from dirt, deposits, paint, fuels and lubricants, and then remove dust;
- treat the areas where the fungus is spreading with copper sulfate (antiseptics);
- remove efflorescence on brick;
- clean and seal cracks in the insulated wall;
- apply a deep penetration primer;
- smooth out unevenness with putty;
- apply a deep penetration primer after filling.
Preparing the tree is much easier. It is treated with impregnations that prevent wood rotting. Wall material such as oriented strand board or thermal wood may not be treated. Then a base of impregnated timber is installed, which ensures ventilation of the facade.
The choice of glue and what is better not to use
Before purchasing, you need to consider the following points:
- acceptable price;
- suitability for indoor or outdoor use;
- adhesion strength;
- consumption;
- harmlessness (for interior decoration).
Typically, any polyurethane or polymer adhesives are purchased for interior work. It is prohibited to use waterproofing products indoors; they can be harmful to health. Cement-based mineral mixtures are often used outside the house. For exterior work - balconies and plinths - acrylic mixtures are ideal.
Requirements for the adhesive composition
To select an adhesive for penoplex insulation that is suitable for certain operating conditions, you should understand the characteristics of the material and the composition parameters necessary for reliable fixation. The following requirements for the solution can be distinguished:
- For interior work, safety for human health is important, preferably the absence of a strong odor. External cladding will require exposure to natural factors;
- High degree of adhesion to materials; compositions can be selected for a specific type of base, since different materials require different properties and impregnation. Concrete, wood, and brickwork differ in the degree of adhesion and other characteristics.
Thus, the choice is influenced by environmental factors and the type of foundation.
For interior work, safety for human health is important, preferably the absence of a strong odor.
Types of compositions
For the installation of Penoplex, the following adhesive compositions are used:
- Dry mixes;
- Polyurethane compounds in cylinders;
- Liquid Nails;
- Bitumen mastic.
Let's look at each option in detail.
Option 1: mineral-based mixtures
This type of composition has the following features:
| Illustration | Description |
| The composition is sold as a dry mixture . It must have the following properties: |
- Improved adhesion to mineral substrates;
- Increased elasticity of the finished solution;
- Moisture resistance and frost resistance;
- No shrinkage during drying.
A very good option is the Atlas Stopter K-20 composition, it is sold in 25 kg bags. The price of the package is about 1000 rubles. There are other dry mixes with similar characteristics. This type of product is most often used for outdoor work; it provides high quality fastening to concrete, brick and gas silicate blocks.
To work, you need to have a container and a drill or hammer drill with a mixer attachment on hand.
It is very important to maintain the correct ratio of components; if violated, the properties of the composition may decrease.
- Distribution of the adhesive composition in stripes along the edges and in the middle;
- Applying the solution in dots with increments of 30 cm in two rows with a distance of 5-10 cm from the edge;
- Continuous distribution of glue using a notched grater (as in the photo). This option provides the best quality of fastening, but is suitable for surfaces with minor unevenness.
The dowels must extend into the wall at least 40 mm; only in this case will they securely fix the Penoplex.
Option 2: polyurethane-based adhesives
This option appeared relatively recently, but has already gained immense popularity due to its convenience and high quality. The main features of this option are:
| Before use, the mixture is diluted with water . All proportions and a description of the cooking process will be indicated by the instructions on the package. |
| Glue is applied to Penoplex boards . There are several options for carrying out the work: |
| When insulating the floor, glue can be applied to the base . In this case, it is distributed with a toothed grater with a tooth size of 10 mm over the entire surface. |
| On the facade, the sheets are additionally secured with dowels . You must use at least 2 fasteners per sheet to ensure reliable installation. The dowel is placed in the hole, which is drilled after gluing the elements. |
| Illustration | Description |
| Sold in 750 ml bottles . It is very convenient and practical. To work, you will need a spray foam gun; with its help, the composition is consumed very economically and is easy to apply. |
The polyurethane composition perfectly glues Penoplex not only to mineral substrates, but also to metal, wood and other complex surfaces. It can be used to glue sheets together.
The cost of a cylinder is 300-400 rubles, one package is enough for 10 square meters.
After application, the mixture remains elastic for 10-15 minutes.
Before gluing Penoplex to a concrete wall, it is worth treating it with primer, this will improve the quality of fixation.
Instead of polyurethane glue, you can use polyurethane foam. It also holds the material well, but hardens much longer, so after applying the composition you need to leave the sheet for about 10 minutes for initial hardening.
Option 3: liquid nails
When choosing what to glue Penoplex with, one cannot help but mention liquid nails; this type of composition is excellent for such purposes and has the following features:
| The composition is applied to Penoplex sheets . This can be done either as shown in the photo, or apply glue around the perimeter and make several stripes in the middle. |
| The sheets are simply pressed to the surface and held for 20-30 seconds . Work can be carried out both inside and outside buildings. When insulating the facade, it is recommended to additionally fix the elements with dowels, but this is not necessary. |
| Illustration | Description |
| The composition is sold in tubes of 310 ml . When choosing an adhesive, you need to take into account the type of surface on which Penoplex will be attached and the location of the work. |
For external insulation, special weather-resistant types of glue are used. Standard options are used inside.
The cost of the package is approximately 200 rubles, it is enough for 3-4 square meters.
Due to the significant consumption, it is not worth using liquid nails on large objects. It's too expensive
Option 4: bitumen mastic
This type of composition has the following features:
- Sold ready-made in buckets . Used for waterproofing foundations and plinths. It is on these parts of the structure that Penoplex is glued using mastic;
Mastic acts both as glue and as surface waterproofing
- The composition is applied to the surface . The work is done with a spatula or brush. The mastic is distributed in a thick layer without gaps to cover the entire base without gaps;
The composition is applied to the surface in a thick layer
- The sheets are carefully pressed to the surface . You should start working from the corner, the elements are combined with grooves and pressed for a few seconds. You can cover the foundation with your own hands very quickly. There is no need to fix the elements with dowels; anyway, the lower part is covered with soil.
The foundation is covered with Penoplex while the mastic is still wet
How to use the solution correctly
To carry out the process of using the adhesive solution yourself correctly, you need to know the basic principles of working with it. Professionals highlight the following points of work:
- Dilution of the dry mixture is done strictly according to the manufacturer's instructions;
- The slabs should be mounted as close to each other as possible to reduce heat loss; the seam areas after installation are covered with sealants or other suitable means;
- When working, monitor temperature indicators; cold often leads to the loss of some of the properties of the compositions;
- When laying, use a building level; the slabs must be mounted on the same plane;
- If you are working with a soluble type of mixture, then first coat the insulation with a product, then leave it on the wall for some time so that the composition has time to set;
- The use of “liquid nails” is inappropriate due to the high cost of such use;
- Foam compositions that are distributed over the surface from a gun must be applied along the perimeter and diagonally.
The plates should be mounted as close to each other as possible to reduce heat loss.
Conclusion
Now you know which Penoplex glue is best to use in your case. I recommend watching the video in this article, and if you have any questions, ask in the comments.
| The composition is excellent for attaching Penoplex to difficult surfaces . Plywood, corrugated sheets, plastic - you can attach insulation to all these bases with liquid nails. |
| Gluing is simple and quick . A small amount of liquid nails is applied in dots or lines to the base, then the sheet is pressed for 10-20 seconds. |
How to choose for different surfaces
For each type of surface, you need to choose your own suitable type of substance to glue foam boards:
- For outdoor work, it is better to choose dry mixtures that have good adhesion to stone, brick and plaster. When choosing, you need to pay attention to the packaging, namely, its integrity and the indicated release date. The seal must be maintained.
- To ensure waterproofing of seams and surfaces, you need to choose bitumen or polymer adhesive.
- Polyurethane types are mainly used for reinforced concrete and wood.
- Liquid nails, polyurethane foam or silicone-based sealant provide good adhesion to metal bases.
- To install penoplex on plastic, corrugated board or plywood, it is also better to use liquid nails.
Note! If the finishing of heat-insulating materials is carried out both on the walls and on the ceiling, then for these purposes it is better to choose polymer compounds.
Polyurethane adhesives are excellent for installing materials indoors, as well as for creating floor thermal insulation. To glue penoplex outdoors, mineral adhesives are suitable.
Adhesive foam is considered a universal material used for finishing walls, indoor and outdoor surfaces. Suitable for working with floors and ceilings.
What you will need
Pre-prepared:
- measuring device (tape tape), knife, spatulas;
- rubber (or cloth) gloves, burlap or clean rags;
- degreaser;
- grinding machine (for cleaning metal surfaces);
- adhesive composition;
- wooden support or plywood sheet for the foam board.
When using spray adhesive or foam, you should also stock up on cleaning fluid.
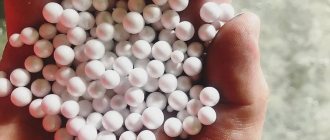
Polystyrene foam, penoplex, expanded polystyrene - are they the same thing?
The name “foam plastic” combines foamed materials based on polymers. The raw materials can be polyurethane, polyvinyl chloride, phenol-formaldehyde and urea-formaldehyde plastics, as well as polystyrene. In everyday life, the polystyrene version (expanded polystyrene) is more common. This lightweight snow-white material is used for the manufacture of protective packaging, thermal insulation panels, disposable tableware, and elements of life jackets.
Another type of porous polymer is also made from polystyrene - extruded polystyrene foam. One of its trade names is penoplex. It has the same chemical composition as expanded polystyrene, but differs in production technology. To obtain it, the extrusion method is used - squeezing out a polystyrene mass foamed with a special agent.
Penoplex
Penoplex has the appearance of frozen foam of a yellowish tint. Penoplex blocks are used in construction to insulate walls, roofs and communications; model details and letters are cut out of them.