quote: Originally posted by YBS:
I really don’t smoke in the kitchen.
quote: Originally posted by ehpebitor:
Isn't that a beauty tile!?
quote: Originally posted by svin+:
Yesterday I smoked fish. The smokehouse stood for 45 minutes
quote: Originally posted by Yep:
it was necessary to retreat 100 millimeters
Is it convenient to use such a stove?
YBS? Can I have a couple of off-topic questions? As I understand it, you have a stove in the corner. — are there any problems with the authorities? Is the gas stove supposed to be at least 30 cm away from the window? — Is it convenient to use such a stove?
— Is it convenient to use such a stove?
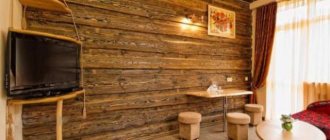
Wall protection for gas stove
A protective screen, to put it simply, is the same as an apron, only larger. The main requirements for wall protection include:
Such products are made from PVC film, on which a decorative pattern has already been applied. Such stickers are inexpensive, so if damage occurs, the surface can be refreshed. This is the most budget option for using the screen. If you want to make it durable, you need to choose durable and high-quality materials.
Design options
There are various ideas on how to design a kitchen apron in an original way. You can “play” with the choice of color. The apron does not have to be plain. The main thing in this matter is maintaining a sense of proportion. A common option is to use various patterns on the surface of the apron, the size of which depends on the dimensions of the room.
One of the popular techniques is photo printing on the surface of the material. A more expensive method is stereo printing, which produces high-quality images. The interesting design of the apron depends on the material used. Additional lighting can be placed behind the glass. The tiles are varied with decorative elements. Purchasing a double-sided panel installed in special profiles allows you to change it yourself. The design option depends on the shape of the room. An apron for a corner kitchen can be different from the traditional covering.
For original design, they use available materials that can be found in every apartment. You shouldn’t throw away shards from broken dishes: you can use them to build an original composition, into which you can add pieces of tiles. Wine corks, pebbles and shells brought from vacation will come in handy.
Screen materials
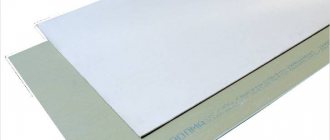
Below are the most common materials used to make slab screens. Laminated board made from MDF and chipboard materials is a budget option, but not so durable, the wear resistance of the protective film is quite low. Service life up to 5 years.
You can get out of this situation if you find a factory for the manufacture of entrance doors, where they will apply a special coating that is highly fire resistant and easy to clean even with abrasives and scrapers. It will not be as elegant, but durable. As a rule, it is just a screen of one color or a high-quality imitation of wood.
Related article: Scrapbooking paintings on the wall
Artificial stone or porcelain stoneware
The product made from these materials is highly durable: resistant to large amounts of moisture, easy to clean, and can be used for many years. The downside is that the surface is not completely smooth, so dirt can get into the seams. Each type of composite material has its own individual properties.
Metal
The metal is usually stainless steel. It perfectly protects walls from fire. However, otherwise there are more minuses than pluses. For example, such screens are thin, so they are easily deformed or pressed through. On such a surface traces of water or grease are visible. Another problem is that the metal sheets are attached to moisture-resistant plywood and secured to the wall. This substrate releases substances harmful to human health.
Tempered glass (triplex)
This is quite expensive, but a stylish and durable solution for the kitchen. If you make it as an apron, then you need to order it according to the individual dimensions of your kitchen. For the screen above the gas stove, standard versions from the store, made with fasteners, are also suitable. However, such a part will still be quite expensive in cost, but the most practical of all the materials presented above. As a rule, the standard thickness for such screens is 6-8 mm. Although these are small sizes, however, the thicker the glass, the more it begins to “green”.
If the screen does not match the planned style of the kitchen, then you can apply a beautiful design to the surface of the glass.
Hide the gas pipe. Methods
There are many ways to hide a gas pipe that are offered on the Internet: from masking the pipe with paint to walling it up in the wall.
Gas pipeline painting
The simplest and at the same time safest method is painting the gas pipe.
You can paint the pipeline the same color as the wall.
You can also beautifully decorate the pipe with patterns, or apply beautiful designs.
This method of decorating (painting) a gas pipe will not cause a negative reaction from inspection authorities and is permitted.
Decorating a gas pipe for the interior
There are tips for masking a gas pipe to match the interior of an apartment. Let's look at the examples below:
Tie the pipe with decorative rope. This turned out to be a beautiful tree.
This method is not permitted and may cause problems when checked by the gas service. The fact is that the gas pipeline must be accessible along its entire length for inspection and maintenance.
With such camouflage, the pipe is actually not visible, it is impossible to understand where the connections are (whether threaded or welded).
Decorating a gas pipe for a bar counter
This method is not allowed, and there will also be problems when checking by the gas service. The design does not allow for visual inspection, leak testing, and is also difficult to disassemble.
Decorating a gas pipe to look like bamboo.
This method is more secure from a regulatory point of view than the previous one.
The fact is that in this case, even if an employee needs access to the pipe when checking the gas pipeline, you can always quickly disassemble the decorative component, and the gas pipeline can be serviced.
Overhead removable panels
Often, advisers recommend covering gas pipes with overhead panels.
From the point of view of the rules, this method is prohibited. From practice: if the panel is really easy to removable - go up and remove it, then there will be no problems with the inspection authorities.
If it takes time to disassemble the panel and access the pipe: unscrew something, disassemble something, then the supervisory authority (gas industry) will definitely issue an order stating that the violation in the form of this overhead panel must be eliminated.
Examples of overlay panels used to hide gas pipes:
I repeat: this method is not allowed from the point of view of the rules! The gas pipeline must be visible and accessible without additional manipulations with dismantling the panels.
Hide pipes behind a plaster wall
The next method is to build a wall with an empty space in which the gas pipe will remain.
This method is not allowed! Covering pipes with walls is strictly prohibited.
Walls covering pipes, even if they are empty inside, are an incorrect and prohibited method!
Even if you leave a hatch for the crane, we still do not recommend doing this. The fact is that if you ever need to change a faucet, hose, or redo the wiring, it may not be possible without dismantling the wall.
Brick gas pipes into the wall
Advisers who recommend this method of hiding gas pipes do not even realize the harm they cause to people.
As time passes, in any case, sooner or later, residents of apartments whose pipes run inside the wall ask them to find them and bring them to the wall, as expected!
This method is the most undesirable (prohibited) of all methods of hiding a gas pipeline.
An example from our practice:
A few years later, the residents were concerned that the pipe was inside the wall under the plaster, they were worried whether everything was okay with it, and they contacted us to redo the wiring.
Remove the outlet with the tap under the countertop
One of the permitted methods is to move the branch with the tap under the countertop.
Pros and cons of stove guards
An analysis of various sources on the installation of protective screens showed that these devices are practical to use and harmoniously combine with kitchen units and household appliances. It is better to consider the pros and cons of shields based on the materials from which they are made. The advantages include the following.
Glass is resistant to liquids, has an average service life, a large number of design options, and is resistant to high temperatures.
Stone products are resistant to impacts, high and low temperatures, no special detergents are needed, they look noble and luxurious.
MDF is a budget price, can be easily attached to the wall, and is highly resistant to liquids and damage.
Plastic is inexpensive, even a person without experience can install it.
Metal – a high degree of resistance to various damages, responds well to temperature changes.
It is non-flammable, therefore it is often used with gas stoves, it is affordable and looks stylish.
The disadvantages are as follows.
For information on how to install a kitchen apron made of MDF with your own hands, see below.
Replacing gas with electricity
\\\To install a combined slab, you will have to go through the same approvals.
In the photo: Chatelaine Pro stove from Godin.
Installation of an electric stove.
Replacing a gas stove with an electric one requires approval from the gas service and energy supply organization. First, the gas service will have to cut the gas pipes to the stove. Secondly, the owner will be required to sign with the energy supplying organization an act of delimitation of operational responsibility and balance sheet ownership, obtain permission to connect power, and also receive a technical plan of the apartment with electrical appliances marked on it, including an electric stove. In addition, he will have to install a separate special cable and install a special socket for an electric stove (Resolution of the State Construction Committee of the Russian Federation dated September 27, 2003 N 170 “On approval of the Rules and Standards for the Technical Operation of the Housing Fund” clause 5.6.19).
Features of stove covers
Many housewives believe that a gas stove cover is an important component of a kitchen set. It can protect walls from splashes and dirt. Iron and glass lids are often used. Iron ones are distinguished by their wear resistance, can withstand high temperatures, and can be cleaned with various detergents, even harsh ones. Glass lids are less resistant to high temperatures, but you can stick interesting pictures on the glass and change them more often. You can make a glass lid yourself. To do this, you need an aluminum corner, two glass curtains, they can be bought in furniture stores. The glass must be cut to fit the size of the lid and polished. Then we temper the glass, the lid is ready.
Stove splash guards
As a result of searching and reading reviews on how best to protect the stove and walls from splashes when cooking, I discovered an interesting option. The idea is to isolate the splashing dishes as much as possible from the outside world. The idea is brilliant, that's what I found suitable for Ozone.
Food foil screen
Honestly, I was already planning to buy it, but I decided to read the reviews. Users write that the screen copes with its functions, but is quite soft. For less neat people like me, most likely, it will not work.
- Pros:
Budget-friendly, copes with its functions. - Cons:
Soft, which makes the screen difficult to maintain. Short-lived.
Eight-section screen for protection
For my taste, the functionality of the screen is much higher than that of previous options, because it practically hugs the dishes from all sides, protecting the epicenter of the splashes.
Theoretically, the cleaning area when using it will be minimal. But I was not able to check this, because according to Ozone, this screen serves as protection from the wind.
However, pictures on the Internet say that they can protect the wall and slabs from splashes.
Primary requirements
Since the functions are the same, it means that the requirements for the surface of the kitchen screen will not differ from the characteristics of a reliable apron. Among them:
However, some screens today are made in the form of a simple PVC film with a decorative pattern. You can buy such stickers for only 100-200 rubles, and it is assumed that as damage appears on the surface of the film, the owners will be able to immediately replace it with a new one. However, those who are used to doing everything well should choose a screen made of more serious material.
No. 1. What materials can be used to finish the apron?
To all the requirements for the material of a kitchen apron described above, it is worth adding that it must have the smoothest possible surface and be low-porous . Due to this, the ability of the material to absorb moisture is reduced, and the ease of maintenance, on the contrary, increases.
Today, the following materials are used to organize an apron:
- ceramic tile;
- mosaic;
- glass;
- PVC panels;
- natural and decorative stone;
- MDF panels;
- metal;
- plaster, paint and other materials.
Each of these materials has its own advantages, disadvantages and features, and below we will dwell on the characteristics of each of them.
In conclusion
A kitchen apron is regularly exposed to negative influences: splashes of water, drops of fat and various products, high temperature, frequent washing. All this makes us look for the most practical and resistant material to all this. Everyone wants the kitchen to be attractive, stylish and harmonious, so another requirement is put forward for the finishing material - a pleasant appearance. In addition to ceramic tiles, there are many other ways to decorate a kitchen working wall: when choosing one option or another, it is important to compare all the pros and cons, think about how the material fits into the kitchen conditions, and only then make a decision.
No. 11. How to organize a kitchen apron in an original way?
A kitchen apron can be finished with paint or plaster , naturally, with maximum water resistance, but if you cook something more or less often, then this option is not suitable, especially when it comes to light-colored finishes.
In addition to all the ways to organize a work wall described above, there are also a lot of unusual, creative options that will highlight your individuality and make your kitchen unique. Here are just a few of them:
- use broken and whole pieces of ceramic tiles and dishes . First you will need to lay out all the fragments on the floor or on the table, and then carefully mount them on the wall. It comes out stylish and original;
- remnants of parquet can also be useful. It is fixed on a sheet of moisture-resistant chipboard, for example, in a herringbone pattern, and a panel of transparent tempered glass is additionally mounted on top near the hob to protect the material in the most critical area;
- wine corks - an excellent option for organizing the space of a kitchen apron, however, you will need a lot of them - about 1000 for an apron 2 meters long. They can be cut in half lengthwise to be used more economically, and it will be easier to attach them this way. You can cut the corks crosswise and also get an original effect. It is better to glue them not on the wall, but on a sheet of moisture-resistant chipboard, in order to make the dismantling process easier in the future. Such an apron is covered with tempered glass in order to preserve the performance qualities necessary for the work area while maintaining the original appearance. Finding such a number of traffic jams is not as difficult as it seems: you can ask around in bars and restaurants or even look on notice boards;
- pebbles – an excellent alternative to granite and other types of stone, however, the installation process is quite troublesome, because each pebble will have to be leveled by hand;
- wallpaper. Using wallpaper in the kitchen work area seems crazy, but if you cover it with a glass panel, then everything falls into place. You can use any wallpaper, and the removable glass panel can be periodically removed and the covering changed: the kitchen interior can be updated very quickly. In the same way, you can hide a piece of fabric under the glass, which also looks very original;
- slate paint Great for the kitchen area, because it can be washed as much as you like, think of school boards. You can use chalkboard paint to paint part of the kitchen apron or the entire backsplash. In any case, in addition to a practical solution, you also get an original interior, because on such a surface you can write down recipes, reminders, draw pictures, etc.
Everyone, if they think a little, will be able to offer their own original version of finishing the kitchen apron, but the main thing is to make this area not only attractive, but also practical.
Laminated MDF or chipboard
Related article: Thickness of interior walls in a panel house
However, an alternative option is now available: look for a workshop for the production of entrance doors, where they can apply an anti-vandal decorative coating to a regular MDF sheet. It is fire resistant, easy to clean from difficult stains and certainly will not be scratched by a kitchen scraper. Don't expect any special artistic delights, but in some kitchens a plain screen or a skillful imitation of wood looks quite decent.
Protective screen 430/0.5 mm in Moscow
Protective screen 430/0.5 mm and other products in this category are available in the catalog of the Leroy Merlin online store in Moscow at low prices. Read the detailed characteristics and description, as well as reviews of this product to make the right choice and order the product online.
Buy products such as Protective screen 430/0.5 mm in the Leroy Merlin online store, having first checked their availability. You can receive the goods in Moscow in a way convenient for you; to do this, read the information about delivery and pickup.
You can always place an order and pay for it online on the official website of Leroy Merlin in Russia. For residents of the Moscow region, we not only have low prices for products such as “Protective Screen 430/0.5 mm”, but also fast delivery to cities such as Moscow, Balashikha, Podolsk, Khimki, Korolev, Mytishchi, Lyubertsy, Krasnogorsk, Elektrostal , Kolomna, Odintsovo, Domodedovo, Serpukhov, Shchelkovo, Orekhovo-Zuevo, Ramenskoye, Dolgoprudny, Pushkino, Reutov, Sergiev Posad, Voskresensk, Lobnya, Ivanteevka, Dubna, Yegoryevsk, Chekhov, Dmitrov, Vidnoye, Stupino, Pavlovsky Posad, Naro-Fominsk , Fryazino, Lytkarino, Dzerzhinsky, Solnechnogorsk, Istra and Zhukovsky.
Triplex or tempered glass
The other extreme is a stylish and expensive glass screen, which in the kitchen can last longer than the furniture itself. You will have to order its production individually according to your dimensions if you want to assemble a large, full-fledged apron. But for a compact screen, only for the section of the wall above the stove, it may be possible to buy small standard panels with eyelets for fastening. But in general, the cost remains the same - 6-7 thousand per square. But in terms of practicality, this finish has no equal.
Keep in mind that for a protective screen, the optimal panel thickness is 6-8 mm.
This seems small, but with such dimensions the glass is already beginning to have a green tint. If this shade is not suitable for the chosen style of kitchen interior, you will have to buy lightened or, on the contrary, tinted panels. But more often, customers prefer glass screens with a beautiful pattern printed on the back.
Although glass screens are among the most expensive and may well exceed the cost of some types of artificial stone, from a practicality point of view they are the best solution for the kitchen.
And their price in comparison with durability will no longer seem to you a serious drawback and an unjustified waste of money.
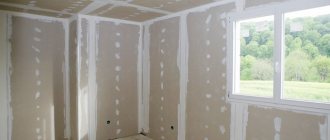
Wall finishing instructions
Next, we will look at several simple ways on how you can cover the wall behind a gas stove yourself. What materials and tools will be required for this.
Option No. 1 - installation of ceramic tiles
Decorating a kitchen work wall with ceramic tiles is one of the most popular and widespread options. Of course, you can entrust this work to professionals, or you can try to do everything yourself.
But, before you start finishing the walls near the gas stove, we recommend that you familiarize yourself with the progress of the upcoming work.
Typically, the height of the apron above the tabletop is 50-75 cm. It should be noted that the tiles must go behind the tabletop so that moisture and dirt do not accumulate at the joint
First you need to calculate how many tiles you will need for the backsplash. To do this, you need to measure the height and width of the apron itself, not forgetting to take into account the size and location of the hood above the gas stove.
The number of tiles will depend on their size and installation method. Considering possible errors in calculations and the possibility of spoiling the material, it is better to play it safe and take tiles 10% more than the calculated quantity.
The most economical method is considered to be the traditional one, in which the tiles are laid on top of each other without displacement, but diagonal laying will require much more skill
Having purchased the required number of tiles, you can begin preparing the tools for work.
To prepare and cover the walls you will need to use:
- Hammer . It may be needed if there is old coating on the walls.
- Screwdriver . For mixing the adhesive composition. You just need to take care of a special nozzle in advance.
- Bucket . It is better to take a spacious plastic bucket with a volume of at least 10 liters.
- Spatulas . To work, you will need a narrow one, with a serrated edge, and a rubber one.
- Building level . With its help, the correct installation of the tiles will be monitored.
- Tile cutter . For trimming the edges of tiles if necessary.
In addition, you may need: a cord, a ruler and a pencil, a rubber hammer, crosses for installing tiles, grout and, directly, the adhesive composition itself.
Having prepared all the necessary tools and materials, you can begin finishing work.
Image gallery
Photo from
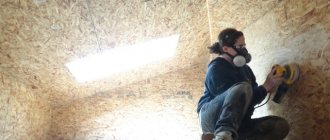
Step 1 – preparing the working wall
Step 2 – estimate the tiles
Step 3 - applying adhesive composition
Step 4 – laying tiles on the wall
After all the tiles have been laid, all you have to do is wait until the adhesive has dried, then remove the crosses and grout the joints using a rubber spatula.
As you can see, the process itself is not as complicated as it might seem at first glance.
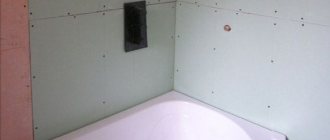
Option No. 2 - decorating a wall with a glass screen
A worthy alternative to a protective screen made of ceramic tiles would be to use special tempered glass. This material will reliably protect the walls near the stove from dirt, it is not exposed to moisture and high temperatures, and also has good wear resistance.
This is why many housewives choose a glass screen. Yes, and it looks very stylish.
Before starting work, it is necessary to measure the area of the wall on which the glass apron will be attached. It is better to double-check the accuracy of the measurements several times in order to avoid installation problems later if the product turns out to be a little larger/smaller than needed.
To save money, you can order an apron made of transparent glass, and stick your favorite photo wallpaper or film with a suitable image under it. You can order a product with a printed pattern, but it will cost a little more.
When ordering the production of glass for an apron, you should immediately specify the making of holes for fasteners. They must be at least 5 cm from the corners of the product.
The panels are quite large in size, so the wall on which they will be mounted must be perfectly flat so that the product fits tightly over the entire area.
A protective glass screen can be easily matched to a wide variety of kitchen interior designs. And the ability to apply any images you like greatly simplifies the choice
Before starting installation, you need to attach the finished apron to the wall and mark the location of the fasteners with a pencil. Next, using a hammer drill and a nozzle of the appropriate size, make holes for fasteners, insert dowels and anchors into them.
The next thing to do is to place the glass panel on the anchors and secure it with the fastening caps.
As you can see, even a novice home craftsman can handle installing a glass splashback. The main thing here is the accuracy of measurements and smooth walls.
What can be done
- a relatively inexpensive, waterproof material and can withstand heating up to 120° C. In addition, it is very durable and cannot be broken with a hammer. And the screen itself does not heat up.
The screen can be mounted on the front of the stove either perpendicular to the floor or at an angle.
The optimal thickness of polycarbonate for installation on a gas stove is from 4 mm, taking into account that the dimensions of the protective screen will be 60 cm or more in width and 30 cm in height.
You can order monolithic polycarbonate by calling: 8-029 676-38-61; 8-029 151-37-03; 8-029 873-06-40. Cutting to size for free!
Advice! If you are going to glue the protective screen to the stove, then carefully select the brand of glue. Thermal expansion must be taken into account; not every glue can fail.
We suggest you familiarize yourself with How to make PVC panels on the wall
It is better to mount monolithic polycarbonate to a stove or countertop mechanically using washers.
Please check the availability of polycarbonate in the color range and thickness you need by calling: 8-029 676-38-61; 8-029 151-37-03; 8-029 873-06-40.
Polycarbonate comes in a variety of colors, so you can choose or make your own protective screen to match the style of your kitchen.
For those who do encounter heating in their kitchen furniture, there are two options for solving the problem. The first - the simplest, but not always feasible - involves a banal rearrangement: if the stove or oven does not come into contact with the set, the unpleasant consequences will disappear by themselves.
In small-sized kitchens, it is quite difficult to “outdo” the interior, so it is more logical to resort to the second method - independent thermal insulation. There are several materials suitable for this purpose:
Any of the listed products, provided they are secured between the device and furniture, can serve as an effective protective screen. The easiest way is to purchase a roll insulator with foil: it needs to be folded in half or three, adjusted to the dimensions of the adjacent wall of the cabinet/cabinet and securely secured with foil tape around the entire perimeter.
For the oven, it is optimal to use regular foil paired with basalt cardboard: the first is attached to the side of the appliance, the second - directly behind it. Fiberglass can be used as a fireproof layer if, for example, a sheet of aluminum is laid between equipment and furniture. Some users prefer to dismantle part of the countertop and the end sides of the set (directly adjacent to the stove) - non-combustible materials such as artificial stone or tempered glass are selected to replace them.
We invite you to familiarize yourself with the use of CBPB for flooring - options
Before testing any of the above approaches, you need to carefully study the instructions - some manufacturers clearly state that thermal protection strips prevent normal cooling of the device case, and therefore are categorically not recommended for installation.
Which apron for the kitchen should you choose and not regret it? Expert advice.
Kitchen apron: tips for choosing:
The kitchen apron plays an important role in the interior design of the kitchen space. A wall panel on the central working wall protects it from wear and tear, has an aesthetic function, can visually change the geometry of the room, shapes the interior style and creates a feeling of harmony.
The versatility of a kitchen apron is achieved only if the choice of finishing material is made correctly. In the opposite situation, a polar effect can be achieved. A finish that is not durable enough will last less than the consumer hopes. The design of a wall panel may be in dissonance with the overall ambiance of the room. If you choose the wrong apron, the external perception of space will be spoiled.
The situation is aggravated by the fact that the modern construction market offers a huge variety of variations for kitchen finishing. Let's try to understand the advantages and disadvantages of the main types of finishing materials and give practical recommendations on the optimal choice of kitchen apron.
Criterias of choice:
Evaluation of the qualities of a kitchen apron as a finishing material is determined by its functions. An important factor, and for most citizens a priority, is cost. Accordingly, the selection criteria for significance are:
- Kitchen apron price.
- Practicality.
- Life time.
- Aesthetics.
- Style.
- Personal taste.
- Dimensions and configuration of the apron.
For each consumer, the priority of criteria is deeply individual. For some, the determining factor is the price, while for others, originality and external effect are important. Let's consider the types and characteristics of kitchen aprons, ranging from the available varieties to the most expensive finishing options.
Kitchen apron made of ABS plastic:
Wall decoration with plastic is the most affordable decor option. The popularity of the material is enhanced by the fact that so-called ABS plastic has appeared on the market, which is characterized by increased performance and aesthetic qualities.
Advantages of ABS plastic:
- Non-toxic, environmentally friendly, safe for others.
- Lightweight, plastic, cuts well, does not undergo deformation.
- Can be painted and perfectly conveys a multi-color pattern.
- Thanks to photo printing technologies, it can be produced in any style.
- It has aesthetic appeal and a variety of colors.
- When the surface is treated with varnish, it has an external resemblance to glass.
- Easily mounted using liquid nails or self-tapping screws, installation is inexpensive.
- If you have simple installation skills, you can install it yourself.
- Easy to clean (soap solution and non-greasy sponge)
- The most affordable price is due to new low-cost technologies.
Flaws:
- Compared to some other finishing materials, the service life is shorter.
- It has temperature restrictions (max. +80 degrees), so it cannot be installed in the kitchen stove area (for gas stoves) without protective glass.
- When exposed to ultraviolet radiation, paints fade over time, so it is advisable to protect the panel from exposure to sunlight.
- It is not recommended to use abrasive products when caring for the surface; for washing, use only ordinary soapy water and a soft cloth.
Advice:
ABS plastic is considered the most inexpensive finishing material today. Provided there are sufficiently significant positive operational and aesthetic characteristics, the wall panel becomes popular and accessible to a wide range of consumers. A huge variety of stylistic compositions allows you to create a non-trivial design in a single copy.
Do you want unique and inexpensive decor? Choose the photo you like and place an order at COZYHOUSE or look at the catalog, where kitchen aprons are presented in the form of city landscapes, flower arrangements, abstract drawings, space and sea fantasies, in the form of your favorite animals.
MDF panels for kitchen splashback
MDF material is an advanced wood fiber composition obtained from wood sawdust, formed into a strong panel using harmless fastening elements. Finishing a kitchen apron with MDF panels, as well as ABS plastic, is one of the available room decor options.
Advantages:
- Environmentally friendly material - no toxic resins or phenol are used in its production.
- It looks beautiful and presentable because it has a perfectly smooth, glossy surface - plain painted or with wood imitation.
- It lends itself well to processing and cutting, and has a soft but durable structure from the point of view of use.
- It is easy to choose according to the decor - the apron is selected mainly to match the color of the table top or furniture, in any shade compositions.
- Incomparably cheaper than wood, it has a long service life.
- It is easy to paint, so you can perfectly choose the right color if you buy a custom-made kitchen apron.
- Over time, the canvas does not crack, deform, or swell.
- Easy installation, so if you have basic practical skills, you can install the MDF apron yourself.
- Inexpensive installation and affordable finishing costs compared to other materials.
- Just like ABS panels, the MDF apron can be easily dismantled, which, given its low price, allows you to change the finishing decor without burdensome financial investments.
Flaws:
- Limited choice of design solutions - in comparison with a similar budget type of ABS plastic finishing, MDF panels are made in popular natural shades, similar to natural wood, and can also be painted in any other colors, but without patterns, in a uniform color.
- Instability to moisture, which is why the apron made of MDF panels must be kept dry and constantly wiped with a soft, dry cloth.
- It is not recommended to use abrasive detergents or hard brushes during maintenance, as the surface is susceptible to scratches.
Advice:
MDF panels look ideal in classic-style rooms. Suitable for those who prefer wood in the kitchen interior, but refuse wood for various reasons. COZYHOUSE sells aprons for the kitchen, including those made from MDF. If you want to equip your kitchen space inexpensively, but tastefully, this is the ideal option.
Ceramic tiles for finishing a kitchen apron
Facing tiles on the construction market are presented in a wide price range and in a variety of styles. This expands your choice and opens up ways for relative cost savings.
Advantages:
- Practicality, resistance to mechanical stress, abrasion, temperature changes, chemicals, moisture.
- Easy to care for, no restrictions in the choice of detergents.
- A wide variety of colors, designs, patterns, sizes.
- Easy to match to the countertop, furniture, and other decorative elements.
- Depending on the design, it is suitable for all interior styles.
- Long service life.
Flaws:
- Not a cheap price - even at the lowest cost, tiling cannot be considered a budget option.
- Installation is complex and requires preliminary preparation of the walls and the participation of a professional craftsman, otherwise the installation will not bring the desired effect.
- High installation cost - in most cases, an average of 50% of the cost of the tiles must be added to the installation cost budget.
- Unlike ABS panels and MDF structures, which can be made without seams, ceramic tile decor has seams, which are quite tedious to maintain.
Advice:
When choosing ceramic tiles, follow the basic recommendations, which are as follows: a matte surface is easier to clean than a glossy one; It is better to choose dark grout, even for light tiles; in a classic interior, plain tiles or with an unobtrusive pattern are appropriate; You can add an accent using decorative ceramic panels.
Mosaic in the interior
Mosaic is a type of facing finish, consisting of small components of a uniform or different type and size. The mosaic is laid in the form of a pattern or design. The constituent elements are small ceramic tiles, pebbles, glass, porcelain stoneware, marble, and metal.
Advantages:
- It looks impressive and noble, the ambience of the room looks expensive and presentable.
- Almost never goes out of fashion, always up-to-date design.
- The strong texture of the material is designed for long service life.
- Shows resistance to water, mechanical stress, abrasive and chemical agents.
Flaws:
- The high cost of the material and expensive installation, the price of which depends on the complexity of the design.
- Many seams that are susceptible to contamination therefore require frequent cleaning.
Advice:
Mosaic is appropriate in luxurious interiors of modern and classic style. The overall ambience of the kitchen and furniture should be in a harmonious relationship with each other. If you want to reduce the cost of the project, choose an apron made of ABS plastic with a mosaic pattern.
Glass apron for the kitchen
Glass is becoming a popular decor for kitchen backsplashes.
Advantages:
- Durable, fireproof, can be installed near a gas stove.
- Easy to clean, does not scratch, does not deform, does not crack under the influence of normal mechanical loads, durable.
- Original design - posters and other inexpensive and fragile decorations, for example, photo wallpaper, photo collage, can be used as decoration.
- Unlimited range of design fantasies.
Flaws:
- Tempered glass is expensive.
- The glass apron is made to individual sizes, to order, since the glass is cut in production conditions.
- Complex production and difficult installation, which requires professionalism.
Advice:
If you want to install a glass apron in your kitchen, use the photo printing technique. Any pattern, drawing or photograph is applied to the back of the glass. In combination with glass, this type of apron is called skinali.
The COZYHOUSE company is ready to offer an inexpensive and alternative option. Glossy panels made of ABS plastic for the kitchen, varnished and based on photo printing, are similar to a glass surface, but their cost is incomparably cheaper.
Artificial or natural stone
Stone in the interior looks stylish, luxurious, and fashionable. Depending on the types of finishes, the price varies. Granite, marble, and artificial agglomerate are used for decoration purposes.
Advantages:
- Durability, strength, abrasion resistance, easy care.
- Resistance to temperature changes, moisture, and abrasives.
- Stylish, effective design.
Flaws:
- High cost - prices for the material are more expensive than for ceramics, porcelain stoneware, glass.
- Complex and expensive installation, requiring high professionalism.
- Not suitable for every interior style.
Advice:
Do you like stone in the interior, but want to reduce the cost of decorating a kitchen backsplash? Choose the option of artistic imitation. Using relatively inexpensive ABS plastic or MDF panels and photo printing technology, they create wall panels in any style, including imitating natural stone. Find interesting ready-made compositions in the COZYHOUSE catalog or order an apron made from your own photo.
Color, style, size - how to choose?
We recommend choosing an apron for the kitchen after choosing furniture, flooring and textile design. The wall panel must be combined with one or more decorative elements. The size of the apron depends on the configuration of the room and the design of the furniture. The style should reflect personal tastes and match the general ambiance of the room.
Porcelain tiles, artificial stone
Durable and aesthetic, porcelain stoneware has all the necessary advantages: it is resistant to moisture and cleaning agents, and durable. The only thing in which this material is a little inferior to glass is that it is impossible to achieve that ideal smoothness on its surface, which simplifies maintenance. Even on polished porcelain stoneware slabs there are very thin seams where dirt will get in every now and then. And it is quite difficult to install due to its heavy weight. But everyone can afford to buy such a finish - the cost of a square of moisture-resistant tiles can be 400 or 4000 rubles.
You should differentiate which composite material you choose for your kitchen, as each may have certain properties. For example:
If you have chosen artificial stone or porcelain stoneware for an apron or protective screen, it is advisable that the finish completely matches the design of the countertop, otherwise you may not get a harmonious picture in the interior.
No. 3. Mosaic: room for imagination
Using mosaics, you can create the most incredible patterns and even entire paintings. A kitchen apron can become a real work of art, and the performance characteristics of the mosaic are very good. Among the main advantages it is worth noting:
- moisture resistance;
- heat resistance;
- easy to care for and hygienic;
- strength;
- wear resistance and durability;
- unique appearance.
These are all the general characteristics of mosaics, because they can be of different types and made from different materials:
- ceramic mosaic repeats all the characteristics of ceramic tiles, only you can lay out any patterns from tiles measuring 2*2 cm;
- glass mosaic performs well in operation, as it is completely inert to moisture and fire. In addition, this material can change color slightly depending on lighting conditions, which makes it even more unique;
- stone mosaic is quite rare due to its high price, and caring for it is difficult;
- metal mosaic is quite durable and practical, but you can’t rely on a variety of shades and colors.
The disadvantages of mosaics include the complexity of the installation process and, in some cases, the cost. A perfectly flat surface is needed, and grouting should be done extremely carefully so that dirt does not accumulate in them. Otherwise, this is an excellent material for finishing an apron in the kitchen.
No. 9. Mirror: original, but troublesome
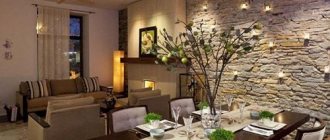
A mirrored apron will become a real highlight of any kitchen. It can visually significantly enlarge a room , so it is a good option for the smallest kitchens. The mirror is not afraid of moisture , and high temperatures, drops of fat, and detergents cannot harm it. This is a very original way of finishing that will transform the kitchen.
There are probably more disadvantages to a mirrored apron than advantages , although the issue must be considered individually in each specific case. The ability to reflect and double the area of the room can play a cruel joke: the amount of dirty dishes will also be doubled . There is often high humidity in the kitchen, so the mirror can fog up , and its appearance deteriorates. But the mirror will look much worse when it gets splashed with water and grease. Of course, it’s not difficult to wipe it down and put it in order, but such a procedure will have to be carried out constantly during active cooking.
Liquid soap
If you don’t have the time or desire to mix different components, you can simply apply a layer of liquid soap to the work surface. All the fat that gets on the stove during the cooking process simply will not have time to burn, so the surface can be easily washed off with a regular sponge. The role of the detergent will be performed by the previously applied liquid soap; you just need to rinse everything thoroughly with water.
Of all the listed methods, any housewife will find a suitable option for herself. These little tricks will help you forget forever about a thick layer of burnt fat and long cleanup after cooking dinner. At the same time, money will remain in the budget that was previously spent on purchasing many products for cleaning the stove.
Metal
This is truly reliable protection for walls from fire, especially if you have a gas stove. However, in all other respects, the practicality of metal screens tends to zero. Firstly, they are too thin and without a perfectly flat base they are easily pressed and deformed. Secondly, if it is an absolutely smooth surface without relief, the slightest traces of water and drops of fat will be very clearly visible, just like on glass.
As a rule, the sheets are attached directly to panels made of moisture-resistant FB plywood and hung on the wall in this form. The problem is that the bakelite substrate itself is not an environmentally friendly material and releases harmful formaldehydes into the air.
Mounting methods
It is not necessary to involve specialists to install the apron. This process is quite simple, so you can do it yourself. There are various ways to install an apron. The choice of a specific technology and the complexity of the work depends on the specific material.
On slats
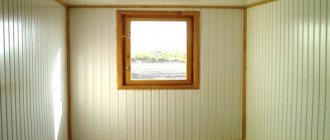
Alternatively, the apron can be mounted on a wooden frame made of slats. The lathing will allow you to ignore even significant unevenness of the walls. For work you will need wooden planks with a section of 10x40 mm. The slats are mounted every 40 cm. It is necessary to ensure that the frame elements do not protrude forward and that their surface is in the same plane. The apron is attached to the slats using self-tapping screws. As an alternative to slats, you can use a metal profile. Almost any materials can be attached to the lathing - MDF or chipboard boards, sheets and panels made of plastic, metal options.
To the kitchen baseboard
The easiest way is to secure the apron using a plinth. The element is built between the apron and the work surface, as well as between the upper cabinets and the apron, closing the gaps and turning the structure into a single whole. It prevents moisture and dirt from penetrating into the gap between the wall and the countertop. Installation of the apron is carried out after installing the headset. It is temporarily fixed, after which the baseboards are installed. These elements are fastened to adjacent surfaces using self-tapping screws, which are subsequently closed with decorative plugs.
For liquid nails
This fastening method is suitable provided there is a perfectly flat base. If the previous apron was made of tiles and the elements of the old covering do not fall off, you can glue the new material directly onto it.
At the preliminary stage, you should prepare the wall. You can remove dust and strengthen the surface using a primer.
In order to secure the apron, you need to apply liquid nails to it or to the wall, then attach the finishing element to the base and hold for a few seconds. It is more convenient to apply the adhesive to a horizontal apron rather than to the wall.
If the size of the panel is larger than the planned distance between the countertop and the upper cabinets, then it must be secured before installing the set. To do this, liquid nails are distributed on the back side of the panel and glued to the wall. To prevent the panel from sliding, you need to make a support from a metal profile or wooden slats.
If the apron is smaller, install the cabinets first. After gluing the apron, you need to install the baseboards. They will protect the joints from moisture penetration into the material. If there is no skirting board of the desired color on sale, you can choose a contrasting option.
How to insulate a wooden wall from a steel stove?
Table of contents
1. Options for wall insulation
2. Wall insulation material
3. Examples of thermal insulation of a wooden wall
Installing a stove is a complex process and requires a lot of attention to each stage, from preparing the installation site to the nuances of removing the chimney pipe from the roof. In this article we will talk about how to properly insulate a wooden wall from a steel or cast iron stove. Any wood has a predisposition to ignition, so a constantly hot stove design can easily cause a fire. Any builder understands that insulating the wooden wall behind the stove is a mandatory process. Let's look at an example of installing a Bavaria stove-fireplace on a wooden floor next to a wooden wall. The furnace does not have a separate foundation, so a light base for a metal structure is required. The base for the stove will be laid out with bricks in one layer. In this case, wall insulation can be done in two versions: asbestos cement sheets or flame sheets (non-hot composition). There are several opinions about asbestos - sometimes they say that they emit toxic fumes. But flamm has its drawbacks: they have standard sheet sizes of 600x1200 mm, which can be inconvenient when working, and also in terms of price they do not beat asbestos cement at all.
Options for wall insulation
The width of a particular oven is 720 mm. As a result, it turns out that horizontal sheets need to be installed - you will need four sheets to the ceiling, it turns out that they can cover the upper part of the room - there is a beautiful partition there. There are several other options on how to proceed: get rid of the existing partition, replace it with a fireproof one and cover it with tiles or stone. You can also place a screen and use a circular saw to remove the wood on the partition completely. Next, finish with tiles, plaster or paint. There is no doubt that the tree needs to be removed. After all, if you cover it with non-flammable materials on top, there is still a chance that the wooden surface will ignite. In this case, it is better not to take risks and remove the partition from wood. Thermal radiation from the oven will not only be from the back wall. Lateral radiation will also emit radiation onto the wall at a distance of 0.8-1 meter. You should carefully read the installation instructions - the manufacturer describes everything very clearly there, including what concerns safety. For example, when a stove with a glass door is on and there is a chair next to it, it is better to move it further away (more than 1 meter).
Initially, the base for the stove was supposed to be one brick thick, but such a thickness for a wooden floor is not very good. Regarding the non-combustible partition, you should also note the importance of the situation - where the chimney will go, at what distance from the beams, walls and rafters. In the area of this Bavaria stove, it is best to use a concrete slab as a base - lay it along the beams, flush with the floors or a little more - it will turn out like a podium, reliable and ensuring safety. However, the bottom of this stove practically does not warm up; there is an additional part for firewood, which takes on the heat. Therefore, you can make it simpler - lay mineralite or CSP on the floor, then tiles or porcelain tiles on mastic or hot melt adhesive. In places where the chimney pipe is laid, you can use basalt, non-flammable or kaolin wool. Cotton wool plays the role of additional insulation and is placed in the ceiling section. In this case, you should make an opening in the ceiling - in accordance with safety standards - from the contour of the two-layer pipe - sandwich, 250 mm in different directions. The furnace cutting should be made of non-combustible materials - superisol, mineralite, calcium silicate, vermiculite. When passing through a chimney pipe, the groove should be filled with cotton wool.
It is, of course, very difficult to get rid of a beautiful partition, because it was built for aesthetics, a lot of time was spent on it, but if it was decided to install a metal stove against this wall, then you should get rid of the additional threat of fire of wooden parts.
Wall insulation material
Facing materials are often made from cement, the complete hardening of which can take several years. As a result, even after the work has been completed, changes in size, bends and deflections may be observed. Some manufacturing companies (for example,), use an effective and efficient method of keeping facing materials in an autoclave in a high-temperature, high-pressure oven. And it turns out that shrinkage due to drying and expansion by exposure to heat can be avoided, and reliable strength is also ensured.
Those same Nitikha panels are made from fiber cement, a universal material that consists of 90% cement and 10% cellulose fibers and various mineral fillers. In this case, technology without the use of asbestos is used by pressing the ingredients.
Panels of this type are environmentally friendly; their production does not use formaldehyde resins, chlorine compounds or asbestos. Fiber cement has excellent fire-resistant properties; it fully fits into the category of non-combustible materials. Fiber cement siding has many advantages, including the fact that it can easily be used to select various design variations, and it is also easy to install. Instead of mineralite, you can also use glass magnetic sheets - this is a more budget option.
Examples of thermal insulation of a wooden wall
Here's another example of making a fire-resistant wall located behind the fireplace:
The decorative panels available are slightly flammable according to the fire classification. It turns out that only a 5 mm layer of basalt cardboard really protects the wall from fire. However, the oven is convection in nature and its outer surface does not heat up much. If you follow the manufacturer's instructions, it will not heat up more than 60 degrees. But you can't help but worry about safety. For example, even in summer, on the facade of the stove on the south side, it is worth measuring the temperature of the outer surface, and its value may greatly surprise you.
You can pay attention to the color of the first mono-pipe; the most furnace heat emanates from it. From the floor to the sandwich pipe, the wall should be reliably covered with super-insulation, especially since the stove is installed close to the wooden partition. In this case, when thermally insulating the partition, you should also pay attention to the cutting.
You also need to be careful about fiber cement boards; they come in two types: moisture-resistant for the facade and for landscaping fire-resistant partitions (the second option is gray in color, there is no paint or pattern).
Minerite panels, painted with acrylic (sometimes even in several layers, 5-6), belong to the category of low flammability and low combustion support. Because of the acrylic, the entire slab cannot be classified as “non-flammable”, and this is very bad; such panels, supposedly resistant to fire, are often used just when it is necessary to insulate wooden walls behind the stove - mineralite panels coated with acrylic look It’s beautiful, but, unfortunately, it won’t reliably save you from a fire.
If it suddenly turns out that you bought mineralite coated with acrylic, then you need to get rid of such “protection” of the wall. You should dismantle the panels - this is not difficult, in their place you glue gray classic mineralite onto a galvanized profile, and then terracotta tiles are glued onto it using heat-resistant tile adhesive. With such reliable thermal insulation you can sleep peacefully.
If the oven is operating normally, nothing should happen in any way. But the fire safety measures specified in the stove manufacturer’s passport must be observed. The distances to fireproof and combustible structures are clearly stated there. Gypsum is a good heat insulator, but its features should be taken into account. If the wall is wooden and gypsum board is attached close to it, therefore, when it is heated, dampness will form behind it, since the wall is cold. The wall itself also shakes - the tree always lives its own life at different humidity levels and temperature fluctuations in the environment. The profile is necessary not only to create an air ventilation channel behind it, but also for the durability of the entire structure. The tile adhesive needed here is one that is suitable for heated floors.
It is imperative to take into account fire safety standards when installing important distances. If you calculate the distance from the metal firebox to the wall, then it is more logical to add another 65 mm to such offsets - this is the thickness of the brick, which any metal stove does not have.
It turns out that the open setback to the unprotected wooden part is 320 mm (+65 mm), resulting in 385 mm - this is the minimum value.
To the protected wooden part 260 mm (+65 mm), and a minimum of 325 mm is obtained.
With a metal chimney things are much simpler. A sandwich with 50 mm insulation is already approaching the edge-on distance of a brick, that is, when passing the floor between the floors of such a pipe and without filling the foam with non-combustible materials and completely open for control, the following important distances must be maintained (from the outer wall of such a pipe):
To an unprotected wooden wall 320 mm (+ 15 mm), resulting in a minimum of 335 mm.
To a protected wooden wall 260 mm (+ 15 mm), resulting in a minimum of 275 mm.
If you are making an interfloor polyurethane foam completely closed and filled with any non-combustible materials (from pipes to wood), it becomes not a retreat, but a cutting, and accordingly, the minimum distances change:
- minimum 500 mm from smoke to an unprotected wooden panel;
— to a protected wooden panel 380 mm from smoke at least. That is, with a sandwich insulation thickness of 50 mm - 330 mm from the outer contour to the protected joist. As for the roof passage, the distance of 130 mm to the sheathing and rafter part is taken into account from the wall of the brick chimney of 120 mm. That is, from the smoke to the protected sheathing and rafters there should be a minimum of 250 mm.
The simplest option for protecting wood is basalt cardboard and a metal sheet.
Wallpapering yourself
Wallpaper is the most budget-friendly finishing option, so most often the finishing is done independently. Let's take a closer look at this process.
You will need the following set of tools:
- tape measure and wooden meter;
- calculator;
- pencil;
- construction spatula;
- perforation spatula;
- scraper;
- wallpaper scissors and knife, wallpaper cutter.
Necessary tools for wallpapering.
Almost everyone knows how to glue wallpaper, but not everyone knows how to do it correctly. Our instructions will help you avoid mistakes.
Preparing the walls
- We remove the old layer of finishing material. To make old wallpaper come off better, you need to first moisten it with a soapy solution and add wallpaper glue.
Tip: If your walls were previously covered with washable wallpaper, then you need to make slits in them. This way the base will be more likely to be saturated with the solution.
We prepare the wall for pasting, remove the old wallpaper.
- We wait until the wallpaper gets wet and remove it with a metal spatula. If necessary, repeat the procedure.
- If you have previously used vinyl two-layer wallpaper, then make horizontal cuts and remove the top layer. The bottom layer, if it holds well, is not removed, as it can serve as a good foundation for us.
- If the walls were painted with enamel or oil paint, then before wallpapering, we clean the surface with coarse sandpaper. Water-based paint is pre-soaked with a soap solution and removed with a spatula.
- We plaster and putty the walls to eliminate cracks, unevenness and other defects.
We putty the walls.
- If you are covering walls with thin paper wallpaper, it is recommended to first cover the surface with facing paper.
Let's start wallpapering
- Roll out the wallpaper face down. We measure the height of the wall on them and add 10 cm. If the pattern allows you to glue the wallpaper without joining, then you can immediately cut several strips. If docking is necessary, we add a tolerance. As a rule, the manufacturer indicates it on the packaging. Please note that the consumption of wallpaper in this case increases.
- We mark a straight vertical line on the surface using a plumb line - it will serve as a beacon for the first strip of wallpaper.
- Apply glue to the wallpaper from the middle of the strip to the edges and leave it for 5 - 10 minutes, depending on the thickness of the paper.
Apply glue to the cut piece of wallpaper.
- When using heavy wallpaper, it is necessary to coat the wall as well. If you use non-woven wallpaper or glass wallpaper, then the glue is applied not to the wallpaper, but to the walls.
Lubricate the wall with glue.
- Glue the wallpaper, aligning it along the intended line. We glue all subsequent strips end to end. Lightweight wallpaper can be glued overlapping.
We glue the wallpaper onto the wall and cut off the excess pieces.
- Press the glued strip with a dry, clean cloth or roll it from top to bottom from the middle to the edge with a roller. We cut off the excess edges at the top and bottom with a sharp knife immediately, before the glue has time to dry.
Paste over the inner corners
A common mistake that many people make is to cover a corner with a whole strip of wallpaper. As a result, folds or mismatches are formed if the angle is uneven. To prevent this from happening, measure the distance from the glued strip to the corner and add 20 mm.
Wallpapering.
We glue the wallpaper and run the blunt side of the knife along the corner so that the paper fits tightly.
Wallpapering the ceiling
- Mark the border for the first strip of wallpaper.
- Lubricate the canvas with glue. We apply it to the ceiling and align it along the drawn line (photo).
We glue the wallpaper to the ceiling.
- We press the wallpaper to the surface and straighten the folds.
How to make your kitchen safe? Vital rules
Everyone knows that the kitchen is a high-risk area. A large number of electrical appliances, gas and open fire of a gas stove or the risk of burns from electric, piercing and cutting objects. Cooking in the kitchen requires you to be attentive and follow some basic rules. However, work on safety begins at the moment of planning the future kitchen. Everything is important: where and how the cabinets are hung, the distances between objects, finishing materials and much more.
Related article: The warmest insulation for walls
Kitchen finishing
Let's start from the very beginning: when there is no furniture in the kitchen yet, but the walls and floor are being decorated. The floor in the kitchen should not only be easy to clean and moisture-resistant, but also easy to move. When choosing flooring, choose flat surfaces with good grip. Textured tiles will be difficult to clean, and glossy tiles can cause you to slip and get injured.
Correctly decorating the walls is most important in the apron area. In addition to splashes from the stove and water, the walls in this area will be affected by temperature. If the wall is covered with tiles, glass or other heat-resistant material, everything is fine, but if the material is flammable (for example, PVC wall panels), you need to install additional protection. This is especially true for kitchens with a gas stove. Please note that the protective screen should not be adjacent to the wall so that the heat is not transferred to the surface behind it. Original ideas for kitchen aprons are here.
What colors go with a white apron in the kitchen?
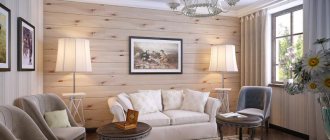
The white apron matches any headset tones. But a lot depends on the choice of colors. It happens that the design looks gray and gloomy, or, on the contrary, too bright; not every person can stand the test of staying in such a room for a long time. The most advantageous option is to design in neutral colors and add bright decor.
A white apron matches the white kitchen and brown surface of the work area. You can also choose brown shades for curtains and chairs.
White glossy kitchen with a plain apronSource ko.decorexpro.com
An apron made of white ceramic tiles will suit a pastel or white kitchen. You can complement the interior with a wooden tabletop, chairs, and dining table.
White kitchen with wooden worktopSource www.mitre10.co.nz
A universal version of the kitchen in gray with a white tile apron. This option is neutral; you can refresh and add something new with bright colors, dishes, and furniture. With little effort and money, you can easily change the design of your kitchen.
White work apronSource yandex.ru
Modern design trends allow you to design a kitchen in black tones with a white apron decorated with a pattern. This strict luxurious design can be complemented with decorative elements made of gold. Using the lighting system, the necessary zones are identified.
Rich green color headsetSource syndyk.by
Most often, a white apron is combined with a white or gray kitchen.
Safety rules when choosing material
The most important thing in the design of a kitchen space is the correct choice of material for finishing the wall behind the stove, especially if the kitchen has gas equipment. In addition to splashes from cooking, this wall will be exposed to high temperatures.
Therefore, it is important that there is a heat-resistant material behind the stove. In this regard, ceramic tiles, glass, and metal have proven themselves well.
If the choice fell, for example, on MDF or PVC panels, then you should know that flammable materials cannot be installed in close proximity to gas burners, so that such a decision does not result in a fire.
Foam plastic, cork, chipboard, plasterboard and many others can be used as thermal insulation material. The choice will depend on your financial capabilities
Also, do not forget that it is highly undesirable to place a refrigerator next to a gas stove. If such a proximity is inevitable, then it is worth laying a heat-resistant partition between the devices.
Insulating material is placed between the refrigerator and the stove. Insulation can save refrigeration equipment from overheating, but will not provide protection from grease.
Covering bathhouse walls with non-combustible insulating materials
To prevent the walls from overheating, you can use materials with increased thermal insulation properties and inertness to high temperatures. Two types of materials are used:
- reflective;
- fireproof with lining.
The first type includes materials for wall cladding, consisting of thermal insulation with fire-resistant properties and a metal covering in the form of a sheet.
Insulating walls with reflective sheathing
A protective cake with reflective materials is done this way. First, the thermal insulation is attached using ceramic bushings directly to the wooden walls, then it is sewn up with a stainless steel sheet.
Advice! It is better not to use galvanized metal, since heating may release heavy metals harmful to the human body.
Stainless steel with a polished surface reflects the heat flow inside the steam room, reducing heat loss. In this case, reflected heat is more useful than direct heat. For thermal insulation use:
- basalt cardboard or cotton wool, the only material with increased hygroscopicity, non-flammable, environmentally friendly;
- asbestos cardboard, which reliably protects against flames and has a long service life;
- mineralite, an artificial material made specifically for these purposes.
Protective sheathing requires ventilation gaps of 2 cm from the wall to the insulation, 2 cm from the insulation to the steel sheet. If it is necessary to install the stove as close to the wall as possible, make a double skin of non-combustible insulation, use ceramic bushings to maintain gaps of 2-3 cm and sew them up with a steel sheet.
Insulation with cladding
Measures to protect walls with cladding are necessary in order to preserve the interior decoration of the room. They are more expensive, but no one has canceled the aesthetic advantages of the bathhouse. It is based on tile cladding, which is laid on fire-resistant cladding made of gypsum plasterboard, non-deformable gypsum-based cardboard with fiberglass, mineralite, non-flammable cement-fiber material, moisture-resistant and resistant to biochemical influences, LSU, fiberglass material bound with magnesium additives, resistant to high temperatures, high humidity. Heat-resistant glue is used for installation.
Advice! Use heat-resistant reinforced Terracotta glue, made from fireclay dust bound with kaolin additives, intended for tiling stoves, fireplaces, and all heated surfaces.
The recommended facing materials are quite varied, the best of them are:
- terracotta tiles, they are made from specially fired clay, which gives increased heat resistance and durability;
- clinker, denser clay tiles with a surface of various colors, similar to facing bricks;
- tiles, also made from clay, having an original embossed surface;
- porcelain stoneware made from a mixture of clays, kaolins, quartz sand, feldspars by high-temperature firing under a pressure of 400-500 kg/cm², with imitation of stone, wood, durable artificial material;
- soap chloride, a rock mineral consisting of talc, magnesite and chlorite, an environmentally friendly natural material that does not absorb moisture at all, has an attractive appearance, does not crumble, and is not afraid of high temperatures.
Advice! Use soap chloride to finish the steam room, this mineral has a healing effect on the human body, regulates blood pressure, stimulates cerebral circulation, expels viruses and microbes due to the release of vitamin D when heated.
All of the listed tiles are an element of protection that forms a cake, the basis of which is a fire-resistant material. Just like a screen, sheet material is installed on ceramic bushings with a gap of 2-3 cm from the wall. The minimum distance to the heat source from the tile should be 20cm.
Protection with cladding decorates the room, creates a positive mood, and helps to increase the efficiency of procedures. And most importantly, properly installed insulation prevents wooden walls from overheating and catching fire. Have a nice steam!
Communications
New and well-laid pipes and good plumbing are the key to the absence of breakthroughs. In any case, make it possible to easily and quickly access the communications under the sink and install additional valves there so that in case of emergency the water can be quickly shut off in this particular area.
If the apartment uses gas, entrust the replacement of the hose and connection of the stove to a professional. If you decide to replace it yourself, lubricate the joints with soapy water to make sure there are no bubbles and no leaks.
Electrical is also very important. It is ideal to connect the entire kitchen to a separate machine, that is, isolate it from the rest of the wiring in the apartment. Many appliances, such as electric stoves and ovens, dishwashers, some microwaves and even kettles require a power cable. Be sure to consult with an electrician to understand which devices can be combined into one network, and which ones will lead to overload and the plugs will constantly be knocked out. Place external sockets away from the sink and stove.
Caring for a white apron in the kitchen
To maintain the original whiteness of the apron, it is necessary to promptly remove dirt from the surface. The frequency of cleaning depends on the intensity of use of the sink and stove. The more often, the more regular the procedure.
The tips are as follows:
- Remove any stains, splashes or deposits immediately. Old dirt is more difficult to clean. This rule is especially true for ceramics, plastic, and glass.
- Avoid cleaning products and hard sponges. It is enough to use universal detergents in the form of gel, paste, liquid. Abrasives cause dents, scratches or discoloration. Additionally, it is recommended to purchase microfiber and foam sponges.
- Install the hood. This is an important element in the kitchen that protects appliances and fittings from soot. Before each cooking, be sure to turn on the hood, otherwise all surfaces will become covered with a greasy coating and all kinds of impurities.
- Use the protective cover of the hob. During heat treatment of food, it is enough to tilt the structural element against the wall. It will additionally protect the apron from grease splashes and steam.
- Carry out general cleaning regularly. All work surfaces should be thoroughly washed at least twice with warm soapy water or a special dish soap. The latter method is considered ineffective: not every composition is able to ideally overcome fat.
- Treat the apron with compounds that repel dirt and moisture. Today, manufacturers offer a lot of options aimed at protecting kitchen surfaces from negative environmental influences. These can be gels, adhesive-based substances, sealants, universal compounds. But they are used strictly according to the instructions.
A white splashback is a practical, cost-effective solution for protecting kitchen walls and providing aesthetic appeal. It is made of ceramics, stone, wood, glass in the form of a plain or monochrome panel. When choosing a material, its properties, characteristics, advantages and disadvantages are taken into account. The durability and appearance of the apron depend on these parameters. Also, do not forget about color combinations in order to avoid absurdity in the kitchen design.
Kitchen set
When planning a kitchen set, you need to maintain the minimum permissible distances between electrical appliances and water sources. If you are making a kitchen to order, the specialist will have to take them into account. If you are planning a purchase, for example, from IKEA and use their kitchen planner, there are text tips there. Read my personal experience of planning a kitchen at IKEA here.
Basic principles: Do not place a stove and refrigerator in close proximity, or a stove and a sink. It is also recommended to make a spacer between the oven and the dishwasher.
Cabinets cannot be hung above the stove unless they contain a built-in hood. For the hood to work effectively, it must be placed at a distance of 70-75 cm (electric stove) and 75-80 cm (gas stove). It is not advisable for the corners of the hood to protrude in front of the wall cabinets; there is a risk of constantly hitting your head against them.
If you are attaching wall cabinets to modern, solid walls, use fasteners recommended by the manufacturer and no problems will arise. Old walls of Stalin and Khrushchev buildings may require additional fastening. Pay due attention to the fasteners, even if you are hanging open shelves - each of them has a maximum weight that they are ready to withstand. If the shelves are overloaded or not fastened firmly enough, they can collapse, even if not on someone’s head.
The height of the wall cabinets depends on their depth and the height of the person who will cook. The optimal distance is 45-55 cm from the tabletop. A lower placement will cover part of the countertop. Deep cabinets especially need to be hung higher, but within sight, so as not to hit your head on them when bending over the work surface.
Before ordering a custom kitchen, to be on the safe side, draw out all future elements directly on the wall. When applying cardboard of the required width, see what the depth of the elements will be and whether it will be comfortable for you. Because in this case, it is comfort that ensures safety.
Is it possible to cover the gas water heater with the facade of the kitchen. What did SNiP tell you about?
The fashion for cabinets with built-in household appliances has not bypassed gas equipment. Many representatives of furniture production offer their clients a sophisticated design of such cabinets for every taste. However, is it really possible to build a gas water heater into a closed kitchen cabinet? Building codes and regulations (SNiP) clearly state that this should not be done under any circumstances.
The column should be located on the wall at least 2 cm from it, both behind and to the side if gas equipment is installed in a corner. Moreover, nearby surfaces must have a non-flammable composition.
Main parts of the gas water heater: 1 – casing; 2 – traction diverter; 3 – heat exchanger; 4 – burner; 5 – gas unit; 6 – water unit; 7 – electronics unit (except for speakers with piezo ignition).
You can, of course, argue that this is not a problem and apply a safe coating to the inner surface of the cabinet. But, besides this, there are other requirements that prevent the placement of a gas water heater in a closet. If a gas leak suddenly occurs, a life-threatening concentration will very quickly form in a closed space. Only 5-15% in the room is enough, and since the gas does not have a pronounced odor, to enhance which the Odorant additive is used, it will be felt much later.
The installation of a gas water heater and all the details of its location are regulated by the section of SNiP relating to the gas supply area. Therefore, when starting a renovation, especially with replacing a water heater in the kitchen, it would be a good idea to study clauses 2.04.08-87, 42-101-2003, 42-01-2002.