Reliable and warm finishing of arched windows in one day from 850 rubles per linear meter, service life 25 years. Installation in one day and without preliminary leveling of the opening surfaces.
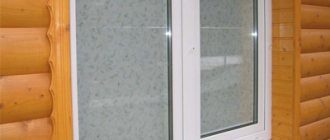
Window openings of non-standard shape are a very stylish feature that is often used in the design of building projects. Arched windows look equally impressive both on the facades of buildings of modern design and on those stylized as antique. The design of such openings requires owners to increase the cost of double-glazed windows. They are made to order and are much more expensive, and require much more time to manufacture.
How to save money and speed up the finishing of arched windows?
suggests using the simplest, fastest and most affordable method - installing arched slopes from PVC panels.
Self-installation steps
Depending on the architectural features, the finishing of window openings on the outside of the building is carried out in accordance with the following requirements and technology.
- The presence of slopes of less than nineteen centimeters requires the installation of a standard plank with a size of no more than 22 centimeters. For fastening, the finishing version of the profile is used, into which the mounted strip is inserted. A replacement for the finishing profile is the J-profile and chamfer.
- The presence of slopes of more than nineteen centimeters requires the installation of a J-profile placed near the frames. The perimeter of the window is equipped with an outer corner into which siding panels should be inserted.
- The absence of slopes requires the installation of a platband, into which the siding panel is then secured.
The design of window openings should begin with the installation of a starting strip, followed by the serial installation of finishing siding panels. All rows must be adjusted to the grooves of the previous elements. If necessary, the planks are cut to the required size.
To get the most neat, aesthetic and reliable window slopes, you need to pay attention to the use of correctly selected fasteners. Building finishing specialists recommend using galvanized fasteners. In addition, the fastening procedure itself should be carried out correctly:
- fasteners must be loosely tightened, leaving a thermal gap of one millimeter;
- fasteners must be screwed in straight;
- the clamps are screwed in straight, not at an angle;
- fastening is carried out strictly in the central part of the mounting holes.
Covering any building with siding panels involves carrying out work on arranging window openings
What is siding
Framing windows with siding involves the use of a specially shaped facing profile. Most often, PVC plastic is used as the main raw material. Due to this, the finish is highly resistant to weathering and frost. Depending on the manufacturer, siding may differ in some characteristics and appearance. The main advantage of this finish is that there is no need to install frequent sheathing.
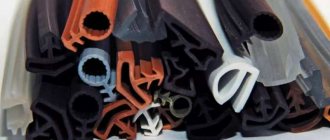
Correctly covering a window with siding requires the use of special fittings, which include:
- starting bar;
- outer or outer corners;
- window sill strip.
In addition, siding involves the use of brackets and profiles that act as sheathing. It is best to purchase galvanized elements, which are less susceptible to corrosion. In addition to vinyl, aluminum and wood can be used as exterior window siding, but they are more expensive to purchase and require more maintenance.
Materials and tools
After completing the facade cladding and before carrying out installation work, you should prepare the necessary fittings and tools for finishing the space around the window. High-quality finishing of slopes around a window is based on cutting siding panels according to the required dimensions and their subsequent installation, which involves the use of the following tools:
- metal scissors, which are used to cut siding when finishing arched openings, or a hacksaw with fine teeth for working with wood or metal;
- screwdriver;
- construction hammer;
- a metal square for measuring the correct mounting angle on the slope area and around the window being installed;
- building level;
- rope and chalk for marking assembly lines.
Building finishing specialists recommend using galvanized fasteners. In addition, the fastening procedure itself should be carried out correctly.
After you have prepared all the tools necessary for the work, you should correctly select fittings and components.
The best option is to use all the elements, parts and fasteners from the manufacturer of those siding panels that are planned to be used in the process of arranging the space around the windows.
The amount of mounting strip is calculated after measuring the perimeter around the window, followed by subtracting the space for window sills and ebbs. To the result obtained, it is advisable to add ten percent of the material for unforeseen consumption.
Read also: How to make your hair curly forever
Window framing is performed using:
- H- and J-profiles;
- external and internal corners for decorating panel joints;
- low tides;
- chamfers;
- window and finishing strips.
After preparing the necessary material and tools, you should begin preparing the surface.
The space around the window must be finished from the outside to increase the heat resistance of the entire external wall covering
Do-it-yourself plasterboard arch: design, installation, finishing work
Drywall is an inexpensive and environmentally friendly material.
Interior arches can be illuminated. Lighting inside the opening is easy to install. 3-4 holes are made in the end plate for lamps, and communications are connected to the nearest switch.
A modern do-it-yourself plasterboard arch can be made using various types of tools. What tools and materials may be required in order to install the arch? It can be:
Construction or painting knife. Roulette. Pencil. Hammer or impact drill. Self-tapping screws (screws). Cord-rope or compass for making bends. Jigsaw. Screwdriver. Hammer. Dowel-nails size 45 mm. Plastic dowel 6 mm. . In addition to the necessary aesthetic components, their installation requires high precision and is carried out using various technologies in each specific case. Technologies and materials for their manufacture come in several types: plaster, plasterboard, plastic.
Slopes for plastic windows made of plaster
The cost of such material as plaster and the installation work itself is much cheaper than in the other two cases. It should be taken into account that, having certain skills in the work of a painter, you can carry out such work yourself, using only high-quality materials.
However, it is necessary to note some disadvantages:
This type of finishing requires quite a lot of time, since the procedure must be repeated several times, waiting for the previous layer to dry thoroughly. The work must be done very carefully so as not to scratch or deform the structure profile. The presence of materials from different manufacturers in such finishing can negatively affect the quality - the mixture can crack and peel.
How to level slopes
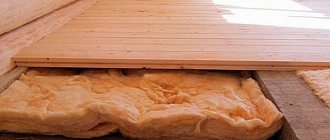
After replacing a window with a new one, it often becomes necessary to trim and level the slopes. At the same time, it is advisable to additionally insulate them in order to subsequently prevent condensation and fogging of the windows. This can be done in different ways, for example, using plasterboard sheets. For window slopes, it is better to purchase not ordinary drywall, but waterproof one; after all, these are windows and high humidity is not uncommon here. If you decide to use regular drywall, then you will have to purchase special protective compounds or impregnations that will allow it to withstand moisture throughout its entire service life.
Lathing
It is necessary to ensure smooth cladding, especially if the slopes of a building are finished from cement or stone material.
Features of the lathing:
- It is better to pre-select areas for fixing rack components;
- parts can be vertical or horizontal, it all depends on the position of the siding;
- The size of the sheathing is calculated taking into account the thickness of the siding.
Tips for choosing finishing technologies
An important factor influencing the choice of material is the choice of the future design of the opening. Thus, it is worth deciding in advance whether the slope will be covered with wallpaper, painted, or something else. The best option for wallpaper or painting would be plasterboard, but plastic is useful for those who decide to use laminating film. That's why it's worth considering the design of the opening and finding ways to implement it.
The slopes must be made of very high quality, since even the most professional finishing is not able to hide minor imperfections. Among the huge variety of technologies, you should choose the one that is truly within your power. In this case, you will be able to create a decent frame for plastic windows yourself.
Submit your application
Sandwich panels, PVC panels
So, a good option for finishing gentle slopes would be PVC or sandwich panels. They have special properties that allow the panels to be bent at a slight angle, which is great for finishing arches with a smooth bend. However, such materials cannot be used for elliptical arches with a small radius, since they may burst during installation. For such work, the flexibility of sandwich panels is increased by separating one of the plastic layers. For operation, a layer of panel with insulation remains, which bends very easily. Making an incision from the back is not a solution to the situation, because... the result will be a curve with edges, and not a smooth arc.
Also, in the decoration of arched windows, a structure created from several parts of plastic panels is used. In this case, it will be necessary to carefully process the joints.
Features of finishing arched windows
Arched windows require the use of a flexible J-shaped profile. If it is necessary to use a classic profile, it must be slightly incised in areas of the natural bend of the window opening. It is advisable to fasten the siding around the window opening using standard metal profiles.
In addition, the arched window opening is equipped with a special elastic profile, which is fastened with nails or self-tapping screws along the entire perimeter of the arched opening. Further sheathing is carried out at intervals of fifteen centimeters. It should be remembered that the arrangement of arched window openings does not require compliance with thermal clearances.
Tree
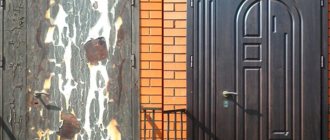
It is possible to decorate the outside of plastic windows with wood using lining, ready-made trims and carved platbands, planed boards, bamboo planks. Wooden window trim will look organic in combination with a facade made of logs or timber. Boards can be secured with galvanized nails or wood screws.
Plaster is not used to seal cracks in wooden openings and it is highly undesirable to use polyurethane foam. The preferred materials for processing are tow and jute.
Selection of materials
Yes, the slopes perform a protective function, but no one took away their decorative function. And you can use a lot of different materials to decorate them. The main requirement for them is the absence of fragility and tendency to mechanical damage. The slopes must be finished so that they can last for many years without the need for repairs, not even major repairs, but cosmetic ones. Moreover, it is worth considering that the doorway is the place where all family members pass every day, and more than once, something constantly falls here, the door and the slopes themselves can be subject to impacts. So the material for finishing them needs to be one that can withstand all these loads for a long time and not deteriorate.
Finishing the opening: slopes, extensions
Arched door and window designs
Popular and frequently used arch-shaped windows and doors:
WINDOW BLOCKS. GENERAL TECHNICAL CONDITIONS. Interregional Window Institute
An arch can be a window, or an integral part of a window or door block. Combinations of designs create glazing elements that are unique in architecture and shape.
From PVC profiles you can make a window of any arched shape and a door with arch elements. A blind element (non-opening) of the structure or a sash part can be made in the shape of an arch.
Arched corner PVC with mesh 100x100 mm white 2.5 m
Attention! The actual color and texture of the goods may differ slightly from their images presented on the online store website.
The PVC arched corner helps to reinforce and create a smooth radial corner edge. It is installed on a layer of mortar previously applied to the corner of the building. After installing the profile, a plaster layer is applied with a tool.
- Made of PVC, resulting in no corrosion during operation
- The corners are made from primary raw materials, so they are elastic and do not break when bent for installation on a radial surface
- Strengthens slopes and allows you to create perfectly smooth edges
- Allows quick and easy installation
- Material: PVC composition
- Length: 2500 mm
- Shelf width: 100x100 mm
Average product rating
0 based on 0 reviews
0% of customers recommend this product
Addressed delivery is FREE of CHARGE in Sevastopol, Evpatoria, Saki, Belogorsk, Feodosia, Dzhankoy, town. Krasnogvardeiskoye, town. Oktyabrskoe, town. Gvardeiskoe for orders over 6,000 rubles. , in Simferopol - from 3000 rubles.
If the order amount is less than RUB 6,000. Free delivery is also possible if you meet the driver on the route yourself, pay and receive the order. The order amount must be at least 500 rubles.
from 3000 rub. , in Kerch - from 6,000 rubles. When ordering a product with a length of more than 2 m, targeted delivery to the specified locations is FREE of CHARGE for orders over 3,000 rubles.
Plastering
Traditional plastering is a very labor-intensive and time-consuming option for finishing window arches. In this case, a large amount of materials will be needed; the plaster is applied in layers and each new layer is laid only after the previous one has dried. To perform such work well, you need certain skills and great patience. So you should think carefully before choosing this option. Do not forget that the quality of the slopes determines the overall aesthetic impression of the opening.
Preparation for finishing
Before making slopes from plasterboard, you will need to prepare a window or door. In terms of preparation, a plasterboard door slope and a window slope are almost the same, but for doors the following is taken into account:
- Presence of communications. For example, wires for the Internet, electricity or a call. The installation is done before the installation of the doorway begins.
- Possibility to install second entrance doors. The need arises if the first door is not insulated, and the sound insulation of the doors does not matter.
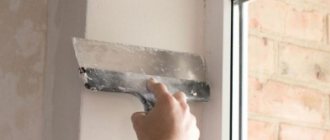
Removing foam from a slope Preparing the opening is as follows:
- When an old window or door is dismantled and a new product is installed, the foam remains and its remains are cut off.
- Use a hammer or other device to remove plaster and other protruding parts on windows and doors. Often there may be a metal pin and other elements under the plaster; they are cut off.
- The gap, hole and other defects in the opening must be puttied.
- The joints that appear between the window frame or interior doors must be coated with sealant.
- After the putty and other mixtures have dried, a primer is applied in two layers around the perimeter of the opening.
At the end of the preparatory work, the opening is completely cleaned of dirt. Everything is swept and dried. In order not to damage the window or door frame, it is sealed with masking tape and cardboard.
Window opening measurements
At this stage, you need to measure the depth of the slopes, as well as the height of the window from the new window sill and the width of the frame.
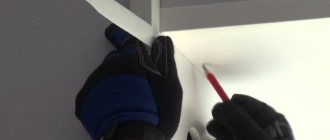
Be careful when you start measuring the depth of the slopes. If the plaster on the walls is old, Soviet, then it is simply bound to have errors; in this case, take a larger depth value. Next, you need to mark the future parts of the slopes on the drywall as shown in the figure below and cut it out. This can be done in the store when purchasing materials. And it will be easier to carry the cut sheet in the car.
When marking the side slopes (2), do not forget to remove 5 mm from the depth of the slopes and 10 mm from the height. At the upper slope (1), you need to add 20 mm to its width and remove 5 mm from the depth. The ends of the slopes, which will be adjacent to the frame and joined to each other, must be cut at an angle of 45 degrees. After installation, it will be easier to fill the joints with putty.
Window finishing methods
When finishing window openings with siding, the type of window plays a big role.
There may be such window installation options as:
- flush with the wall. In this case, wide or narrow trims are used to decorate it. In terms of complexity of work, this is the simplest option;
The simplest design option
Note! If you need to design an arched window, then it is better to use a narrow casing; its mounting part can simply be cut at a certain pitch and then bent. But if the bend radius is too large, then bending may become difficult.
- the window is recessed into the wall to a small depth (no more than 200 mm). To decorate it, you can use a finishing strip or J-profile, and a special near-window strip for siding will cover the slope;
- For deeper recessed windows, the option of using offcuts of wall panels is suitable. Additionally, you will need a J-profile and a corner for decorating the outer corners.
In all the cases described, the finishing is done even before the wall panels are attached around it. In this case, during installation, their edges will simply be inserted into the groove on the edge of the window profiles. If you start finishing after covering the walls, then it will be more difficult to do.
Installation of window trims is completed before the wall sheathing itself
As for the technology itself, the general rules for installing siding panels remain in force. That is, self-tapping screws/nails/staples should be placed in the center of the mounting holes, without fixing the profile rigidly, the gap between the head and the surface of the material should be approximately 1 mm, this will allow the element to move freely when the ambient temperature changes.
Note! The installation instructions allow for fixing elements in any location.
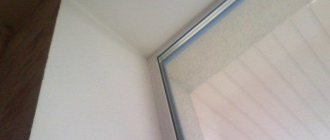
Also, a common point for all cases of window finishing can be considered the installation of lathing. The bars are attached around the perimeter of the window opening, and small strips will also need to be placed on the slope directly next to the frame, so that you can install the finishing profile or J-profile (for windows recessed into the wall).
In the photo - the sheathing is installed around the perimeter of the opening
Styrofoam
Finishing the outside of plastic windows with foam plastic is the cheapest way to insulate slopes. The procedure is as follows:
1. Prepare the opening: clean it, seal the cracks with plaster.
2. Prime the surface.
3. Place glue on the wall of the opening and on the foam blank, carefully spread it over the entire surface with a notched trowel.
4. Glue the blanks, starting from the bottom corners. After installation, coat the joints with glue.
5. Remove excess glue with a wet sponge.
6. After drying, cover the entire surface with another layer of glue and place a reinforcing fiberglass mesh.
7. External and internal corners are covered with perforated corners. They are also planted on glue.
8. Dry the surface and prime. Masking tape is placed around the perimeter of the glass so as not to stain it when painting.
9. The finishing of the windows from the outside ends with painting the wall with acrylic paints or covering it with decorative plaster.
Slopes for arched windows, what material to choose
Arch-shaped structures, just like regular windows, can be finished with plaster, plasterboard, or plastic slopes can be installed. But not all materials are suitable for this type of product.
Plastic products are not very suitable for installation on arched products. The reason is that plastic panels or a sandwich only bend at a slight angle, and if the radius of your arch is quite steep, or resembles an ellipse, then they will simply burst during installation. That is, they can only be recommended for shallow arches with a small radius. You can make slopes from several parts; the joints of the panels must be very neat.
But such experience exists. In this case, a sandwich was used. One of the layers of plastic was removed, just torn off, quite easily. In a single-layer form with insulation, the panel bent quite easily.
Attention! It is worth checking carefully to ensure that the edges of the insulation are located along, and not across, the slope. Otherwise, the edges will be visible, the arch will not be even and smooth.
Next, the two panels were connected to each other using an H-shaped profile.
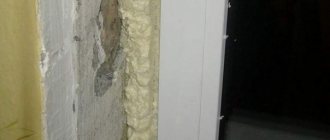
Application of foam and thermal insulation.
There is also experience in using conventional plastic panels and a sandwich without removing one of the sides by making longitudinal cuts on the back side. The result is not a smooth arc, but a faceted surface. The customer will not accept such products.
You can use foamed PVC; it can be bent by heating it with an industrial hair dryer. But it will also have to be made from two pieces, joining PVC with glue for plastic (for example, Cosmofen). But it's quite expensive.
Drywall for arched windows
Most often, the “wet method” is used to make arches and gypsum boards. To do this, the desired size of sheet is moistened with water using a brush.
Pierce with a roller. In this form, the sheet is pliable and bends easily.
Cut out two arch templates of the desired shape and the bottom, and lay a damp sheet on top.
Fix the top and apply the plaster mixture over the sheet.
Install the entire structure using guides into the window.
Remove unnecessary details. We install side slopes, putty, sand, paint. Result.
Plaster
It is quite important to find a plasterer with straight arms. The foam around a plastic window rarely makes up a layer of less than 1 cm, and more often it is 2-3 cm. Therefore, if you want to cover the arched slopes with plaster and then paint, you will need quite a lot of consumables, no less than 2-3 bags of construction material mixtures per window opening. In addition, layers of plaster must be laid sequentially, only when the previous one has dried, otherwise they will crack. Therefore, in addition to the material, it will also take a lot of time. If you happen to have a lot of materials and time, this method is suitable for you.
Colored slopes for arches
Most owners of such products prefer to finish the slopes with plaster or drywall. But some people want to decorate their entire opening in the appropriate color. There is the option of finishing with foamed PVC 4-5mm thick or with a sandwich panel as described above. Such sheets bend perfectly; if necessary, you can bend them additionally using a hair dryer if the arched window has a very steep radius. Not all manufacturers of plastic structures do this, but with due diligence you can find this material yourself. Foamed PVC can be colored, painted in standard lamination colors, or any color can be made to order.
Bending drywall
There is also the option of wet bending drywall. Using this method will save money, however, the process of performing the work itself is very labor-intensive. Two arch templates are cut out and secured to the bottom, leaving a small space for finishing the drywall. The strip is placed on top of the templates and moistened with water using a brush. The resulting drywall is easily bent and can take the shape of the templates. The dried structure is treated with plaster, and then moved into the arch and finally fixed.
Afterwards, the side slopes are installed, puttyed, sanded and painted and wallpapered.