If your iron doors have lost their visual appeal, this is not yet a reason to replace them with new ones; restoration of old iron doors does not require excessive costs and great effort. Next, we will look in detail at how to update an old iron door with your own hands in 3 different options, after which you can decide for yourself which method suits you best.
Do-it-yourself restoration of metal entrance doors is quite accessible to the average home craftsman
The meaning of door restoration
Why restore old doors when you can buy and install new ones? If you think about it, there are quite a lot of reasons for restoring doors:
- Expenses. Wooden, veneered and especially metal doors are quite expensive. For little money you can only buy an MDF box, which will not last long and will not look very aesthetically pleasing.
- Change of style. It happens that the style of the room or its color scheme completely changes, and the door no longer fits into the interior.
- Importance of the product. Some doors are expensive or have artistic, historical value, or are antiques. They can be completely restored.
- The opportunity to make an exclusive thing. After restoration, the door can become the real center of the room, attracting attention.
- The door is out of date. If the product is outdated for a long time, you don’t have to throw it away, but update it at home.
- Hobby. Woodworking is a fun and rewarding activity that sometimes even brings additional income.
If you wish, you can update any door with your own hands. However, professionals usually do not take on products with serious damage, destruction, which are already rotten or have large chips or holes. In such a situation, it is easier to buy a new door leaf with jambs and platbands than to waste time and effort on restoration.
Finishing materials
How can you decorate an iron door with your own hands? You can create an original design for the partition and adjacent slopes using:
- cheap leatherette;
- self-adhesive PVC film;
- veneer or laminate with wood imitation.
Quite interesting are the options for finishing the door leaf and slopes with a mirror surface, which is suitable for small hallways. The mirror costs a little more, but as a result, the old design turns into a real exclusive right before your eyes.
Laminate door trim
The main thing is to take into account when choosing a material for upgrading your entrance partition and slopes:
- his safety;
- resistance to corrosion and sudden temperature changes;
- purpose of the design;
- degree of renewal;
- combination with the overall design both inside and outside your home.
To finish the slopes and the entrance door you can use:
- decorative MDF panels, available in a wide range of colors;
- plastic;
- laminate;
- paints;
- veneer;
- various overlays for decoration.
Manufacturers offer residents of multi-storey buildings and new buildings as a budget option an inexpensive and reliable cladding material in an assortment that meets all quality and fire safety standards when installed in public places.
Siding panels can be used to finish the canvas
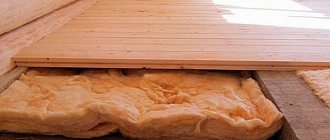
Preparatory stage
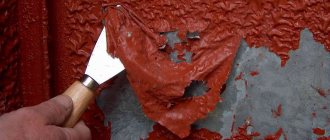
Before painting the door or performing other manipulations to restore it, it is important to properly prepare the surface. Some old doors are already varnished, others are painted, and others are finished with veneer. Under the layer of paint and varnish there is a natural or artificial material that must be completely exposed, otherwise the quality of the restoration work will be low.
To clean the door leaf from the old coating you need to prepare:
- construction hair dryer,
- grinding machine,
- sandpaper (sheets of different grits),
- metal spatula,
- solvent (removal),
- brush,
- rags.
First, you should remove the door from its hinges to make it easier to work with. It is imperative to remove the fittings - hinges, handles, locks, and parts that are outdated or not suitable for the new look will have to be replaced. For ease of operation, the door is placed horizontally on two installed stools. It is important to carefully remove the glass and set it aside for a while, otherwise it may break during the grinding process.
There are several methods for removing varnish and paint from a door leaf:
- Warm up the base with a hair dryer. This will help the coating soften, after which it can be wiped with a rag or scraped off with a spatula. It is important to move the hairdryer evenly over the canvas, without lingering on any areas, otherwise the paintwork will catch fire. Due to the risk of releasing toxic fumes during heating, all work must be carried out using personal protective equipment and in a ventilated area.
- Apply a universal remover suitable for wood to the door. Such products are made on the basis of acids, alkalis, and organic solvents. They are applied with a brush, and after the action has expired, the paint is cleaned and the base is washed.
- Rub off the paint with sandpaper and scrape off with a spatula. Such methods can be carried out if the paint or varnish has already begun to peel off in pieces. The work will require accuracy (it is important not to scratch the door) and a lot of free time.
- Clean the door with a sander. This is the method used by professionals. Using a special tool, you can quickly and efficiently clean the door leaf from any old paint and varnish coatings, as well as make it smooth.
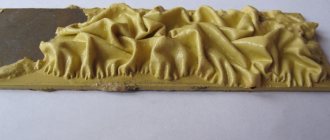
After eliminating unnecessary contamination, you can proceed to the next stage of work. It is important to get rid of all cracks and crevices that appear on the old product. The door must be carefully treated in the area of any defects using a special wood putty of a certain color. Pencils, putty, and, if there are shallow cracks, furniture wax are suitable for this purpose. The latter must be melted to soften before application. You can use homemade putty made according to the following recipe:
- take wood dust, which was obtained when sanding the top layer of wood,
- dilute the dust with furniture varnish to the desired thickness.
You can also connect equal parts of sand, alabaster, cement, and apply the resulting product to the defective areas of the door. After drying, excess grout should be sanded with sandpaper. For this purpose, it is advisable to use a grinder, especially if the treated area is large in size. Do not press the machine too hard, as this may leave dented stripes. As a last resort, you can use sandpaper with the finest grain. After completing the preparatory activities you need to:
- wash the door thoroughly,
- dry the product
- apply drying oil or stain (when required).
If in the future the door is treated with white or other light paint, artistic painting will be done on it, only colorless stain should be used.
What is needed for upholstery
Upholstering metal doors is not a difficult process if you have the equipment and tools. You need to make sure in advance that you have enough materials to carry out the work so that you don’t have to go out and buy more. The set of tools largely depends on the chosen fastening technology and materials.
If you choose natural or artificial leather, then you will additionally need to purchase plywood to fit the door, screws, glue, staples, decorative accessories (nails with heads), foam rubber, and insulation. To attach plywood, you will need a drill with a metal drill, and a construction stapler for attaching upholstery material. To upholster a metal front door with soft material, you may also need a jigsaw to cut holes in the plywood for hinges, a peephole, a lock and a handle. If you choose solid cladding, you will need the same set of tools.
How to obtain permits for construction: list of documentsModern Bluetooth headphones
Construction services for business
It should also be taken into account that you need screwdrivers to remove the fittings, wire cutters if the upholstery is leatherette (for attaching wire decor), possibly a foam gun, an abrasive to clean the surface, and a solvent to degrease it.
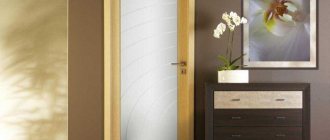
How to update wooden interior doors: instructions
First, you need to think through the design of the future door in detail: it should fit well with the overall style of the room, combine with the furniture, floor, and decor. There are many simple ways to update a door: stick a film, veneer it, or apply paint or stain. If desired, you can use more complex techniques that turn an old door into a work of art.
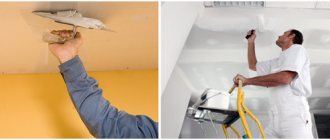
Painting, varnishing and staining
The easiest way to update your doors without changing them is to paint them a new color. It is only important to choose high-quality paint that matches the color. This can be done from photos in manufacturers’ catalogs to match the shade of the floor or furniture. Most often, doors are painted with nitro enamel, acrylic or alkyd enamel. Acrylic paints are considered completely safe, while others emit a pungent odor that disappears only as the layer dries. It is advisable to carry out coloring in the fresh air.
Acrylic paints have a rich palette of shades, give a noble matte finish, and do not smell. It is recommended to apply a special furniture varnish as the second layer after the acrylic product, which has protective properties and increases the service life of the paint. Application is done with a roller or brush. To prevent brushes from leaving lint, they are pre-soaked in water for several hours and then combed out. Before any paint, it is recommended to coat the door with a wood primer, so the paint and varnish material will lie smoothly, without drips or stains.
In addition to painting, you can varnish the door. You should choose the appropriate remedy from the following varieties:
- acrylic,
- alkyd,
- polyurethane,
- nitro varnishes.
Before applying the varnish, a primer is also used, adding to it an antiseptic against rotting and mold. To make the transitions of varnish strokes unnoticeable, the product is applied with quick movements in a cross direction.
Stain is another option for an inexpensive and very beautiful coating for an old door. It is absorbed into the deep layers of wood, giving it a pleasant color and beautifully highlighting the structure of the material. After staining, it is also recommended to apply 1-2 layers of wood varnish.
Veneering
To completely renew the door and give it an expensive, elegant look, natural veneer is used. With its help, you can refine even cheap canvases made from pressed sawdust. Procedure for working with veneer:
- lay the door on the stools horizontally,
- start facing the canvas from the middle, moving towards the edges,
- lubricate a small area with special glue, apply finishing material, press,
- roll well with a roller,
- It is advisable to heat the surface with a construction hairdryer, and then carefully roll the veneer again - this will make the connection between the finish and the veneer itself more reliable.
After gluing the entire door, allow it to dry completely, then apply protective varnish or wax.
Self-adhesive film
There are many options for film on sale that imitate wood in color. It is easy to stick, hides defects in the base, and gives a more noble and beautiful look to the canvas. The procedure is as follows:
- cut the film according to the required size using a sharp knife,
- remove the protective layer from the wrong side, but not from the entire cut, but only 3-4 cm from the top,
- apply the film to the door, smooth it with a rubber spatula (you can use a regular rag instead),
- start tearing off the rest of the protective layer, not forgetting to immediately expel any air bubbles from under the film,
- trim the film at the corners,
- install fittings.
Photo wallpaper or vinyl
A piece of vinyl with a photo print made by an advertising company, or photo wallpaper of the required size will also help decorate the door, giving it a completely new look. It is important to purchase only washable photo wallpaper, because the door leaf can get dirty and will have to be washed regularly.
To glue photo wallpaper, you can use high-quality PVA (it is better to take carpentry compound). It is necessary to thoroughly lubricate the door with glue, press the finishing material well, smooth and level it. Of course, you first need to try on the photo wallpaper or vinyl dry to make sure that their size matches the dimensions of the door.
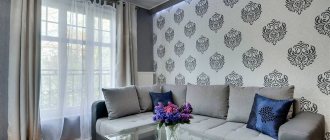
Wallpaper with moldings
Such an unusual decor option is often offered by designers when decorating a room in a classic style. With the help of vinyl or non-woven wallpaper and polyurethane moldings, you can create a bright accent in the room and enhance the style of the design. The background can be plain, patterned, saturated or pastel in color - at the request of the customer.
First you need to measure out the required piece of wallpaper. Then PVA wood glue is applied to the prepared, leveled door, finishing material is applied, and its surface is leveled with a rubber roller or rag. Air bubbles are immediately expelled with a plastic spatula from the center to the edges. It is advisable to buy wide wallpaper so as not to make joints. If there are joints, you will have to carefully adjust the two canvases to each other. The edges of the wallpaper are trimmed immediately before they get wet. Drying time is a day, then you can start gluing the moldings:
- make markings for platbands on the wall with a simple pencil,
- cut the moldings to the required length (there should be 3 pieces),
- cut the moldings at an angle of 45 degrees - these will be the corners at the top of the door,
- Lubricate the back surface of the pieces with PVA or liquid nails, and glue them in place according to the markings.
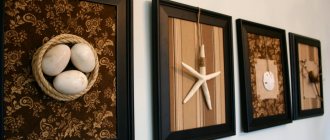
Drawings and paintings
Drawing on the door surface has many advantages over other finishing methods. The appearance of the finished door will be unusual, exclusive, it can “fit” into absolutely any interior style. Other advantages of painting on the door leaf:
- ease of execution,
- the ability to use stencils if you have no artistic abilities,
- large selection of colors and materials.
The prepared door should be well degreased with alcohol. Next, a wood primer is applied in 2 layers, which will allow the paint to lie flat, without stains or drips. Then you need to make markings and apply an ornament or design. The door must be divided into zones so that the drawing is done accurately and correctly. When ready, paint individual elements of the picture in the desired colors with acrylic paints. Apply at least 2 layers of paint. To give a vintage look, the contours of the design are outlined in contrasting tones.
Decorating doors using decoupage technique
To decoupage, the door does not need to be removed from the jambs. If it does not have an old coating, it is enough to simply wash and dry the product, prime it with 1-2 layers. The opening should be sealed with construction tape. Soak the decoupage card in water for 12 minutes, remove it, and wipe off excess moisture with a rag. Remove the protection strips and attach the drawing to the pre-lubricated PVA door.
As in the case of wallpaper, the image should be carefully ironed, air bubbles expelled, and all wrinkles removed: otherwise it will be uneven and ugly. After complete drying, the surface of the door is coated with acrylic-based varnish in several layers.
Antique decoration
In vintage, retro and a number of other styles, various items, souvenirs, and antique finishes are very popular. Ready-made aged decor is rarely found in stores, but you can make it yourself. To give the door an original look, the craquelure technique is used - a two-layer application of varnish.
First you need to choose the right materials. Purchase two varnishes with different compositions and drying times. One of them should be a special wood varnish for craquelure; even a beginner can work with it, and there are detailed instructions on the package. The second varnish is bitumen, which has o.
The procedure is as follows:
- apply craquelure varnish to the pre-prepared door (use white or another light shade),
- after drying, a layer of bitumen varnish of a darker color is applied, which will enhance the contrast.
In the craquelure technique, you can also use a dark base varnish, but then, instead of bitumen, acrylic paint of the required shade is used as a second layer. After drying, the craquelure varnish becomes covered with a network of cracks, which gives the door a vintage look.
Decor with stencils
This technique is used for doors that have glass inserts. A picture or pattern is sketched on paper and cut out along the contours. The glass is degreased, cleaned, the drawing is leaned against it, and outlined on the back side with a marker. Then you can start drawing the image with acrylic paints, but from the front side. Afterwards you need to let the picture dry completely.
Artistic painting
Drawing on a door can involve the use of different artistic techniques. For example, first the canvas is completely dyed and only then a drawing is made on it in contrasting shades. Also, the picture can go beyond the door and continue along the walls: it will look unusual and very impressive. It is possible to apply paint to the door using a sponge, a spray can, or strokes. It is allowed to use interesting techniques - glazing, multi-layered strokes.
Creating an unusual texture
An original way to restore a door is to give it an interesting texture. In addition to the effect of artificial aging, which is obtained using craquelure varnish, you can use another technique. A lighter shade of paint is applied to the base, then a second layer is applied with a soft sponge, carefully blotted. Using this simple technique, spotted surfaces or “steel wool” type bases are obtained. There are also special paints on sale, thanks to which you can create the appearance of a canvas or a slate board from an ordinary door.
Patchwork for doors
A door made using this technique will fit well into any interior. To decorate it, you can use scraps of fabric, newspaper clippings, magazines, photographs, pieces of leather, and other items that go well with each other. It is better not to use this method for a bathroom or other damp room - the collage will quickly turn yellow and begin to become moldy. Patchwork is ideal for interior doors in the bedroom and living room.
As for the fabric for patchwork, it must be dense, not fraying at the edges, and, if necessary, have a small repeating pattern. The cuts can be overlocked, although this is not necessary. Fabrics and laces that are too light should not be glued in the area of the door handle - they will soon become dirty. You will also need PVA, a furniture stapler and staples for the job. The procedure is simple:
- prime the door
- apply PVA glue to the door area,
- attach scraps and other materials to create a picture,
- press well, roll with a roller,
- let the collage dry well,
- attach heavy elements to the door with a stapler,
- the finished object can be coated with furniture varnish.
Door lamination
For lamination, a special self-adhesive film is used. Unlike factory lamination, home lamination has a shorter service life due to the lack of the necessary pressing equipment. Externally, the result will be no worse than that of professionals.
First you need to buy a special film, which is sold in furniture component stores. The finishing material is glued onto a flat, smooth, grease-free door after removing the protective coating (first remove only its upper edge by 3-5 cm). After pasting the entire surface and expelling air bubbles with a plastic spatula, the film is heated with a construction hairdryer and rolled well. This will help the glue adhere more reliably to the surface. After the glue has dried, the product will be ready for use.
Glass inserts
To update the look of an old door, you can change the glass yourself or change the decor of the old one. Stained glass technology gives a particularly interesting effect. To complete it you will need special stained glass paints, a marker, brushes, and a finished sketch.
You need to work this way:
- remove the glass or the entire door, lay it horizontally,
- on the back side of the glass, draw the contours of the future stained glass window and all its sections,
- paint contour lines on the front side,
- after drying, fill the empty spaces with the desired shades,
- if desired, glue decor onto the paint that has not yet hardened: rhinestones, stones, pieces of colored glass (you can then circle them with a black marker),
- wait for the paint to dry completely,
- install the glass in its proper place.
Stained glass techniques are also used on the canvas itself. It is allowed to create the effect of a stained glass window with paints, as well as to cut holes in the door and insert pieces of multi-colored glass into them, the result will be a beautiful, exclusive composition.
Textile
Textile finishing is used infrequently, and in vain. This is a unique and easy way to dramatically change the look of an old door without breaking the bank. You need to buy fabric and prepare a piece of the desired size from it. A piece of fabric must be glued to the door using double-sided self-adhesive tape. It is important to remove all folds immediately, because after that it will be very difficult to peel off the tape.
It is better to avoid light colors in textiles: they get dirty quickly. Fabric with images of cartoon characters and fairy tales is ideal for a children's room. If desired, the finish can be replaced with a new fabric you like or one that is more suitable for the main style of the room.
Is it worth restoring an old door structure in an apartment or house?
If your old door functions normally, but its appearance leaves much to be desired or does not fit into the new interior, you can carry out independent restoration of the front or inside.
Principles for selecting basic materials for canvas restoration:
Below is a photo of the old front door before and after restoration:
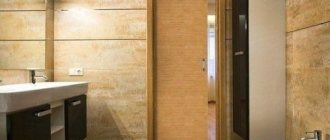
Updating the opening and slopes
The doorway may also have an old, unpresentable appearance; after updating the door, it will inevitably have to be brought to the appropriate appearance. First, you need to treat the support guides: for example, paint them in the color of the canvas or apply stain or varnish. If they are very worn, you will have to install plasterboard structures on them and only then paint them.
To install the platbands, special clamps are used; they can also be attached with self-tapping screws. MDF strips are usually used for finishing slopes. It is allowed to use drywall, which is fixed with glue or perforated corners.
A more labor-intensive process is plastering slopes or installing perlite platbands, which are expensive, but give the most durable results. The restoration of the slopes and opening must be given close attention, otherwise the repair of the door itself will be incomplete.
Care Tips
In order for a veneered door leaf to last as long as possible and look like new, it must be properly looked after. It is forbidden to clean the veneer with abrasive materials, otherwise small scratches will remain on the coating and it will quickly lose its gloss. It is not advisable to install veneered doors in such a way that direct sunlight always falls on them. This will cause the cladding to fade; veneered doors will have to be updated quite often: apply varnish or paint.
It is allowed to wipe the veneer with a damp cloth, but it must be thoroughly wrung out. Literally washing with water; using the structure at high levels of humidity is prohibited. You also need to be careful when washing the floors, because the bottom of the door frame and sash will suffer from this.
Veneered doors, if properly cared for, will last for decades. Only in this case they cannot protect themselves from minor scratches and defects. Therefore, it is necessary to have an idea of how to reconstruct a veneered door with your own hands. This can be easily accomplished using available materials and basic tools.
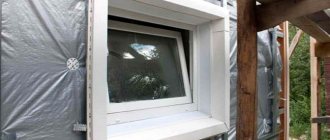
Causes of misalignment
A heavy iron entrance door can warp due to improper selection of hinges for it.
Misalignment occurs if the door weighs a lot. If the door leaf is skewed, repair it. The door hinges weaken, the door frame is deformed, the geometry of the door is disrupted, this leads to the fact that the door does not close during operation, and the thermal insulation and sound insulation deteriorate. Malfunctions identified at an early stage can be easily repaired independently or by a door repair technician. Swing fasteners secure and tighten the hinges. Deformations can be eliminated by installing special spacer wedges under the base.
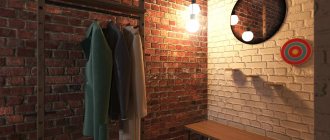
Leatherette covering
Many associate leatherette with the decoration of entrance doors from the distant “pre-perestroika” times. It seemed fashionable, beautiful, practical - I wiped it with a rag and that was it. Only over time it became clear that the material was becoming rougher, fading and cracking, the foam padding was sticking together and becoming unusable, losing its appearance. But, nevertheless, the material remains one of the cheapest and easiest to work with, although it is no longer produced in “Soviet” quality. Now the fabric is more modern and durable.
What distinguishes leatherette from leather substitute, vinyl leatherette? Of course, this is a fabric base, which in modern leatherettes is elastic, knitted, but in leatherette it does not stretch. Replacing old upholstery on a metal or wooden entrance door always begins with dismantling. You should immediately buy fabric. We determine the consumption by the size of the door plus thirty centimeters in width and height. This reserve is used for folding the fabric at the fastening point.
If you do not make a hem, then after a couple of years the fabric will begin to unravel where it was punched with a stapler.
If you plan to make a roller or decor, or sheath external frames, then take the fabric with a reserve. When forming a roller on a common canvas, a margin of 10 cm is needed on each side. If it will be attached separately, then we will buy 20 cm. For the sidewalls, we measure the dimensions and also add 10 cm on each side.
Leatherette is attached with a stapler to staples to plywood secured with self-tapping screws. For old-style metal doors, the cladding is done from the outside without foam rubber or insulation. The fabric is simply glued all over the canvas. If you plan to make a three-dimensional design, then buy foam rubber, decorative nails with round heads, and wire.
Additional decor
For additional decoration, you can attach a mirror sheet to the door on the inside. It's not just decor. A mirror at the entrance is very convenient, because you can look at yourself before going outside. A mirror in the hallway will help to visually enlarge the space.
For self-assembly, choose lightweight panels, because factory-made doors with a built-in mirror often use a mirror film instead of real glass. The canvas is attached only to a solid base using special fasteners or “liquid nails”. You need to choose a specialized glue, which is marked “for glass and mirrors.” The canvas can be full height or only in the upper part. Make sure that when opening the door, the mirror does not hit anything.
The door is like a business card of your home; people who come by it begin to form an impression of you. If it is in poor condition, this is not an argument in favor of the owner of the house. A door doesn’t have to be beautiful or creative, but many people want to make it neat and well-groomed.
Prices for modern doors are affordable, although they cannot be called low, so upholstering or reupholstering them with a new coating is much easier than purchasing a whole door. The advice and instructions received will allow you to step-by-step replace the door trim without resorting to hiring craftsmen.
Source
Vinyl cladding
The composition of sheets made of polyvinyl chloride plastic mass, called vinyl plastic, includes thermal and light stabilizers, which increase their resistance to adverse influences and improve performance characteristics. For cladding door panels, a special grade of vinyl plastic is used - VD, called decorative. The panels of this brand have a thickness that is ideal for work - it is 1.5-3.0 mm.
Viniplast is a panel consisting of two layers: PVC and high-hardness fiberboard.
Vinyl plastic cladding tolerates temperature fluctuations well, is resistant to mechanical stress and is a material that is safe for human health.