Despite the variety of flooring materials, plank flooring will probably never lose its fans. Both the selection and installation of floorboards require certain knowledge, which must be obtained by deciding to carry out the installation work yourself. Therefore, in the sections of this article, different options for arranging the floor will be considered, as well as what you need to pay attention to when choosing a material.
Laying floorboards
Preparing the base
Before laying a wooden floor, you will need to prepare the base. Preparation begins with choosing an installation method. The floorboards are laid in two ways: on logs or plywood. The best option is laying on logs. Situations when this method is not possible:
- the room has a low ceiling;
- after installing the floor on the joists, the door to the room will not open;
- it is necessary to lay a new coating on top of the old one.
In these cases, the floor made of wooden floorboards is laid on plywood.
Do not install on a wet subfloor. To check whether the concrete screed has dried, place a piece of plastic film or a rubber mat on the floor. The film is glued with tape. After 24 hours, the polyethylene or mat is lifted; there should be no condensation below.
Then, regardless of the type of base: concrete, wooden floor or old floor, check the slope level, not higher than 0.2% of the length of the room. To correct the situation, a concrete screed is made. It is enough to pour a self-leveling mixture onto the concrete floor.
With any installation method, on logs or on plywood, a waterproofing layer is created. The material used is plastic film, glassine, roofing felt or special mastic. The film strips are laid with an overlap of 15 - 20 cm and an overlap of 10 - 15 cm on the walls, glued together and to the walls with tape. The surface is coated with mastic, extending onto the walls by several centimeters. Coating waterproofing is used to prepare concrete bases.
Installation of wooden floors on joists
Material selection
, regular or tongue and groove boards can be used ; it is better to use the latter, as they have a lock that guarantees a reliable connection and reduces the likelihood of cracks appearing. Don't skimp, buy quality material and if you install it correctly, this coating will serve you for a lifetime. Ordinary boards can only be taken from oak, as they do not hold up over time.
A good flooring material is
Siberian larch , but its cost will be 2-3 times higher than that of pine. Aspen or alder are perfect for children's rooms , although their characteristics are worse than those of oak or larch, but they release useful enzymes, and in the children's bedroom the load on the floor is not very large, so this coating will last a long time.
The most budget option is pine, spruce , but in this case you need to use only tongue and groove boards and they must be well dried. The humidity of the floorboard should not exceed 12%, the best option is when it is 8-10%. Oak boards can be taken with a thickness of 20 mm, and pine boards 40 mm. The tongue and groove boards have a thickness of 28-36 mm. Their choice depends on the load that the floor will experience.
Width is also important, especially for regular boards. The higher their humidity, the smaller the width should be. The optimal width is 100 mm, but if the material is well dried, it can be up to 200 mm. Before installation, the material must acclimatize in the room, and this will take several days.
Preparation for installation on joists
Wooden beams 40-70 mm thick are used as logs, attached to the base of the floor in two ways:
- screws or anchor bolts;
- gluing to bitumen mastic or glue (the adhesive layer serves as waterproofing).
Attaching joists with glue is used when there is a risk of damaging communications under the subfloor. If it is not possible to glue or screw the logs with screws, take beams of greater thickness (up to 100 mm). It is recommended to treat the logs with an antiseptic before installation.
The prepared beams are installed in increments of 50 cm; if the board is thick, the increment is increased. Under the spliced panels, the step should be no more than 40 cm. A heat-insulating material is placed in the voids between the joists, which at the same time serves as sound insulation. An additional layer of waterproofing material is placed on top of the insulation. To improve sound insulation, before laying a floor made of wooden planks, a backing under laminate or padding polyester is placed on the logs.
Logs under the plank floor
Review of manufacturers
Since the actual performance of paint products is extremely important, there are a number of leaders that best protect load-bearing structures. The Thermobarrier coating guarantees steel protection for up to two hours, the minimum level is three quarters of an hour.
Cost and paint parameters can vary greatly. “Nertex,” for example, is water-based and reliably protects the structure from high heat.
“Frisol” fully meets GOST standards and can have properties of groups 2–6. The coating's service life is a quarter of a century, and its fire resistance meets all requirements.
The Joker brand protection works well, but it is advisable to use it only in rooms where the security level is equal to the second, third or fourth groups.
“Avangard” is a product of a recently established company of the same name, but it has already managed to gain solid authority and become famous for its excellent efficiency-to-price ratio.
Preparation for laying on plywood
Plywood for plank flooring is chosen from the FK brand, moisture-resistant, with a thickness of 18 mm. Procedure:
- Using a jigsaw, cut the sheets into four pieces. The ends should not delaminate.
- Apply the adhesive to an area of the subfloor equal in area to the size of a piece of plywood. A layer of glue 2 cm thick.
- Place the sheet on the surface coated with glue, screw it with self-tapping screws around the perimeter and diagonally in increments of 20 cm at a distance of 2 cm from the edge. Sink the protruding heads of the fasteners into the material.
- Lay the plywood, arranging the sheets according to the principle of brickwork. The distance between adjacent ones is at least 3 mm, between plywood and walls 10 mm. Fill the cracks with putty.
- Sand the finished surface with a grinding machine or sandpaper.
- Before laying the boards, remove debris and dust.
Plywood flooring
Which style to choose for the kitchen
Before you start decorating your kitchen interior, you should choose a specific style.
There are certain subtleties when choosing that need to be taken into account. Below are the styles that exist in the kitchen interior and how they can be implemented.
A set in a minimalist style is suitable for a small kitchen.
For small kitchen areas, styles rich in a large number of different small elements are not suitable. In this case, you should not use the classic style, country and Provence. It is advisable to give preference to modern solutions bordering on minimalism.
Whereas for a kitchen with a large area, you can choose absolutely any style solution.
Interior design of a large kitchen.
Types of floorboard joints
How to make a floor from planks? Fastening is carried out depending on the type of floorboard and the method of connecting the panels:
- tongue-and-groove connection (the most common option);
- a quarter;
- with edges beveled at an angle of 45 degrees;
- edged
Types of floorboards
A tongue and groove board is made from solid wood, a whole piece of wood, sometimes a spliced beam glued together from several parts is used. Regardless of the type of connection, additional fasteners suitable for the floorboard are used: screws, nails or clamps. Self-tapping screws are taken twice as long as the thickness of the panel, nails - three times.
Attachment to base
For each type of floor panel, a suitable fastening method is used. Edged boards with beveled edges are nailed. The fastening has a significant disadvantage - caps that are covered with putty are visible on the floor surface. It is recommended to use decorative nails.
The board is tongue-and-groove and secured in quarters with screws, screwing it into the groove at an angle into pre-drilled holes.
Fastening with self-tapping screws
Important! There are special self-tapping screws for floorboards on sale that have a small cutter on the tip of the fastener that allows you to screw in a screw without pre-drilling holes. The upper part of the screw is without thread, which allows the board to fit more tightly to the joists.
Claypers are used for laying tongue and groove boards. First they are inserted into the groove on the panel, then attached to the joists. There are no traces of fasteners left on the surface. The covering is nailed, screwed, and glued to the plywood.
The final stage
After laying the floorboard, the surface is inspected and in case of mechanical damage, all defects are eliminated using wood putty , and it is necessary to match it to the color of the wood.
To remove small protrusions and irregularities, the coating is sanded. It is better to do this not with a manual machine, but to rent a professional sanding machine, otherwise, after applying the paint and varnish coating, all existing defects will be very noticeable.
If you have purchased a high-quality and solid floorboard, then during its installation, practically no protrusions are formed, so sanding may not be carried out or fine sandpaper is used for this.
At the last stage, the floor is covered with paints and varnishes. It is better to take varnish on a polyurethane basis. You can use oil and wax based coatings, which look very beautiful after application; in addition, they are natural, so the wood breathes and helps maintain an optimal microclimate in the apartment.
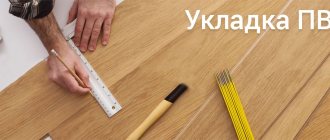
Installation of plank floors
The technology for laying floorboards allows the use of long or short panels. Long ones are cut to fit the width of the room. Short ones are laid sequentially with or without offset. When laying with an offset, each row begins, alternating with a whole panel or half. After trimming, the ends of the floorboards are coated with wax emulsion. Before laying a new floor, it is recommended to keep the material in the room for at least three days.
Important! Air humidity during installation should be in the range of 40 - 60%. Damp boards cannot be used.
Installation on joists
Flooring is laid in the following order:
- Place the first panel perpendicular to the joists (tongue-and-groove against the wall). Since wood can swell, there should be a distance of at least 10 mm between the wall and the floor covering, but no more than the thickness of the future plinth. To maintain the interval, wooden or plastic wedges with a thickness of 1 cm are inserted into the gap between the first board and the walls.
Installation of plank flooring on joists
- Nail the board or fasten it with self-tapping screws, having previously drilled holes in the groove with a drill at an angle of 45 degrees.
- Install the next board. The gap between the floorboards should be no more than 1 mm. Attach the second panel in the same way as the first. The tongue and groove boards are inserted with a tenon into the groove of the previous one. Panels “in a quarter” and with beveled edges are aligned relative to each other.
- Lay all the flooring sequentially. If necessary, cut holes for pipes and other communications passing through the floor. Sawing is done with a jigsaw.
Laying boards
- After installing all the parts of the floor covering, remove the wedges and cut off the protruding parts of the waterproofing with a construction knife.
- To make a plank floor complete, you will need to sand its surface: first along the grain, then across, and lastly diagonally. For grinding, use a grinding machine or a hand scraper.
- Apply the primer in two to three layers, sanding each after drying, and if desired, also saturate with an antiseptic.
- Cover the laid floor with varnish, paint or oil in several layers; instead, it is possible to use a tinted impregnation.
- Install floor plinth.
Important! To join the panels along the length when laying a short board, you need to ensure that the seams fall on the joists.
Features of installation using clips (clasps):
- Before laying the plank floor, screw the starting clips to the joists strictly along one line.
- Insert the first board with a tenon into the grooves of the clamps and tap its end with a mallet.
- Place intermediate clips into the groove of the installed board at the intersection with the joists. Attach the clamps with self-tapping screws.
- Place the next board in the grooves of the intermediate brackets and hammer it again with a mallet.
- Re-insert the clips at the intersections with the joists and secure with screws.
- Lay all floor boards sequentially. Treat the finished coating in the usual way.
Mounting on plywood
Attaching the board to the plywood additionally requires gluing. How to properly lay a plank floor with glue:
- Before installation, prepare the adhesive.
- Apply glue to the surface of the plywood before laying one board.
- Place the first panel and secure with nails or screws.
- Lay all panels sequentially. Sometimes, for a more reliable connection, the ends of the joined floorboards and the grooves are also coated with glue.
- Treat the finished floor as when laying it on joists.
Important! If the heating in the room complements the heated floor, installation with glue is not suitable.
Sanding a wooden surface
The main purpose of sanding is to obtain a perfectly clean and smooth surface of the floorboard, ready for further processing. In order not to damage the grinder and the surface itself, it is necessary to recess the screw heads as deeply as possible. There are several types of grinding machines - surface grinders and angle grinders.
The former are used to treat the entire floor surface, while the latter are intended for hard-to-reach places. Instead of sanding machines, you can use a sanding block or a hand scraper.
Location methods
Regardless of which frame the installation is performed on, it is enough to place the logs with a step between them of 50–60 cm. With a larger distance, the upper finishing board may sag (“spring”) and lose strength.
You should start from a higher area, if the subfloor has differences, level it horizontally using a building level, and install logs with the maximum possible parallelism. To do this, it is enough to draw a horizontal line along the opposite walls or pull a construction cord along the mark of the upper surface of the joist.
Advice for owners
The same idea can be used to cover old floors. The creation of fasteners will ensure the integrity of the floor covering throughout the entire period of operation. Laying wood flooring yourself is quite a labor-intensive task.
To reduce the time for all installation operations and not have to think about leveling the subfloor, it is best to use logs.
The second fairly quick and reliable option is to lay a false base, which will serve as a finished floor and at the same time a heat insulator. The option of laying new boards on the old floor is best considered as an exception. If possible, the old coating must be dismantled and replaced completely with a new one.
Warm floor in the garage: is it easy to do it yourself?
Concrete floor in the garage: how to make it yourself?
Floor in the garage: how to make it yourself?
Leveling a wooden floor without tearing off the boards: how to do it?
Tags: board, flooring, nail
« Previous entry
SOLID BOARDS IN THE ATTIC AND IN THE ATTIC
The most economical way to expand your living space is to add an attic or attic. An insulated roof, sloping walls (they need to be sheathed) - and you get an additional room of almost 40 square meters. m. All that remains is to lay wooden floors in the future attic studio, which will perfectly suit the unusual atmosphere of the attic space. True, first you need to take care of sound insulation: since the beams of the roof, on which only chipboard is now laid, the noise of footsteps is perfectly transmitted to the first floor. But the construction of a monolithic seamless floor in this case is technologically impossible. If you do not make great demands on sound insulation, you can get by with an intermediate layer of slabs based on bast fibers.
Mineral wool is laid along the entire perimeter of the walls and in places where the floor covering adjoins other building elements, which serves as an additional soundproofing strip.
Insulation boards based on bast fibers are laid over the floor surface. Their advantage is that they have compressive strength and are able to bear the weight of the future coating, and due to their fibrous structure they absorb impact noise well. When laying, avoid cross joints.
One layer is added to the base - chipboard. The slabs are laid in a floating manner, gluing together into tongue and groove. It is better to apply glue along the upper and lower edges of the ridge. Cross joints must be avoided.
The figure shows the assembly of the floor: a three-layer “sandwich” structure - chipboard, an intermediate layer of sound insulation and a top layer of solid boards.
Tongue-and-groove floorboards are sold for flooring. Glue is applied only to the ends. The boards are laid with a shift: the remainder of the board of the previous row serves as the beginning of the next one. At the same time, make sure that the joints of the ends in two adjacent rows do not coincide.
The first row of boards is placed against the wall, not forgetting the gaps, leveled and nailed to the base. The second row of nails is driven along the upper edge of the ridge at an angle of 45 degrees in increments of approximately 50 cm.
The heads of the nails must be recessed. This is done using a special hammer.
To tightly join the boards, you can use a cracker for fitting or simply cut a board.
Insulated coating
First you need to make a pit, which is then filled with thermal insulation. The layer of thermal insulation material should be covered with a second layer, which consists of bags for lime or cement. These bags need to be stacked in several rows.
After this, a layer of crushed stone is laid, the thickness of which should be about 8 centimeters. It should be compacted and filled with lime solution. A roofing material covering is installed on top. A fiberboard sheet with a thickness of about three centimeters is mounted on it. Finally, you need to make a final layer of small or medium expanded clay.
Sorry, nothing found.
This entire base, which is made for the floor along the joists, must be filled with a small layer of concrete mortar. Most of the solution should contain sand. After the solution has hardened, it should be covered with sand and follow all the instructions that are described a little higher in this article.
WOOD SPECIES AND THEIR CHARACTERISTICS
Wood species differ from each other not only in appearance, aesthetic effect, but also in operational properties. For flooring, the first thing to consider is the hardness of the rock, that is, its resistance to dents and wear resistance.
In practice, various types of wood are most often divided into the following groups:
- very soft - spruce, poplar, willow, linden;
- soft - pine, fir, larch;
- medium hard - pear, walnut, birch, alder;
- hard - maple, oak, ash, yew;
- very hard - rosewood, beech, hornbeam.
TABLE OF WOOD HARDNESS
So, when choosing a tree, you should take into account not only the external decorative appearance, but also how well this or that species will meet the functional requirements for the future floor. The very soft and soft wood is suitable for residential areas with little abrasion load on the floor covering.
However, coatings made from medium-hard wood cannot always be used in rooms designed to receive large numbers of visitors.
ORINALIZED WOOD
Ornamental wood is especially important for floors made of multi-layer glued parquet and laminated floors. The following materials are used for such floor coverings.
- Glued plywood is a board consisting of several sheets of wood (veneer), glued together perpendicular to the direction of the fibers (adjacent layers). Thanks to this gluing method, individual sheets do not warp, which provides increased strength and better dimensional stability compared to solid wood construction. Particularly multi-layer and thick laminated plywood is called multiplex plywood.
- Chipboard (flat-pressed particle board) is produced by pressing wood chips with the addition of a binder. Chipboard is easy to process, but their edges leave much to be desired.