Characteristics and composition
The name "gypsum plaster" is not entirely accurate. Gypsum is a mineral from the sulfate class. It has a double structure: fibrous - selenite, granular - alabaster. It is from alabaster that the plaster mortar is obtained, which everyone knows as gypsum.
The technological process is not very complicated:
- the mineral is fired at high temperatures for a long time;
- crushed to a powder state - the smaller the particle fraction, the higher the plasticity and better binding properties;
- additives are introduced:
- fillers with granules no more than 1.5 mm - reduce the weight of the solution. For these purposes, the smallest particles of polystyrene foam, foam glass, vermiculite, and perlite are used;
- plasticizers and modifiers - reduce the speed of setting of alabaster (without additives, after 5 minutes the mixture becomes stone) and improve the level of adhesion.
- bleaches - lime (used before), titanium or zinc based white;
- polymer additives - increase the viscosity and strength of dried plaster.
Available for sale in bags of 5, 15, 25 and 30 kg.
Crushed alabaster.
This is the composition of the dry mixture. Water and retarding agents are added to the ready-to-use paste, as a result of which the solution does not harden without access to air. Pasta is sold in plastic buckets.
Technical characteristics depend on the density of the material and the size of the component fractions. Therefore, specific numbers may vary. The main indicators are:
- color - can be white, gray with different shades, pink and beige;
- The proportion of water for mixing is on average 2:1, where 2 is gypsum, 1 is water. But different manufacturers have deviations - from 0.4 l per 1 kg of mixture to 0.6 l / kg. You need to look at the recommendations on the packaging;
- the thickness of the base layer without reinforcement is from 2 to 5 cm (different for each manufacturer);
- compressive strength - 25-40 kg/cm2 (according to GOST 31377-2008 - 2.45 MPa);
- work is allowed at a temperature of - +5-+30oC;
- solution lifetime - 1 hour (according to GOST - 45 minutes for manual laying, 90 - machine);
- complete drying time - 3-7 days (depending on the thickness of the layer);
- composition consumption per 1 mm of layer - 0.8-1.2 kg/m2 (hand laying - 0.85-1.0 kg/m2, machine - 0.75-0.9 kg/m2;
- adhesion force to the base - 0.3 MPa;
- moisture retention without dripping - 90%. Solutions with 95% appeared on sale, which is much better;
- density - 950 kg/m3;
- vapor permeability - 0.11-0.14 mg/ (m*h*Pa);
- shrinkage of the base layer is not allowed.
Pros and cons of gypsum plaster
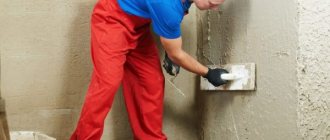
Gypsum plaster has gained popularity due to its advantages :
- high plasticity - easily applied and stretched in a thin layer onto horizontal and vertical building structures;
- good adhesion to almost all building materials, including concrete, brick, aerated concrete and clay bases;
- formation of a smooth surface after drying - no further processing is required: grouting and sanding with finishing mixtures;
- absence of shrinkage with a plaster layer of up to 3 cm, and, therefore, the entire surface - no microcracks form;
- excellent soundproofing properties - absorbs indoor noise, weakens structural noise;
- prevents heat loss due to the low thermal conductivity coefficient - 0.23-0.3 W/m*K;
- low weight - no serious loads are created on the walls and foundation;
- environmentally friendly - sanitary standards allow use in any room of a house or apartment (children's room, bedroom);
- ability to pass vapor molecules (vapor permeability). Thanks to this, a comfortable microclimate is maintained in the plastered room;
- economical consumption - allows you to completely offset the higher price compared to CPR;
- fast setting - the following stages of the technological process are not delayed;
- short drying period - from 3 to 7 days, which significantly reduces repair time;
- does not serve as a basis for the development of fungi and mold;
- thinner base layer than cement mortars - 2 cm versus 3 cm;
- fire safety - fire-resistant partitions are manufactured.
The list of strengths is impressive. However, the existing disadvantages narrow, however significantly, the scope of application:
- afraid of moisture - cannot be used outside (on facades) and in rooms with high humidity (basement, bathroom, open balcony or loggia, etc.);
- having an acidic environment, it corrodes metal, even galvanized;
- has low surface hardness - can easily chip or leave a deep scratch;
- Quick setting for beginners in plastering creates problems: they do not have time to work out the batch. But this is the other side of the coin, because... for professionals this is an undoubted advantage;
- Do not work in unheated rooms in winter. Only at positive temperatures - from +5oC or more.
Review of manufacturers
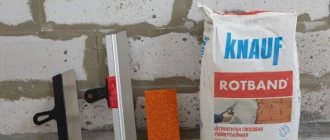
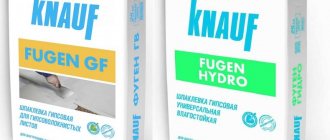
KNAUF. The manufacturer produces many brands of gypsum mixture with different characteristics. The most popular: ROTBAND, ROTBAND PRO, XP, PROFI, for machine application MP 75.
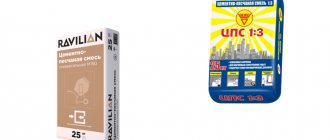
VOLMA. The domestic manufacturer produces compounds in several cities, gypsum plasters - 11 varieties. Popular: Layer, Layer Titan, Layer Ultra, Canvas, Plastic, Gypsum Active.
PERFECTA . The company is aimed at professional craftsmen and produces compositions for machine and manual application. Popular brands of solutions: Gipstar gray, Gipstar white, Gipstar MN, Smartgips.
VETONIT. The manufacturer produces high-quality products that are sold in many countries, including Russia. Well-known brands in the line of gypsum plasters: Easi Gips, Profi Gips, Mech Gips.
Application area
Alabaster-based plaster was originally intended for plastering walls and ceilings inside residential premises made of any materials: concrete, brick, aerated concrete, plasterboard, etc. under wallpaper and paint. Later, they began to putty on slopes, use it to seal seams between sheets of drywall, and with the advent of fiberglass reinforcement, to strengthen the joints of concrete ceilings.
You cannot plaster metal, facades, walls and ceilings in damp and damp areas. There are two reasons:
- acidic environment corrodes metal structures;
- At high humidity, gypsum plaster actively absorbs water vapor, softens and floats or collapses.
But there are exceptions here too. So, gypsum plaster is used under tiles in the bathroom, but not under wallpaper or painting. Gypsum mixtures also appeared for facades. But the amount of polymer additives there is so large that it is not correct to talk about gypsum solutions. These are rather gypsum-polymer plasters.
Specifics of plaster compositions
Since buildings need to be plastered outside and inside, where the finishing is exposed to different conditions for a long time, the compositions of plastering solutions are also specific. Facade surfaces are subjected to more severe mechanical stress, are watered by rain, hit by hail, endure frost and heat, and are scorched by direct sunlight. Therefore, solutions for external conditions should be more resistant to all these “troubles”.
There are mixtures for facades, interior work and universal ones. The latter can be equally used for outdoor and indoor decoration.
All basic data on the proportions of plaster solutions for exterior and interior decoration are contained in the table from the standard.
spray and soil during external and internal plastering
The following figure shows the proportions of the covering.
cover - proportions
Composition of mortar for plastering external walls
Mortars for external walls differ in their base. Gypsum and lime compounds are not used for exterior finishing. An exception is plastering of closed loggias and balconies, where there is protection from water ingress. Therefore, the main binder for facade compositions is cement. Cement-lime (popular) and cement-polymer (more expensive) compositions are also used.
Clay is not afraid of frost and sunlight. But clay plaster must be protected from erosion. For facades in regions with a dry climate, if water does not directly fall on the plaster, plastering with lime-clay and lime-gypsum mixtures is used.
Types of gypsum plaster
The criteria for classifying plaster by type are:
- size of component fractions;
- method of application;
- appointment;
- release form;
- color.
Fraction size
When doing plastering work with your own hands, it is important to select the correct mixture according to the particle size of the components. After all, the purpose of the solution depends on the fraction:
- coarse-grained - intended for thick layers of plaster (5-8 cm) when eliminating large surface defects. Difficult to find on sale. You definitely need a reinforcing mesh - without it it will shrink and crack;
- medium-grained is the most popular type of dry mortar. Used to level small differences in height, up to 3 cm. The maximum possible layer thickness is 5 cm, but from individual manufacturers;
- fine-grained - applied with a thickness of no more than 8 mm onto existing layers of previous types. With a thicker layer, extensive cracking is possible. Can be used for putty for painting.
Application method
You can plaster walls in different ways:
- manual - used in small areas or when performing work independently;
- machine - the solution is quickly applied to the walls. The quality of the dried surface is almost perfect. However, to mechanize the process of leveling walls, a stirring station and a pneumatic blower are needed. The equipment is expensive, which is why the prices are high. They can be reduced to an acceptable level only by increasing the volume of work.
Purpose
According to their intended purpose, solutions can be:
- starting ones - applied directly to the walls, hiding defects;
- finishing - laid on an existing layer of plaster. The only function is to make the surface smooth to a mirror shine;
- universal - can be used for any purpose.
Attention: finishing solutions can be applied to drywall without an underlying layer of coarse or medium-grained mixtures.
Release form
Gypsum solutions are offered for sale in the form of:
- dry mixes - sold in bags;
Dry mixture.
- pastes - ready-to-use solution. Packaged in plastic buckets. Weight can be from 1 to 18 kg.
Paste.
Color
Gypsum plaster is associated with the color white. However, you can find dry mixtures on sale:
- white;
- gray, with different shades;
- beige;
- pink.
Colored gypsum mixture.
How to apply gypsum plaster to avoid cracks
There are several most likely reasons that can lead to the formation of cracks.
Possible causes of cracks:
- Uneven mixing of the composition . If there are lumps in the mixture, cracks and voids will certainly appear on the wall.
- Presence of dust . Dust and dirt impair adhesion, hence cracks.
- Excess water. The gypsum mixture is sensitive to excess water.
- Layer thickness . The gypsum mixture is not applied in a layer less than half a centimeter, otherwise the moisture from the solution will evaporate too quickly.
Again, add powder to the mixture, which will prevent the solution from thickening quickly.
Recommendations for selection
The quality of repair depends on the materials. When choosing gypsum plaster, you must first pay attention to the technical characteristics . They must comply with GOST (given at the beginning of the article). If there are deviations, and they occur in imported products, you need to analyze what consequences this will lead to.
For example, with a manual application of plaster consumption of 12 kg/m2 per 1 cm layer, the cost of finishing increases sharply. In this case, you need to look at the price and the presence of unique properties - the low cost compensates for the overexpenditure, and moisture resistance or high strength will allow you to plaster the walls in the bathroom or kitchen.
The second indicator that you should pay attention to is the date of manufacture . As a rule, the shelf life of mixtures is 6 months. After it expires, problems arise with stirring - many lumps form inside the bag, which are difficult to dissolve. True, the quality characteristics remain virtually unchanged.
The container must be undamaged - gypsum actively absorbs moisture from the air. The result is lumps that practically do not grind. It is better not to buy such dry plaster. Two more important indicators:
- drying time. Varies from 3 to 7 days. More flexible solutions dry faster;
- viscosity. The more plastic the mass, the more convenient it is to work. But such mixtures also have increased consumption. More consumption means higher repair costs. You need to choose one thing.
For wet rooms you need to buy moisture-resistant brands of gypsum plaster. But for financial reasons, it is better to use a well-tested technology - cement-sand mortar for interior work.
If you want to reduce the cost of materials, you can buy alabaster (sometimes they write gypsum on the packaging, which is the same thing). Rapid setting can be eliminated using diluted PVA glue (1% of the solution volume), slaked lime, citric or tartaric acid, or even better by adding the retarder “Plast Retard PE”. In any case, it will be cheaper than dry mixture or paste.
And, of course, look at the manufacturer - for time-tested brands, all the strengths and weaknesses can be found on various forums. Here, buying a “pig in a poke” is excluded.
Comparative characteristics of plasters from different manufacturers
SGShS of several modifications are contained in the lines of different manufacturers. If we compare leading manufacturers that produce the best gypsum plasters, we can note that each manufacturer has its own approach. If Volma experiments more often, obtaining new mixtures with interesting properties, then the German Knauf focuses on the quality of an almost classic recipe. At the same time, Knauf mixtures are much more expensive and require multi-layer application and special primers. SS Volma, having its merits, is only slightly inferior to Knauf in terms of gypsum quality.
| Characteristics | Comparable brands | |||
| Knauf | Volma layer | Bolars | Prospectors | |
| Consumption of dry mixture (kg/m2) per layer of 10 mm | 8.5 | 8-9 | 8.5 | 8-9 |
| Maximum layer, mm | 50 | 60 | 50 | 50 |
| Water consumption, l/kg | 0.6 | 0.55-0.65 | 0.5-0.56 | 0.5-0.7 |
| Complete drying, days | 7 | 5-7 | 7 | 7 |
| Beginning and end of setting, min (pot life min) | (45-60) | 45-180 | (60) | (45) |
| Peculiarities | Suitable for wallpaper | Plastering without primer | Shelf life 12 months, does not require puttying | |
| terms of Use | Wet and dry areas | Dry and normal mode | Dry and normal mode | Dry, normal |
As you can see, the average figures are close. In the end, everyone decides which gypsum plasters are best suited in their case, relying on their own experience or the recommendations of specialists when choosing.
Popular manufacturers
Many companies produce gypsum plaster. But in terms of popularity, not a single product can compare “Knauf” Rotband (“Knauf” Rotband) Indeed, high plasticity, an easy-to-work consistency, which is why the mortar adheres well and adheres well, the absence of shrinkage and, as a result, a surface without cracks after drying, are liked by builders.
But there is one big drawback: the price is greatly inflated. At the same time, not due to the best quality and operational characteristics - they are approximately the same for all leading ones, “DeLuxe”, “Unis”, “Ceresit”, etc.), but due to the promoted brand.
Among the competitors, there are several companies that are really good in terms of product quality.
"Volma". The Russian manufacturer supplies the following line of mixtures to the retail chain:
- “Layer”, “Plast”, “Canvas” - for classic manual application;
- "Gypsum asset" - for mechanized.
The product is intended for leveling walls, restoration and decorative work. Peculiarities:
- low price;
- good adhesion to all types of wall materials;
- insufficiently high ductility;
- does not like significant changes in temperature and humidity;
- maximum thickness of one layer - 3 cm;
- no shrinkage during drying;
- does not peel off or crack;
- the color is not only white, but also beige or pink;
- It sets faster than the stated 45 minutes, which creates problems, especially for home craftsmen.
The company guarantees high performance characteristics of the plaster with a layer thickness of up to 5 cm, but subject to reinforcement with fiberglass or basalt mesh.
"Prospectors". Another domestic manufacturer. Supplies mixtures for interior work to the building materials market. They can be used for finishing walls and ceilings, sealing seams and joints, and restoring stucco.
There are no complaints about product quality. It is plastic, fits well, and glosses easily. Plus, the maximum permissible thickness of the base layer is large - up to 5 cm. The disadvantage lies in the area of logistics - packaging in bags of 15 and 30 kg, which is not always profitable.
"Unis". The Russian one has several enterprises in the country. It produces products with the following technical and operational parameters:
- White color;
- diluted in a ratio of 0.4-0.5 l / kg;
- base layer thickness - 5-50 mm;
- compressive strength - 2.45 MPa;
- plasticity is maintained at temperatures from +5 to +30°C;
- the life activity of the solution is 50 minutes;
- consumption per 1 cm of layer - 8-9 kg/m2.
Reviews vary widely in quality. At some enterprises, control over compliance with the technological process has been established. As a result, there are no complaints. At the same time, where this point is missed, shortcomings are noted:
- does not mix well - lumps remain;
- slides off the walls, despite experiments with the amount of water;
- takes a long time to dry.
Can be applied manually or by machine.
"Ceresit". The German company, under the trademark “Ceresit”, produces in the Urals (Chelyabinsk) not only gypsum plaster, but also gypsum-polymer plaster for facade work.
The plaster mixture is impact-resistant, plastic, with an optimal consistency, which allows you to apply different patterns using rollers - imitation of some types of decorative plaster. The disadvantage is the price. Too high. But you have to pay for quality and brand.
"Deluxe" Plaster mortars are not inferior in quality and technical characteristics to German manufacturers, but at a lower price.
"Bolars." The product is used for leveling walls and ceilings. It has:
- color - white or gray;
- compressive strength – 2.45 MPa;
- consumption for a layer 1 cm thick - 10 kg/m2;
- solution lifetime - 60 minutes.
Mixes easily. Lay in a layer of 2 to 30 mm. If the solution thickens ahead of time, you need to re-stir without adding water. Among the disadvantages, consumers note the high price - the most expensive plaster among domestic manufacturers.
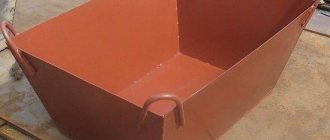
Materials and tools
To work with gypsum dry plasters you need to have:
- dry mixture;
- primer;
- reinforcing mesh made of fiberglass, basalt or plastic;
- metal profile for beacons;
- self-tapping screws;
- special clamps for attaching beacons: “Kremmer”, “Ushastik” or clips. What they are and how to use them can be found here.
Tools and equipment needed:
- stepladder or strong table;
- container for mixing the solution - a 10 or 12 liter bucket;
- electric drill or powerful screwdriver with different attachments (mixer, drill and cross-shaped bit);
- grinder or metal scissors;
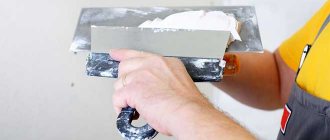
- trowel (trowel) for applying mortar to the wall;
- h-shaped rule - for leveling and redistributing the solution;
H-shape rule.
- trapezoidal rule for pruning;
- spatula, even better two: wide and narrow. The first is used for polishing the solution and instead of the falcon, the solution is collected, the second is for processing hard-to-reach places;
- primer cuvette;
- roller or mat - walls are primed;
- sponge grater for polishing the surface. You can take P400 sandpaper and wrap the block;
- laser level or building level;
- roulette;
- plumb line;
- fishing line or twine for hanging walls;
- simple pencil.
Calculation of plaster consumption
The consumption of gypsum plaster per 1 m2 is influenced by several factors:
- curvature of the walls - the greater the slope or height difference, the thicker the layer of plaster is needed;
- type of mixture - grinding depth and consistency affect technological consumption rates. Indicated on the packaging;
- manufacturer - the plasticity of the solution depends on the additives added. But this is a double-edged sword: convenient application equals increased consumption, for which you have to pay.
Master plasterers use several calculation methods to calculate the amount of dry mixture. More accurate results can be obtained after installing the beacons. To do this, design points are marked vertically and horizontally at equal distances from each other on the wall surface. Experts call them key. The more there are, the more accurately the required volume of the mixture is determined.
Then, at each point, the distance from the wall to the conditional plane, which is formed by the beacons, is measured. The resulting numbers are added and divided by the number of measurements. The result is an average layer thickness. Then everything is simpler. The area of the surface to be plastered is found (window and door openings are subtracted from the area of the wall), the consumption rate is taken and the amount of dry plaster in kg is calculated. The formula looks like:
V = S x T x N x k , where:
- V is the volume of dry gypsum mixture, kg;
- S—wall area for plastering, m2;
- T—thickness of the plaster layer, cm;
- N—consumption rate for a layer of plaster 1 cm thick, kg/m2;
- k is the coefficient of unaccounted losses. For professionals it is around 5%; home craftsmen need to target an overrun of around 10-15%.
The procedure ends with determining the number of bags. To do this, the result obtained when calculating using the formula is divided by the weight of the bag and rounded up.
How to plaster walls with gypsum plaster
Due to the characteristics of SGShS, the process of plastering surfaces with them differs from the application of cement and lime mortars. Work is carried out at air humidity no higher than 60%, base temperature not lower than +10°C, positive air temperature (above +5°C). The metal parts of the tools must be made of stainless steel. The order of plastering is ceilings, walls, slopes.
Stages of work:
- preparation of the foundation with installation of beacons;
- mixing the solution;
- applying a layer of plaster along the beacons and leveling,
- preparation for finishing (griding and glossing).
To dry the plaster layer (~ 5 days), provide ventilation, preventing drafts in the room.
The tools are periodically washed with water, and the container for preparing the mixture is washed immediately after it is emptied. The ingress of particles from the old solution sharply reduces the setting time of the new one.
preparation of gypsum plaster
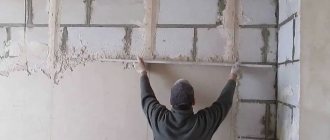
wall application
removal and sealing of beacons
alignment rule
grouting gypsum plaster
Preparing the base
Before plastering the walls with gypsum plaster, various layers (old peeling plaster coating, wallpaper), growths, oil contamination, and cleaned of dirt and dust are removed from the surface of the base. Remove old nails and other metal parts. If they cannot be removed, they are coated with anti-corrosion agents.
Rust will certainly appear on the surface over time. Working with gypsum plaster requires protection from corrosion of all metal parts under the coating.
The base is primed. Walls made of dense glossy concrete are covered with Betonokontakt. Substrates that absorb moisture (foam, expanded clay and aerated concrete, etc.), as well as rough and porous concrete - with deep penetration primers, for example, Grundirmittel. Apply the primer with a roller or brush, after which the base is dried for at least 3 hours. The wrong choice of primer mixture and non-compliance with its application technology often causes the coating to peel off.
If you plan to apply plaster without putty (with gloss), then the electrical work is done after priming and installing the beacons, but before applying the solution. Because on glossy surfaces it will not be possible to close the groove unnoticed. The socket boxes are placed in the same plane as the beacons. They are embedded in the same mixture that will be used to plaster the walls, checking their level with the rule until the plaster hardens. After the mixture has set, a wire is inserted into the socket boxes and twisted into a ring inside the socket boxes. After this, they are sealed with masking tape, the excess of which is cut off with a stationery knife. When applying gypsum plaster to the wall, the tape reliably protects the socket boxes from getting the solution inside. After the grouting is done, the tape is carefully cut out.
Read more about how to mix gypsum plaster.
How to thin gypsum plaster
To prepare the solution, prepare a clean plastic container. When working alone - no more than 65 liters, when working with two or three people - a larger capacity. Cold water from the water supply is poured into it in the proportion of 18 liters per 30 kg of SGHS (0.6 l/1 kg). First, 8-10 trowels of GS are poured into it, stirred for ~ 2 minutes. Then, gradually, stirring, add the rest of the mixture. Leave for about 3-7 minutes and mix with a mixer. Do not add dry mixture after aging. The entire prepared mass should be laid within 20-25 minutes.
If you do not have experience working with a quick-hardening mixture, reduce the volume of the prepared material until you get used to it.
Installation of beacons
To install beacons, walls are hung vertically and horizontally. To do this, stepping back from the top of the wall and each corner by ~30-40 centimeters, drive in dowels made of a material that is not susceptible to corrosion. Their caps should protrude above the base by the planned thickness of the plaster layer. The other 2 dowels are installed along a plumb line lowered from the caps 30-40 cm above the floor. Pull the cord diagonally and horizontally, determine the place where the layer thickness will be minimal. After this, the cords are moved, moving them on dowels, closer to the wall and set to the minimum layer thickness that is planned for future plaster. 2-3 dowels are installed along the vertical cords, the heads of which have the height of the cord above the wall, or the already driven ones are buried to the required amount. They are needed for installing/making beacons.
Throw the solution along the line of the cord (slightly higher than the plumb line goes). Then take a long building level, moisten it with water (so that it does not stick to the solution) and install it on the dowel heads (the plane of the level ruler should be perpendicular to the wall). In this case, the level is slightly pressed into the solution. Then, using a spatula (on both sides of the level), remove the solution protruding from under it. The level is removed downward and to the side. A rectangular plaster beacon remains on the wall. Such a beacon does not need to be removed after plastering. Saves time and effort on removing the beacon and sealing the groove.
The installation of metal beacons occurs in the same way. Only instead of plaster, a beacon is pressed into the wall onto plaster “cakes”.
The pitch (distance) of installing beacons is determined by the length of the rule. It is 20 -30 cm smaller. If the beacons are made from a galvanized profile, then a plumb line is drawn on the wall, onto which a solution is applied with slaps every 30 cm, into which the beacons are pressed, controlling the surface vertically and horizontally. Correct installation is checked using a plumb line. At internal and external corners, mesh corner profiles are installed (also on mortar slats) in the same plane with the beacons of adjacent walls.
Preparatory work
You need to start leveling the walls by preparing the surface for applying plaster. During the work, the following tasks are solved:
- the strength of the walls increases;
- the level of moisture absorption from the solution by wall materials is reduced;
- adhesion between the base and plaster improves.
The process consists of several independent stages:
- wall repair;
- applying primer;
- installation of beacons;
- mixing the solution.
Repair
At the first stage of preparatory work, the strength of the plastered surfaces is restored. For this:
- Electrical wiring, wall lights, sockets, switches, etc. are removed from the wall. The surface must be cleared of anything that interferes with further work;
- The furniture is moved to the center of the room. If necessary, covered with plastic film;
- old finishing is removed;
- if there is a large area of “bubbling” plaster, it will be completely knocked off;
- cracks, chips, cracks are repaired;
- Contaminants are removed: dust, dirt, greasy heels, traces of paint.
Unfortunately, the length of the article does not allow us to consider this stage of preparatory work in more detail. You can find out more details in the material “How to prepare walls for plaster?”
Primer
Concrete and brick walls actively take water away from any solutions, disturbing the water balance. There is no need to explain what this leads to. Therefore, surface waterproofing is necessary. This can be done using a primer, which not only prevents unauthorized removal of moisture, but also improves the adhesion of the solution to the base.
You need to prime it 2 times, and preferably aerated concrete three times. The next layer is applied to the completely dry previous one. On a flat surface, 1-6 hours are enough for complete drying, on a porous surface - 6-12 hours.
For all types of concrete, it is recommended to use “Betonokontakt”; for other surfaces, other types of primer: acrylic or styrene-acrylate deep penetration primers are cheaper.
Attention: concrete and brick are also primed twice until they are saturated with moisture. But here it is allowed to use a diluted primer for the first layer.
Important! In many works devoted to the problems of gypsum plaster, it is recommended to reinforce the walls after applying the primer. This cannot be done for two reasons:
- Only metal fittings are attached to the wall. But metal and gypsum mortar are incompatible - the reinforcement is corroded by the acidic environment of the plaster within 5-7 years. The option is no longer available;
- Fiberglass mesh is ideal. But it is not attached directly to the surface, but is pressed into the already applied solution and covered with a thin layer of gypsum. More detailed information about reinforcing mesh and fastening methods can be found here.
Reinforcement with fiberglass mesh.
Installation of beacons
Beacons are installed when the thickness of the plaster layer is more than 10 mm. The process is complex. Requires a detailed description of each action. Therefore, we refer everyone who is interested in technology to the relevant material, which can be viewed here.
Lighthouses on mortar piles.
Let us note only one nuance that needs to be taken into account. When reinforcing the solution, the beacons are installed only on self-tapping screws. If you do not plan to use reinforcement, you can use mortar piles.
Mixing the solution
When mixing the solution, you need to follow a few simple rules:
- the mixing container must be clean;
- the mixture is poured into the water, and not vice versa;
- mandatory adherence to the proportions recommended by the manufacturer (available on the packaging). Deviation disrupts ductility, drying time and, as a result, leads to shrinkage with cracking of the surface;
- the plaster removed according to the rule is dumped back into the solution and mixed;
- Before each subsequent batch, the dishes and tools are washed well. Otherwise, the next batch will set faster. Or there may be lumps.
The instructions on how to thin gypsum plaster are simple:
- 1 liter of water at room temperature (20-25oC) is poured into a clean bucket or basin;
- pour out the amount of dry mixture in accordance with the recommendations;
- Using a power tool with a mixing attachment, the solution is kneaded until a homogeneous consistency is obtained for 2-3 minutes. You can stir by hand, which is more difficult and takes longer;
- the solution is infused for 5-7 minutes. Some manufacturers indicate 2-3 minutes;
- mix again until a creamy consistency without lumps is obtained.
The readiness is checked with a trowel - the solution should not drain from the plastering tool. For putty - slowly slide off the trowel tilted at an angle of 45o.
Plaster plaster mortar can be prepared independently from pure gypsum. Several recipes from professionals will help with this.
Recipe No. 1. Take 4 parts of alabaster (gypsum) without additives and mix with sawdust (1 part) and ceramic glue (1 part). All this is thoroughly mixed and then diluted according to the technology described above.
The process takes place in two stages - the solution must mature for 3-4 minutes (it gains strength and plasticity), after which it is stirred again. You can slow down the setting process with PVA glue (1% by weight of the solution) or citric acid (tartaric acid is also allowed, but it is more difficult to find on sale). You need 0.05-0.15% dry citric acid powder by weight of gypsum
Recipe No. 2. Mix 1 part gypsum with 3 parts ground chalk. Add 5% of the resulting mass of wood glue and mix again. Dilution and introduction of retarders, as in the first recipe.
Recipe No. 3. Lime dough is being prepared. Gypsum is mixed in the same proportion, after which the compositions are mixed.
How to make decor from gypsum composition?
Decorative plaster made of gypsum composition can be performed in several ways:
- Gypsum in an amount of 10 kg is mixed with 30 kg of lime paste. To obtain a thick plastic mixture, dilute with water. If necessary, add color. Suitable for work in dry rooms. Can be used on walls, ceilings.
- Lime paste in an amount of 35 kg is mixed with liquid glass (5% of the mass of the solution is taken). Can be used in rooms with low humidity.
- 10 kg of cement, 20 kg of sand, 10 kg of lime and liquid glass at 5% by weight of the solution are mixed well. Dilute with water to the desired consistency. Used for exterior work and decorative finishing in rooms with high humidity.
How long will it take to dry?
To continue finishing work, you need to know not only how long it takes for gypsum plaster to dry, but also at what speed it gains strength. After all, the finishing touches: gluing and painting can begin after the plaster has completely hardened. This takes from 3 to 7 days, depending on the thickness of the layer. But it’s better not to risk it and start the next stage of repairs in a week. But the applied solution dries within 1-2 days.
The process of strengthening should take place under natural conditions at a temperature of +5-+25°C. No heat guns, heating devices operating nearby, or drafts.
Checking the moisture content of the plaster.
Before subsequent finishing, the room is ventilated and the plaster is primed. The surface ready for wallpaper or paint should be smooth and light. Humidity for wallpaper should not exceed 4-5%, for paint - 1%. Drying up to 10 days may be required to achieve this moisture content.
Recommendations for subsequent finishing
On gypsum plaster it is allowed to glue wallpaper, apply liquid trellises and cement-based decorative solutions, and paint. At the same time, you need to remember that for decorative finishing based on CPR you need to apply a primer twice. Paint can be of different types. But whitewashing with lime mortar is excluded. Even with a primer.
Instead of a conclusion. There are no bad gypsum based plasters. The finishing can be done independently with excellent quality, if you take into account the characteristics of the solution and the nuances of working with it.
Technology of working with gypsum plaster: how to apply it correctly
The main difficulty when using gypsum plaster is the rapid hardening of the material.
Therefore, immediately after preparing it, the solution must be applied to the walls and the surface leveled.
Any delay will lead to the fact that you will need to do the work again, and this will invariably increase the consumption of material. This is why most homeowners who decide to use gypsum plaster turn to professional builders.
Preparing plaster is not difficult. On the packaging you will find all the necessary information on preparing the solution and material consumption. It is best to stir the resulting mixture using a mixer attachment, which will allow you to get rid of air bubbles and lumps in the mixture.
Remember also that you should not prepare a large amount of solution at once. Try to make as much plaster as you can use in 5-10 minutes. After which it is necessary to prepare a new portion of the finishing material.
Finishing work must be carried out in a well-ventilated area at room temperature. Before you begin directly applying the solution to the surface of the walls, it must be cleaned of the old finish and covered with one layer of primer. This will increase the strength and durability of the finishing materials used.
You can apply prepared gypsum-based plaster using a trowel or trowel, and level the mixture using a rule.
It is also possible to use special sprayers that apply the composition in as thin a layer as possible and thereby reduce material consumption.
Starter plaster is applied to a well-primed surface. It must be leveled according to the leveled beacons.
Each subsequent layer can be applied only after the previous layer has completely dried.
This usually takes at least a day, depending on the room temperature. No processing of the starting plaster is required. Only the last leveling layer must be sanded first with coarse sandpaper, and finally with fine-grain sandpaper. Finishing is carried out using a similar technology.