A variety of ceiling finishing options allows the owner to choose simple or more complex methods. A simple way is to make a stretch ceiling. It is practical, reliable and durable. In addition, there is no need to carefully level the surface. But if you want to get an individual home, give the room elegance and chic, decorative ceiling plaster is suitable. The application process is labor-intensive, but the result is worth the effort and time. Let's look at the types of material and the features of application technology.
Pros and cons of decorative plaster for the ceiling
Decorative plaster feels better on the ceiling than on the walls, and lasts longer because it is not subject to mechanical damage. The advantages of finishing include the following:
- Can be applied to any surface.
- Does not reduce the height of the room.
- Has a long service life (10-20 years or longer).
- Provides additional heat and sound insulation.
- Creates a healthy indoor microclimate thanks to the content of natural ingredients.
- The relief finish hides defects and curvature of the ceiling.
- Does not serve as a haven for harmful microorganisms and parasites.
The coating is non-toxic and fire resistant. It can be painted, thereby changing the original design.
Relative disadvantages are: high labor intensity and cost, difficulties with cleaning the relief surface.
Different application methods
How to do:
- The plaster is dried before painting.
- If there is such a need, it must be treated with fine-grain sandpaper.
- Paint is applied in two layers. The base layer - a dark shade - is applied with a long-haired roller.
- After complete drying - a lighter color. Short-hair roller.
Painting methods:
- Blur method . The technique exists for drawing with concave elements. A more complex style than the next one. It takes much more time and effort to get the desired effect. A darker one is applied on top of the base layer. After drying for a short time, it is wiped with a wet cloth, as a result of which the paint will remain in the concave part of the design. If more paint is removed than necessary, you need to apply it again.
- Dry application method . Dry brush painting accentuates raised elements. It fully lives up to its name, since during operation the brush is really almost dry - there is a minimum of paint on it. The paint is applied in chaotic, even careless, light strokes, wiping off the excess on the protrusions. The presence of bold strokes and sharp transitions is normal when using this technique.
Everything will depend on the drawing.
In any case, the background paint is applied in two layers. After finishing the work, two layers of varnish are applied. Of course, a homemade composition is simple to make, and gypsum-based mixtures are inexpensive, but they will not 100% replace branded decorative putty for walls, which contains marble and granite chips. In no case should it be compared, for example, with Venetian plaster, which is applied only by masters, and even then not by everyone. But nevertheless, the option described above is available to anyone who wants to add variety to the interior of their home. It will give both wallpaper and painting a head start both in appearance and in the durability of the coating.
How to choose decorative plaster for the ceiling
Depending on the constituent substances, the market offers the following types of plaster mixtures to choose from:
- Mineral. The basis is lime. These are the cheapest and most environmentally friendly compounds with good vapor permeability, strength, and abrasion resistance. Disadvantages: fragility (lasts no more than 10 years), easily susceptible to mechanical damage (however, this is not relevant for ceilings), prone to cracks during shrinkage. Mineral mixtures are available only in white, and the surface must be painted after drying.
- Silicone. Made from polymers. These are the most expensive mixtures and the best. Advantages: durability (more than 20 years), high degree of vapor permeability, low ability to absorb moisture, good elasticity (after drying, cracks and other shrinkage deformations do not form), do not attract dust and dirt. Disadvantages: high cost.
- Silicate, made on the basis of potassium glass and polymer resins. Advantages: good adhesion, workability, moisture resistance, low level of electrostaticity. They are not afraid of dampness and temperature changes, have an antifungal effect, and are ideal for porous walls. Cons: poor color variety, high cost.
- Acrylic (polymer). Mineral and organic substances serve as fillers. Acrylic mixtures are easy to work with; after drying, they do not crack and are not afraid of impacts and scratches. They have a wide range of colors and affordable prices. Due to their high moisture resistance, they are ideal for rooms with high humidity. Disadvantages: they attract dust (but they can be washed), they do not transport steam well.
The properties of decorative finishing are determined by various fillers and additives in the form of bulk material (sawdust, vermiculite, slag, stone chips, coal, shells, pumice, etc.). Depending on the size of the fractions of these components, decorative plasters for interior decoration are:
- coarse-grained (3-5 mm);
- medium-grained (1-3 mm);
- fine-grained (0.5-1mm);
- fine-grained (no more than 0.5 mm).
Coarse-grained plasters easily hide defects and unevenness in the ceiling, but they are more difficult to paint. Fine-grained mixtures require a perfectly flat surface.
Decorative plasters are also distinguished by their appearance (texture).
Textured plaster
This type of plaster is also called relief plaster. With the help of various tools and devices, any patterns, designs and reliefs are created on it, imitating stone, wood, leather, fabrics and other finishing materials. Textured plasters do not contain fibers or large fractions of fillers. They are plastic, have a delicate consistency, are easy to lay, and do not require careful preparation of the ceiling.
Popular varieties: “Wet silk”, Sgraffito, “Marseille wax”.
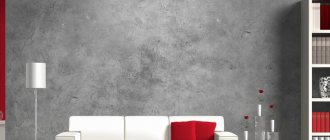
"Wet silk" on the ceiling
Structural plaster
This type of plaster is similar to textured plaster (they are even often confused, replacing one name with another). The difference is that reliefs and patterns on the latter are applied only with the help of tools, whereas on structural compositions the relief is created using special additives.
There are 2 types of structural plaster:
- Stone. Granules of crushed natural stone (granite, marble, quartz and even semi-precious stones) are added as a filler.
- Mineral. Lime, light Portland cement, sand, quartz and other minerals are used as fillers.
Composite compounds reliably adhere to any surfaces and create additional sound and heat insulation. The most popular varieties are “Bark Beetle”, “Lamb”, “Mosaic”.
Structural (as well as textured) relief plasters on the ceiling should be used with great caution and only in certain areas, because they reduce the reflective qualities of the surface.
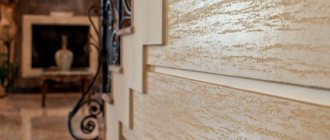
"Crackelure" on the ceiling
Venetian decorative plaster
This type of finishing was invented in ancient Rome, and centuries later Venetian craftsmen improved it. Without exaggeration, we can say that the “Venetian” is a real work of art. It looks magical, magical, will decorate any interior, applied to any surface. At the same time, this is the most labor-intensive technology, involving multi-layer application of the solution, repeated grouting with a spatula, ironing and waxing at the finish.
Venetian finishes imitate marble and balsa wood. It is characterized by a mirror shine and play of light, which is very important for the ceiling. The coating is durable, has good moisture resistance and vapor permeability.
The mixtures contain marble chips and dust, small fractions of quartz, granite and other stones. Synthetic polymers, often acrylic, are used as binders.
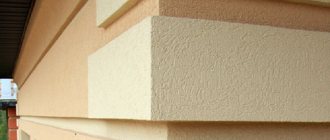
"Venetian" on the ceiling
Flock plaster
The fillers of flock plaster are not granules, but small plates - flocks, 1-15 mm in size. They come in different colors, shapes, and can glow. When mixed, the flakes create a unique texture and color of the surface.
Flock finishing is a godsend for the ceiling in a nursery, bedroom, living room, because with its help it is easy to create the illusion of the night sky or spreading tree crowns.
There are 2 types of flock plaster:
- All components are provided separately. The surface of the ceiling is covered with an acrylic adhesive base, onto which a layer of plates is immediately applied. Finishing – coating with transparent, shiny or matte varnish.
- Ready-made composite compositions are used.
This type of coating has such useful qualities as strength, high waterproofness, moisture resistance, long service life, and a varied color palette.
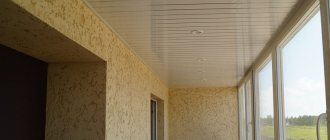
Flock decorative plaster
How to make a stencil with your own hands
At home, they are most often used:
- cardboard;
- Whatman paper, landscape paper or other thick paper;
- plastic or plastic folder;
- self-adhesive film.
First you need to transfer the image to the material. It is more convenient to print the drawing on plain paper and cut it out, then press it firmly to the surface and trace it. If there is no printer, apply it to the monitor and draw an outline.
Peculiarities! Only a permanent marker writes on plastic. For paper and cardboard, a regular felt-tip pen, soft pencil or pen are also suitable.
Then carefully cut out the design. There should be no burrs or jagged edges, otherwise the contour will be uneven.
Often a sharp knife is used for this purpose. It is better to work on a substrate - a special cutting mat or board. This method works well for images with a lot of sharp corners and straight lines.
For rounded and smooth designs on a plastic base, you can use a soldering iron with a thin tip. It is heated to approximately 260° and carried along the contour.
Regular scissors will also work. But the tool must be sharp to cut the material and not tear it.
Advice! If you only need the outline of the image, jumpers are made. In the finished drawing, traces from them are painted over with the remaining paint.
Disposable ceiling stencils are the easiest to make. Simply print the image on sticker paper, which is sold in many office supply stores. Then cut out the excess, remove the protective film and stick on the template.
Technology of finishing the ceiling with decorative plaster
Decorative plastering is carried out in several stages. Each new layer is applied after the previous one has dried. The technique of applying decorative plaster is similar to conventional plastering of walls and ceilings. Technologies for different types of finishing have their own nuances, but some work is performed in the same way.
Materials and tools
To finish the ceiling with decorative plaster, you need a minimum of tools, the same as for regular plastering: scraper, spatulas, rectangular trowel, graters, rollers, sander, construction mixer (optional). Fine and fine-grained mixtures can be applied mechanically.
To create texture, rollers, stencils, stamps, a shaped spatula, a trowel, sponges and even a broom or broom are used.
If color pigment is not added to the plaster mixture, the finished surface will have to be painted. To do this, you will need painting supplies: brushes, roller or paint sprayer. Materials other than plaster mixtures include primer, putty, colored pigments, wax, varnish or paint.
A trowel and spatula are used for application.
Preparation of the composition
Most types of decorative plaster are sold ready-made, so all that remains is to mix the selected composition. If the mixture contains large granules of filler, then it is better to do it manually. The composition with fine fractions can be mixed with a power tool at low speeds. After opening the container, the remaining solution can be stored by tightly closing the container, but its properties may deteriorate.
To prepare a mixture of dry powder, water is added to it and mixed, and then left to swell. The consistency of the solution should be paste-like. To increase adhesion, you can add PVA glue to the water in a ratio of 5:1.
The difficulty in finishing the ceiling lies in the uncomfortable position of the master. Your arms, back, and neck get tired, so you have to take breaks often. Because of this and because the plaster mixture dries quickly, a small amount of solution should be prepared at a time.
Ceiling preparation
The surface must be dry and clean. It is prepared as carefully as before gluing wallpaper to the ceiling: it is cleaned of old coating, paint, dirt, grease stains, and dust.
The previously plastered base should be tapped to identify places where the solution does not adhere well to the base.
Use safety glasses and a respirator when working
Defects and irregularities are repaired and leveled with ordinary putty. After this, the surface is primed twice, preferably with a deep-penetrating compound. The soil is chosen depending on the type of surface. For damp rooms, compositions with an antifungal effect are used.
The seams on the plasterboard ceiling are unstitched, cleaned of dust, covered with mortar and reinforced with sickle tape, and the screw heads are deepened. The soil is chosen so that it does not wet the gypsum core.
The cleaned ceiling is puttied and primed
Applying decorative plaster to the ceiling
Decorative plaster is worked as with ordinary putty. Using a spatula, apply a small amount of solution to the trowel, apply the layer to the ceiling with careful, smooth movements and rub thoroughly. In this case, pay attention to the thickness of the layer - it should be the same over the entire surface. Some types of plaster (for example, roller plaster) are applied once, and “Venetian” contains 3-8 thin layers, which are applied diagonally in a special way.
It is important to apply the plaster in an even layer around the entire perimeter
If it is textured plaster, immediately before the solution hardens, using a trowel, roller or stencils, apply the previously selected relief images. Do this carefully so as not to damage the inner layer. After applying the structural plaster, the ceiling surface is smoothed in a circular motion so that the granules are distributed evenly.
For final decoration, the surface is painted, varnished or waxed.
It is more convenient to paint the ceiling with a roller with a long handle.
Technology for treating walls with “decorative” putty
The first step is to create a base layer. To make the surface individual, you can use spatulas with embossed edges and special sponge rollers. Original patterns can be created in the following ways:
- Rough relief can be made with a simple spatula by quickly pressing the tool into the coating to a shallow depth.
- The mixture can be spread with a spatula on the sides, applying strokes and distributing them in different directions.
- A grainy surface can be created using a regular sponge.
- For a soft “silhouette”, the putty can be sanded with sandpaper.
When the decoration is finished, you can start painting and then varnishing. The last stage is not necessary, but it will extend the “life” of the decorative putty for many years.
Expert advice
When choosing a type of ceiling finish, you should consider the following points:
- Some mixtures can be laid on any base, others cannot.
- For rooms with high humidity, it is better to take moisture-resistant compounds.
- Plaster mixtures that help establish a comfortable microclimate in the room are suitable for residential premises.
- A water-based solution is not suitable for wood and plasterboard ceilings.
- Relief finishing masks small defects in the ceiling well, so it is worth choosing for problem surfaces.
Do-it-yourself decorative plaster for the ceiling is becoming in demand. To do this, you need to take a gypsum-based putty mixture. If desired, PVA glue and coloring pigment are added to it. After applying the composition, relief patterns are made with any convenient device (tool).
Required Tools
The list of tools used to apply decorative coating depends on the chosen technology. The main ones include:
- spatulas of various widths;
- trowels, the working platform of which is made of different materials;
- rollers;
- brushes;
- graters for leveling and smoothing;
- special devices for leveling or giving the desired relief;
- construction mixer, which allows you to obtain a homogeneous solution;
- roulette;
- masking tape;
- sandpaper.
Attention! Considering that the ceiling will be decorated, it is worth taking care of the presence of a scaffold or stepladder to gain free access to the surface.
Features of preparation
Plaster, in its main purpose, serves to level the walls, but it is impossible to perform finishing and roughing at the same time. Therefore, you will need to prepare the base:
- Plastering, smoothing out visible defects.
- Sanding.
- Padding.
When doing DIY work, textured and Venetian plaster from putty is applied in several layers.
Important! It is worth remembering that putty dries quickly, so applying texture and decor is done in squares of 1–1.5 square meters. m.