How does installing a Grilyato ceiling differ from other suspension systems?
About how interesting and convenient a lattice ceiling is, you can find out in detail and easily in the advertising of decorative manufacturers, or better yet, directly from the owners of houses or offices in which ceiling cladding of this type has been installed and used for a long time.
This will help, before installing the grilyato ceiling, to understand its structure, and at the same time do some minor preparatory work:
- Seal with plasterboard or paint the ceiling. Suspended ceiling cladding Grilyato is, in fact, a lattice made of thin sheet metal, which will not hide defects, but will only slightly change its design;
- Calculate the number of profiles and draw up a diagram for installing the Grilyato ceiling. It is important to do this in advance, since the metal profile is made of metal with a thickness of only 0.2 mm, and any attempts to disassemble the structure and correct the installation will always leave dents and scratches.
The Grilyato system differs from the same Armstrong suspended frame in a huge number of small operations. If you look at the finished lattice ceiling and imagine that each intersection point of the profile is a joint that will need to be assembled by hand, then it becomes clear that such a structure cannot be assembled in one day without preparation and assistants. In Armstrong, you just need to correctly install the supporting frame, and the slabs can be laid in literally five minutes.
Advice! Before assembling the Grilyato ceiling, you will need to fold or mount ready-made lattice sections of 60x60 cm. Each such panel requires 12 pieces of profile, the work is not difficult, but it takes a huge amount of time.
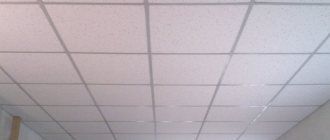
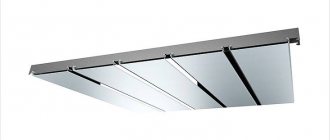
Specifications
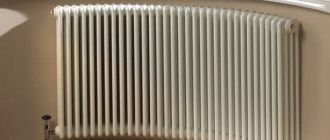
For the production of Grilyato panels, aluminum tape is used, which has a thickness of 0.5 mm. Hot drying technology is used for the production of slabs. The color of the grilles can be different: silver, gold, beige, black and white.
The panels are matte and chrome plated. The grille is made to order in the desired color.
One square meter of cellular coating weighs 2-6 kg. The mass depends on the size of the cells. The smaller they are, the more weight. The total weight is also affected by the thickness of the profile used.
[custom_ads_shortcode3]
Material and tools for ceiling installation
The Grilyato design is assembled from four main U-shaped profiles:
- Main support rail or strip 240 mm long. Along the entire length of the profile, in increments of 10 cm, there are holes and mounting grooves into which the crossbars are placed; a connecting lock and stop are stamped at the ends;
- The plank is a crossbar 120 cm long. It also has perforations and grooves; petal locks are cut out at the ends, ensuring engagement with the main supporting profile;
- Small profiles of two types - “male” and “female”, 60 cm long, they are used for mounting and assembling Grilyato lattice ceiling panels;
- A supporting or peripheral corner, it is stuffed around the perimeter of the room and used to level the plane of the Grilyato ceiling.
The auxiliary parts will require joining strips and adjustable wire hangers. Sufficient detail on how to prepare and adjust the fasteners during the installation of the Grilyato suspended ceiling is given in the video
The tools you will need are a hammer drill with a carbide drill, a screwdriver, a laser level and metal scissors.
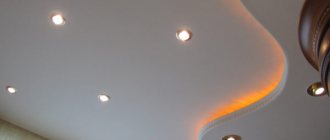
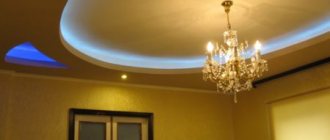
LED lighting of structures - options
Properly selected lamps will add completeness to the Grilyato ceiling structure. Usually raster ones with dimensions of 60x60 cm, one- and two-lamp directional light are used. Ideas with non-standard sized lamps are possible, but only if trimming the ceiling is considered an acceptable option.
The following types of lamps are used for Grilyato ceilings:
- Raster. Their size is 60x60 cm;
- Single-lamp directional light fixtures;
- Two-lamp directional light fixtures.
You can also use non-standard sizes of lighting fixtures, but this will require trimming the ceiling.
Grilyato ceiling calculation
Drawing up the cost estimate begins with determining the number of panels. One lattice 60x60 cm occupies 0.039 m2, taking into account the supporting profiles. To calculate the required number of 60x60 cm gratings, you need to divide the ceiling area by 0.039. For example, the ceiling surface occupies 16 m2, in this case, to install the Grilyato ceiling, 411 panels or 2466 short strips will be required.
To calculate the number of load-bearing and transverse strips required for installing a Grilyato suspended ceiling, it is best to draw a diagram to scale and recalculate the data from the sketch. The number of main strips can also be calculated as follows:
- The length of the room in meters is divided by 2.4, rounded to the nearest whole number;
- The width of the room is divided by 0.6 in a similar way;
- Multiply the resulting values and round to the nearest whole number.
The length of a room, as a rule, is never a multiple of 2.4. Therefore, to form one plank of the supporting profile of the Grilyato ceiling, a certain number of whole slats and a small piece of the standard profile are required.
Advice! The connecting lock of the supporting profile is installed only on one side, so only one “add-on” can be made from a whole profile, which means that when calculating the quantity it must be taken into account as a full-fledged whole profile.
Features of calculating the load-bearing strip when installing the Grilyato ceiling are shown in the video
Description of species
There are several types of Grilyato suspended ceilings.
The most common design is “Grigliato Standard”, consisting of a large number of identical squares. The cell sizes are selected depending on the size of the room. On high ceilings, systems with cells of 10*10 cm and a profile height of 3 cm are installed. If the ceiling height in the room does not exceed 5 meters, then you can take a design with smaller cells and a profile height of 4-5 cm.
The Grilyato pyramidal cellular suspended ceiling consists of V-shaped profiles, resulting in a system consisting of a large number of pyramids. When installing such a hanging system, an openwork surface is obtained, creating a three-dimensional effect. The most common are pyramidal systems in white, gold, black and blue.
The multi-level suspended ceiling of Grilyato is divided into several large squares. This design is formed by using profiles of different heights. In this case, the guides are installed with a height of 5 cm, and the profile is taken with a height of 3 cm. A similar effect is achieved when using multi-colored profiles for ceilings. The color scheme of multi-level structures coincides with the pyramidal ceilings.
Installation of the Grilyato suspended ceiling with non-standard cells is carried out according to a scheme similar to the standard type. The difference is as follows: the placement of the “father” and “mother” profiles follows a certain principle, as a result of which not squares are created, but other rectangular cells. Thanks to a variety of solutions, it becomes possible to emphasize the individuality of the overall style of the room.
The grid ceiling “Griglyato CL 15” consists of grids and a T-15 suspension system. The use of U-profiles allows you to add volume to the entire structure. To install the gratings in the T-15 system, you do not need to make much effort. Corners are installed along the perimeter of the ceiling, which completes the appearance of the structure. Finished ceilings of this type are a homogeneous and continuous structure, therefore they are most often installed in exhibition halls and hotel lobbies.
“Cellio Armstrong Grilyato” is a cassette ceiling with profiles 15 cm wide. Installation of such a structure is carried out quickly and without any problems, and dismantling work looks similar. The main plates of the structure are fixed to the suspension system, so it is possible to dismantle one cassette without causing damage to the entire structure. Ceilings of this type become a decoration of the room, giving it originality.
Standard method of installing a Grilyato ceiling
The first step is to secure the starting corner around the perimeter of the walls of the room. The corner profile itself is practically no different from a similar product used in other suspended structures. If someone has had the opportunity to install cassette or panel systems, for example, Armstrong, then this stage will take at most a couple of hours of time.
Installation is carried out in two steps:
- A marking line is applied to the wall using a bubble level or a laser beam;
- The corner strips are sewn end-to-end using ordinary dowels and self-tapping screws; the line should coincide with the bottom edge of the profile.
The starting profile line is drawn at a distance from the rough ceiling surface of at least 15 cm, more is possible, up to a meter, less is not possible, since when installing Grilyato ceiling parts, a small margin of suspension length is required in order to align the plane strictly along the horizon line.
Area of use
Such designs are recommended for use in rooms where the ceiling should be as practical as possible. This category includes trade and public catering enterprises, train stations and airports, industrial premises and residential buildings. The durable and reliable Grilyato ceiling can be used to decorate all of the listed objects.
For residential premises, this option can be called the best solution due to the possibility of installing a ceiling ventilation system. In addition, Grilyato ceilings are suitable for people who prefer simple and unobtrusive interior design.
Preparation and installation of hangers
Even experienced craftsmen sometimes do not pay due attention to the preparation of fasteners. As a result, a situation often occurs when the engagement point on the support profile rail coincides with the installation line of the transverse profile, as in the photo.
As a result, you have to think about how to assemble the grilyato ceiling so that the crossbar fits into place and the suspension does not “break” the thin metal.
Advice! If a situation similar to the one in the photo occurs, it is best to move the suspension hook to the next hole on the bar. Any attempts to bend the wire or insert the crossbar lock into the blocked groove of the supporting profile end with dented metal of the Grilyato ceiling frame.
The adjustable quick hanger itself is a flexible steel plate with two holes. To assemble the fastening device, simply bend the plate into an arc with your fingers and thread two wire knitting needles. There is no need to cut off excess metal; this will need to be done at the stage of assembling the ceiling frame.
The second stage is marking for installation of fasteners on the rough ceiling. If the ceiling plane is covered with plasterboard, then the quick-hanging loop can be secured with a regular metal screw. In the event that a concrete slab remains, you will have to use a hammer drill to drill holes for installation using dowels.
Markings for the Grilyato ceiling are applied to the rough surface in the form of longitudinal lines indicating the future installation of the supporting profile. We place the risk under the first hanger at a distance of 60-70 cm from the wall; we place the remaining points under the dowels for engaging the quick hangers with the same step of 70-75 cm. After completing the installation of the hangers, they need to be adjusted and leveled so that the catching hooks are approximately in the same plane .
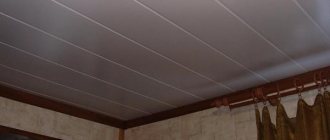
Film tensioner
The most common type of suspended ceilings is film, with harpoon fastening.
Film ceiling in the author’s bedroom
The ceiling itself is a thin film of plasticized polyvinyl chloride, made according to the shape of the room (but having a 20% smaller area) and equipped with a harpoon - a vinyl profile welded around the perimeter.
During installation, the film, together with the air in the upper part of the room, is heated by a heat gun (usually gas), after which the harpoon is inserted into the groove of a baguette fixed to the walls or surface of the ceiling (aluminum or plastic mounting profile). When cooled, the film stretches and forms a perfectly flat surface.
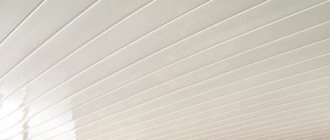
Installation of tension film with harpoon fastening
Bead fastening device
Advantages
- Cheapness. The price of a square meter of film with installation has dropped to 300 rubles and continues to fall;
- Minimum distance from the rough ceiling. When installing a baguette on a flat floor surface, the room will become lower by only 15 mm;
The stretch film retained water when the bathroom was flooded
- Excellent decorative qualities. Glossy films make a room appear larger than its real size thanks to the ghostly reflection of its interior;
- Easy care. The film is washed off from contamination with soapy water with minimal effort and time.
Caring for PVC film: fast, simple, cheap
Flaws
- Low heat resistance. The film may sag or melt over a gas stove or near a heating riser;
- Low strength in relation to mechanical stress. Manufacturers of competing solutions often cite the rupture of a film ceiling caused by a champagne cork as a negative example;
Boris confirms: where it is thin, it breaks
Impermeability to air, limiting ceiling ventilation in wet rooms. The consequence may be damage to the ceiling by fungus;
The lampshade is attached to a mounting platform pre-fixed on the ceiling
- The width of a seamless ceiling is usually limited to 2.2 - 3 meters (read - the width of the film used for its production). The German ECOfolie film, which is relatively rare in the vastness of our great and vast expanse, has a larger width (up to 5 meters). With a significant ceiling size, its appearance is spoiled by the welded seam - not conspicuous, but still noticeable;
- At least several days pass between ordering the ceiling and its installation: the canvas must be welded with a harpoon in industrial conditions;
- The stretched film has a rather strong specific odor, which disappears within 2-3 weeks.
Meaning
- second light ceiling installed when renovating a room ◆ There is no example of use (see recommendations).
Installation of the supporting ceiling profile Grilyato
After the hanging devices have been fixed to the concrete or plasterboard slab, you can begin installing the main supporting profile of Grilyato.
This is a U-shaped strip, 50 mm high and 2400 mm long. There is a lock on one of the ends, photo.
The second end of the profile is made with a longitudinal groove and a blind supporting surface so that it is possible to rest the end on the starting corner during installation or splice the planks together if necessary. Along the entire length of the slats, transverse grooves are made for installing 120 cm slats in them.
Installation begins with placing the first rail with its blind end on the starting corner and hooking it onto the hooks of the suspensions. As a rule, two or three carrier rails are installed simultaneously. To hang the next 240 cm sections, new planks are joined using short adapters with elements already installed on the hooks.
The last sections are of non-standard length, so before installation the profile must be cut off from the lock side. Next, the adapter is placed inside the ends to be connected and snapped onto the longitudinal slot-like holes of the profiles.
All high-quality Grilyato ceilings have adapters hidden inside the strips, so they are not visible after installation, and the design itself creates the impression of a single solid frame.
The assembled line of the supporting profile, suspended on hooks, turns out to be very flexible and weak, it can easily be damaged by careless movement. Experienced craftsmen prefer to install 120 cm crossbars as the length increases. This way, the Grilyato ceiling has a better chance of remaining undamaged.
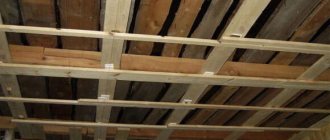
A little history
Galliato ceiling systems are an invention of Italian designers that have become widespread in our country. The prototype of Grilyato’s ceiling was such a trivial household item as a gazebo with a mesh ceiling area. Due to their lattice structure, such gazebos helped residents of the southern regions to grow grapes, performing several important functions at once. The mesh ceiling acted as a trellis, onto which the vines clung with tendrils, and provided access to a sufficient amount of sun, while simultaneously protecting the climbing plants from the scorching rays of the sun.
In the 20th century, it became fashionable for Italians to decorate terraces with lattice elements, and later this idea was embodied in the creation of the Grilyato suspended ceiling, which owes its name to the Italian word grill - “grill”. Grilliato technology was borrowed by designers concerned with finding a non-standard solution for ceiling design.
In 1970, wood was used to make such structures, and the use of aluminum for this purpose began to be practiced only later. The first samples of Grilyato suspension systems had considerable weight, and their installation was quite expensive.
We carry out installation of transverse elements
Installation of the side crossbars can be called the simplest operation of the entire technological process of installing the Grilyato ceiling. The strip is a short, only 1200 mm, section of a U-shaped profile with locks stamped on the ends. Along the entire length of the plank, 10 grooves are cut - cutouts with petal latches. When installing Grilyato crossbars, you do not need to bend or adjust anything; it is enough to lay the planks on the assembled and suspended support rails.
After assembly, the frame of the Grilyato ceiling gains a certain rigidity, so at this stage of installation the final adjustment of the lengths of the suspensions is performed. All that remains is to assemble and lay the lattice panels.
Price policy
The cost of the structure is determined by several factors:
- Grilyato ceiling dimensions.
- Cell sizes.
- Color solution.
- Quality of material.
- Availability of anti-corrosion protection.
- Ceiling manufacturer.
- Complexity of design.
- Ceiling view.
Installation work costs vary, it also depends on the complexity of the design. For example, installing a standard Grilyato suspended ceiling will cost the consumer much less than similar work with a multi-level ceiling. A ceiling with more complex cells and profiles also costs more.
Assembly and installation of decorative grilles
For the manufacture of decorative lattice panels, two types of short profiles of 60 cm are used. The first type of strips has five cutouts or grooves located along the lower edge. On the second type of slats, the locks are cut along the top edge. This allows the grille to be assembled without mechanical fasteners.
Assembling the grilles is long and boring, so some craftsmen use the following panel installation technique:
- Two identical profiles are laid out parallel to each other on the table in a vertical position;
- A second type of rail is inserted into the outer grooves, resulting in a U-shaped structure;
- The remaining strips are simply put on the base ones and stretched, first to the outermost grooves, then install the rest, approaching the first strip.
The result is the design shown in the photo.
After assembling all the grilles, you can proceed to installing the panels on the ready-made Grilyato ceiling frame. The procedure for laying decorative elements is quite simple; you need to insert the grille into the window between the crossbar and the supporting profile and place the ends of the panel with locks into the grooves of the frame.
It is clear that installing the Grilyato ceiling decor requires enormous patience, since, despite the high precision of manufacturing the frame elements, you still have to make a small effort, so you need to work with the utmost care.
The installation of the last rows of gratings, which are adjacent to the wall and with which the assembly of the Grilyato ceiling is completed, is carried out with a slight modification. The panel may end up shorter than the standard size, so you have to cut it with tin snips. The metal is cut perfectly, you just need to run the scissors separately along each sidewall, and simply break the central shelf.
If the last Grilyato panels do not need to be trimmed, then before installation you only need to precisely cut off the locks at the ends with scissors, hook the remaining grooves onto the petals of the frame and lay the grille on the slats. The cut edge will rest on the starting corner of the ceiling.
After installation is completed, the frame of the Grilyato ceiling acquires sufficiently high rigidity and strength, so an accidental touch or slight push will not cause any damage to the structure.
Main advantages
Why have Grilyato lattice structures become so popular, what are their main advantages? Developers, installers, and designers love them. And most importantly, those who work or live in rooms with Grilyato ceilings also like these ceiling panels.
- Easy installation. No need for a large number of fasteners. For installation you will need a standard set of tools - stepladder, hammer, dowel-nails. Ceiling structures for large rooms can be installed during the day.
- The ability to visually change the space. Such panels make large rooms more comfortable and connect them into a single whole. In small rooms and narrow corridors, an emphasis on geometric shapes can visually expand the space. The same color of the grilles and base expands the space and raises the ceiling. A contrasting, dark coating under a light profile visually makes the ceiling lower.
- Masking of imperfect surfaces and communications. For installation, you do not need to make the surface perfectly flat. Small differences that cannot be leveled out will be completely invisible behind Grilyato bars. Even large protrusions and pipes are easily hidden behind the frequent geometric pattern.
- Access to communications. If necessary, you can quickly disassemble part of the structures. This is necessary to repair closed communications. Individual parts can be easily replaced or repaired.
- Safety and environmental friendliness . Aluminum has a high degree of fire safety. Light metal can be used where the load on supporting structures should not be large. Aluminum ceilings do not emit harmful substances, do not collect dust, and leave enough space for air circulation. Raster designs absorb noise well and do not leave an echo effect in large rooms. This is especially true for offices with open space, for halls in public spaces - at airports, train stations, where there is constant noise.
- Design possibilities. A set of colors from the RAL palette makes it possible to produce aluminum panels of almost any shade. You can visually make the room lower to highlight a separate area or add coziness; on the contrary, you can choose light profiles and a light background in order to bring a feeling of airiness. Original combinations with lamps of different shapes allow you to create an unusual design.