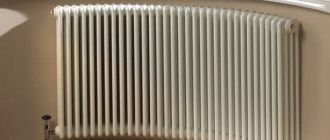
Is it a good idea to cover the battery with plasterboard? Many people don’t even understand why to do this. Let's discuss this in detail. Old cast iron radiators and steel gas pipes, which are found in so many houses, can hardly be called works of art. Their presence can spoil any interior in the room. If you create a special box from plasterboard, you can hide the presence of heating pipes and unpleasant parts.
The main advantage of this process is that anyone can do it. You don't need to have special knowledge or be a repair professional. A small layer of drywall will completely hide the radiators. It's also very cheap. In this guide, we will look at not only the process of installing drywall, but also many interesting nuances on this topic.
Is it worth hiding batteries behind a plasterboard structure?
In his home, the owner himself decides how to hide the radiators. Including using a box. That is, it CAN be done, and there are no problems from the legislative side either.
Only the owner of the apartment will feel the disadvantages of installing the box, and here’s why:
- convection of air flows will decrease, due to which heat transfer to the room will suffer - the room will warm up a little worse;
- If heating repairs are needed, the box will need to be dismantled - extra work and expense.
In any case, no one completely covers the battery with drywall. Only the side parts are masked. A box is constructed from the sheets, which forms a niche for the heating device. Behind this structure there is a pipe connection.
It is worth remembering that when installing the box it is important to follow two basic rules:
- Leave a small distance between the side parts of the radiator and the walls of the box. The drywall should not come into close contact with the battery. These gaps will maintain optimal air convection.
- Make the niche dimensions convenient to easily access the control units.
Don't forget to also check the radiators for leaks before masking them with a plasterboard box.
Box design
Designing a camouflage structure always begins with choosing its device. So, there are two main types of structures - a plasterboard box and a plasterboard decorative wall, behind which the radiator will be hidden. Each design has its own characteristics and areas of application.
Arranging a plasterboard box makes sense if radiators are installed on the walls. Such a box can be installed very quickly, and it has many other advantages - for example, the free space of the room from such structures is almost not reduced. The plasterboard box for the battery allows you to close only the battery itself.
The dimensions of the box must be selected depending on the size of the battery itself, which will be masked. When choosing, you need to take into account that the edges of the structure should be located at a distance of about 15 cm from each side of the battery. The box can be installed on the floor or attached to the wall, which also needs to be taken into account in advance.
The floating box, fixed on the wall, is set up as follows:
- A certain distance is measured from the bottom edge of the battery, at which a straight line is drawn, indicating the bottom edge of the box;
- Using a construction corner, the sides are also drawn (a distance of 15 cm between the battery and the box must be observed);
- All perpendicular and parallel lines are connected, after which they must be checked with a level.
A box installed on the floor must be marked from the top side and all other lines must be drawn down. When designing and marking, it is necessary to take into account that each side of the structure must be at least 15 cm away from the radiator. Floor boxes are optimal for hiding radiators that are recessed in wall niches.
If you really want to, at the design stage you can think through more comprehensive options for changing the design of your home. For example, a rather interesting and popular option is a solution in which not only radiators are masked, but also other elements of the heating system. To implement this scheme, false walls made of plasterboard are used. Of course, the cost of work in this case increases significantly, but if the goal is to create a verified style, then these costs will be justified.
Pros and cons of battery cover material
The plasterboard niche for radiators looks attractive. The material is very easy to work with, so you can make almost any structure: simple rectangular, interesting shaped, etc. Plus, you mask the pipe connections. Only the front part of the battery will be visible, although it can be covered with a screen.
As for the downsides, there are some too:
- if the heating radiators leak, the drywall will be hopelessly damaged, even if it is moisture resistant;
- behind the box it will not be possible to notice the first signs of a leak, which makes it more difficult to prevent an emergency;
- during scheduled heating repairs, the box will need to be removed;
- After installing the structure, the temperature in the room will drop by several degrees.
Whether it is worth making such sacrifices is up to the owner to decide. Installation of a plasterboard box is quite possible, and there are no restrictions for this.
Useful tips
In order not to deteriorate the quality of heating and to disguise the battery as beautifully as possible, it would be a good idea to listen to a few useful tips:
- It is better to install a decorative screen made of plastic or metal. The material has good thermal conductivity. The wooden lattice looks beautiful. However, such a screen is bulky, heavy, and has low thermal conductivity.
- When the heating is running, warm air from the battery, according to the laws of physics, is directed upward, where it encounters an obstacle in the form of a window sill or the upper edge of the box. For better convection under the window, it is optimal to make a false wall where the lower and side ends of the niche will be closed. The upper end is not closed so that warm air is directed to the window sill, and a decorative ventilation grille is cut into it. The front part of the niche is similarly covered with a screen.
- To improve heat transfer, the surface of the niche is covered with foil material.
The grille on the windowsill will improve the convection of air masses.
It is optimal to develop the simplest casing design so that the battery can be easily reached if repairs are necessary.
The video shows an example of battery casing:
We make markings and drawings
- If you plan to build a floating structure, do the following:
- Measure the required distance from the bottom of the radiator and use a level to draw a straight line. This will be the bottom part of the future box.
- Draw the side lines using a construction angle. Do not forget to leave a distance between the edge of the box and the radiator (15 centimeters is enough).
- Connect the upper edges of the perpendicular lines by level.
- Review the direct lines.
For a structure standing on the floor, make the markings from the top of the heating radiator.
The last stage is installation of drywall
The main processes are completed, the easiest part remains. You need to start directly installing drywall on the old battery.
- We cut out several plasterboard sheets and attach them to the previously created profile.
- Then we mark on each marking sheet.
- Using a utility knife, cut out the necessary elements of the box.
- We lean the parts against the main structure and secure them with screws.
Remember that the material itself is quite fragile. To ensure its integrity, use a sharp knife. For one meter of drywall you need 4 self-tapping screws. Do not forget about the heat that the room will receive through a special hole. The maximum diameter of each is no more than five centimeters. It is possible to simply install a ventilation grill, this is a more beautiful option.
Assembling the frame
Take profiles measuring 60x28 and 27x28. First, secure the elements that will not be on the wall:
- Place the profile against the line on the wall.
- Secure the profiles with dowels in increments of 20 cm.
- Check everything with a level.
Then install the second level of the frame. Divide the profile into sections of the required length. Then cut the edges 5 cm along the fold of the profile.
It turns out that the edges of the profile product are cut off, and the middle cut part is bent to the side. At the exit, a structure with an angle of 90° is formed.
Next, secure the vertical products to the front side of the structure. This way you will have a finished frame for drywall.
Finishing the box
First you need to carry out rough finishing, which includes the following operations:
- All gaps between different parts of the material and the heads of the fasteners are puttied;
- When the putty has dried on the gaps, you need to putty the entire structure twice;
- After the putty has completely hardened, the box is sanded.
The rough finishing is now complete, and you can begin finishing. Any materials can be used for cladding that will not interfere with the functionality of the structure and will suit the specific chosen visual style.
You might be interested
Radiators in the floor heating in the house
Connecting heating batteries with bottom supply
The heating battery is leaking - what to do?
The tap on the radiator is leaking
Heating area of an aluminum radiator (heating radiator power per 1 m2)
How to properly flush a heating radiator
Bimetallic batteries for a private home
How to connect aluminum radiators
Bimetallic radiator design
How to keep warm?
There are several simple methods that can solve this problem. The first concerns a special heat reflector screen. It is mounted behind the battery itself and has a foil color, glitters and shimmers.
Heat reflective screen
As it heats up, it reflects heat into the room, a negligible percentage. Sintepon, which is covered with aluminum inserts on both sides, is a version of a homemade reflector. You will receive enough warmth even in the harshest winters. Another option is aluminum foam, it does not bend at all.
Aluminum foam
Also remember that screens should not have very small holes, the holes should be medium sized. This guarantees a normal amount of heat in the room. But don’t overdo it; you shouldn’t make them more than five centimeters in diameter. Holes must be made on the front side and on top of the entire structure. This ensures heat distribution throughout the room.
Additional decorating tips
The battery box will need to be covered with putty before finishing, but a primer should be applied before starting work. This will ensure better adhesion of the building mixture. The primer is applied with a brush or roller. Processing should be carried out thoroughly, without leaving dry spots. Particular attention should be paid to the seams. Next, reinforcing tape, called serpyanka, is glued to the joints. It is also pasted in corners, but from the side of the adjacent wall.
Select a sketch
Before you cover the battery with plasterboard, you must select a sketch, having decided on the design features. Some craftsmen build cabinets, and some cover the entire wall under the window sill, creating a kind of shelf. The second method will be more consumable in terms of materials, but will solve the problem with a narrow window sill. It can be built into the top surface of such a cabinet. At the same time, the question of how to close the pipes is removed, because they will be hidden behind the casing. This is only permissible if the communications have compression fittings; in other cases there is a high risk of breakthrough.
Decorating pipes
Many apartment and house owners try to cover heating radiators and pipes with plasterboard. In the latter case, it will be necessary to carry out some preliminary work. First, you should prepare materials, for example, metal profiles, racks and guides. You will need not only plasterboard sheets, but also dowels and screws.
Prepare some tools, namely:
- screwdriver;
- knife;
- level;
- plumb line;
- hacksaw;
- pencil.
If the pipes are made of metal, their surface is cleared of old paint before covering, and the communications are repainted. After covering, access to the pipes will be difficult, in some cases it becomes completely impossible.
