After paintable wallpaper, painted walls are again gaining popularity in the design market. Glossy, matte, incredible shades of indoor walls are not only beautiful, but also practical. This type of finishing is perfect for those who like to change their interior frequently, because repainting a wall is much easier than covering it with wallpaper. In order not to be disappointed with the result obtained and not to think about repairs for a long time, careful preparation of the wall for painting is necessary.
Is it possible to glue wallpaper immediately after removing old wallpaper?
How to prepare walls for wallpapering Before gluing new wallpaper, you need to prepare the walls. ... It is important to keep in mind that it is not always necessary to remove old wallpaper. If they are glued exactly in one layer, without air bubbles or folds, then you can safely glue new ones on top of the old ones.
Interesting materials:
Is it possible to add citric acid to fish instead of lemon? Is it possible for military personnel to fly abroad? Is it possible to build a regular refrigerator into the kitchen? Can I bring IQOS into Vietnam? Is it possible to import sweets into Russia? Is it possible to import canned food into China? Is it possible to throw away old watches? Is it possible to throw away old pillows? Is it possible to travel to Abkhazia with loan debt? Is it possible to leave the sterile area of the airport?
Part II: painting
What you need
- Putty knife;
- Sandpaper;
- Roller;
- Brushes;
- Paper tape;
- Putty;
- Primer;
- Dye.
Eliminating irregularities
Before painting, it is worth performing two more important procedures: filling up uneven areas and treating the wall with a primer. Then the result will be perfect.
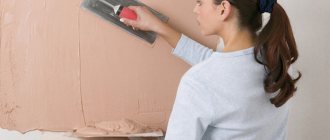
How to putty:
We buy putty, use a spatula to fill the unevenness with the mass so that it becomes approximately the same level as the wall, and rub (sand) it after drying. Grouting can be done using sandpaper.
How to prime:
a special liquid primer is purchased, which is applied in one layer to a clean, dry putty wall with a brush. The drying time for the primer depends on the manufacturer.
Apply paint
| Read about what types of paint exist (and at the same time how to paint old furniture) in our special material. |
In general, the tips for applying paint to horizontal surfaces are approximately the same. The main thing is to make the necessary preparations: apply paper tape where you need to maintain clear boundaries (along the baseboards, if you did not remove them; near the ceiling; around the sockets), select the right painting tools and calculate the volume of paint (consultants of a specific paint company will help you with this : there are special calculators on individual manufacturers’ websites).
Some people use only rollers; others find it more convenient to work on individual areas with a brush. We are guided by experience or simply try the instrument on in our hand. In general, a roller is convenient for large surfaces; the main thing is not to take a lot of paint onto the sponge. When painting, it is very important to follow the instructions of the paint manufacturer: if it is written that a layer of paint dries in one hour, do not repaint the wall after ten minutes, otherwise streaks and unevenness will appear on the fresh coating.
You can, however, try to deliberately paint the walls unevenly - in some interiors this looks like an interesting stylistic device. However, keep in mind: heterogeneity is a decorative effect, and not a bad coloring. It is better to make the first layer even, and you certainly should not neglect puttying and priming the wall before painting.
And remember: the apartment will smell quite strongly (even if your paint is “almost odorless”), so if you have a studio or one-room apartment, it’s better to go to relatives or friends for the drying time.
Remove the masking tape
Illustration: Artem Kozoriz / Lifehacker
After everything is painted, it is important to remove the tape that protects the contours and junctions of the walls. This should be done 15–20 minutes after applying the second layer. If you hesitate, the paint will dry out and the masking tape will tear it off. Be careful not to damage the paint edge.
It takes about a day to dry completely, depending on the temperature in the room and the type of paint used.
Removing whitewash
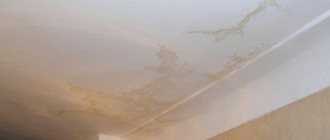
It is necessary to remove whitewash from the walls as carefully as you remove wallpaper. Poor quality surface cleaning may ultimately prove to be detrimental. All imperfections in the walls will become more noticeable after painting.
A common way to remove whitewash is to soak the coating with water and work with a scraper to the base. Use a warm water sprayer or a large, soft sponge and scraper for this step.
In most cases, whitewash must be removed from the ceiling. You need to stock up on a long-nap roller on the telescopic handle. The surface must be cleaned in two stages. First, moisten the entire area, let the moisture absorb, and then remove the whitewash in sections and immediately use a scraper.
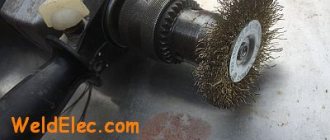
If it is known that the whitewash was applied in one layer, then it can be washed off with a sponge and plenty of warm water. A more “dusty” method is to walk over the dry coating with a wire brush. In this case, you cannot do without a construction vacuum cleaner and a respirator.
Just like for wallpaper, there is a special solution for removing whitewash. This will make the work of preparing the walls in the apartment several times easier and faster.
Removing the bleaching composition leads to severe contamination and the formation of large amounts of dust. Therefore, it is necessary to cover the floor, furniture and other surfaces with protective film, as well as protect the respiratory system and hands using special equipment.
Removing ceramic tiles and plaster
Cracked plaster coating must be removed to avoid future problems. The old layer will begin to crumble over time and ruin the appearance of the painted wall. Preparing plastered walls for painting will become much easier if the old coating is of high quality and in good condition.
If there are obvious cracks on the surface, then for cleaning you only need a metal spatula, which can easily pick up the separated pieces.
If the coating is high-quality and dense, you will need a hammer drill with a special attachment. If a hammer drill is not available, use a chisel and hammer. This method is also suitable for removing ceramic tiles from prepared surfaces.
The plaster can be removed using a professional sanding machine with a construction vacuum cleaner connected to it. With this device, time is saved and the room is less dirty.
After removing such coatings, the wall requires more thorough preparation for painting. The walls will require leveling and should be re-plastered.
Apply a second coat
Illustration: Artem Kozoriz / Lifehacker
You can start painting the next layer only after the previous one has dried, otherwise the roller will tear off the paint and all the work will go down the drain. In the warm season, it usually takes about 2 hours; for the exact time, see the instructions for the paint.
The second layer should be painted in exactly the same way as the first, the only difference is that the paint no longer needs to be diluted.
Paintable wallpaper: types and features
The choices may vary. Starting from paper and ending with fiberglass. But each type has its own disadvantages and advantages.
Paper ones with a relief structure are usually impregnated with water-repellent mixtures. This will allow you to dye them up to three times. The cheapest option and the most practical, but it is absolutely forbidden to wash them and wipe them with a damp cloth.
Non-woven ones - they adhere perfectly, they perfectly remove all the imperfections of the walls, they can also be painted several times and at the same time they can be cleaned with a damp cloth.
Fiberglass is very strong and durable. Quartz threads are used in their production. Fiberglass wallpaper can imitate quite different textures, which after painting will give its own specific effect.
Painted walls perfectly absorb sound, and this property improves the sound insulation of walls. Wallpaper for painting can be monotonous or chaotic on the surface, or have a regular and precise relief. The chaotic texture gives the room a rather careless look, so I don’t recommend you choose these. The monotonous pattern after painting will look official and strict. Usually, most people choose the golden mean - it will not look provocative and, moreover, will not be overly boring.
Repairing a room by painting is fast, high-quality, effective, and cheap. Do the repairs yourself and, of course, with us!
If you find an error, please select a piece of text and press Ctrl+Enter.
Source
Video material
It seems that painting a wall is very simple. In fact, this process will require preparation, which may take more than one day and consist of several processes. But still, such work is within the power of everyone, and you can do everything thanks to our advice.
We have done cosmetic renovations to our apartment more than once, and it does not present any difficulties. We approached the renovation of an old relative’s apartment with full confidence that we could renovate a one-room apartment in two weeks.
Preliminary inspection of walls
An inspection of the apartment led to disappointing conclusions:
In short, the amount of repairs was terrifying, and we decided that it was easier to pay for repairs than to do them ourselves. Alas, the cost of painting the walls alone would have cost us 23 thousand rubles, since it was necessary to remove all layers of wallpaper, wash the surface of glue, prime it, etc., etc. And that's just the work itself! We had to buy the materials separately. The apartment would have been golden, and we decided that we would move our relative to our dacha, fortunately it was summer, and we would slowly do the renovations ourselves. Of course, there was an idea to paste the wallpaper again, directly on the old ones. But we decided to abandon this and do everything efficiently.
Since we didn’t expect to re-paint the wallpaper every year, we agreed with a relative that we would paint the walls with water-based paint. The color was chosen together so that the old lady would enjoy living in the room.
It took a total of:
List of materials for repairing and painting walls:
The following tools and materials were still needed for repairs:
Step-by-step guide to painting walls with water-based paint:
This is how the apartment looked when we started renovating it.
Removing wallpaper
Every centimeter of the room was filled with furniture, so everything had to be taken out, otherwise it was impossible to work. We removed the wallpaper with a steam generator (I recommend it to everyone, it turns out quickly, although a little dirty due to the steam), and at the same time the old glue was removed.
The plinths are wooden, so the wallpaper was glued to them with some kind of super glue; we had to cut it off with a knife along with part of the plinth.
There were nails driven into the walls, it was unclear why, since we were tearing the nail heads out of the plaster.
Leveling walls with putty
We need to properly prepare the wall for wallpaper or paint, the principle is almost the same. The largest irregularities were immediately filled with putty, since it took time for the putty to dry. Before applying the putty, the surface should be slightly wetted.
After the baseboard was torn off, the amount of work increased and there were gaps between the wall and the floorboards. In places of crumbling, we strengthened the wall and glued fiberglass webs.
Selection of paint shade
While the central wall was not plastered, we decided to choose a paint shade. Adding color to the paint drop by drop, mix thoroughly with a mixer to obtain a uniform shade. The shade that the relative liked is marked with a tick.
After preparing the paint, we completely primed the wall and smoothed out all the unevenness with sandpaper.
Application of primer
To ensure that the paint lay evenly, before the first painting we treated the wall with a special paint solution (it is sold in building materials stores).
The first layer of paint was applied with a roller to the dry wall, then we waited for the paint to dry completely.
Painting
We covered all the sockets with construction tape, which is then easily removed without leaving any traces.
After the wall was completely dry, we covered it with a second coat of paint.
Installing a new ceiling plinth
Instead of the old plinth, they put a new plastic plinth, in the groove of which all the wires were removed.
The ceiling plinth was glued to liquid nails, and the plinth was supported for some time with wooden supports.
This is how the walls turned out after our renovation.
We roughly estimated the cost of our repairs. It amounted to 13.5 thousand rubles, since we only bought materials, we had some tools, and some we borrowed from friends. So DIY repairs are both cheaper and more enjoyable. We recently painted the ceiling ourselves with water-based emulsion; be sure to check out this interesting article. We wish everyone a good DIY repair!
Nowadays the topic of painting wallpaper has become quite popular. This is the easiest and cheapest way to change the color of the walls, and generally update the renovation of your apartment.
Decorating walls with painting is:
how to calculate wall area in square meters for siding
After you have painted the wallpaper, it will not fade in the sun, and painted wallpaper can withstand various physical damages very well. In addition, the wallpaper has its own specific relief, and if you paint it correctly, the look will be exquisite.
Painting itself is not such a difficult matter and everyone can make their dreams come true, but you need to know what paint to use and for what wallpaper.
In any store that sells wallpaper there is simply the widest assortment. There are also special non-woven wallpapers that are designed specifically for painting. It is better to choose plain, white ones - it will be easier for you to paint them in new colors without distorting the color. If you have already glued something, you will have to paint it in several layers to cover the old color.
When painting, it is better to use a brush with hard bristles or a roller with a stiffer coat. It is this moment of rigidity that will give the wallpaper a better textured surface.
Selection of working tools
After assessing the wall covering before repair, select the right set of tools. The surface to be painted must be perfectly flat and smooth. To do this, you need to clean the wall of old material: plaster, ceramic tiles, wallpaper or old paint.
You can remove a layer of plaster using:
- chisels by hand or with a special attachment on a hammer drill;
- a grinder or a brush with metal bristles using a drill;
- hammer;
- remove dust with a sponge or soft bristle brush.
To remove ceramic tiles, you will need the same tools as for plaster. The previous layer of paint is removed with a solvent or using the following tools:
- chisel, spatula, scraper and powerful technical hair dryer;
- wire brush, sponge or brush to remove dust.
To remove whitewash you will need:
- water
- roller with long pile;
- spray or soft sponge to wet the surface;
- scraper or small spatula.
On video: how to remove whitewash.
To remove wallpaper from the walls you need to prepare:
- steamer (one of the best options) or water spray;
- small spatula or scraper;
- You can also treat the surface with a needle roller.
Lay down the corners
For better results and faster work, first carefully paint all the corners and contours of the junctions, and then the main surface. There are two main options for performing layering.
Illustration: Artyom Kozoriz / Lifehacker
First: using a small brush, slowly paint 5-7 cm wide stripes along the ceiling moldings, in corners, at baseboards, and around radiators, sockets and switches. To protect the ceiling, you can seal the spatula blade with masking tape and, placing it in a corner, calmly paint with a brush.
Second option: cover the junctions with the ceiling and other surfaces with masking tape, smoothing the joint well with a spatula so that paint does not flow there. There is no need to smooth the entire surface of the tape, otherwise the tape will be difficult to remove later.
The adhesive tape on the ceiling can additionally be painted along the edge with white paint: this way it will immediately fall into the gap and after painting the wall with a different color the border will be perfect.
How to get rid of paint?
But what to do if you need to remove the paint itself? It is also quite difficult to cope with:
- Sometimes in this case they use a metal brush with short bristles. But it will not always help, since it can only smooth out the paint layer.
- Most often, it is more effective to use a set of nozzles, which includes scrapers of different shapes. To make them yourself, chisels, wide screwdrivers and spatulas are used.
- To facilitate and speed up the process, use a special nozzle. It looks like a rod with short chains attached to it. A few links will be enough. It needs to be inserted into the drill chuck and clamped. The drill should be parallel to the surface being cleaned. When the drill starts to rotate, the chains will simply knock off the paint.
- You can also use special chemical removers, but they must be used in compliance with all safety measures and instructions from the manufacturer. They give the effect of removing old coating quite quickly.
Important! If paint will be applied to the wall again in the future, it must first be puttied.
Removing wallpaper from wall surfaces
High-quality wallpaper is not easy to remove. To do this, use a proven method of processing canvases with a roller dipped in warm water, and using a scraper or spatula to separate the layers. A more effective way is to use a steamer.
With such manipulations, paper wallpaper is easily separated from the walls. For vinyl and non-woven fabrics, a needle roller is used. Thanks to processing with such a roller, moisture will quickly penetrate the paper base of this type of coating. In both cases, the wallpaper is moistened generously with water. If you cannot clean the surface the first time, repeat the entire procedure again.
To enhance the soaking effect, add household dish detergent or vinegar to the water. For five liters of water, take two tablespoons of the product.
The process of stripping old wallpaper occurs when there is visible deformation of the canvas. Using a scraper or spatula, pick up the edge at the junction of the strips and try to remove the entire strip. Remove the remaining pieces of old coating with a spatula. After wallpaper, the technology for preparing walls for painting involves washing off the adhesive.
The procedure for soaking old wallpaper can be made easier if you purchase a special product at a hardware store. It is diluted according to the instructions, which describe in detail what needs to be done.
Non-woven, vinyl, and paintable wallpaper require more effort to remove from the walls. The use of a steamer, in such cases, is necessary. Hot air heats the canvas itself and dissolves the glue. The surfaces are first passed through with a needle roller. Walls cleared of wallpaper are cleaned of glue residues first with a damp cloth, then the clean surface is passed over dry. This is how the surface is prepared for painting.
On video: how to remove wallpaper from walls.
In cases where the wallpaper cannot be removed, they are left and carefully primed with a deep-penetrating compound, and then the surfaces are puttied.
Apply primer
Illustration: Artem Kozoriz / Lifehacker
Before painting the walls, you should definitely prime them: after this treatment, the paint will lie smoother and will adhere better. In addition, by reducing surface absorption, paint consumption will be significantly reduced.
Using a wide, medium-nap roller, apply primer to the walls. Make sure that there are no untreated areas. Don't rush and don't let it drip. Let the soil dry completely. This usually takes about 2 hours, the exact time is indicated on the label.
Checking the evenness of the walls and choosing a method for eliminating identified deviations
When the surface repairs are completed, they should be checked for spatial deformations and unevenness to determine which final leveling method is best to choose. To carry out such an audit, you will need a building level and plumb line.
Before finally putting the wall surfaces in order, you should figure out whether there is a need for their large-scale leveling
These tools are applied to the surface of the wall (directly or through a long rule), and all its differences are traced. If the level differences exceed 5 mm, it is recommended to completely level the wall. Minor irregularities of 2÷3 mm can be leveled by applying a thin layer of plaster or putty mixture.
In addition, if you want to not only level, but also partially insulate and soundproof the walls, you can use plasterboard sheets, securing them to the wall with a gypsum-based adhesive. You can also attach this material to a frame sheathing, but in this case it should be taken into account that the size of the room will decrease on each side by at least 50 mm, and in cramped city apartments this is a very noticeable loss of space.
Necessary materials
- Oil based primer.
- Dye.
- 2 brushes and 2 rollers (for primer and paint).
- 320 grit sandpaper.
- Putty.
- Putty knife.