15062 0 5
Zanoza November 12, 2016Blonde with head and arms
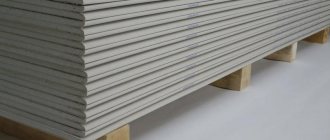
Plasterboard wall putty
No matter how good the drywall (gypsum board) is, in order to paint it efficiently, it is necessary to carry out a number of manipulations. Today I will try to give all the information on this issue so that preparing drywall for painting will be as clear and easy as possible.
The most important thing is to get perfectly smooth walls as a final result, and this can only be achieved with careful puttying; you will also need to grind and prime the surface. But first things first!
Selection of necessary materials
Putties from various manufacturers
Store shelves are filled with a variety of building mixtures. It is not surprising that among such a variety, finding a suitable composition for drywall is problematic.
Some of them are intended only for cracks, others for ceilings, and others are completely decorative. We also need to choose a primer, so we carefully compare the features of the materials and see what their price is.
putty
Having studied the assortment, I consider dry putty to be the best choice for finishing gypsum boards. It is very unpretentious for storage, and also costs a little less than ready-made mixtures. Let's take a look at its advantages:
- Has a long shelf life.
- Its quality is not affected by temperature conditions of storage.
- Can be used in parts, leaving a reserve for further work.
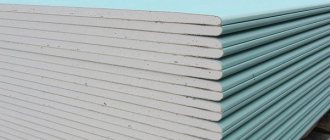
Dry putty is the best choice
Dry putty can be divided into three types:
- Cement.
- Plaster.
- Polymer.
Each of them suits certain room conditions. For example, for a kitchen or bathroom, it is best to choose a cement composition, since it is more moisture resistant than gypsum.
But in other situations, the cement mixture will not be able to cope with the task qualitatively. And then the polymer type, which has more universal properties for finishing home premises, is more suitable.
In the photo - polymer putty
Of course, universal putty is more expensive than other types, but it will save you time, nerves, and allow you to easily do everything yourself.
Primer
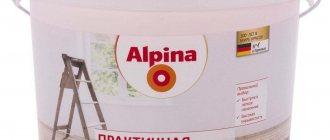
The primer is sold in containers of different sizes
Here the choice entirely depends on the size of your wallet. There are a lot of primers, and most of them are suitable for working with gypsum boards. The only important fact is that you cannot use alkyd primers, they destroy the top layer of drywall, causing it to crack.
This can result in hanging rags. All other types of primer compositions are more tolerant of cardboard, so you don’t have to worry.
Surface priming is a necessary operation
Do I need to prime the surface before applying putty?
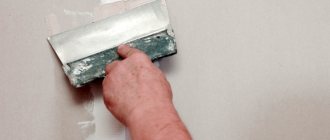
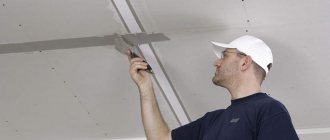
Primer is required. The more careful the priming is, the smoother the finishing layer of putty will lie, and accordingly, painting the surface will not cause difficulties and will not disappoint expectations from the finish. After the primer has completely dried, a thin layer of gypsum putty is applied to the drywall. To carry out such work, use a wide spatula, since it makes it easier to achieve an even distribution; a roller is also used. It is indispensable if the ceiling is being processed. The walls and ceiling are primed with special building mixtures from an imported manufacturer.
It is important to prime with deep penetration mixtures, while paying attention to the presence of acrylic in the composition. The primer dries at a temperature and humidity no higher than normal in 1.5-2.5 hours.
Ceiling after treatment
Start of finishing work
Having decided on the materials, it’s time to answer the question - how to prepare drywall for painting? Those who are faced with such work for the first time may make a grave mistake by skipping the very first stage - primer .
However, further actions are also important and require a careful approach. I will give you the correct order of work. So:
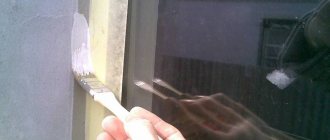
Priming: step 1
Applying primer to “clean” drywall
Priming is the first and very necessary step; neglect is unacceptable. The primer will improve the adhesion of the paint to the gypsum board and also prevent its excessive absorption:
- We clean the drywall from dust and dirt.
- Distribute the composition over the entire surface. It is very important to do this evenly. If it is difficult to get into hard-to-reach places and corners, then use a small roller or brush.
- We are waiting for the wall to dry.
As a result, we get a barely noticeable moisture-resistant film that will serve as protection against paint absorption. At this point, the priming work can be considered complete, and I hope you will no longer have the question of whether you need to prime drywall before painting!
In some cases, it is recommended to dilute the primer with water, but it all depends on the brand of primer. Before use, read the manufacturer's recommendations, and also ensure that the layer thickness does not exceed 0.03 mm.
Processing and sealing butt seams: step 2
The cut of the drywall seam needs to be widened slightly
- At this stage, it is necessary to check not only the seams, but also the screws that secure the sheet. Make sure that they do not sink too much into the plasterboard sheet and go to a depth of no more than 5 mm. Otherwise, it is recommended to unscrew them and install new ones.
- Next, we proceed to processing the joints themselves. If the joints do not have a factory edge, they must be cut manually at an angle of 45°. This angle is considered optimal for reliable seam reinforcement. In the photo you can see the correct cut.
Preparing drywall for painting involves cutting off the seams, that is, expanding them
- Then serpyanka (special adhesive tape) is glued to all joints and corners. Make sure that it is glued evenly on each side of the joint. The seam should be right in the middle of the tape.
Serpyanka tape for reinforcing joints
Seam filling: step 3
To seal joints with putty, it is best to use narrow metal spatulas. Dilute the selected putty according to the instructions specified by the manufacturer and begin to distribute it evenly over the entire seam. So, before you wonder, it’s better to think about processing butt seams.
How to prepare drywall for painting? The next stage is applying putty to the serpyanka
The easiest way is to take a small amount of putty and gradually apply it along the entire length in small portions. Then you need to stretch it with a wide spatula. Carefully ensure that the seam is sealed exactly along the wall, without any flaws .
It is very easy to check the correctness of the work - place a wide spatula perpendicularly and look at the gap. If you don’t see it, it means the joint filler was successful!
All you have to do is seal the heads of the screws and excess holes with a crosswise movement of the spatula. Let the surface dry for about 1 day.
Base requirements
Next, you need to figure out what the coating should be in order to be suitable for painting:
- Drywall must have a perfectly flat surface, which will avoid the occurrence of unevenness that could damage the appearance.
- There should be no chips or cracks on the coating.
- The material must be exposed with primer, putty and sanded.
Sometimes fiberglass is also used in addition to this, but often this happens when creating a first-class coating for painting.
Conclusion
Processing drywall is a necessary and extremely important step for painting walls. Despite so many operations, performing them is not that difficult. In the video in this article you will find comprehensive information on this topic. If you have any questions, please ask in the comments!
Did you like the article? Subscribe to our Yandex.Zen channel
November 12, 2016
Plasterboard systems, Paint, Finishing materials
If you want to express gratitude, add a clarification or objection, or ask the author something, add a comment or say thank you!
Why paint a plasterboard ceiling?
Modern ceiling paints contain many additives based on polymeric elastic substances, such as latex. Such coatings give plasterboard the following beneficial properties:
- Appearance – when applied correctly, the design turns out even, smooth, without streaks, smudges or stains.
- A large selection of shades allows you to accurately fulfill the designer’s plans.
- During long-term use, cracks will not appear on the ceiling, and the paint will not peel off, thanks to the presence of additives.
- As you know, hot air and fumes rise, and drywall can become wet and swell, causing partial collapse of the elements. If you choose a high-quality coating with a minimum degree of vapor permeability, this problem will not arise.
- The coating of plasterboard sheets is made of paper, which can collect a lot of dust, and the dried paint forms a uniform plane, devoid of pores and irregularities, which reduces the risk of contamination to zero.
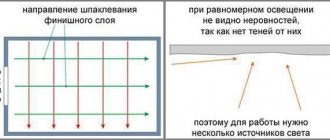
Rice. 2. Preparatory work
One of the main advantages of a painted plasterboard ceiling is the ease of wet cleaning without the risk of damaging the coating. Thus, painting plays an important role in finishing the floor surface in an apartment.
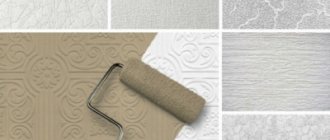
What paint is suitable
There is a wide range of paint and varnish coatings for ceilings on the market. The choice of a suitable composition is determined by the type of room, temperature and humidity conditions and other parameters. The owner of the apartment has the opportunity to choose the following types of paint for decorative finishing of the structure:
- Water-based coatings - a paint and varnish composition known since Soviet times, has been improved by modern manufacturers and today is in high demand among the population due to its ease of application, durability and affordable price.
Rice. 3. Water-based paint
- Acrylic paints are found on counters in standard versions and with the addition of latex. The peculiarity of the composition is the creation of an impenetrable protective polymer film upon drying, which is why the coating has increased resistance to mechanical stress and a humid environment under conditions of intensive use of the structural element.
Rice. 4. Latex-based composition
- Silicone coatings - the composition includes a modern polymer that allows the paint not to collapse from stretching or compression under strong temperature changes. Considering the strength of the silicone film, which forms after the applied paint hardens, it is capable of hiding minor defects and cracks on plasterboard sheets from prying eyes.
Rice. 5. Silicone composition
- Water-dispersed compositions have an attractive appearance, do not fade under the influence of direct sunlight, and also protect the structure from swelling in a humid environment. Water-based paint is an environmentally friendly material and is recommended for use in children's and medical institutions.
Rice. 6. Water-dispersion composition
- Silicate is the best solution for decorative surface finishing in rooms with high temperature and humidity conditions. Despite the mineral composition, the coating does not promote the growth of bacteria, meeting sanitary and hygienic standards.
Rice. 7. Silicate paint
Before purchasing the most suitable paint and varnish coating at a retail outlet, you must consult with the seller, telling him about the features of the premises. With the right choice, the paint will refresh the interior, will not be destroyed over time, and the consumer will be able to save significant money.
Features of using a painted ceiling
After painting the plasterboard ceiling, the master connects spotlights and pendant lights with pre-installed wiring inside the ceiling space. The ceiling is ready to decorate the interior, however, so that it does not lose its original appearance, it is necessary to take care of it from time to time:
- When dust settles on the surface, it must be wiped with a dry, soft, clean cloth.
- The ceiling can also be vacuumed with precautions, since hard bristles will damage the decorative layer, and a dirty nozzle will leave marks that will be very difficult to remove.
Rice. 18. Cleaning the surface with detergent
- Spotlights are wiped clean from dust separately. To perform the procedure, the lights in the room must be turned off, and the halogen bulbs must cool down so as not to cause harm to health.
- Replacement of light bulbs should be carried out from a stepladder, so that both hands of the technician are free, because the spring grips of the lampshade can damage the edge of the ceiling when removed.
- If yellow or brown areolas form over time around the light bulbs due to high temperatures, the white surface can be easily painted over with a construction marker.
Rice. 19. Replacing the lamp
- If certain areas of the ceiling, for example, in the kitchen, are subject to heavy contamination, paints with polymer inclusions can be wet cleaned, eliminating the strong friction of a rag or sponge. For effective cleaning, do not use powder detergents, as they will leave scratches on the finished surface.
If the ceiling gets wet from the inside and its individual elements swell, it is impossible to eliminate such a defect without dismantling and re-finishing. Therefore, in places where there is a risk of leakage, it is better to use other structural elements for the ceiling.
Rice. 20. Wet drywall
Removing stains
For owners of apartments in a multi-storey building, the problem of eliminating stains on the ceiling can be called urgent. In most cases, this occurs due to water leaks from neighbors on the upper floor. As a result, you can observe the formation of brown stains on the ceiling. Therefore, it is important to know what is used to paint plasterboard ceilings to mask stains.
It is practically impossible to solve this type of problem by simply painting over it. The best option in such a situation is to use a special primer to remove stains.
You need to do the following:
- The ceiling is pre-leveled.
- Then a layer of special primer is applied, trying to cover all areas of the ceiling surface. The use of such a composition makes the base more durable and prevents the appearance of stains that form when exposed to moisture, soot and grease on the surface.
- The soil is thoroughly dried and a layer of paint is applied. In most cases, two coats are enough to cover up water stains.
The main condition for obtaining a high-quality result when painting a gypsum board ceiling with your own hands is following the rules and recommendations of experienced craftsmen.
Some nuances regarding painting
We hope you have figured out whether it is possible to paint drywall without putty, and have drawn the appropriate conclusions.
After preparing the surface, you can start painting, the process is quite simple, you just need to know a few nuances:
- It is impossible to properly treat the surface in one layer, especially in cases where there is no continuous putty on the surfaces. You will have to apply 2-3 layers at a minimum.
- It is better to paint with a roller, as brushes always leave streaks on the surface, and it is impossible to achieve an ideal result.
- Each new layer is applied after the previous one has completely dried, and the direction of movement of the roller should be perpendicular to the previous layer.
- Corners and areas along the edges are tinted with a brush, and it is better to do this first and only then paint the main surface.
- The number of layers is determined by the fact: if there are spots and color changes, another layer is needed.