Drywall sheets are an excellent alternative to plaster. Fastening to the wall can be done with glue or using a special metal profile. In this article we will talk about the first method.
Leveling the walls with such sheets does not take much time; it is only important to know how to glue drywall to the wall correctly, because most often the sheets are glued.
Assortment for gypsum boards
There are several types of adhesive compositions that are used for gluing plasterboard sheets (GKL) to walls:
- "Ceresit SM 11" is an adhesive for tiles, but is also suitable for gluing plasterboard sheets.
- Perflix is perfect for gluing drywall to brick walls. A simple and relatively cheap version of the adhesive composition that can be used at home.
- “Fugenfüller” - in the form of putty, which must be diluted with water, requires manual mixing, the applied layer must be thin.
- Silicone glue will glue ceramic tiles or mirror surfaces with gypsum plasterboard well.
- "Knauf Fugen" (putty) is suitable for gluing sheets to smooth wall surfaces. The mixture is plastic due to the polymer additives included in its composition. Must be applied in a thin layer.
- Foam adhesive for drywall or assembly adhesive is convenient, easy to use, and inexpensive. Ideal for home use, for this reason this composition is most often recommended for gluing plasterboard sheets to the wall.
Advice! When choosing adhesive, you should take into account the evenness of the wall.
Plastering a plasterboard ceiling with Rotband
Anyone who has ever dealt with drywall knows that this material is capricious. Particular difficulties arise when it is necessary to cover the surface with plaster. Due to the fact that it is a fairly fragile material, drywall can become damaged and change shape under the influence of the heavy weight of the applied layer of finish. Using a material such as drywall, everyone who makes repairs with their own hands asks whether it is possible to plaster drywall with a rotband and how to plaster it with a rotband, avoiding damage. There is only one answer: technology.
Which is better: heated floors or radiators?
Warm floorBatteries
Finishing walls and ceilings with plasterboard is very popular due to its ease of installation and low price. However, you should be careful when plastering drywall.
Plasterboard sheets are the most popular finishing material, affordable for most consumers, and also allowing one to achieve excellent results in finishing premises in a short period of time.
Drywall allows you to quickly and perfectly level the walls and ceiling.
After finishing with drywall, only one problem remains - visible joints between the sheets and recesses from the heads of the screws. These irregularities can be eliminated by plastering the plasterboard covering.
The choice of glue depending on the flatness of the wall
There are three options for surfaces to which plasterboard sheets will be attached:
- flat surface (stone or monolithic plastered walls) with a height difference of no more than 5 mm;
- Brick wall;
- surface with significant unevenness.
Plasterboard can be glued onto a flat wall using almost any adhesive. This can be cement- or gypsum-based adhesive, polyurethane foam, or polymer mastic. The simplest and most affordable method is mounting on polyurethane foam.
For gluing sheets to a completely flat surface, adhesive mastic is suitable. Manufacturers package it in plastic tubes, from which glue is squeezed out using a special gun.
An adhesive composition based on cement or gypsum will need to be diluted with water before use according to the description on the package.
Advice! Before attaching the sheet with a gypsum or cement based adhesive, spray the wall surface with water from a spray bottle.
If the installation of drywall is carried out on a brick wall, then any glue can be used if the masonry is even. For uneven brick surfaces, Perflix is ideal, which is applied to the sheets pointwise along the entire perimeter. The thickness of the glue layer should vary from 5 to 30 mm, the distance between the “dots” should be approximately 30-50 cm.
In order to glue gypsum plasterboard onto an uneven wall, the Knauf-Perlfix adhesive composition is suitable, and the curvature should be no more than 2 cm. If the slope is greater, it is necessary to cut the sheets into strips 10 cm wide and glue them to the wall at intervals of 35 cm at using Fugen putty.
Subsequent finishing
All joints of the glued plaster are filled with putty; it is better to do this with the same mixture on which it was glued. After filling all the joints, they should be glued with sickle tape. The ideal option is when, in addition to serpyanka, the walls are covered with painting fiberglass mesh. And this applies not only to gluing, but to plasterboard cladding in general. If you plan to paint, then it is better to replace the fiberglass with fiberglass. Next, all walls are plastered in the standard way.
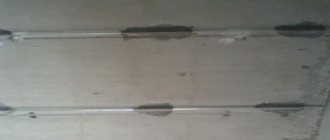
Before gluing the serpyanka, you need to fill the seams with gypsum mixture, even if the gaps are very small. This will significantly increase overall strength and prevent cracking. Although this is a photo of installation on a profile, this statement is also true when gluing gypsum sheets.
When subsequently tiling with tiles, continuous puttying should be completely neglected, the main thing is to fill the seams and not forget about the serpyanka, fiberglass mesh is also not superfluous.
Preparing the walls
Before gluing drywall to the wall, its surface must be prepared:
- To determine the optimal method of fastening the sheets, it is necessary to find out how much the wall is curved. Measure the wall using a rule or plumb line.
- Remove protruding nails, screws and other elements.
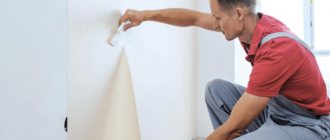
- Clean the surface from any remaining wallpaper, paint and other finishing materials. Only the brick or concrete base should remain. This ensures reliable adhesion.
- Clean the walls from dust, dirt and primer. This helps to increase the adhesion of materials and ensures strong adhesion of the plasterboard and glue to the wall.
- Draw lines on the floor along which the sheets will be aligned. In case of severe curvature of the wall, draw similar lines on the ceiling. This will ensure that the drywall is installed in one plane.
- Treat surfaces with poor adhesion with a primer. It must be selected in accordance with the material of the walls. Highly absorbent surfaces should be additionally treated with a product that will reduce this property.
After all preparation activities are completed, gluing can begin.
A few words about safety precautions
Working with gypsum boards generates quite a lot of dust. Inhaling it will not add health to anyone, so it is better to protect yourself with a respirator. You should also ensure that dust does not penetrate into living spaces by curtaining the openings with a damp cloth.
As you can see, gluing drywall to a wall with your own hands is not such a difficult task. To do this, it is not necessary to invite a specialist of the appropriate profile. Just be patient and have a little experience, and you will succeed.
(votes: 2 , average rating: 5.00 out of 5)
Step-by-step instructions for gluing drywall to a flat wall
GKL adhere perfectly to surfaces whose unevenness is no more than 4 mm. Drywall is attached to such bases as follows:
- Start finishing from the corner.
- Make the solution according to the instructions on the package (Fugenfüller putty is most often used). Do not dilute a lot of adhesive at once, as it has a short shelf life.
- Apply glue to the gypsum board along the perimeter (along the edges) using a notched trowel. Make one or two stripes in the middle of the sheet. The application must be continuous if you plan to subsequently hang shelves on the wall. The glue should not come out at the joint.
- Place 2-3 pads on the floor along the wall, which will provide a 10 mm gap between the floor and the edge of the gypsum board. The support should not be solid, since air access is necessary for the adhesive to dry.
- Lift the plasterboard and press it against the wall, placing it on the spacers. It will be more convenient to take the sheet if it lies on the floor on 2-3 wooden blocks.
- Using a fist or mallet, align the gypsum board vertically, using the lines previously drawn on the floor as a guide.
- Install all the sheets in the room in a similar manner. Periodically check the evenness of the gypsum boards relative to each other using the rule. The seams should be tight and even.
- Don't forget about the holes for sockets and switches.
- The adhesive composition dries in approximately 3-4 days. After the glue has completely dried, remove the spacers and seal the cracks with sealant.
A few more important advantages of the Rotband mixture
- The consumption of this mixture is 2-3 times lower than the consumption of conventional cement-sand plaster.
- Rotband can be used both for simultaneous plastering and puttying of plasterboard surfaces, and for the manufacture of decorative elements.
This coating is very smooth and does not require additional processing. This plaster dries very quickly, after a couple of days you can start wallpapering or painting the walls. A relief method of applying gypsum plaster is also used, which allows you to make the design of your room unique.
But it is worth considering some nuances when working with this material. Gypsum coating is not as durable as cement; under strong mechanical stress, dents may form. Despite its moisture-absorbing properties, it should not be used in rooms with very high humidity. It may get wet and fall off. This plaster also strongly corrodes metal objects: fasteners, nails and screws located under the plaster, they rust very quickly, and yellow spots may appear on the wall.
Functions performed by plaster
Before gluing wallpaper on plasterboard walls, it is necessary to prime the surface, then use a spatula to putty all the cracks and irregularities.
- Decorative. Plaster allows you to create a variety of decorative effects. The plastered layer can be given different textures and structures and painted with paints of different shades.
- Protective and structural consists of protecting walls from excessive moisture, fire, and retaining heat in the room using plaster.
- The sanitary function is that with the help of plaster, a perfectly smooth, even surface is obtained, which can subsequently be covered with various wallpapers, painted in any colors, or tiled.
Using a thick layer of plaster is not recommended to hide frame installation errors that led to the formation of obvious uneven walls. For some time, this will hide the defect, but over time, the sheets of drywall may not withstand the weight of the applied plaster. They will become deformed, cracks will appear, and the plaster layer will peel off. Therefore, if large distortions have been identified, it is recommended to correct installation defects as quickly as possible and replace sheets with defects with high-quality material.
Step-by-step instructions for attaching gypsum boards to an uneven surface
The method of attaching gypsum plasterboard to a concrete or brick wall, the unevenness of which varies from 5 to 20 mm, is practically no different from that described above. You just need to change the adhesive composition and the method of applying it.
- For large uneven areas, use Perflix. Apply it in the form of cakes with a diameter of 1-1.5 cm at a distance of 30-35 cm from each other, first along the perimeter, and then in the center of the plasterboard.
- Once the adhesive has been applied, lift the canvas and place it on the pads on the floor. Align the plasterboard along the lines drawn on the ceiling and floor.
- There should be no glue in the seam; remove excess glue with a spatula.
The existing large bumps and depressions on the surface of the walls greatly complicate the procedure for gluing gypsum boards. To get the job done efficiently, use beacons.
- Cut the sheet into strips 10 cm wide and glue them with Perflix vertically. There should be a gap of 40-60 cm between them.
- Align the stripes - they should be placed in the same plane. This will form a frame on the wall, let it dry. It is at this stage that the wall is leveled.
- After 2-3 days, when the frame has dried and reliable adhesion to the wall surface has been achieved, attach the gypsum board to it using Fugenfüller or liquid nails.
Advice! The smaller the distance between the strips, the more reliable the gluing will be.
Recommendations for using drywall
A general recommendation for working with any drywall is that before starting work, drywall sheets should not be placed on edge, as this can lead to their deformation. You need to stack them on top of each other.
If it is necessary to plaster drywall, it must be of a moisture-resistant grade to avoid the penetration of moisture from the plaster mixture.
In most cases, it is impossible to perfectly level the walls or ceiling only by installing sheets of drywall - you will also need to fill up the cracks and dents. Therefore, it is better to use moisture-resistant drywall, since plastering is a wet process. If during operation it absorbs a lot of moisture, then deformation of the material may occur during the drying process. This is especially important when leveling ceilings, since it is on the ceiling that the highest bending load exists for the sheets.
Today, there are certain requirements for how to properly plaster drywall when installing ceilings. If you follow them, you can avoid damage and deformation of the coating.
Completion of work
After the adhesive has completely dried, after 2-3 days, start filling the joints: apply putty for leveling, then press the reinforcing tape into it. Once everything is dry, apply another leveling coat of joint compound to the joints and any protruding nail heads (if used).
Advice! For leveling, you can use the same mixture that was used for gluing the plasterboard.
Seal gaps along the floor with caulk. Finishing work can begin only after the joints have completely dried.
Leveling drywall with rotband
So I’m wondering how reliably the rotband will stay on the gypsum board? Will the plaster fall off when the door slams? There was an acrylic primer, but it is unknown whether he used it or not. He rubbed some of the plastered walls “wet on,” but some did not, and they had already dried and turned out to be rough. Now he suggests mixing Rotband and Vetonit LR+ and rubbing the plaster with this mixture. Is this how you can mix it? It seems to me that this is a violation of technology. Definitely a hemorrhage. It’s not difficult to do smoothly. 1 minute longer.
The material is the same. The technology is the same. I think this question will confuse many.
The worker built plasterboard structures, and then leveled them with concrete using rotban. Moreover, the thickness of the plaster of the doorway varies from almost zero to a centimeter. When asked why plaster the drywall, he answers: to make it stronger, but when asked why not put two sheets of plasterboard, he forgets the Russian language. I think it was easier to somehow build a wall, and then align everything, than to calculate how to build a straight wall. It’s not he who pays for the rotband. Although he does double work.
Useful tips
Recommendations for working with adhesive and drywall will help you complete all the work efficiently - the walls will be perfectly smooth, and the fastening of the sheets will be very strong:
- Finish all work with electrical wiring before starting to level the walls using plasterboard.
- Drywall cannot be glued to lime plaster.
- Glue the sheets exclusively to the supporting base, and it should not delaminate or crumble.
- Dowels will provide additional fastening strength. Use 4-5 pieces per stove.
- Glue plasterboard to the walls at a temperature of +10˚ C.
- Leave the drywall to sit in the room where it will be attached to the wall for 2-3 days.
- Cut the plasterboard so that there is a gap of 10 mm at the bottom. This will protect the drywall from absorbing moisture from the floor.
- You can use different gluing techniques even on the same wall.
- If the base is made of gas silicate blocks, then apply the glue not to the plasterboard, but directly to the surface of the wall.
The frameless method of fixing gypsum boards to uneven walls has its advantages. To ensure long service life of the structure, the adhesive mixture and gluing method are selected correctly and the entire process is carried out according to a given algorithm.
The essence of the frameless method of fastening a gypsum board sheet
Installation of drywall on walls without a frame is carried out using a special compound. They glue the sheet onto the base surface. The joints are puttied and reinforced with tape. After priming, the wall is ready for finishing - wallpaper, decorative panels are glued to it, or painting is done at your discretion.
Since the sheets themselves are small in thickness, the overall area of the room is almost not affected. They are convenient to use when leveling the walls of small rooms: bathroom, storage room, loggia, and in other places where every centimeter of space is important.
Cladding with plasterboard sheets: advantages
Facing with HA sheets is carried out in the following cases:
- surface leveling;
- improved heat and sound insulation;
- hide wires and pipes;
- surface decoration - creating niches, shelves, design with figured elements.
The plasterboard sheet has a flat surface; when mounted on a wall, it does not deform, but remains flat. This is convenient for subsequent painting, laying tiles, and wallpapering.
In various rooms with high humidity and high temperatures, the following types of gypsum boards are used:
- An ordinary room with moderate temperature changes is a gray gypsum board sheet.
- Wet room: bathroom, corridor in a private house, balcony, attic, kitchen - green sheet of plasterboard.
- A room with a working fireplace, a Russian stove, with a rough stove - pink gypsum board.
There are methods for attaching sheets to the surface - frame and without frame. In the first case, profiles are applicable. For the second method, you need to choose the right adhesive composition.
Advantages of gluing gypsum board to the surface:
- installation is easy and quick;
- less expensive method compared to frame;
- this method does not take away extra centimeters.
The negative side is the inability to hide wires and communications behind the casing.
Is it possible to glue on uneven walls?
One simple way to level a “falling” wall is to cover it with plasterboard on a pre-made frame.
If the difference in wall unevenness is small, the method of gluing sheets is used. To use this technology, you need to familiarize yourself with the nuances and rules.
- The type of plaster and adhesive composition must be selected in accordance with the humidity and temperature conditions in the room.
- The frameless method is applicable if the wall has an unevenness of maximum 5 cm.
- When carrying out installation, you must follow the step-by-step instructions in compliance with all the rules.
- To select glue, you need to pay attention to the material of the rough wall.
If you follow all the rules, installing gypsum boards with glue will be easy and will last a long time.
How to choose the right gypsum board adhesive for gluing plaster
Wall covering with plasterboard is carried out by choosing the right adhesive composition. The mixture is selected according to environmental factors. Stroy market offers mixtures:
- Gypsum glue "Perlfix".
- Plaster based on gypsum: “Start”, “Finish”.
- Gypsum-based putty “Knauf-fugen”.
- Tile adhesive "Ceresit -SM 11". This is a cement composition with fillers.
- Silicone sealant made of acrylic and polyurethane, “liquid nails”, assembly adhesive mixture. These mixtures are used for smooth surfaces or for gluing sheet to sheet.
- Polyurethane foam. Select a composition with a “min” coefficient.
Sealants are mainly used on brick, concrete walls, and foam blocks.
Is it possible to glue it to polyurethane foam?
There are 2 ways to glue a sheet of material to the wall on foam:
- First, the gypsum board is attached to the wall with dowel nails, then holes are made and the void under the plaster is filled through them.
- Apply foam to the sheet and stick it to the wall.
The material is placed on a flat horizontal surface. 9-12 holes are drilled in it. After the gypsum board with holes is applied to the wall, all drilled holes are marked with a pencil. The holes for the dowels are brightened on the rough coating.
The GC sheet is secured with dowel nails. There is no need to screw in the screw all the way. It is necessary to achieve evenness of the vertically placed material, so when screwing in, use a level. When the sheet is exposed, foam is injected into the holes.
If the wall is flat, then the foam is applied to a horizontally lying plasterboard. After this, the sheet is applied to the wall, leveled and pressed to force the foam to adhere to the surface.
Is it possible to glue gypsum boards to tile adhesive?
GKL is glued with tile adhesive, but if the wall has unevenness up to 1 cm. If the unevenness is more than 1 cm, the adhesive will eventually fall off along with the sheet of drywall.
For greater strength, plasterboard sheets are additionally fixed with self-tapping screws or dowel nails.
If you need to make a double covering of gypsum plasterboard, then when gluing the first layer, apply glue with a thickness of 0.3-0.5 mm, after complete drying, the same amount of glue is applied for the second gypsum board. A prerequisite is additional fixation with self-tapping screws.
Adhesive for foam block walls
The best option for choosing adhesive for a foam block wall is Perlfix. Holes are made in the HA sheet at a distance of 40 cm with a diameter of 2-2.5 cm. The glue is applied to the wall. After which, the gypsum board is immediately glued. Excess glue will come out through the holes made. It is removed with a spatula. In this way, additional reinforcement is achieved.
Made from polystyrene concrete
Polystyrene concrete - made from cement, foam balls, quartz sand and additives. On a wall made of this composition, it is necessary to use cement-based adhesive mixtures with fillers. There is a negative point at the base - it freezes. Therefore, to ensure that the wall finish is held firmly in place, it must be additionally secured with dowel nails.
For wooden walls
The cladding of wooden walls is done in this way:
- Treating wood with an antiseptic agent.
- Setting beacons for the evenness of the applied sheet.
- Holes are made 30 cm from the beacons and a plastic sleeve from the dowel-nail is inserted.
- GK sheets are glued to the adhesive mixture. Additionally fixed with dowel nails.
Attention. Before using glue, you need to coat the rough surface with a primer.
For walls made of brick, concrete
GCRs are attached to brick and concrete walls in 4 ways:
- Fixation with glue.
- Cladding with polyurethane foam.
- Using self-tapping screws.
- Fixing the dowel-nails.
The choice of method depends on the curvature of the wall and humidity.
Concrete wall. Basically it is smooth - cement-based glue is used. For better adhesion, notches are made on the wall, covered with a primer, and then the gypsum board is fixed.
Brick wall. The facing material is fixed using polyurethane foam. Applying foam to the sheet with a snake allows you to control the amount of product applied. After applying the foam to the sheet, wait 2-3 minutes. When the foam begins to expand, the sheet is applied to the wall and leveled.
Alignment of walls by Rotband using beacons
Until recently, leveling was carried out only with cement or lime-cement plaster mortars. Now there is an alternative in the form of high-tech gypsum mixtures. One option is to level the walls with Rotband , a product from Knauf.
This plaster compares favorably with traditional compositions because it has: – good adhesion to most substrates; – plasticity; – no shrinkage; – resistance to cracking and delamination; – relatively low weight of the plaster layer; – relatively fast drying. Plastering work should begin with preparing the base. We clean it of weakly adherent layers, all kinds of contaminants, and remnants of old coatings. Particular attention must be paid to protruding metal elements (protruding reinforcement, lintels over door and window openings from the corner, embedded parts, nail heads and screws...), it is recommended to clean them and paint them with a special primer , otherwise rust may appear on the front surface. Walls made of smooth concrete should be treated with a primer containing quartz sand - Betonkontakt or ST16. Porous substrates are carefully primed with deep-penetrating compounds, for example, CT17Ceresit.
Now you can install beacons; for Rotband you can use guides with the smallest edge height - 6 mm. Initially, using a plumb line or a long slatted level, it is necessary to diagnose the rough plane - hang the wall in different places to find its most protruding section. Next, we mark the installation locations of the beacons - usually 200-300 mm from the corners of the room and 1.3-1.8 meters between them (depending on the length of the working rule). We make vertical ridges on the wall from the plaster composition, about 40-50 mm wide, and press the guide profile into it. Using a long level, we rub it against the wall, constantly monitoring the verticality.
Having installed the outer beacons, we pull control cords along their working edges, relative to which we fix the intermediate guides. Sometimes internal beacons are placed according to the rule.
We prepare the solution in a plastic container, strictly following the manufacturer’s recommendations. Pour the mixture into the required amount of water and stir with a powerful drill or a construction mixer with a frame or auger attachment.
After 5-7 minutes, the plaster is mixed again. We have 25-30 minutes to apply the finished mixture to the wall.
Using a plaster ladle, trowel, wide spatula or metal trowel with some excess, apply the solution to a small section of the wall (50-100 mm) between two beacons.
We start work from the floor. We press the trapezoidal aluminum rule tightly against the guides (beacons) and, moving from bottom to top, level the plaster mark, removing excess mixture, which we return to the bucket for further use. We repeat this set of operations until we reach the ceiling.
Several passes should be made, filling gaps in the plaster layer and large sinks with the mixture as necessary. We process the remaining fields between the beacons in the same way.
If the thickness of the plaster exceeds 50 mm, then the work is carried out in two stages, and notches must be made on the surface of the first layer.
As soon as we have covered the entire wall and the mortar has set, we should remove the beacons and seal the resulting grooves flush with the plane (by analogy with the technology of pouring screed ). In a wall intended for tiling, the guides can be left.
Surfaces that will be covered with wallpaper can be almost completely prepared by “glossing”, bypassing the puttying stage. To do this, no earlier than 2-3 hours after the start of work, the plaster is generously moistened with water and rubbed in a circular motion with a sponge grater. Please note the opportunity to save on the entire stage of applying the finishing putty! At the same time, the cleanliness of the surface formed with the help of Rotband, with a certain skill, turns out to be of very high quality, suitable for wallpapering.
Direct glossing is carried out with a high-quality spatula or metal trowel.
Note that most practicing craftsmen still prefer to apply one or two layers of putty, especially for walls that are being prepared for painting.
After 7-10 days, the plaster will dry and leveling the walls with Rotband can be considered complete. For subsequent finishing it is recommended to prime it. Now you can paint or wallpaper.
Preparing a plasterboard wall: what is needed?
To fix the gypsum board to the wall, you need materials and tools:
- The selected type of drywall is moisture-resistant, ordinary.
- Dowel-nails, self-tapping screws.
- Selected adhesive for fixing sheets.
- Hammer, construction mixer.
- A plumb line, usually a sharp knife, a level.
- Container for preparing glue, spatula.
- Primer, roller, brush.
After collecting the necessary tools, as well as purchasing all the materials, you need to prepare the rough surface.
- Clean the wall of old cladding, wallpaper, paint.
- Existing cracks must be reinforced and puttied. Seal all holes with cement or gypsum based mortar.
- The surface is coated with a primer.
When the primer dries, gypsum boards are prepared. Holes for switch sockets are cut out in them.
For high-quality wall finishing, you need to properly prepare the adhesive mixture:
- The specified amount of water is poured into a clean container.
- Add a little dry mixture to the water and mix.
- After this, add the specified amount of dry mixture and slowly mix with a mixer.
- After obtaining a homogeneous mass, pour a small amount of PVA into the glue and mix again.
After kneading, the solution must stand for at least 5 minutes to completely dissolve the additives and obtain elasticity.
Tips for leveling walls
And if the layer is thick, then the surface must first be treated with starting putty. With the right technology, the putty is applied in several stages, but only when the previous layer has dried. Usually three layers are used, the last one is finishing putty to finish the job. Then the entire surface is sanded with sandpaper. A similar operation must be carried out with the other edge of the wall. The next step is to pull the cords along the four beacon points; as a result, you can get an accurate picture of the condition of the wall surface. Installation of beacon slats begins with the installation of profiles on opposite walls. The verticality of each lighthouse is checked with a plumb line, and such profiles are mounted on the wall with building plaster. Plaster is applied to the rail at several points while maintaining a distance of 50 cm. Then a cord is pulled through the lower, middle and upper profiles.
The following slats are also mounted on the wall, but so that the cord barely touches them. The frame for fastening plasterboard sheets is assembled from a galvanized profile specially designed for this purpose. Several types of profiles are used. If there are bulges in the middle of the wall, then the first beacon must be attached to the largest ledge, and from it, guide directions to both sides of the wall along the extreme points and a stretched fishing line.
All surfaces must be located strictly in the same vertical plane. I advise you to immediately decide on the areas where you can apply the residue. It is more convenient to knead the mixture in a container with rounded corners. A plastic bucket is ideal for this.
Clean water is poured into it and then the dry mixture is added in a ratio of 2: 3. Should you be afraid of uneven walls and how to deal with them? The answer is obvious - of course not. In this article I will tell you how to level walls with a rotating band with your own hands and get a result no worse than the pros.
DIY gluing plaster to the wall: step-by-step guide
Having prepared the rough walls and mortar for fixing the gypsum boards, you can begin installation. There are 3 methods for gluing sheets:
- Apply a continuous layer of glue using a notched trowel. Used for concrete walls.
- Applying glue in small piles.
- Using beacons and lining foam (gypsum pieces). For very uneven walls.
Stages of applying plaster to drywall
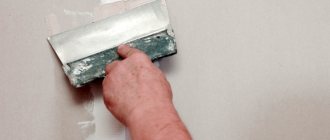
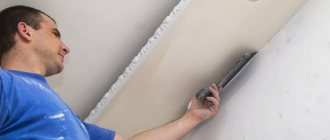
- Apply the prepared plaster for drywall with a spatula, completely filling the recess between the sheets of drywall.
- Apply serpyanka (tape for sealing seams) to the still wet plaster and press it with a spatula. This tape will further protect the walls and ceiling from the formation of cracks. You need to apply 1 more layer of plaster on top of the tape and level it using a wide spatula.
- To obtain a perfect finish leveling of the wall surface, it is necessary to apply a fine-grained putty (thin layer) to the drywall.
- After all layers are completely dry, use a grater with a sanding mesh inserted into it to remove any unevenness in the dried putty.
- After the puttying process is completed, the drywall is ready for final finishing - painting, wallpapering, etc.
Useful video
Published on October 27, 2017 in the Walls category // // Author: Admin
- 5
- 4
- 3
- 2
- 1
(0 votes, average: 0 out of 5)
With the help of plasterboard sheets, repair work has become much easier. Even a beginner can cope with this task by following simple instructions. The time required to complete repair work is significantly reduced. GCR can be glued or attached to a special profile frame or adhesive solution. The two methods are extremely clear and differ in the complexity of execution. In the article we will figure out whether it is possible to glue drywall to plaster - both to plastered walls using glue, and to the plaster mixture itself.
Technology of frameless installation of plasterboard sheets
Before gluing drywall to the wall, you need to set the general level. Using the installation rule and a plumb line, vertical surface deviations are measured. The length of the wall alignment line is marked on the floor and ceiling.
A sheet of gypsum board is cut out onto the entire wall at once. To reduce the amount of work, it is better to buy sheets the height of the room or larger. Then you won’t have to adjust and putty the horizontal joints.
GCR can be attached to walls in two ways.
Peculiarities
Drywall is a building material consisting of several layers:
- paper - there are two of them and they are located outside;
- gypsum - acts as an internal layer; to improve its properties, various fillers are added to it.
Available in the form of sheets, which can be:
- conventional (gypsum plasterboard);
- moisture resistant (GKLV);
- fire-resistant (GKLO);
- with increased strength (gypsum fiber - GVL).
Among the advantages of the material, the main one is that it can be used not only to create rectangular building objects, but also radius ones, with completely unimaginable shapes. It is multifunctional - it hides architectural defects well (for example, deviations from a right angle by several degrees) and uneven walls and ceilings, ventilation communications, pipes and wiring. In addition, it is lightweight, flexible, environmentally friendly, has fairly good thermal insulation and fire resistance.
There are also disadvantages - fragility, poor sound insulation and the need to purchase a special mounting system.
There are lengthy discussions on construction forums about the need to apply plaster to plasterboard structures. After all, in essence, they have the same functions - leveling and protecting walls from external influences. In addition, they are very similar in composition. Professionals still emphasize that this needs to be done.
- Firstly, the drywall surface is rarely left in its original form. And to apply any decorative coating you need a perfectly flat surface.
- Secondly, when fastening, plasterboard sheets often have to be joined and in order to do this, fasteners are needed. All caps and joints will be perfectly visible even under wallpaper and paint.
- Thirdly, this is necessary if you need to mask defects that appeared during long-term use.
- Fourthly, plaster is applied only if it will serve as a decorative coating.
Choice of material, can decorative plaster be used?
The plaster is selected according to the type of drywall, the degree of humidity in the room, the rate of polymerization, and the thickness of the layer. For wall and ceiling HA, solutions are allowed that do not contain water or contain small quantities. Moisture-resistant and withstands cement compounds. Polymer mixtures are suitable for both types.
Table 1. Selection of plaster for HA
| Type of plaster | Room humidity level | Polymerization speed | Layer thickness | GKL type | ||||
| High | Low | Fast | Slow | Medium thick | Thin | Standard | Waterproof | |
| Plaster | + | + | + | + | ||||
| Limestone | + | + | + | + | ||||
| Magnesian | + | + | + | + | + | |||
| Cement | + | + | + | + | ||||
| Polymer (decorative) | + | + | + | + | + | + | + | |
Plastering with decorative solutions does not damage drywall. Hides surface imperfections and provides sound insulation. Therefore, the use of decorative compositions in combination with HA is possible.
Before plastering the base, you need to apply a primer in 2 layers and put a thin layer of putty. This improves adhesion, reduces the consumption of the polymer mixture, and increases the service life of the finish.
Based on the type of binding element, there are 4 types of decorative solutions:
- Silicate – based on liquid glass. Water-repellent, fire-resistant, does not collapse.
- Acrylic - creates sound insulation, is vapor permeable, and does not suffer from temperature changes. Suitable for bathrooms, kitchens.
- Mineral – not afraid of water, abrasion resistant, environmentally friendly.
- Silicone - durable, does not crack, is easy to clean, does not fade, and is moisture resistant.
Based on texture, the following decorative plasters are distinguished:
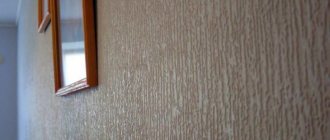
- Structural - the composition includes granules and fibers of arbitrary size, which form an uneven layer (“lamb”, “fur coat”, “bark beetle”).
- Venetian - contains marble chips, polymers, plasticizers, colored fillers. The coating is smooth, reminiscent of marble. Violation of the installation technique leads to the formation of cracks, which will be difficult to remove.
- Marseilles wax - after drying it becomes embossed, but remains smooth to the touch.
- Craquelure - creates an interesting effect of a cracked surface.
- Wet silk – due to its pearlescent particles, it resembles iridescent fabric.
- Sea breeze - technology uses translucent colors with a slight tint.
Putty or plaster
Formally, both materials are used to level surfaces. However, there are some nuances. Significant differences in composition make their scope different. Their main difference is the grain size of the binder. In plaster it is larger, even in the finest-grained varieties. It is good for rough leveling the base. Easily covers even large defects and irregularities.
The putty is applied in a thin layer because it has minimal grain size. With its help, final leveling is performed when all significant flaws have already been closed. Solutions can be distinguished even by appearance.
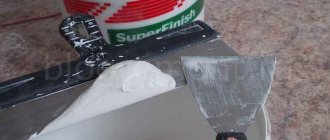
Finishing putty Knauf Rotband Pasta Profi, 5 kg
Plaster necessarily contains large or small particles, while putty is a homogeneous paste. These differences should always be taken into account when deciding on the finishing treatment of gypsum plasterboard.
Both putty and plaster level the base, but do it in different ways
Alignment Methods
The technique is chosen based on the curvature of the surface. If the unevenness is more than 40 mm, it is optimal to choose a frame method; if there is less curvature, it is frameless. Mounting to the lathing makes it possible to disguise any communications, insulate or soundproof the wall. But at the same time, the space of the room is “eaten up”, you need to know this. We will analyze in detail both options for fixing gypsum boards.
Aligning walls with plasterboard with frame
The sheathing is installed on a frame-sheathing made of metal profiles or wooden blocks. The technology of work includes four stages, we will characterize each of them.
Preparing for installation
An important step that cannot be ignored. You must understand that a poorly prepared wall will affect the quality of the finish. For example, mold or efflorescence on its surface can lead to damage to plasterboard sheathing, while unfixed defects can lead to deformation of the frame. Therefore, preparation is carried out in full and only after all engineering communications have been installed.
First, the old decor is removed: wallpaper, falling off fragments of plaster. This does not apply to paint. Then all defects in the base are identified, after which they begin to eliminate them. The crumbled seams and cracks are properly sealed with repair mortar. They are given time to dry thoroughly. The fungus or mold is carefully scraped off. The areas where they spread are treated with an antiseptic. The frequency of treatments is usually indicated on the packaging of the product.
Be sure to inspect all communications that will be covered by the frame. Particular attention should be paid to the wiring. It is advisable to ring it to make sure it is fully operational. It’s good if there is a supply of wiring length for sockets and switches. For installation on top of the sheathing, you will need another 10-15 cm. If they are not there, this deficiency is corrected. Be sure to mark the wiring lines at the joints between the ceiling and walls so as not to touch them when installing the frame.
Installation of sheathing frame
The installation of drywall on the wall begins with marking the sheathing. First, mark the lines for fastening CD-shaped profiles. 1.2 m is measured from any corner, this is the standard width of the gypsum plaster board, and a mark is placed. A strictly vertical line is drawn through it. All walls are marked in the same way. If you fix the slab only at the edges, the structure will be fragile and will not have enough rigidity. For reinforcement, additional rack profiles are installed. You can put one strip inside the sheet, then markings are carried out every 600 mm. Or two profiles, then lines are drawn every 400 mm.
Next, areas for securing the guides are outlined. To do this, the so-called “hanging” of the plane is performed. It's done like this.
- 100 mm are retreated from the corner, and holes for dowels are drilled in the wall at the same distance from the ceiling and from the floor. Similar operations are carried out on the opposite side.
- Self-tapping screws are screwed into the prepared dowels, but not completely. The hat should rise 1.5-2 cm above the base.
- Using a plumb line, the screws are brought in pairs into one plane.
- Cords are pulled between the hardware: vertically, diagonally and horizontally. A virtual flat plane is formed, which allows you to determine the area of maximum curvature of the base.
- The point of greatest curvature is transferred to the floor. The guide will pass through this mark.
- Using a plumb line or laser level, the line drawn on the floor is transferred to the wall and ceiling.
Hanging makes it possible to assemble the frame as close as possible to the base, thereby keeping part of the space intact. If there is no desire to fulfill it, they act differently. In the corners, leave a distance of 5-6 cm, put marks, then connect them with lines. Guides are laid along them. This is a very simple method, but it significantly “eats” the area of the room.
After this, they proceed to installation. First, drill holes for fasteners on the markings of the guides on the ceiling, walls and floor. The installation step is 0.4-0.6 m. Then similar holes are drilled along the vertical lines marked for the CD profiles. The installation step is 0.8 m. After this, the guides are fixed to the floor and ceiling, and their base is glued with a damper.
Move on to attaching vertical profiles. First, the hangers are attached to the base with self-tapping screws. Profile posts are placed one by one inside the guides and lowered to the bottom. The edges of the hangers are folded onto the CD profile and secured with self-tapping screws. The protruding fragments of the suspensions are cut off. The sheathing frame is ready.
