Beginners are perplexed by drywall plastering. This is one of the popular materials for making partitions and leveling walls. We answer numerous questions that beginners have: is it necessary and how to plaster drywall under wallpaper, what mixture is best suited, what are the features of plastering for painting? Let us immediately consider the main features of the material itself.
Peculiarities
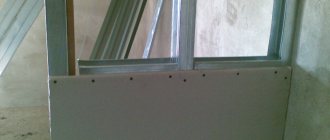
Many of the building materials on the market are designated by abbreviations. One of them, gypsum board, refers to the well-known drywall. The sheet material consists of paper (cardboard) facings glued to a gypsum core. Plasterboard sheets are used to cover walls and ceilings, cover niches, and make partitions from it. The material creates smooth surfaces and serves to level walls.
Plasterboard material is inferior in strength to brick, ordinary concrete, and wood. Needs protection. The gypsum board is attached directly to the wall (with a sticker) or to the frame (with self-tapping screws).
Seams, broken corners, screw heads are not the best sight. The first thing you want in such cases is to cover everything with plaster mortar.
However, heavy plaster coating can deform it. Moisture from the solution will warp and reduce strength. Therefore, questions arise about the possibility and necessity of plastering gypsum boards.
Do-it-yourself preliminary preparation: finishing with putty
Before puttying, plasterboard walls must be primed. Special primers for drywall are used to protect against moisture and mold, provide better adhesion to the finish and create a uniform film. The choice of primer depends on the wishes of the master, from dry mixtures to ready-made solutions, and is applied with a brush or a rough brush in one thin layer. Puttying can be started immediately after the soil has completely dried.
The need to fill holes from self-tapping screws
In the places where the drywall sheets are attached to the guides, small dents remain from the heads of the screws. These places need to be wiped down for several reasons:
- Firstly, so that finishing solutions do not seep through the holes into the sheets.
- Secondly, so that the surface becomes visually smooth.
In addition, self-tapping screws coated with putty will be less susceptible to corrosion and rust formation.
Do I need to putty the corners?
The corners formed by plasterboard sheets can be internal or external.
External ones are typical for rooms of complex architecture, where complex structures were created using plasterboard. To finish external joints, metal or plastic corners are used, which are stapled to the wall surface and then puttied.
It is more convenient to putty internal corners using a special corner spatula. If you are unsure about the evenness of the joints, they can be sealed in the same way as external ones - using corners.
Puttying plasterboard walls under the mesh
Fiberglass adhesive mesh for sealing seams between sheets is called serpyanka. It is glued along the entire length of the joint as tightly as possible to the surface, then putty is applied so that the sickle is not noticeable under the layer of mortar.
Alignment with serpyanka allows you to avoid the formation of cracks in the finish and additionally fastens the sheets together. Puttying the entire surface of the wall is repelled by the layer at the seams, which makes the finish smooth and even.
It is also possible to completely align with a painting mesh, but for plasterboard walls an important parameter is the weight of this mesh. If it is impossible to select the lightest mesh possible, it is better to abandon this method.
What to putty on: the best putty for gypsum boards
The putty layer directly depends on the quality of drywall installation:
- if the alignment along the guides is done carefully and level, then the thickness of the putty layer will be only 1-2 mm;
- if the sheets are fastened with gaps, then putty with a layer of up to 3-4 mm will help to level the surface.
Also, the choice of the mixture itself depends on the quality of the installation: if the surface is sufficiently smooth, you can get by with finishing putty, but if a lot of leveling is necessary, you need to first make a layer of the starting composition, then the finishing one.
Why do this?
The cardboard wrapping of the drywall is unpresentable, so a finishing coat is supposed to be placed on top of it. Most often this is a “shirt” made of wallpaper or painting. Both of these types of finishing are thin-layer, do not hide joints and fastenings, and require a particularly flat, smooth surface. For this reason, before gluing wallpaper or applying paint, drywall needs additional leveling using putty or plaster.
In addition, drywall plaster serves as a protective layer for the easily vulnerable external “misfortunes” of a fragile material.
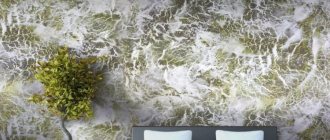
A separate type of finishing coating for gypsum boards is decorative plaster. This is a recognized leader among means of interior transformation and ways of self-expression for homeowners.
Modern plastering materials allow you to create a unique design without overloading load-bearing structures with their weight, protect plasterboard walls from moisture, fungus, mold and rodents, and allow the walls to breathe. Making plasterboard partitions with the effect of malachite, marble or onyx, for example, decorating a ceiling in the Venetian style with any wallpaper will not work - only with decorative plastering.
However, it is recommended to plaster drywall only for leveling littered or bent walls, when it is not possible to remove the sheets and replace them with new ones. During dismantling, the sheets break; fasteners must be installed in new places. In all other circumstances, the plasterboard lining is puttied.
Briefly about the main thing
Plaster is necessary for filling depressions over 3 mm thick, gaps between individual sheets, when forming external corners using a beacon profile.
After the solution has dried, a reinforcing tape made of fiberglass mesh, paper or construction bandage is fixed.
There is no need to use compositions with quartz filler as a primer, since the paper shell of the canvas, despite its smoothness, has good adhesion to most mortar materials.
Before using decorative plaster, filling joints and reinforcing seams is mandatory.
Before applying Venetian plaster or liquid wallpaper, it is recommended to apply a continuous layer of putty.
Ratings 0
Types of drywall
Five types of gypsum plasterboard are produced, the difference between which is in the composition of the core and its properties:
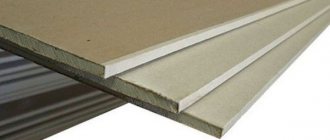
- In addition to the usual wall gypsum plasterboard, they produce plasterboard ceiling sheet material, which differs from the wall one only in its smaller thickness. The core contains the same building gypsum.
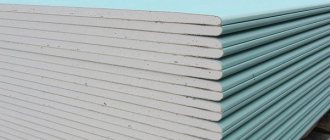
- Moisture-resistant plasterboard lined with green cardboard (GKLV) is used in the interior of bathrooms (they even cover walls in swimming pools). GKLV treated with antifungal impregnation and other compounds is not afraid of moisture.
- GKLO - fire-resistant gypsum board with reinforcing and fiber additives is suitable for lining fireplaces and chimneys. In a fire, the cardboard becomes charred, but the plasterboard sheet retains its shape.
- The core of a flexible arched gypsum board is reinforced with fiberglass threads, which allows the sheet to be bent in different directions with a possible minimum radius of up to 300 mm. It is thinner and more expensive. If you consider that to ensure the strength of the arches that are made from it, gypsum boards are used, folding two sheets at a time, the cost of plasterboard structures is decent.
- Moisture-resistant combines the qualities of fire-resistant and moisture-resistant.
- Combined, used for wall insulation, has a special composition with the addition of expanded polystyrene.
Finish stage
After the putty has dried, it needs to be sanded. If you choose embossed wallpaper based on polymer compounds, then when
After drying, the surface must be sanded
Grouting removes only imperfections visible to the naked eye. For example, stripes formed from excess material along the edges of the spatula. You can remove them quickly and without much effort.
If you choose paper or photo wallpaper, then sanding will need to be given more attention. For such cases, you can use the old trick of placing a lamp in the corner of the room so that the light spreads along the wall. In the dark, such illumination will make any surface defects noticeable and they can be quickly removed using sandpaper.
Material selection
The characteristics of plasterboard walls determine the choice of primer and plaster compositions. For ordinary, ceiling and arched types, solutions are suitable that do not transfer moisture to the base, do not contain a lot of water or do not contain it at all. It is better to leave ordinary mineral mixtures for gypsum boards, and polymer solutions for plasterboard walls of any type.
Plaster
Gypsum-based plasterboard plaster, popular for finishing dry rooms, is ideal for leveling and decorative finishing. Does not “share” water with the base, quickly sets and hardens.
Pros:
- vapor permeability;
- easy restoration (repaired without visible trace of repair);
- low weight of the coating;
- environmental friendliness;
- versatility (combinable with any base);
- perfectly sculpted and polished;
- does not form shrinkage cracks when hardening;
- fire safety;
- low thermal conductivity;
- easy to mix;
- compared to cement mixture, consumption is lower;
- An excellent base for paints, varnishes and wallpaper.
Minuses:
- low frost resistance;
- rabies;
- fast setting.
As already mentioned, gypsum plaster can be used to plaster plasterboard walls in dry rooms.
Cement
The binding component of the cement mixture is Portland cement. A simple composition with sand as a filler is complemented by additives that provide the necessary properties. It is characterized by frost resistance and durability of the coating. Cement plaster for drywall can be made independently or purchased in the form of a dry mixture.
Pros:
- good adhesion;
- availability (large selection, low price);
- easy application;
- maintainability;
- fire safety;
- resistance to water;
- strength;
- versatility;
- frost resistance;
- durability.
Minuses:
- refers to heavy (not for weak plasterboard walls);
- long-term strength gain (at least 3 weeks);
- does not withstand precipitation and vibration.
Suitable for plastering plasterboard in damp areas. Complex compositions are also used, for example, cement-lime
Modern polymer compositions
The versatility of polymer compositions is especially appreciated by specialists. Polymer mixtures are easy to install, dry quickly, adhere firmly to drywall, and do not weigh down the wall.
These include:
- acrylic,
- silicone,
- polymer cement,
- siloxane, etc.
Pros:
- elasticity;
- strength, as well as its rapid gain;
- water resistance (water repellent and waterproof);
- 25 or more years of service;
- environmental friendliness;
- non-shrinkability;
- richness of the palette;
- increased mechanical resistance;
- workability;
- increased adhesion.
Minuses:
- high price;
- not suitable for leveling;
- are purchased only in finished form.
The best choice for plastering drywall, as it does not “supply” it with water, does not weigh it down, and protects it from water ingress.
Is it possible not to putty drywall before finishing?
Let us say right away that such an approach to repair is possible, but it is absolutely not worth the problems it will bring in the future. The fact is that plasterboard is a material for rough finishing of premises; it is used for walls and ceilings. Its surface cannot be called attractive, and its shape is uneven.
Drywall
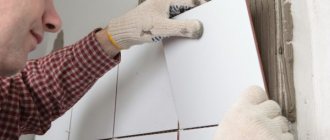
Therefore, no matter how you look at it, in order to make a beautiful finish, you will first need to level everything, which is what putty is actually used for. The exception is cases in which it is planned to stick ceramic tiles onto drywall, since they themselves are strong and create a durable surface. And then the surface is still pre-treated with priming compounds so that the glue sticks to it better.
What do you think will happen if you try to tear off ceramic tiles glued to the surface of drywall? That's right, due to the fact that it is a thin paper layer on a gypsum core, the surface will be destroyed, which leads to an immediate decrease in the strength of drywall, since paper is a reinforcing element in it.
The surface will have untidy seams and exposed screw heads
Oddly enough, the same thing will happen if you try to tear off drywall and wallpaper from an unputtyed surface. In most cases, the paper surface cannot withstand such manipulation. It is worth noting that your wall, of course, will not collapse, but its strength will suffer significantly. Evenness may also be affected, since parts of the gypsum core may also fall behind along with the paper.
It is possible to repair drywall in such situations, but provided that only a small part of its surface is damaged. Sealing such places requires the installation of patches, which will also need to be puttied. As a result, unevenness is formed in these places, since the resulting seams do not have indentations like factory ones. In turn, this leads to the fact that new wallpaper pasted on top, especially if it is thin, will not be able to hide such places.
It is better to glue wallpaper on putty walls.
If you did everything as expected and puttyed the entire surface of the drywall, the result will be completely different. Gypsum putty creates a durable intermediate layer that will prevent damage to the material if something happens. In addition, even in thin layers, you additionally level the walls, which is especially important in places where you unstitched the seams yourself. We'll talk about this in more detail later, as things may be a little confusing right now.
Such installation leads to curvature of the surface
Also, in cases where the frame is assembled by layering profiles and fixing them with self-tapping screws, as shown in the photo above, similarly, the drywall becomes bent. Putty helps correct these defects.
If someone still thinks that puttying is an extra waste of money on materials and craftsmen, then we will try to convince them too. Firstly, the cost of one bag of dry universal putty of varying degrees of quality will vary from 300 to 600 rubles. This bag is enough for you to putty all around a huge room, despite the fact that it is not applied to the drywall in large layers. Agree, the costs are not huge, and considering how much you will spend on the drywall itself, such savings look completely ridiculous. Secondly, as for the masters, you can do the job just as well yourself if you carefully study the material presented below.
Sealing drywall seams
What happens if you glue wallpaper onto drywall?
If for some reason you still need to stick wallpaper on drywall, then do not forget about the following points:
- If your room is lined with green, moisture-resistant plasterboard, then rest assured that the same shade will be transferred to your wallpaper, especially if it is thin. At the same time, along the seams that you definitely seal, the shade will be normal. Yes, and don’t forget about the stains caused by smeared screw heads. Fireproof sheets are used extremely rarely, but the same story will happen with them, only their color is pink.
- The front side of the drywall is marked clearly in the middle of the sheet. It doesn’t stand out very much, but it will also be noticeable on light wallpaper.
- Another small nuance is puttingtying the self-tapping screws - without applying the base layer, you will have to go over them at least twice, since putty always shrinks, especially in deep holes. In principle, this does not take long to do, but it is necessary, since these small irregularities may later appear on the wallpaper.
The seams will have to be sealed anyway
How to avoid these troubles? Firstly, you can use gray/beige drywall. It is intended for dry rooms. Its shade will almost coincide with the tone of the putty. Secondly, if this is not possible, then when priming drywall, you should add a little white water-based paint to the composition. This will give the material, if not a perfectly uniform color, but will still reduce the differences in tones to a minimum.
When priming drywall, you can add a little white water-based paint to the composition
Prices for various types of putties
Putties
Tools
To plaster walls with your own hands, you will need the usual tools and equipment for plastering work:
- spatulas - for applying the solution;
- for priming - rollers, brushes;
- grater;
- mixer;
- rule;
- construction knife;
- masking tape;
- containers;
- rags.
Putty joints
First of all, you should putty all the joints of the sheets.
For work, it is advisable to use narrow and wide spatulas. Narrow ones are convenient for applying putty to the seam, and wide ones are convenient for leveling it.
Work is carried out in a top-down direction. The composition should fill the seam completely, even protrude slightly, since the putty shrinks when it dries. After the walls treated in this way have dried, the excess can be removed by sanding. If it is not possible to fill the seams in one layer, you need to let the composition dry, and only then repeat the operation.
Features of preparatory work
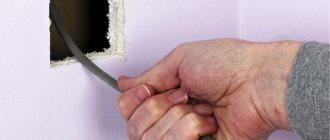
Before applying the solution, the surface of the plasterboard coatings must be cleaned of dust and repaired. During installation of gypsum boards, corners often break off and dents form. It is necessary to cover with mortar and level with the surface all the places where the screws are installed.
The seams are also sealed. Where chamfers have not been removed, they are removed with a sharp knife at an angle of 45°, otherwise the monolithic work will be of poor quality. Serpyanka mesh is often used to reinforce seams. However, there are more worthy substitutes - special paper, fiberglass tape.
First repair the drywall joints:
- A bevel is cut with a knife.
- Clean the joint from dust with a brush or broom.
- Apply primer and dry.
- Spread the putty.
- Apply the composition with a narrow spatula and level.
- Apply a reinforcing mesh (pre-wetted paper tape), press and smooth with a narrow spatula (from the middle to the ends).
- Apply a covering layer of putty and level with a wide spatula.
Chamfering
Padding
Fastening the reinforcing mesh
Application of the composition
Applying a covering layer
Repairs dents in fasteners. The caps must be recessed into the thickness of the sheet. All attachment points are covered with the solution crosswise with a narrow spatula. In this case, the grooves (slots) on the heads of the screws are guaranteed to be filled with solution.
The corners of plasterboard walls and partitions are reinforced using perforated corners, mesh or paper. The first ones are preferable.
The work should be performed sequentially:
- The edges of the sheets are processed by chamfering.
- Remove any accumulated dust.
- Primed.
- Apply the first layer of putty.
- Apply a corner and sink it into the solution (at the level).
- Apply the solution on top and level it with a spatula.
- After drying, the unevenness of the mortar in the corner area is rubbed with a trowel.
Preparing drywall for putty, step-by-step diagram
After installation, you need to prepare the HA for finishing. For this:
- Tighten the screws so that the heads do not protrude above the surface of the sheet. If the screw goes deeper into the sheet than 1 mm, remove it and place a new one next to it. The cardboard above the cap often swells. Cut off the peeling paper.
- Seal the joints.
- Remove debris, clean dust.
- Prime the surface with a brush or roller. Let dry. Ventilate the room during drying. Continue work only after drying - at least 12 hours. Primer solutions are selected according to the type of finish. For painting, light wallpaper - a mixture of surface penetration. For heavy wallpapers and tiles - a primer with the deepest impact. In damp rooms it is recommended to use moisture-resistant compounds.
- After that, start reinforcing the corners. Internal corners can be processed in two ways. The first is to start with sizing with serpyanka. Apply putty on both sides of the corner and smooth it with a spatula. Let dry, rub, repeat until the bevel is level. The second way is to cover it with putty and stick paper for reinforcement. Apply putty and go around both sides of the corner with a spatula. Clean off excess solution. It is easier to work with an “angled spatula” than a standard one.
- Puttying of external slopes begins with primer treatment. Let dry. Cut the required length of the perforated corner. At the joining points, make the cut obliquely. Apply the adhesive mixture to the corner on both sides in small beads at a distance of 10 cm from each other. Fit the perforated corner, check the evenness, cover the profile with the mixture, remove excess solution with a spatula. Leave until dry. Sand. If necessary, add another layer of mixture.
How to plaster drywall - technology
Let's turn to how to properly plaster plasterboard walls. If the unevenness on the surface of the gypsum board is small, it is better to plaster by stripping:
- apply the solution into the recesses with a spatula;
- The mixture is leveled using the rule, resting the tool on the surface of the sheets.
Stripping plaster technology
In case of unevenness with differences of up to 10-15 mm, plaster with a wide spatula. It is possible to apply two layers sequentially with the obligatory drying of each.
How to plaster drywall under wallpaper with large curvature of the walls? If the curvature or unevenness of the surface is too great, plaster along the beacons, applying two layers in succession. Each layer is dried and only then the next one is applied. After the solution has dried, the unevenness is rubbed down with fine sandpaper or an abrasive mesh.
For painting
Since a layer of paint is capable of making visible and emphasizing even small flaws, after application the drywall putty for painting is processed especially carefully. The plaster layer applied and leveled with a wide spatula (except for the gypsum layer, which is sanded to the desired smoothness) is rubbed using a trowel.
They begin this from the moment when the solution stops sticking and does not press through with a slight finger pressure. The surface of the solution is moistened. The grater is applied flat and rubbed in a circle with slight pressure. On convex places the pressure is increased, on depressions it is reduced. The dried drywall plaster, intended for painting, is sanded. After this, a primer is applied.
How to plaster drywall under wallpaper with your own hands
If you are not confident enough about the need to plaster drywall under wallpaper, the following information is for you.
If drywall is being prepared for wallpaper, a layer of primer and putty/plaster is also necessary to ensure that the wallpaper does not stick tightly to the gypsum board cardboard. Otherwise, it will not be possible to remove outdated wallpaper without damaging the plasterboard base.
Wallpaper, unlike painting, can hide small, minor flaws and errors - small pores, microcracks. Therefore, it is quite possible to apply only the starting putty under the wallpaper, ensuring the absence of protrusions, dents, and large pores. The same applies to plaster. When applying leveling plaster on beacons, the top layer - the covering - is made with a fine-grained composition. The surface is rubbed and, after drying, sanded.
You can also learn from the video how to properly plaster drywall under wallpaper.
Is it possible to apply decorative plaster to drywall?
Of course you can. Decorative plasterboard plaster is one of the types of finishing. The application of decorative plaster to drywall must be preceded by preparatory work, culminating in the application of a primer. For thin-layer coatings, for example, Venetian, the surface is additionally puttied to achieve smoothness. A smooth base is not necessary for structural plasters.
Decorative plaster is applied to drywall with a spatula, roller or trowel in the manner prescribed for the selected effect. Layers of textured plaster are applied sequentially, and each one is dried. The decorative layer should not be thick.
After drying, the decorative plaster is coated with paint or varnish.
Is it possible to plaster drywall with rotband?
Among the best plasters for gypsum boards is the gypsum composition - Rotband (Knauf). This is not only a leveling plaster for drywall. It can be used to form a decorative coating. It contains gypsum, polymer additives and light aggregate. The use of rotband for plastering allows you to create a smooth surface that does not require any other additional processing.
Plaster for wallpaper and painting
Wallpaper requires that the walls be smooth, especially when a subtle look is chosen. The work begins with priming the surface, then the uneven areas where the differences are greater are covered with a plaster solution, a larger amount of the composition is applied, then a coating with a finishing putty composition is applied, and the end will be the application of a primer.
If the wallpaper is thick, you can apply one coat of primer; for thin wallpaper, you may need to apply it twice.
Wallpaper requires that the walls be smooth, especially when a subtle look is chosen.
When painting, an even surface is required; paint will not be able to cover minor defects, as thick wallpaper can. Carry out the same work as when gluing thin wallpaper. It may be necessary to apply two layers of the starting mixture, as well as increasing the layers of finishing putty. Afterwards the walls are sanded.
Only gypsum compositions that acquire a white color can be used; other mixtures can appear through the paint.
When painting, an even surface is required; paint will not be able to cover minor defects.
Drywall plaster or putty - what's the difference?
It is no coincidence that the two building materials have different names. There are significant differences between them:
- Purpose. Plastering is used to level out large deviations and uneven surfaces of the base. Putty – for leveling minor unevenness.
- The size of the filler varies. Coarse-grained components are possible in the composition of the plaster mixture; the grain size can reach 5 mm. In the starting putty, the filler grain has dimensions of 80-200 microns (0.08-0.2 mm), in the finishing putty - 20-80 microns, in thin putty - up to 20 microns. The grain size affects the minimum thickness of the created layer. The putty paste intended for finishing is applied with a thickness of 0.1-0.4 cm.
- Shrinkage of putties is less.
- Plasters have higher strength.
- The cost of plaster compositions is lower.
- Application technology also varies. You can apply plaster manually and mechanically, throw it on, apply it in a thick layer. The putty composition is applied in small portions and leveled.
You can also decorate walls with putty, just like with plaster.
Preparing the surface for gluing after puttying
After the putty has dried, the walls are sanded with special abrasives: mesh or sandpaper. The advantages of mesh are its wear resistance and the absence of dust accumulation, however, sandpaper is a more common choice due to its affordable price, despite its rapid grinding and frequent clogging.
Also, for better sanding you will need a flashlight: a beam of light at an angle of 45° will show all the imperfections of the wall. You can do without sanding if putty is applied professionally, but even experienced craftsmen clean the finished finish with at least zero-grit sandpaper.
Sanding corners requires special attention: for this purpose, use a special sanding sponge with beveled edges.
Tips and tricks
Needless to say, every case has nuances. Plastering drywall is no exception.
- When purchasing gypsum boards, it is better to immediately purchase moisture-resistant ones. After all, even in a dry room, water can appear, for example, the neighbors from above will flood it. Moisture-resistant cardboard will help out in such cases. You only need to remove the coating that has become unusable (wallpaper, whitewash, paint) and apply a new one.
- Plaster work starts from the ceiling.
- When preparing gypsum boards for plastering or applying putty, you need to pay attention to the joints. If cardboard comes away from the core, it is cut off; the peeled cardboard remaining at the cut line is sanded with sandpaper.
- When performing plastering work, the same conditions are observed as for ordinary plaster: temperature not higher than +30°C not lower than +5°C. Humidity up to 60%. No drafts or heaters. The electrical wiring is disconnected from the network.
- Nearby surfaces (for example, platbands) are covered to prevent splashes of the solution. Platbands, switches, sockets are covered with masking tape.
- If the choice is made between ready-made and dry mixtures, choose dry ones. They can be diluted in the required doses. Ready-made formulations must be completely developed, since they are not stored after use.
- Dilute gypsum mixtures correctly by pouring them into a container with water, scattering them over the surface of the liquid. After filling, you can mix by hand or with a mixer at low speed. Otherwise, thick lumps will form.
- If there are large chips at the joints of the sheets, these places are primed. After drying, the primer is sealed with a special adhesive composition. Subsequent work is carried out no earlier than the composition has dried.
- It is advisable to purchase dry mixtures closer to the beginning of the shelf life. It is not recommended to use expired compounds (it is fraught with serious consequences).
- The reinforcing tape is laid strictly in the middle of the seam.
- Do not add water to drying plaster or putty mixture. After this operation, the solution sets faster.
- Excess plaster gypsum mortar must not be thrown into a container with the working composition.
- Gypsum mixtures are diluted with cold water.
- To reliably plaster the joint, fill the seam with mortar, moving the spatula along the seam and making sure that there are no voids in the filling. Drips and splashes are removed immediately, since once they set, removing them will be problematic.
It is useful to support information on how to plaster drywall with a visual demonstration. Videos will help with this.
It is not difficult to do leveling plasterboard on drywall with your own hands. Many types of decorative plaster can also be done by beginners. You can learn anything if you want.
The working process
Now let's take a step-by-step look at the entire puttying process from the very beginning. We have prepared everything, put on gloves, a hat, glasses and begin to act.
Table 1. How to putty drywall.
| Steps, photo | Description |
| The drywall must first be primed. Many people do not do this, but in vain, since the material absorbs moisture quite intensively without treatment, which significantly complicates the work. Particular attention should be paid to additional seams, since they have an open core - coat them thoroughly. |
| If you use serpyanka for reinforcement, then at the next stage you need to cover all the seams with it. Try to ensure that it does not overlap anywhere, that folds do not appear, and that threads do not hang from the edges. Cut off the latter immediately with a knife, as they will interfere with your work. Paper tape is mounted differently, since it does not have a cellular structure - it is glued immediately after applying the first layer of putty into the seams and recessed. |
| Next, the putty is spread manually. It needs to be hammered into the seams with perpendicular movements, and then stretched along them with a large spatula. The seams are puttied in two layers - the first one closes the serpyanka and fills the deepest part of the seam, and the second levels the seam into the main plane of the drywall. It is very important to remember that when sealing an additional seam, layers occur, so a difference in this place is inevitable. You need to seal such a seam with a second layer using perpendicular movements, stretching the mixture as much as possible on the sides to get a smooth transition. |
| At the same time, we cover the heads of the screws that secure the drywall. Everything here is extremely simple - one pass is enough. If you see loose screws, correct them immediately, otherwise it will be difficult to hide them and there is a possibility that they will show through after sanding. Advice! After all the applied putty has hardened (this will take at least an hour), the surface should be cleaned of various layers with a spatula. |
| Step 5 – applying a base layer of putty | Now we can take spatulas seriously. We dilute the amount of putty that we will definitely have time to work out in half an hour. If you don’t know your capabilities yet, then do a small test batch. The thickness should be medium so that the composition does not slide down from the spatula and at the same time stretches well. 1. We begin to putty the wall from any corner. To do this, use a small spatula to evenly distribute the mixture over the blade of a large one, then apply it to the wall at an acute angle and pull the tool towards you without reducing the pressure on it. Your goal is to make the layer uniform and no thicker than 1 mm, so don’t be afraid to apply pressure. 2. If you see that the putty is slipping on the drywall, then make the first layer as a primer, then peel it off - this should not happen with the second. 3. If grooves remain after the spatula, do not rush to level them right away. Give 30-40 seconds for the mixture to release a little moisture to the base, then run a clean tool over it again. 4. After covering one wall with the first layer, return to the beginning and immediately apply the second before the putty has time to dry. This technique will save you from a large number of unnecessary actions and significantly simplify your work. 5. The second and subsequent layers (these are done if you want to achieve an ideal result) should be as thin as possible, so they are applied to the strip - the spatula is placed almost perpendicular to the drywall. Advice! Light the surface from the side at an oblique angle to reveal irregularities. |
| Next, the walls dry for several days, after which the surface is brought to smoothness through abrasive processing - grinding. This should be done in a circular motion, simultaneously highlighting from the side, just like when putting putty. |
That's all, your drywall is ready for wallpapering. Now the coating will be beautiful and will last a long time.
How to properly putty walls for painting? In a special article we will share important secrets that will allow even a novice master to do everything correctly and beautifully.
