Every beginner in renovation must learn how to work with building mixtures. The fact is that many types of work involve the fact that you need to glue something, seal something, level something. In each case, a different building material is used. But they have one thing in common - this is a dry construction mixture that you purchase in a store, then, according to the instructions, you prepare a solution from this mixture and begin to work with it. Today we will talk about such a dry construction mixture as plaster.
Types of plaster compositions
The following plaster compositions are used for initial wall finishing::
- cement-sand or cement-lime - for leveling the surface, ensuring high strength of the coating for finishing materials;
- gypsum - for leveling walls inside in living rooms, corridors, kitchens and other rooms with normal humidity;
- limestone - only for exterior decoration;
- clay-sand – universal compositions for external and internal processing;
- cement-lime-clay - a universal coating for facades and walls inside housing.
Attention
Depending on the operating conditions of the walls and the required qualities of the coating, one or another type of plaster mixture is used. Some are used only for interior decoration, others only for plastering facades.
We invite you to watch a video about the types of plaster for finishing work and the features of its use:
Stages of work:
- The surface of the base for plaster must be dry, free of dust, formwork compound, paint, residues of masonry mortars and other substances that weaken the adhesive qualities of the material.
- Surfaces that strongly absorb moisture, for example, brickwork, foam blocks, must be treated with a deep penetration primer.
- To obtain a flat surface and create the correct geometry of the room, as well as to minimize the plaster layer, it is necessary to set up corner profiles on the outer and inner corners, and install beacon profiles on a straight plane, taking into account the previously set level marks.
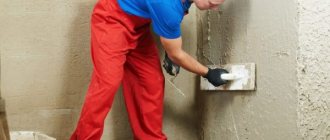
- Pour the dry mixture into a bucket of clean, cold water and mix by hand or using a construction mixer until a homogeneous mass is obtained. Pause for a few minutes and stir the mixture again. It is not allowed to add water or dry mixture to the prepared solution.
- Using a metal spatula, the required amount of plaster is applied to the wall with sharp throws.
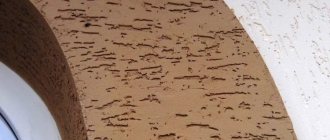
- When plastering a surface in two layers, it is necessary to apply a notch to the first, not yet hardened, layer (you can use a notched trowel), and then apply a second layer to the dried surface. The thickness of each layer is from 8 to 30 mm.
- Leveling of the applied solution is carried out using an h-shaped rule according to the previously set beacon profiles. The length of the rule must be selected taking into account the distance between the beacons.
- Plaster can be added to the surface to be smoothed directly while working with the rule.
- It is advisable to apply and smooth the plaster from top to bottom so that excess material does not fall onto the smoothed surface.
- After the plaster layer begins to lose its mobility (approximately 65 minutes after mixing the mixture), it is necessary to trim the surface using a trapezoidal rule. This quality of the treated surface is sufficient for tiling with ceramic tiles.
- If the plastered surface needs to be prepared for wallpapering, then after the surface of the plaster has begun to set (the appearance of a matte surface, approximately 90 minutes after mixing the mixture), it must be moistened using a generously moistened sponge trowel. Take a break for about 3-5 minutes so that the water applied to the surface can be absorbed.
- Using a sponge trowel, grout the surface in different directions. To make the surface more pliable for further processing with a metal spatula, let it stand for about 3-5 minutes.
- After the thin top layer of plaster softens when exposed to a metal tool, the putty mass (gypsum milk) is released. Next we smooth out the remaining unevenness.
- To process corner joints, use a corner spatula. After complete drying and treatment with a deep penetration primer, such a surface is ready for wallpapering.
- To prepare the surface for high-quality painting, it is necessary to thoroughly wet the plaster surface again within 24 hours, but not earlier than 2 hours after mixing the mixture, and repeat the surface grouting.
- Beacon and corner plaster profiles are made of galvanized steel. During surface treatment, the galvanized coating may be damaged. Therefore, in order to prevent subsequent rust formation, after drying the plastered surface, it is recommended to protect them from corrosion by treating them with anti-corrosion agents. Or the beacon profiles need to be deleted.
What solution is needed?
The plaster solution is prepared using standard technology, regardless of the basic components. For clay, sand, gypsum, cement and other dry mixtures, the addition of clean water and some additional components is required, depending on the desired qualities of the composition and the final functions of the plaster layer. This leveling is “rough” and requires additional finishing.
Plaster is used only on wall surfaces where the permissible maximum difference in height over the entire length does not exceed 3-4 cm. In other cases, the use of wall panels is required, for example, plasterboard sheets for interior decoration or facade slabs for exterior decoration.
The durability and strength of the coating depends on the quality of the raw materials from which the solution is prepared. Therefore, when choosing the type of plaster mixture, you need to pay attention to the following indicators:
- Microclimate of the room - expected temperature fluctuations, level of maximum permissible humidity, presence of direct sunlight, etc.
- Selected type of finishing compound.
- Type of finishing – façade or interior.
The main components of any solution can be divided into several groups:
- binder component - clay, gypsum, lime or cement (most often);
- filler is river sand, less often quarry sand, but of medium and fine fraction;
- water – only clean, sometimes heated to room temperature;
- additives and plasticizers - their total share should not be more than 10% of the total volume of the solution, since exceeding this figure can significantly deteriorate the quality of the plaster mixture.
According to the area of application of the solutions, there is the following distribution:
- cement-lime, cement-gypsum or cement-sand are used for facade finishing, covering walls in the basement or utility room, bathroom and for other surfaces that require increased durability and strength;
- gypsum or lime plaster is suitable for interior decoration of living rooms, which maintain a stable temperature and normal humidity without sudden changes;
- combined and clay mixtures - for working with wooden walls and other surfaces.
Important
In order for the quality of the solution to ensure the required durability and strength of the plaster layer, it is necessary to use clean fine- or medium-fraction sand from the river bottom. It is necessary to monitor the degree of purification of the material, since inclusions from earthen or clay lumps will create points of reduced strength.
When choosing quarry or sea sand, the material must be carefully sifted . It is advisable to take water for preparing the mixture at room temperature with the highest possible purity.
Features of homemade and ready-made purchased options
One of the main advantages of cement plaster mixture is the development of ready-made compositions by different manufacturers and the ability to prepare it yourself from the components.
Ready-made varieties are produced in dry form, packaged in bags. They are a homogeneous mass of binder, sand and other mineral fillers and plasticizers. The main advantage of ready-made mixtures is the exact adherence to the characteristics, the exact intended purpose while maintaining the ratio with water. Ready-made mixtures have the following advantages:
- best quality;
- simple preparation;
- better adhesion to the surface, which simplifies and speeds up work;
- thixotropy;
- longer operating time.
But these ready-made varieties also have several disadvantages:
- the price is 2-3 times higher than if you cook it yourself;
- components are 100% unknown;
- requirement of strict compliance with the ratio with water.
Ready-made varieties
Because of the price, many people prepare mixtures themselves in the old fashioned way. It is often difficult for an inexperienced specialist to correctly prepare the cement-sand variety for plaster the first time. If we talk about DSP, we can highlight the following advantages:
- low price;
- independent selection of components;
- regulation of the strength of the solution by the ratio of components.
Among the disadvantages are:
- complexity of the work;
- lower quality;
- difficulties with cooking.
Many people think that preparing the composition with their own hands is very simple, but in fact it is not so. To obtain a material of sufficient quality, you need not only to maintain certain proportions, but also to add certain additives.
Proportions and technology for preparing the mixture
There is a basic principle for preparing plaster mortar: first, mix the dry ingredients until they have a uniform consistency and color, and then add water as needed. In this way, it is possible to control the viscosity of the solution.
Plaster
If a mixture is selected for finishing surfaces in rooms with different purposes, then the recommended compositions may differ slightly for spraying, primer and coating:
| Lime, part | Gypsum, part | Sand, part | |
| Spray | 1 | 1 | 2 |
| Priming | 2 | 1 | 4 |
| Covering | 1 | 1 | 5 |
For interior decoration, many manufacturers offer ready-made dry compositions that need to be diluted only with the addition of water. Kneading is carried out strictly according to the manufacturer’s recommendations, which are indicated on the packaging with the material.
Advice
Gypsum plaster is used to decorate walls indoors, and if there are areas with complex geometry and relief, then gypsum is used.
We invite you to watch a video on how to prepare a solution from gypsum plaster:
From cement
Cement plaster is used mainly for facade work or for finishing rooms with a more aggressive environment and microclimate, for example, a bathroom, toilet, cellar, basement, pantry. For different stages of finishing, the proportions may differ.
| Cement, part | Sand, part | |
| Spray | 1 | 2,5 – 4 |
| Priming | 1 | 2 – 3 |
| Covering | 1 | 2 |
This difference in the distribution of the amount of sand is due to the different strength of the plaster layer. For plastering indoor surfaces, 3 or 4 parts of sand are sufficient. For facades or basements, the proportion of this component must be reduced to 2-2.5 parts per portion of cement.
We invite you to watch a video about the features of mixing cement mortar:
Read our other useful materials about plastering work:
- How to calculate plaster for different types of mixtures?
- How to plaster foam block and plasterboard walls?
- How to fix plaster and how to check the quality of work?
- How to get rid of mold?
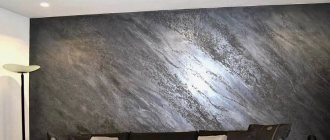
Silk
Another name for this type of plaster is “liquid wallpaper”. To prepare the plaster mixture, you must follow all the recommendations that are indicated on the packaging of the material by the specific manufacturer. This finish is used only for interior work .
Mixing the composition of silk plaster is allowed only by hand, since technical means, even at low speeds, can damage the fibers and structure of the wallpaper.
Material dilution technique:
- The recommended amount of water is added to a container, the volume of which approximately corresponds to 1 package of material (indicated on the packaging of the specific manufacturer and brand of product).
- If glitter or other decorative fillers are used, they must be poured into water and mixed well with your hands. They are not harmful to health, so you don’t need to use gloves.
- Pour the entire packet of dry mixture into the container and gently knead with your hands until a homogeneous consistency is obtained.
- In most cases, the material requires aging after mixing to acquire a more uniform structure. Such time frames are also indicated by a specific manufacturer in the instructions for their product.
Useful video
Add a comment to the article “Options for diluting finishing putty with your own hands without a mixer at home: proportions, structural features, recommendations” Cancel reply
This site uses Akismet to reduce spam. Find out how your comment data is processed.
The time has come to learn in more detail how to dilute plaster so that the resulting solution is of high quality, and the coating is reliable and lasts a long time, without causing trouble to the owner. To do this, you need to do everything correctly: choose the composition, mix the plaster mixture, apply it and provide conditions for hardening. Since plaster materials differ in their base, scope, and purpose, there are also nuances in the preparation of plaster dough. Let's look at what you need to pay special attention to using examples of various mixtures.
How to work without a mixer?
Attention
If the mixture is diluted incorrectly or deviates from the recommended technology for a certain composition, then cracks, peeling, and other serious defects may soon appear on the surface of such a wall.
Most often, the requirements for diluting plaster compositions are as follows::
- depending on the specific manufacturer, unquestioning adherence to the recommended proportions, mixing method and other conditions for working with the solution is required;
- apply only to cleaned and specially prepared surfaces;
- applying a primer will ensure reliable adhesion to the wall or ceiling and increase surface adhesion. It is necessary to dry the wall for at least 6 hours after such treatment;
- for a higher-quality finish, it is necessary to apply at least 2 layers of plaster, and the second coating is used simply to level out minor flaws in the thicker first layer;
- The plaster must dry for at least 24 hours, since applying the next layer of material to a wet surface will cause various negative consequences in the future.
The level of viscosity and consistency of the plaster mortar must correspond to the finish - façade, starting or finishing.
Instructions on how to prepare plaster without a mixer:
- To work with gypsum composition, a clean, dry container is required.
- Depending on the required portion, the dry composition is poured, and the number of measured portions must be observed to make it easier to work with the volume of the required liquid and other components.
- For the highest quality dilution of gypsum plaster, a simple technique is used. Approximately 7 small trowels of dry composition are filled with a small volume of water and kneaded until a homogeneous structure.
- As necessary, the required amount of dry composition is added for one serving, followed by the addition of the required amount of liquid. The solution is mixed until smooth.
- The prepared solution must be kept for at least 3 minutes to “swell” the dry particles. Then it is advisable to mix again.
Important
If you pour water first and do not add the dry ingredients, the mixture will have lumps that will be very difficult to break and dissolve.
Plastering walls with sand concrete
26.05.2019 14:33
In order to make the walls even, it is necessary to properly prepare the solution and perform all steps sequentially.
There are several types of sand concrete plaster:
• If the wall has large irregularities, then a mixture of sand concrete is used for rough plaster, after which a layer of putty is applied to the surface.
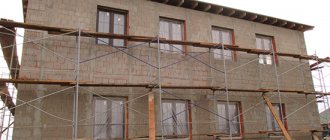
• Quite often, sand-cement mortar is used for facade plaster.
• Sand concrete solution is also used for complete plastering of walls.
The process of treating walls with a mixture of sand concrete is quite labor-intensive, but as a result you can get a perfectly flat surface.
Preparatory stage
First of all, the walls must be prepared for work; to do this, the surface is first cleaned and then all dirt and dust are removed. After which marks are made and beacons are installed.
Checking the quality of the solution
It is necessary to determine the fat content of the solution. To do this, a small amount of the finished composition is placed on the tip of a trowel. The mixture should lie in an even layer, not leak, or separate. Otherwise, the consistency needs to be leveled in the right direction.
The applied layer must be of appropriate thickness depending on the functions assigned to it:
- for simple leveling of walls with small flaws up to 1.2 cm - simple plaster;
- when leveled with a layer of 1.5 cm - an improved plaster coating provides greater strength;
- no more than 2 cm - called a high-quality finish with high strength of the outer layer and its necessary evenness.
Surface preparation
When applying cement plaster, it is important to ensure good adhesion of the mixture to the base. To do this, you need to clean the surface from dust and dirt. Then wet the surface with water using a plant sprayer.
Also, for better adhesion of the mortar to the wall, it is necessary to deepen the seams in the brick wall by 1.5 cm.
On a smooth concrete wall you will have to make 3x15 mm notches using a serration, approximately 250 notches per 1 sq.m. Then the surface is cleaned with a wire brush and moistened with water.
If you are going to plaster a wooden wall, you need to lay down boards and stuff shingles on top. Cuttings from 15x4 mm plywood are suitable. You will get a diagonal sheathing.
You can also use a chain-link mesh for wooden walls. It is stuffed onto plywood strips. In this case, there should be a gap of approximately 3 mm between the mesh and the wall.
How to save an incorrectly prepared mixture?
If the solution was prepared in violation of the technology or in an inappropriate consistency, then it does not need to be thrown away. There are some steps you can take to help save the batch. To do this you need:
- in the case of a solution that is too liquid or, as it is also called, “lean”, it is necessary to add the binding components in small portions with thorough mixing;
- in the case of a very thick composition, it is necessary to add liquid with sand (for cement mortars) or water (for gypsum mortars) in small portions with constant mixing.
Advice
In order for the plaster to be durable and last a long time, you need to adhere to the recommended technology for diluting the composition. This will prevent defects from appearing in the future.
Plastering walls is a very responsible and important stage of finishing work. The future characteristics of the decorative coating depend on the quality of its execution. To avoid the appearance of defects and other flaws that are very difficult to correct, you must adhere to all the recommendations indicated by the manufacturers of building materials.
Are plasticizers needed?
When mixing independently, special additives - plasticizers - are added to make the plaster mortar plastic. They make it easier to apply the material, extend the time of working with it, and improve the durability of the coating.
Plasticizers are produced in three types: powders, pastes and liquids. They are added to water in an amount of 1-2% before adding the dry mixture.
For cement-sand mixture:
- Superplasticizer S-3. Contains naphthalene-formaldehyde sulfate.
- Saponified wood resin.
- ArmMix Superplast and others.
- Available materials such as liquid soap or detergent. Read more..
Suitable for gypsum compositions:
- PVA glue - 1% of the total volume.
- Tartaric or citric acid.
- Industrial plasticizers, for example, Plast Retard PE.