Many people know what plaster is. This is a finish that gives the building a complete look, serves to protect structures from adverse influences, and extends the service life of the structure. You can entrust this to professional plasterers, but even a beginner can plaster walls with his own hands.
This requires practice and knowledge of some basics. And skill comes with experience. What is plaster used for? How to plaster walls in a new building? What is needed for plastering walls? We will try to answer questions that are important for a beginner here.
Why do you need to plaster the walls in your apartment?
Even a loft-style interior is just an imitation of untreated wall surfaces using concrete-like plaster. Plastering walls in an apartment solves many problems in a comprehensive manner.
Plaster coating:
- strengthens brickwork;
- protects concrete and aerated concrete surfaces from the penetration of moisture from the air;
- prevents the formation of fungal or moldy lesions;
- protects wood from cracking, rotting, insects, rodents;
- levels uneven surfaces of walls and ceilings;
- serves as additional insulation;
- absorbs noise;
- creates a comfortable microclimate in the apartment;
- monolithizes the internal surface of the apartment, sealing the seams and joints of structures;
- protects wood from fire;
- protects building structures from external influences;
- Levels surfaces in accordance with state standards, which makes tiling or plasterboard, wallpapering, and painting easier.
Replacing a wall or partition is more expensive than replacing or repairing plasterwork. Modern plaster compositions are durable - service life reaches 25 years or more. Plastering the walls of a house simultaneously solves many problems.
What are the application methods?
Depending on the size of the surface to be plastered, as well as the included components, methods of applying plaster can be:
- manual (trowel, roller, trowel, ladle or just hands);
- mechanized (using a hopper, plastering machines).
The choice of application method is often dictated by how much plaster can be applied per pass. When performing work manually, some types of mixtures are applied in a layer up to 6 cm thick. Mechanical application is limited to creating a layer of up to 20 mm.
Among the manual methods of plastering walls, there are different application methods:
- technical (leveling) finishing with or without beacons;
- decorative (application with various tools, shaping the surface using various techniques) finishing.
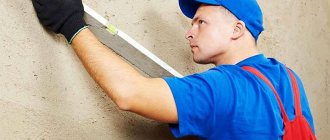
Manual application
Plastering walls with your own hands involves applying a solution to the base with a hand tool, leveling, smoothing or forming a textured surface in one pass, or sequentially creating a multi-layer coating. Manual plastering of walls is usually carried out with a small coverage area, a total thickness of the leveling layer of up to 10 - 12 cm, and a final textured finish. With multi-layer finishing, each layer is dried.
Mechanized application
It is rational to use this method of performing plastering work when there is an optimal combination of plastering speed, low cost of materials (part of the money is saved on expensive machine work), and a large volume of coating.
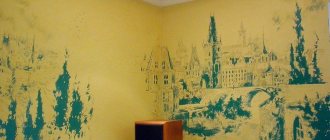
Decorative look
A façade finished with plaster looks very aesthetically pleasing. Plastering is not always used to protect or level walls. Recently, a technology for finishing external surfaces called “wet facade” has become increasingly popular. This cladding method involves gluing foam plastic, followed by treatment with a decorative layer of plaster, which acts as a finished facade. The advantage is that the method is inexpensive, and as a result you will get insulated walls and an interesting appearance.
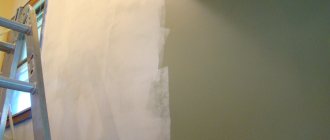
How to prepare walls for plastering
Beginners will need to know how to prepare walls for plastering. Preparing walls for plastering begins with an inspection.
Need to find out:
- what material are the walls made of?
- how strong is the foundation?
- how tightly the plaster coating, if any, holds;
- are there any peeling places (check by tapping);
- are there any other defects that require elimination;
- How smooth are the walls themselves (measurements are taken).
General preparation
According to the standards, the base for plastering must be dust-free, free from foci of biological damage, oil and rust stains, efflorescence, and uninsulated metal parts (staples, nails, screws). The plaster coating has a considerable specific gravity.
Before plastering the walls, they make notches with their own hands and deepen the seams to increase adhesion. The base is primed and then dried. In addition, preparation includes the installation of beacons if plastering is carried out along them.
Priming walls and installing beacons
Removing old plaster
If the old plaster coating is durable and adheres well to the wall, plaster the walls using the old plaster. The coating unnecessary for subsequent finishing is removed completely. This is required when the old plaster cover is severely damaged.
Before removing the finish, it is wetted using a sponge. If there is drywall under the plaster being removed, then it can be easily tapped. Having tapped and chipped the partially exfoliated area, peel off the adjacent plaster by inserting a corner of a spatula or chisel under it.
For complete dismantling you may need:
- Bulgarian;
- hatchet;
- hammer;
- putty knife;
- perforator;
- scraper;
- spray;
- safety glasses, respirator.
Necessary tools for dismantling old plaster
Sequencing:
- wet the plaster coating, give it time (15 - 20 minutes) to soak;
- use a spatula to check the looseness of the layer;
- remove the layer using possible means (with a spatula, chisel, hatchet, or sawing the finish into squares with a grinder, followed by chipping it off with a hammer drill with a chisel attachment).
How to prepare a concrete wall
Often inexperienced people have problems when plastering concrete walls with their own hands. Not every plaster solution adheres well to a base of this kind. Previously, plaster mortar was applied to concrete surfaces without the use of primers. Therefore, there is a possibility that the old coating may fall off the concrete wall along with the new one.
To prevent this from happening, the old finish is completely removed from the concrete walls. When the structure is exposed, the joints of the wall panels, which were usually simply covered superficially, are also exposed. Hollow joints are filled with foam before sanding.
Foaming concrete slabs and scoring before plastering
Also, before plastering, notches up to 3-5 mm deep are applied to the concrete surface with a hatchet, chisel, bush hammer or hammer. To apply notches, a light jackhammer with a bush hammer attachment is sometimes used. Unevenness increases the adhesion of dense concrete bases to joints.
If the electrical wiring is planned in grooves, then its installation is done before plastering. Fastening elements, such as hanging hooks, are installed in advance.
This eliminates unnecessary labor, time and materials costs later.
Preparing a wooden wall
Wood especially needs preparatory work. It is not always rational to apply notches. Therefore, before plastering, wooden bases are covered with shingles - thin slats no wider than 20 mm. The shingles are nailed to the surface of the base, placing the slats at an angle of 45 degrees to the floor, at a distance of about 4.5 cm from each other.
The narrow or crooked shingles are filled first. The second row of shingles is nailed crosswise on top. To prevent the planks from splitting during the nailing process, the ends of the shingles are soaked.
In addition, at the ends the slats are not nailed close to each other, leaving a gap of 2 - 2.5 mm. Stuffing nails with wire weave along them helps to do without shingles.
To increase the heat and sound insulation of plank partitions, the boards are covered with burlap or matting before attaching the shingles, lowering the woven material until it touches the floor. Having nailed it along the bottom, tighten and attach the upper end.
These materials adhere well to solutions, serve as additional insulation for boards, and reduce wetting and warping of the boards. Then the plaster coating cracks less. The edges of the fabrics are overlapped.
Preparing a brick wall
In brickwork, before plastering, masonry joints are deepened by about a centimeter. This is done with a chisel, holding the tool at an angle of up to 45 degrees to the surface along the seam line. Bricks are cleaned from contamination with metal brushes. Then the wall is washed.
If, after washing with detergents, greasy or tar stains or efflorescence appear, they are treated with special agents or mechanically cleaned until the material is clean. After preparation, the base is dried.
Aerated concrete, gas block, foam block
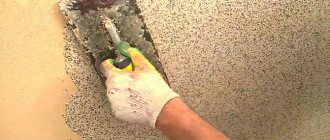
How to prepare walls from these materials? It would seem easier with them. All protruding irregularities are ground off with a float designed for aerated concrete or a plane. After removing the dust, apply primer with a brush or from a sprayer twice. Dry between priming, allowing crystals to form and fill the surface pores.
Priming the wall
Installation of reinforcing mesh
Installation of beacons
Partitions and walls made of foam and gas blocks do not shine with strength, therefore they can crack at the slightest subsidence of the foundation. To strengthen the surface, it is reinforced with a fiberglass mesh, which is attached to a 2-3 mm layer of tile adhesive. The glue is spread with a spatula and stretched with a trowel. Apply glue in a strip about a meter wide. Apply a strip of mesh to it, smoothing it from the center of the strip up and down.
Having installed the grid, beacons are installed. Before plastering, apply a layer of glue on top of the mesh with a spatula, combing it (to increase adhesion) horizontally with a notched trowel. Dry it.
Arbolite slabs
Due to their roughness, wood concrete slabs always adhere well to the plaster finish. Therefore, no additional measures are required. Some plasterers attach a metal mesh to the wood concrete to strengthen the wall itself.
Whitewash
It is impossible to plaster over lime whitewash, because the coating will not adhere firmly. Whitewash is always multi-layered, and plaster adheres only to the upper lime film.
Whitewash is removed in several ways:
- remove with a spatula (wet, painstaking method) - moisten the areas, after 15 minutes remove the soaked lime;
- remove with a grinder (the disadvantage of this method is that there is a lot of dust, you need to work in a respirator and goggles);
- Apply the paste with a brush in a thick layer to the whitewash. After drying, the pasty crust, which holds together the multi-layered lime mortar, is removed with a spatula (the most dust-free method);
- wash off with a soap solution (half a piece of grated soap in a bucket of water, 5 tablespoons of soda), repeatedly wetting the whitewash with a sponge or brush;
- washed with acid solutions.
Why is it needed?
Plaster not only prepares the base for finishing with finishing materials, but can also become an independent decorative coating.
To the question: why is plaster needed, many arguments can be given, after which the decision about its necessity in some cases will become groundless. First of all, this concerns sealing seams between brick or block masonry.
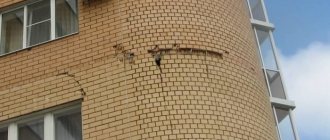
Most buildings (especially those erected in the 90s of the last century) were made of poor quality, because there are microcracks between individual wall elements, through which cold street air penetrates into the room. Plastering the walls allows you to close them, thereby insulating the room.
Leveled walls are the key to successful finishing
It should be noted that panel houses also have a similar problem. Over time, during the process of shrinkage, the walls begin to move, which leads to cracking of the seams between the reinforced concrete slabs. This problem is faced not only by residents of old houses built in the middle of the last century, but also in new economy class buildings.
In this case, the main criterion for the developer is the quick and inexpensive construction of a new residential or commercial building, while the quality of the work leaves much to be desired. That is why the problem of plastering walls periodically arises both for new residents and for people who have lived in the same apartment for many years.
Facade mixtures are used for exterior work
Another case where plastering walls is simply necessary is thin brickwork. As a rule, it is erected as a partition inside a house or apartment, separating 2 rooms. After the surface is plastered, the strength of the wall will increase several times.
A fairly common situation is when, when wallpapering, the question arises of matching the seams of adjacent strips when passing corners. The problem arises due to the curvature of the walls (again, poor quality work by the masons who built the house).
In addition, modern building materials, used for the construction of low-rise buildings and considered an excellent heat insulator, are susceptible to destruction under the influence of moisture. This happens due to the fact that these are predominantly porous materials, into which water gets inside, which, with the onset of frost, destroys the pores from the inside. It follows from this that they need to be protected from harmful influences. Similar materials include the following building elements:
- tripe brick;
- foam concrete;
- aerated concrete;
- wood concrete based on cement and sawdust.
If you cover the wall with acrylic paint in a thick layer, you can achieve the desired effect, which will protect the material from moisture no worse than plaster.
Required tools and materials
List of what will be needed for plastering:
- for preparing the solution - containers, mixer, mortar mixer;
- for application - spatulas (in simple terms - spatula), ladle, trowel, trowel, rollers, brushes;
- for stretching, leveling - grater, grater, rule;
- for priming, forming a relief pattern, painting: rollers, brushes, brushes, sponges, stencils, other improvised means;
- for measuring, marking, installing beacons - level, plumb line, tape measure, masking tape, cord;
- for painting – brushes, sponge, rollers, spray bottle;
- for protection – glasses, respirator, gloves, work clothes
Materials you will need:
- components of plaster composition, SS or ready-made compositions;
- water;
- primer;
- shingles;
- lighthouses;
- reinforcing mesh;
- fastening parts - dowels, screws, nails;
Required material for plastering
What is lighthouse plaster?
The technology for plastering the walls of a house includes options:
- under the falcon (alignment without rules, by eye);
- as a rule (does not allow you to easily achieve high evenness of the walls);
- along the lighthouses (high-quality finishing).
It will not be possible to plaster a crooked wall with high quality by eye (without beacons). Therefore, the falcon-like wall plastering technology is used only in new buildings with improved quality walls, or in utility rooms where the quality of the surface is not important.
A lighthouse is a plank, the surface of which serves as a guide for the rule, moved by the plasterer when leveling the mortar applied to the wall. Lighthouses are made of metal, plastic, wood, or mortar used for plastering. The beacons have a shelf height of 6–10 mm and are attached to the base with mortar or self-tapping screws.
The installation of beacon strips is carried out plumb or level strictly vertically after priming. First, the outer beacons are placed 30 cm from the corners of the walls. The surface of the planks forms a vertical plane, focusing on which the intermediate planks are installed. The distance between the planks is made less than the length of the rule by 20-30 cm. For beginning plasterers, it is more rational to place beacons in meter increments.
When plastering over beacons, the mixture is applied in layers until the solution rises above the planks. The protruding mortar mass is cut off with a rule tightly pressed to the beacons, moving it in a zigzag manner.
The excess is removed from the rule with a trowel or spatula and placed where the mixture is missing. As a result, the surface of the leveling solution forms a vertical plane. After the mixture has set, the beacons are removed, and the remaining grooves are filled with plaster mortar.
Plaster reinforcement
Mineral plaster compositions do not have elasticity, and therefore, like natural stone materials, they can crack at the slightest movement of the base and form cracks during the hardening process, for example, if the plaster solutions are greasy. In order to reduce crack formation and their opening, the plaster is reinforced.
The same is done when repairing large cracks. The use of reinforcement increases the strength of the finish. Installation of nets is necessary in problem areas, for example, at the junction of bases made of different materials, for example, walls made of wood and concrete. Different characteristics of materials cause them to behave differently when temperature or humidity changes. Consequently, cracks will form in the joint area.
For reinforcement, meshes are used from:
- metal;
- plastic;
- fiberglass;
The choice of material and cell size of the reinforcing mesh depends on the main purpose of the reinforcement and the installation location. If powerful meshes are installed to reinforce facade finishing or create a plaster casing for insulation slabs, then for interior finishing, as well as where the plaster layer is small, plastic or fiberglass meshes are used.
Grids are a hidden structural element located in the body of the plaster closer to the surface. If the plaster coating is thick, two or more meshes are installed. When attaching the mesh to a wall or ceiling, a gap is left between the mesh and the base, which is filled with adhesive or plaster. This is done so that there are no air bubbles left around the mesh panel. The mesh must be recessed.
To secure the mesh to the walls, its panels are stretched, nailed or attached with self-tapping screws. Adjacent canvases are overlapped. It is important to tighten only so that there is no sagging, so that the wall does not turn out crooked. Do not overtighten.
If the mesh material can corrode during a chemical reaction, for example, with lime plaster, the mesh is protected by covering it with asphalt or coal tar varnish, oil paint, or laitance and drying.
TOP 5 manufacturers
To ensure that the characteristics of the coating being formed fully correspond to the declared ones, it is worth giving preference to plaster from leading manufacturers. Traditionally, the TOP 5 includes:
- “Ceresit ST 29”, which has a cement-sand base with the addition of a certain amount of mineral additives. Designed for finishing walls made of brick or concrete. The average cost of a 25kg package is 780 rubles.
- "Volma Canvas" based on gypsum. Suitable for walls made of concrete, brick, foam concrete. The average cost of a package weighing 30 kg is 350 rubles.
- "Prospectors". It consists of a cement-sand mixture with a certain amount of mineral additives. Recommended for brick or concrete surfaces exposed to high humidity. On average, you will have to pay about 200 rubles for a bag weighing 25 kg.
- "Knauf Rotband". Gypsum plaster for brick and concrete. A package weighing 30 kg costs 425 rubles.
- "Caparol Capatect" for bricks and surfaces made of expanded clay and porous concrete. The basis of the plaster is made up of mineral components. A 25 kg bag costs an average of 765 rubles.
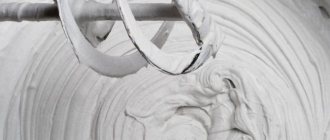
Preparation of the solution
There are three possible options here:
- preparing the mixture by mixing the components yourself;
- dilution of the SS composition with water or a diluent;
- mixing the finished plaster dough before use (with or without adding a small amount of liquid).
If you prepare a mixture yourself from components purchased separately, then you need to follow the sequence of mixing the constituent substances.
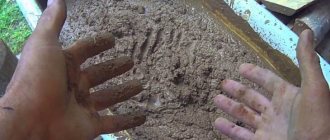
DSP is prepared in the following order:
- Bulk dry substances (sand, cement powder, perlite, stone chips) are placed in the container;
- stir;
- prepare the liquid separately (lime milk, water with a plasticizer, etc.);
- while stirring, gradually pour the liquid into the dry mixture until the desired consistency of the solution is achieved;
- The composition is allowed to “rest” and brew for about 5 minutes, after which it is stirred again.
Preparation of dry mixtures
Mixing the solution
Ready-made solution
If the mixture is prepared in a mortar mixer, then it is permissible to first pour some water into it, then add other components. The remaining water is added little by little, controlling the consistency of the dough.
Purchased SS are closed following the manufacturer's instructions, which are in the detailed instructions on the package. The prepared mixtures in buckets are also mixed before use to restore homogeneity to the composition. If the plaster solution is painted, it’s time to add color.
Some plaster compositions have their own nuances. For example, perlite sand is very dusty. It is moistened before kneading. In addition to knowledge about the rules for preparing the base, you will need information about how to properly apply the plaster itself to the walls, in what sequence, how long and how it should dry.
Difference from putty
Despite the fact that, based on everything described above, it became clear what it is - plaster, an inexperienced person can easily confuse it with putty.
The difference is that you first need to plaster, and only after that putty them, ideally leveling them for painting or wallpaper.
In addition, there are a number of differences, based on which each of the materials must be applied in a timely manner.
| № | Plaster | Putty |
| 1 | The main components are sand, cement and water. By adding polymer additives, elasticity improves, which ensures good adhesion to the surface. | Cement. The main components are sand, water and cement when adding plasticizers. The difference is that the components have a small core size, which characterizes its use in finishing decorative work. |
| 2 | With the addition of gypsum and stabilizer additives, the mixture will set with the base much more slowly, and the composition will become very plastic. | Plaster. It is used only for interior decoration, as it is susceptible to moisture. Upon contact, the structure absorbs water particles and quickly collapses. The main difference from plaster is the fine grain structure, which characterizes it as a finishing material that does not need to be covered with wallpaper. |
| 3 | When mixing cement and lime, clay and lime, clay and gypsum, clay and cement, the composition will be similar. | Acrylic. Mainly consists of acrylic resins with the addition of chalk as a filler and water as a binding element. If you need to create a surface with a glossy base, the use of such material is considered the most optimal. Can be applied to walls both indoors and outdoors. |
In addition to the listed options, there are so-called “exotic” types: oil (consists of natural drying oil and fillers), adhesive (about 10% of the composition is epoxy resin used for the binder), latex or with the addition of polyvinyl acetate adhesives. See the answer to the question in this video:
If a layer more than 1 cm thick needs to be applied to the wall, then plaster is used, if less, putty is used.
Thus, we can conclude why in some cases it is necessary to putty, and in others - to plaster? If necessary, slightly level the surface, repair small scratches, cracks and microcracks. It is recommended to take into account that when subsequently wallpapering or painting, it is advisable to treat the surface with putty.
Source
How to apply plaster on walls with your own hands
The mixture can be applied by pouring and spreading. Plastering surfaces using the first method is more dense; the finish adheres more firmly to the base. You can throw the composition with a ladle, a spatula (trowel) with a steel blade. The solution is scooped out of the container and thrown from the tool onto the base, where it lies down and sticks like a thick blot - a “slap”. Spread the dough with a spatula, trowel, or falcon.
The solution, applied to a spatula or trowel with an auxiliary spatula, is transferred to the wall with a stroke of a specified thickness. The plasterer places the tool with the dough against the wall at an acute angle, and moves it along the wall, decreasing the angle as the material is transferred to the base. If the smear begins on a previously made smear, the technique is called “wet to dry.”
If a smear begins on a dry spot and ends on another smear, the technique is called “from dry to wet.” Compliance with the techniques is important for decorative plaster. How to apply the final decorative finish can be found in another section of the site. Below we offer a detailed description of the method for performing rough finishing on concrete.
Plastering corners
The words “husks” and “usenki” will not say anything to an ignorant person. Meanwhile, these are professional terms for plasterers, denoting internal and external corners, respectively. The technique for plastering them differs from applying plaster to walls.
The main techniques used by plasterers:
- using a profile corner;
- with lighthouses;
- with a counter-piece (perforated corner with an aluminum base));
- with serpyanka (ribbon mesh made of fiberglass or synthetics with an adhesive layer);
- without a contrarian.
Counter-shuls can be used to produce husks and usenki.
Step-by-step technology for making an angle using a contra-sharp:
- Cut the perforated corners to the required length.
- A contact solution is applied to the corner in a thick layer (the mixture is stretched along the entire length along the inner corner).
- The corner is placed against the corner, pressed most tightly in the most “protruding” place, then using the rule, the counter-shoulder is pressed so that it stands strictly vertical (check with a level or plumb line).
- The excess mixture released during installation is removed with a spatula. After this, the mixture is allowed to harden.
- After installation, the corner is aligned with the wall using a test. The corner shelves end up inside the plaster mortar. The corner counter protects the protruding corner from damage.
Applying contact solution
Installation of the corner
Removing excess solution
Aligning the corner with the wall
Making an external corner along a profile corner:
- Cut the profile corners to the required length;
- Beacons are installed on adjacent walls (the corner is plastered before work on the wall is completed);
- A contact solution is applied to the corner in a thick layer (the mixture is stretched along the entire length along the inner corner).
- Next (thicker) soil is applied on both sides from the corner to the nearest beacons.
- The corner is placed against the corner, the mesh is pressed against the mixture, using the rules, the solution is leveled along the beacons on one, then on the second wall.
- The excess mixture removed by the rule with a spatula is added to where it is missing.
- The profile corner and the mesh are inside the plaster layer.
Approximate mixture consumption
Before purchasing plaster, craftsmen always calculate the required amount of mixture. Each manufacturer indicates the average consumption on the packaging. To make the calculation, you need to know the area of the treated surface and the thickness of the layer being formed.
If you want to do the calculation before going to the store, you can be guided by the following average values. They are given for a 1 cm thick coating formed on 1 square of base. With these initial values you will need:
- Gypsum mortar about 9 kg;
- Cement composition 15 kg;
- Lime plaster on average 12 kg.
Attention! The actual thickness of the formed layer may differ significantly from 1 mm.
Gypsum plaster 2 mm thick often completely copes with the task. When using reinforcement, the thickness of the cement coating increases to 2 cm.
How to check the quality of wall plaster
The accuracy of the finishing is checked using a rule or a long two-meter strip. When carrying it along the surface in different positions (horizontally, diagonally or vertically), deviations from the plane are detected visually. In the dark, you can check the quality of the plaster by directing the flashlight beam parallel to the plane of the wall. Long shadows will reveal protruding irregularities.
By measuring and comparing the two diagonals of the room, you can check whether the corners of the room are right. The diagonals must be equal in length. The distance between parallel walls is the same along their entire length. The correctness of the angle can be checked by drawing vertically along a square with a side length of 50 cm.
The quality of the finishing surface is determined visually. There should be no darkening or other kinds of stains on it. The sashes of windows, vents and doors must open without interference. The areas around sockets, switches and door frames, along the perimeter of the floor must be level so that the overlay strips, baseboards and trims fit tightly against the wall.
If you are planning to renovate your apartment, but you do not have experience covering walls with plaster yourself, you should not despair. After reading the information presented and watching the videos, you have gained an idea of the main types and techniques of plastering work.
Detailed information about plaster compositions and how to apply decorative solutions can be found on the website. When contacting plasterers, you will know what to pay attention to, how the work should be performed, and why this or that stage is needed.