General information about plaster
For work, various types of mixtures are used, which are used depending on their purpose. It is also necessary to take into account the climatic conditions of the region, room temperature, humidity, etc. The plaster mixture is designed to protect walls and other structures of the house from the influence of the external environment.
When choosing plaster, all conditions should be taken into account. In addition, the composition must have waterproofing and acoustic properties. Ready-made mixtures are used for decorative finishing. However, you can prepare the composition with your own hands, and you need to select the right ingredients and dye, according to a special recipe.
To apply plaster to a stone base, complex solutions are used. Cement mortar is applied to the concrete wall. In this case, the concrete must first be scored. A lime-gypsum mixture with additional elements is suitable for a wooden surface.
If it is necessary to cover the surface with a layer of plaster 20 mm thick or more, a reinforcing mesh is used. It is also used for plastering architectural elements made of concrete and brick. Mesh is often used at the junction of walls, especially if they are made of different materials. This procedure will prevent future cracks from appearing on the coating.
Finishing work
Technologies for finishing walls and ceilings
Interior finishing work involves a wide range of methods for decorating walls and ceilings. Among them:
- painting;
- wallpapering;
- finishing with decorative plaster;
- tiling and other materials;
- covering with wooden or plastic panels, etc.
The cost of the repair, its labor intensity, and the time it will take us to decorate the premises depend on the choice of methodology.
Regulatory documents put forward the following requirements for work on finishing walls and ceilings:
- Before performing painting work, it is mandatory to prime the surfaces. Either special compounds or diluted finishing material (paint, whitewash, glue, etc.) are used as primer.
- After the primer has dried, paint is applied in several layers. The decorative composition is rubbed over the surface to be finished until an even coating is formed without drips, gaps, etc.
Painting indoor walls
- The number of layers of paint is not regulated , so application must be continued until the desired result is achieved.
- When finishing with decorative plasters (structural, textured, mineral, fibrous, etc.), the putty layer should be left without sanding - this way we will ensure maximum adhesion to the base.
- As in the case of leveling plaster , each subsequent decorative layer is applied only after the previous one has polymerized.
Application of decorative plaster
- When wallpapering walls and ceilings, the adhesive composition is applied to the treated area evenly, without gaps or sagging. Along the perimeter of window and door openings, as well as along the edges of the trellis strip at the top and bottom, it is allowed to apply an additional portion of glue after partial polymerization of the main part.
- If the wallpaper density is 100 g/m2 or less, it is possible to glue it overlapping. If the density of the material is higher, then the rolls are fixed to the wall only end-to-end.
Pasting wallpaper end to end
- Carrying out interior cladding work with your own hands involves the use of cement- or polymer-based tile adhesives. The adhesive is applied to the primed and moistened wall evenly, forming grooves to improve the adherence of the tiles.
- Finishing elements can be adjusted to each other either closely or with seams of different thicknesses. After polymerization of the glue, the voids in the seams must be filled either with mortar, followed by jointing, or with a special grouting compound.
Tiling process
- The maximum plane difference allowed when tiling a wall with smooth tiles is 2 mm per two-meter control rail. When using lumpy or grooved tiles, the maximum permissible deviation increases to 4 mm per 2 m.
Separately, the requirements for suspended ceilings put forward by the same SNiP 3.04.01-87 should be specified:
- A suspended ceiling made of slab materials is fixed on a frame fixed to the ceiling and walls. It is mandatory to check the horizontalness of the frame.
- The joints between the panels of the suspended ceiling are masked either using special overlays or using putty.
- If necessary, the ceiling is finished using paint, wallpaper, decorative plaster, etc.
The design of suspended ceilings (in the diagram) is also regulated by abortion documents
Floor coverings
Wooden parts, polymer products, linoleum, laminate, ceramic tiles, etc. can be used as indoor flooring. The cost of interior finishing work depends on both the price of the material and the complexity of the installation process.
Trying to reduce costs, many home and apartment owners install flooring themselves. In this case, you need to strictly follow the technology, and also listen to the requirements of SNiP:
- When installing a log system under a plank or plywood floor, the load-bearing elements must be positioned in such a way as to minimize the risk of sagging of the covering. It is desirable that each lag rests with its entire lower plane either on the ceiling or on a layer of sand bedding.
Laying joists on polyurethane foam
- A wide joist must be installed in the doorways, which will compensate for the load on the threshold.
- For work, you need to use parts whose humidity does not exceed 10 (for parquet and front boards) - 18 (for joists and support bars) percent.
Plank floor plan
- All wooden parts used to form the flooring must be joined together to reduce gaps. To attach the boards to the joists, self-tapping screws or nails are used, the length of which is 2 - 2.5 times the thickness of the board.
- Board materials, as well as parquet panels (for type-setting or block parquet) can be attached to the base using adhesives (polymer or bitumen based).
- When using rolled polymer materials, linoleum, synthetic carpet and other coverings must be kept indoors for some time to compensate for thermal expansion. After this, the roll is rolled out on the base and left until the waves and creases completely disappear.
Gluing linoleum onto a plywood base
- For gluing roll material, a composition corresponding to the type of raw material is used. Cutting along the edges of the room should be carried out no earlier than three days after gluing is completed.
- When covering the floor with ceramic tiles and their analogues (clinker, porcelain stoneware), the same recommendations apply as when finishing walls. The only mandatory condition will be the use of specialized tile models, which are characterized by increased strength and significant roughness, which prevents slipping.
Necessary conditions for plastering
Practically, perfectly smooth surfaces are difficult to find in residential buildings or public buildings. Before you begin finishing the walls, they should first be leveled. If you plan to plaster yourself, there are a few things you should consider to ensure that no problems arise during the process.
Standards for plastering walls, as well as permissible deviations for plastering can be found in SNiP. In order for plastering to take place according to technology, as well as to create normal working conditions, the readiness of the territory must meet special rules.
Important. If plastering work is carried out in winter, the temperature in the workroom should not be lower than +10°, while the humidity should preferably not be higher than 70%.
To prevent the cold from penetrating into the building, all openings, vestibules and other openings are insulated. You also need to monitor the humidity of the walls. For brick and stone foundations it should be no higher than 8%.
Layer thickness
Expert opinion
Alexander Guryanov
Plasterer and decorator
Quite often you can hear the question: what thickness should, for example, improved plaster be? This cannot be answered unequivocally, because whether the coating will be simple or improved depends on the quality of its execution, i.e. from compliance with SNiP requirements. This will be shown by control measurements of deviations.
The thickness of the finish depends on the curvature of the surface and, accordingly, on the number of plaster layers applied to correct this curvature.
Control the quality of wall construction! To level them with plaster at the finishing stage, huge material resources can be spent.
Below we will look at what thickness is acceptable for each layer.
Note that modern technologies have long moved away from these old standards for coating thickness without reducing strength.
The use of metal or fiberglass reinforcement and the presence of polymer additives in gypsum and cement-sand mixtures make it possible to plaster over a mesh in one layer 5 cm thick!
Features of plaster according to SNiP
- At an air temperature of 22-24 ° C, stone or brick walls should be sprayed with water before starting the plastering procedure.
- Such types of plaster as improved and high-quality are performed using beacons. Their height is determined by the thickness of the mortar coating without taking into account the covering.
- In the case of finishing in one layer, immediately after applying the mixture the surface is leveled. If using a trowel, you need to wait until the solution sets.
- If the plaster coating consists of several layers, after each stage of applying the mixture it is necessary to allow the layer to dry completely. But the procedure for leveling the soil begins until the mixture completely sets.
- Sheets of gypsum-based plaster are glued to the brickwork using special compounds. This material is attached to wooden walls using nails.
- To install gypsum parts, a plastered surface that is completely dry and set is required. To secure architectural elements to the external walls of a building, reinforcement for them is placed in the structure in advance.
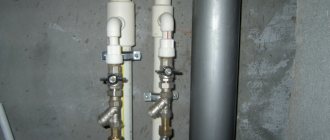
Advice. It is better to purchase fittings installed in the walls of the house from stainless steel so that they do not become rusty. Otherwise, dirty spots may appear on the parts attached to it.
Wet plaster has many benefits. It is considered universal: by selecting the desired composition, it is used under different conditions. However, like any building material, it also has its disadvantages. The main disadvantages of plastering are the labor-intensive and long process of the work performed. Wet plaster is divided into simple, improved and high-quality plaster.
SNIP plastering works (requirements and GOSTs for plastering works)
Plastering rules for passing SNiP 3.04.01-87 9, 10
- surfaces from the vertical per 1 m length - 2 mm;
— for the entire height of the room — no more than 10 mm;
- uneven surfaces of a smooth outline (per 4 m2) - no more than 2 depth (height) up to 3 mm;
- window and door slopes, pilasters, pillars, etc. from vertical and horizontal (mm per 1 m) - 2 mm;
— radius of curved surfaces, checked with a pattern, from the design value (for the entire element) — 7 mm;
- surfaces from the horizontal per 1 m length - 2 mm;
— slope width from the design — 3 mm;
— thrust from a straight line within the limits between corners — 3 mm.
The humidity of brick and stone surfaces during plastering is no more than 8%.
Thickness of each layer when installing multi-layer plaster without polymer additives, mm:
- spraying on stone, brick, concrete surfaces - up to 5;
- spraying on wooden surfaces, including the thickness of the shingles - up to 9;
— soil from cement mortars — up to 5;
- soil made from lime, lime-gypsum solutions - up to 7;
— covered layer of plaster coating—up to 2;
- layer of decorative finishing to be covered - up to 7.
Adhesion strength of plaster mortars, MPa, not less than:
— for interior work — 0.1;
— for outdoor work — 0.4.
- peeling of plaster, cracks, sinkholes, traces of troweling tools.
Requirements for the quality of materials used
GOST 28013-98. Construction solutions. General technical conditions. SNiP 3.04.01—87. Insulating and finishing coatings (Table 8).
Plaster mortars delivered to the construction site must meet the following technical requirements:
— pass through a grid with cell sizes:
— solutions for spraying and soil — 3 mm;
- solutions for the covered layer and single-layer coatings - 1.5 mm;
— mobility within — 5+12 cm;
— delamination no more than 15%;
— water-holding capacity — no less than 90%;
- strength - according to design;
The plaster mortar should be prepared on sand with a fineness modulus of 1 to 2; do not contain grains larger than 2.5 mm in solutions for spray and primer and larger than 1.25 mm for finishing layers.
The plaster mortar must be accompanied by a quality document, which must indicate: date and time (hours, minutes) of preparation of the mixture, brand of mortar, type of binder, quantity of the mixture, mobility of the mixture, designation of the standard.
The plaster mortar mixture delivered to the construction site must be unloaded into a mixer or other containers, provided that the specified properties of the mortar mixture are maintained.
Instructions for carrying out work
SNiP 3.04.01-87 pp. 3.1, 3.3, 3.7-3.11, 3.15, 3.37, 3.18
Plastering work must be carried out at a positive ambient temperature and the surfaces to be finished are not lower than 10 °C and air humidity is not more than 60%. This temperature in the room must be maintained around the clock for at least 2 days. before the start and 12 days. after completion of work.
Finishing work must be carried out in accordance with the work project (WPP) for the construction of buildings and structures. Before finishing work begins, the following work must be completed:
— the premises being finished are protected from precipitation;
— waterproofing, heat and sound insulation and leveling floor screeds have been installed;
— the seams between the blocks and panels are sealed;
— joints of window, door and balcony blocks are sealed and isolated;
— glazed light openings;
— embedded products were installed, heat and water supply and heating systems were tested.
Plastering and cladding (according to the project) of surfaces in places where embedded products of sanitary systems are installed must be performed before the start of their installation.
Plastering over substrates with rust, grease and bitumen stains is not permitted. Dust removal of surfaces should be done before applying each layer of plaster compositions.
The strength of the bases must be no less than the strength of the finishing coating and correspond to the design. Protruding architectural details, places where they meet wooden stone, brick and concrete structures must be plastered over a metal mesh or wire attached to the surface of the base; wooden surfaces - on shingle panels.
The internal surfaces of stone and brick walls constructed using the freezing method should be plastered after thawing of the masonry from the inside to at least half the thickness of the wall.
When plastering brick walls at an ambient temperature of 23 °C and above, the surface must be moistened before applying the solution.
When installing single-layer coatings, their surface should be leveled immediately after applying the solution; in the case of using trowels, after it has set. When installing a multi-layer plaster coating, each layer must be applied after the previous one has set (covering the final layer - after the solution has set). Leveling the soil should be done before the mortar begins to set.
Plastering rules for passing SNiP 3.04.01-87
Basic requirements of SNiP III-21-73 for simple plaster.
Basic requirements of SNiP III-21-73 for improved plaster.
Basic requirements of SNiP III-21-73 for high-quality plaster.
We look at SNiP 3.04.01-87, Table No. 9.
With simple plaster, the following parameters of the finished surface are allowed: Deviation from the vertical - 3 mm per 1 m, but not more than 15 mm per room height (that is, with a ceiling height of 2.5 m, builders have the right to “fill up” the wall by no more than 7, 5 mm). >Irregularities of smooth (!) outlines are allowed - no more than 3 for every 4 square meters. Moreover, their height or depth should not exceed 5 mm. Horizontal deviation is allowed no more than 3 mm per meter.
With improved plaster : Deviation from the vertical - 2 mm per 1 m, but not more than 10 mm per room height. Irregularities of smooth outlines are allowed - no more than 2 for every 4 sq. m. Moreover, their height or depth should not exceed 3 mm. Horizontal deviation is allowed no more than 2 mm per meter.
With high-quality plaster : Deviation from the vertical - 1 mm per 1 m, but not more than 5 mm per room height. Irregularities of smooth outlines are allowed - no more than 2 for every 4 square meters. Moreover, their height or depth should not exceed 2 mm. Horizontal deviation is allowed no more than 1 mm per meter.
SNiP of Russia is quite demanding regarding the quality of plastering work.
Simple plaster
Simple plaster is usually used in rooms where people do not live. Such premises do not require perfect surface finishing. For example, utility rooms, basements, garages, attics, etc.
This coating is done in two layers (spray and primer). At the same time, the walls are not hung and are not checked according to the rule. The soil layer is immediately rubbed down without covering. When applying simple plaster, the total height of the ramp can reach 12 millimeters, but no more.
Tolerances for plastering walls in this case are allowed 3 mm per 1 meter of area, and over the entire height of the room no more than 15 mm. Taking into account the height of the ceiling, you can determine the permissible deviation. So, if the length of the wall is 2.5 meters high, then the tolerance is 7.5 mm.
With simple plastering, no sharp irregularities are allowed. There can be no more than three per 4 sq.m. In addition, the depth and rise are allowed no more than 5 millimeters. Along the horizontal line, the maximum deviation is considered to be 3 mm per 1 meter of area.
Improved plaster
This type of plaster is used for finishing surfaces in residential buildings, children's institutions, special utility rooms and other rooms that require special treatment of walls and ceilings. Improved plaster is applied to the walls in three layers. The first is spray, which, depending on the base, has a different layer thickness. Thus, the spray is applied to concrete and brick walls at a height of 5 mm.
Second layer - the soil can have several layers. At the same time, the height of the cement tent is 5 mm, and the height of the lime mixture is 7 mm. The third is a covering, the layer thickness of which is 2 mm. The surface treated with this plaster is checked according to the rule, and the covering is smoothed.
With improved plaster, according to building codes, there are tighter requirements for various tolerances. So, for 1 meter of area, only 2 mm is allowed vertically, and over the entire height - 10 mm and no more. For 4 sq.m. Only two uneven waves are allowed, the depth of which is allowed no more than 3 mm. The tolerance on the horizontal plane is 2 mm.
Normative base
The interior and exterior decoration of residential premises is regulated by a whole list of various documents, the key of which are Construction Norms and Rules - the so-called SNiPs. These sets of rules contain the most important information regarding the arrangement of certain finishing elements. That is why it is very important to study them before starting work.
The regulations describe a variety of technologies. Some of them are shown in this diagram
| Index | Name | Summary |
| SNiP 3.04.01-87 | Insulating and finishing coatings | Basic SNiP for interior decoration of residential premises, which includes requirements for plastering, puttying, surface decoration, as well as for the installation of floors and floor coverings. The requirements of this SNiP do not apply to cooling systems that are operated under special conditions (extreme temperatures, unusual humidity conditions, etc.). |
| SNiP 2.03.13-88 | Floors | A standard that is used in the design and installation of floor coverings. Regulates the choice of floor design depending on the type of building and planned loads, and also describes the technologies used in finishing floors. |
| SNiP 3.05.01-85 | Internal sanitary systems | A set of rules that relate to the arrangement of sanitary systems in residential and industrial buildings. Formally, these processes do not relate to finishing work. But when performing repairs or reconstruction of apartments, houses and cottages, they must be taken into account. |
Naturally, this is only a small part of all the documents that are used when designing the interior decoration of houses and apartments. For almost every operation there is a separate GOST, SNiP or instructions that will help you understand the nuances of the work.
High quality plaster
This type of plaster is used for finishing rooms in theaters, in some residential apartments, and other public places. With high-quality plaster, a spray is applied to the surface, one or more layers of primer and a finishing layer - a covering. In this case, plastering of the walls is carried out with hanging and the mandatory use of beacons. The thickness of such plaster can be approximately 20 millimeters.
According to the rules, the requirements for high-quality wall plaster are the most stringent. Deviations of up to 1 millimeter are allowed per 1 meter vertically, and 5 millimeters along the entire height. Permissible errors for waves – 2 irregularities per 4 sq.m. Each unevenness can be up to 2 mm deep. On the horizontal plane, permissible deviations are allowed less than 1 millimeter.
Rules for performing rough work on the surface during interior finishing
Rules for finishing work
Snip rough finishing is performed according to established rules.
Advice. In order for the finishing to be done efficiently, the rough finishing on the surface is also good.
The first thing to do on the surface is to clean it. The process of such work includes:
- Elimination of rust on the surface.
- Chipping of plaster from a surface that has already come away from it.
- Removing the paint layer.
- Removing wallpaper and other adhesive material from the surface.
- Disinfection of surfaces in order to protect premises from the formation of mold, which can serve as a source of human diseases, and when using certain materials, to protect them from harmful effects and prevent the destruction of their structure.
- Cleansing. This is done with the help of detergents and cleaning agents, which are used to treat the surface using foam rubber or metal brushes.
- Surface priming.
Advice. The last work is carried out only after the surface has dried thoroughly after wet exposure.
- All work of this type is quite simple and is done with your own hands. To remove rust, special products are used to treat the surface. It will be necessary to further apply asbestos solution to the surface and those places where there was rust.
- If there is mold on the surface, then treatment cannot be done without chlorine-containing products. Special solutions are also used that are applied to the surface.
Advice. When using such products, safety standards must be observed. Rubber gloves are put on your hands, and a respirator is put on your face.
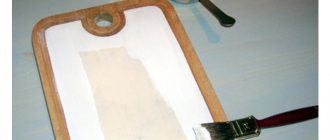
Paint or varnish is removed from a surface using a specific product. There are instructions for proper use. According to it, it is indicated how many layers of the product and what size are applied to the surface. What work is done after this?