Doorway, Miscellaneous
After installing a new door, finishing the opening will be necessary. This step cannot be avoided regardless of the type of materials used, because it reduces heat loss and provides an excellent basis for subsequent decoration of the doorway.
Doorway without door and plaster
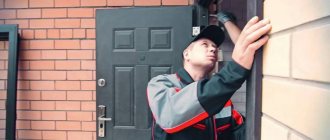
How to eliminate a skewed metal entrance door: solution options
- The subsidence of the canvas is visually determined as an uneven gap along the contour of the vestibule between the inner border of the box and the edging of the canvas. Characteristic is the appearance of abrasions on the side of the hinges in the upper part, as well as in the lower part on the opposite side. The culprit is most often the deformation of the hinges or their attachment point.
- Deformation of the canvas - manifests itself in uneven through gaps along the border of the vestibule or in difficulties with locking the lock. The reason is mainly a violation of production technology, when there is no low tempering procedure to relieve stress in the area of the welds. If the structure has not undergone heat treatment, then curling of the leaf is a matter of time, and eliminating door misalignment in this case is very problematic.
- Installation errors - when opening the door leaf touches the floor, if you lift it, you feel a noticeable play. In this case, it is possible that cracks will appear on the wall and the platbands will not fit tightly. The reason is quite simple - the door fasteners are loose and will need reinstallation.
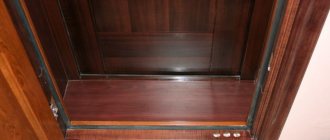
We are restoring the kitchen doorway, which the previous owners for some reason demolished. Lots of photos.
Several years ago we bought a two-room apartment in a house built in 1974. We have already told you that we decided to redo everything in this apartment, since the renovation of the previous owners did not suit us at all. In previous articles, we described in detail several stages of renovation of our apartment, and in particular (you can read it by following the links):
- bathroom renovation (article 1, article 2, article 3)
- toilet repair (Article 1, Article 2, Article 3)
- redoing the floors in one of the rooms and laying laminate flooring
Today we would like to share with you information about restoring the doorway between the kitchen and the hallway.
For some unknown reason, the previous owners removed the kitchen door and didn’t stop there. The entire opening was also dismantled. As far as we understood, the meaning of this was to combine the kitchen and the corridor - supposedly the passage would become wider.
We, in turn, cannot imagine the kitchen as a space combined with either a room or a corridor. Still, the room for preparing food should be isolated from the rest, at least not by a tight door, but by a door. In general, we began to restore the doorway and install the door.
What is plastering?
Before plastering a doorway, you need to understand the essence of the work being performed. Finish that part of the opening that frames the door on the sides and top. Objectives of this step:
- level the surface;
- protect from destruction;
- insulate the opening.
The choice of method of performing work is influenced by a number of factors:
- technical indicators of the opening;
- intensity of operation;
- renovation budget.
Note! The choice of one method or another is influenced, among other things, by the quality of installation and the design of the opening.
If the gap is more than 5 cm, then you will have to first insulate and soundproof the opening, and only then plaster it. If the door is installed correctly, such gaps should not appear. In this case, using polyurethane foam would be the right solution.
Cement plaster
Openings where there were none
Sometimes, during major repairs or redevelopment of apartments or houses, the owner decides to change the size of the opening. If the walls are load-bearing, such actions are preceded by obtaining permission; if it is just a partition, then the housing commission is notified of the fact of the work performed. But that’s not about that now.
Passages are made in different ways, the choice of which depends on the structural material of the wall. Accordingly, slopes are formed in different ways. In brick, foam concrete and asbestos-cement partitions, passages are cut. These materials are quite soft, so large expenses for cutting the opening are not required.
Naturally, this is done according to preliminary markings, after which leveling and finishing are carried out. If the passage just needs to be widened, it is easier to do it on only one side. Although, the layout does not always allow you to do what is easier, and you have to cut the opening on both sides.
How to level a door
Reasons for door misalignment
One of the reasons for door misalignment may be mistakes made during repairs. It happens that an oversized door is hung on two standard hinges, when in a good way it would be necessary to at least increase their number to four.
The door may also skewer due to a violation of the geometry of the doorway. This happens if repairs are carried out in a new building, when the house has not yet had time to sag.
If we talk about wooden doors, then swelling of the door leaf or frame is also one of the causes of this problem. Excessive room humidity leads to wood deformation and structural failure. Most often this happens in old houses, where the water supply should have been replaced a long time ago, but for some reason this was not done on time.
Misalignment of plastic doors often occurs due to the fact that they were initially screwed crookedly during installation. Less commonly, the cause may be poor quality of the material from which they are made.
Door alignment instructions
To align the door, you must first determine the cause of the misalignment. If the problem is due to improper installation, fixing the problem is quite simple. All you need to do is screw the door hinges in a new place.
If the problem is that the hinges are sagging, the door should be completely replaced.
When a door starts to swing due to too much weight, it must be removed from its hinges and additional fasteners added.
But if the wood swells, the door alignment process may take longer. In this case, you will have to not only change the door leaf, but also completely replace the frame.
As promised, we leave the video instructions for eliminating the distortion here.
Ways to reduce a passage in a wall
Narrowing an old doorway during redevelopment involves reducing the size of the door in height or width, as well as in both parameters at the same time. The procedure can be performed in three ways: using timber, drywall or blocks.
The most reliable method to reduce an opening in a wall is to partially block it with blocks. The option is ideal for the front door. Suitable materials include brick, cinder block, and cellular concrete blocks. It is better to use foam block or aerated concrete for interior partitions. The material is light, easy to cut, but absorbs moisture. It is slightly less durable than brick.
The work consists of the following actions:
- to reduce the height of the passage in the wall, prepare a jumper from a beam or a metal corner;
- the workpiece is cut off larger than the width of the passage, and landing nests are made under it at the ends of the wall using a grinder;
- After fixing the lintel, the space above it and the sides of the passage in the wall are filled with blocks.
When choosing this method, take into account the weight of the blocks. The heavier the material, the stronger the jumper will be needed. If the whole block does not fit into the gap above the jumper, it is sawed with a grinder or wood, polystyrene foam, or polyurethane foam are used for filling. The disadvantage of porous blocks is the absorption of moisture. To prevent fungus from appearing, the structure is treated with protective impregnation.
How to reduce a doorway with timber?
It is easier for an apartment dweller who does not have construction experience to reduce the width of the doorway with timber, and also to lower it. The work order consists of the following stages:
- The thickness of the timber used to narrow the doorway is adjusted with a planer so that the workpiece does not protrude beyond the plane of the wall. The surface is treated with a grinder. In this case, the finishing material will fit better.
- The dimensions taken from the opening are transferred to the timber. Use a saw to cut the pieces to the required length and fix them to the ends of the wall. The thickness of the beam should not protrude beyond the plane of the wall, and the upper lintel should be cut to such a width that it fits tightly into the ends of the side walls.
- When drilling mounting holes on the beam, recesses are provided to allow the heads of the fastening elements to be hidden flush.
- The posts and lintel are fixed to the wall with anchors, bolts or other parts.
- Large gaps between the frame and the end of the wall are filled with polyurethane foam. Small cracks are sealed with putty.
- The finished structure is impregnated with a primer. After drying, they are covered with gypsum board, chipboard or other sheet material.
When reducing the doorway, the frequent dynamic loads acting on the door are taken into account. To prevent the structure from becoming loose, the timber is attached to the wall as often as possible.
After you have managed to lower the door opening with timber, the question arises of how to close the space from above. The easiest way is to cover it with plasterboard, plywood or chipboard. A small gap is hidden with wide platbands. Before finishing, the cracks are filled with foam.
The advantage of this method is the ease of installation of the timber. The downside is the installation limitation. In humid rooms, the wooden frame becomes deformed and cracks due to temperature changes. The method is not suitable for the bathroom and kitchen.
Reducing the span with plasterboard
To build up an interior doorway with plasterboard, on the installation side of the profile frame, the wall is cleaned of various materials and treated with a primer.
- Having taken measurements of the entrance opening, cut the guide profile into the required pieces. The upper lintel is fixed with hangers, and the side elements are fixed directly to the ends of the wall.
- GKL sheets are screwed to the finished frame with self-tapping screws, maintaining a pitch of 150 mm;
- The cracks are sealed with putty. The plasterboard structure is primed, and a metal perforated corner is glued to the corner joints.
Seal the opening above the door and along its width with plasterboard if the difference in size between the opening in the wall and the door frame does not exceed 100 mm. To fix the gypsum boards, a frame is made from a galvanized profile. The frame turns out to be quite weak and is easily deformed if there is a large gap when opening the sash. It is better to use a plasterboard structure for an arched passage. To strengthen the gap between the profile and the ends of the wall, fill it with pieces of timber or polyurethane foam.
Forming a smooth opening
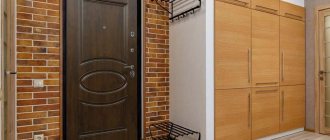
Repairing openings in the bathroom, or near the front door, which will be discussed later, is a completely different matter. In these places there are no plasterboard partitions, but rather thick load-bearing walls.
The front door opening is often filled with one frame with two panels or several bindings. This is justified by the fact that one door, for example, can be metal, and the second wooden.
The space between them is called the stub. Considering that the thickness of a load-bearing wall can be quite impressive - say, two bricks (51 cm), then it is natural that even a double frame does not completely fill the opening. Most often, the door is placed flush with the wall on the outside, and slopes are created on the inside.
Sometimes they are covered with wood or MDF, but most often they are plastered with cement plaster. In any case, after replacing the door, or during a major renovation of the walls, when the plaster needs to be knocked down to the base, the geometry of the slopes is significantly disrupted, and you have to think about how to level the opening.
Methods for leveling slopes
Now we have come to the most difficult stage of wall repair. By the way, invited craftsmen charge separate money for plastering slopes, and the price, I must say, is rather high - about 250-300 rubles per linear meter.
Thus, the slope of one door measuring 2.1 * 0.9 m will cost at least 1,300 rubles. Although, such work may not take too much time - it all depends on the initial state of the opening.
- Try to do it yourself, especially since you can use a variety of available materials for the work. Aligning the side walls of an opening without a door is carried out according to the same principle as plastering rectangular columns. On the sides of the slope, checking the level, two long aluminum rules are fixed on both sides, extending them beyond the plane of the surface to the thickness of the plaster.
- The rules, in this case, serve as beacons, but in principle, you can do without them. The role of the rules is just as successfully performed by ordinary profiles for drywall, which are mounted on self-tapping screws or dowels, with their backs to the side surface of the opening. Just like the rules, they need to be moved forward by the thickness of the screed.
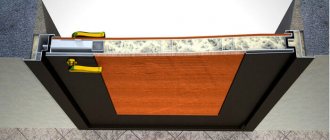
- If there is a door in the opening, then the beacons are mounted only on one side. In the first case, excess mortar is removed with a short rule, a small spatula, or a wide spatula. If there is a door in the opening, you need to make a template from scrap materials, which is shown in the picture above.
- It can be made from a piece of plywood, hardboard, plasterboard or even thick cardboard. The main thing is to make a recess on the template that exactly fits the protrusion of the door frame. This will allow you to make a clear line of the plaster layer around the perimeter of the door. After the solution has set, but has not yet hardened, the beacons are carefully removed and a corner is formed, cutting off all excess with a spatula.
- When the leveling screed, which is made with a base mixture with a coarse dispersion of components, has dried, a perforated plaster corner is mounted on it. And then they putty. If there is no major damage to the slopes, then a thick layer of plaster will not be necessary.
- In this case, you can do without beacon profiles and install the corner straight away. By the way, when plastering walls and slopes with specialized mixtures, you can simplify the leveling process by using the same drywall. If you cut long narrow strips and glue them onto putty along the uprights of the box, you will get a perfectly even junction.
- Aligned in level, these strips will serve as beacons for applying a leveling layer. There is no need to remove them, since after the starting layer has dried, the strips of drywall will be hidden under the putty. By the way, it is also more convenient to level the upper slope with plasterboard.
Plaster mixtures, especially when a thick layer has to be applied, do not adhere very well to horizontal surfaces. You have to install the mesh, apply several layers, and each time wait for them to dry.
And the wall plasterboard itself has a thickness of at least 12 mm, plus a thick layer of glue, which allows you to level the slope in one step.
Finishing method
There is such a thing as wet and dry plaster. The first method means applying plaster mixtures, which are sold dry. To work, they are diluted in the proportion indicated on the package. It is advisable to strictly adhere to the recipe, because if the mixture turns out to be too thick, it will quickly harden, not allowing you to adjust the application. Too liquid will drain from the walls.
The following types of wet plaster are used:
- Cement is the cheapest, moisture resistant, but shrinks after drying. It is used as a starting material or subsequently painted, since the color characteristic of cement is gray.
- Plaster. This class of plasters is characterized by uniformity and excellent application. The surface is smooth after use, but a damp environment is contraindicated for such compositions.
- Polymer. It has excellent technical characteristics, including in terms of moisture resistance and ease of application. However, many are put off by the high price.
When plastering, several layers are applied. Each one uses different plasters – starting and finishing. The difference between them is that the finishing has fine grains, due to which the surface is smooth. There are universal formulations, but they are expensive.
Profiles for drywall
Drywall is called dry plaster, because it does everything to the opening that wet plaster does, but without diluting the mixture and applying it. This method is convenient for the speed of work. A plasterboard-lined floor will still have to be plastered, at least in the places where the screws are screwed in. However, the scope of work is much less.
This is an excellent method on how to plaster a doorway in a wall without installing a door. The surface will be smooth and neat. A huge advantage is that you don’t have to wait for the plaster to dry.
How to reduce a doorway with drywall
In our opinion, this is the easiest way to reduce a doorway, both in width and height, in typical city apartments, as it allows you to create a wall of any length and thickness.
We would like to share our personal experience on how to reduce the width of a doorway using plasterboard.
As always, we recommend creating a minimal project to get a clear idea of what you'll end up with. The project will also allow you to calculate the required amount of material and prevent overexpenditure and the purchase of excess.
A few drawings from our project:
Fig.3. Wall frame made of metal profile
Fig.4. Plasterboard wall
Fig.5. Diagram of installation of a metal profile and fastening of drywall
What we have is an entrance to a room with a standard size of 910 mm, the plan is shown in the figure below. The red arrows indicate the places where the plasterboard walls will be completed.
Rice. 6. Floor plan with doorway before remodeling
We need to narrow the doorway by 200 mm and get the correct walls in order to install a standard 600 mm door and not cut off one trim on both sides of the doorway after installing the door.
What are slopes called?
Before leveling the surface, you should define the concept of slope. The concept refers to the area in the area where the door is inserted, framing it from the sides and from the top. The use of plaster mixture in this embodiment allows:
- will be able to perfectly level surfaces;
- will reliably protect slopes and adjacent surfaces from destruction;
- will increase the level of thermal insulation in the room;
- will enhance sound insulation properties.
Traditionally, slopes are made using the rule and various dry-type compositions, which are selected according to the location and operating conditions of the facility. Scientific information on this topic can be found at ru.wikipedia.org
Selection of plaster mixture
To get perfect slopes, you will have to choose the right plaster mixture. It is necessary to talk about the selection of initial and final plaster, since it is selected depending on:
- features of the technical plan object;
- features of further operation;
- the cost of the work performed.
If the gaps are more than 50 millimeters, then before filling them with the plaster mixture, care should be taken to ensure maximum noise and heat insulation by filling the door jamb with special materials.
How to choose the right plaster for the ceiling?
Experts strongly recommend making plaster-type slopes from:
- cement-sand composition - for which you should stock up on cement and sand (1:4), diluting them with water to the state of thick sour cream;
- alabaster based solution.
If the structure is installed in compliance with all requirements, the gap is so small that it can be easily filled with ordinary polyurethane foam. After the foam layer has dried, it will be possible to carry out further surface treatment - plastering and decorative finishing.
Plastering tools
For high-quality alignment of a door or window opening, it is strongly recommended to use branded devices that can be purchased at any hardware store. Although just a few years ago plastering work was carried out exclusively with the help of a trowel and a painter’s bucket. All material is taken from the website inforemontik.ru.
Now, before leveling the doorway with plaster, the following is purchased in the store:
- scraper - a small spatula used to remove old trellises from walls, the length of which is only four centimeters;
- a brush with metal bristles - allows you to remove old paint, but is often replaced with a drill with a chain for speed;
- a plastic bucket for diluting dry plaster, the volume of which can be ten or twenty liters;
- trowel and spatula for applying the plaster mixture - have the shape of a drop or an uneven rectangle, used for a flat surface or corners;
- metal profile beacons with galvanized coating, which are necessary for leveling the surface;
- plaster spatulas - for accurate selection, application and distribution of plaster mortar over the wall surface, you should purchase a wide and a narrow one (for applying the mixture to hard-to-reach areas).
It is necessary to clarify the best way to level the doorway with plaster, and then purchase the necessary tools. To work with this material, you may need a plaster corner, and in large quantities, since with its help you can make a spacer between the walls and the ceiling and properly plaster the doorway.
Experts say that plastering works need to be stocked up with:
- usually - a metal strip, which removes excess solution from the surface;
- trowel - a strip whose surface is polished, designed to smooth out the applied layer of plaster;
- steel trowel - can replace a trowel, but allows you to apply a thicker layer of plaster.
For more comfortable production of high-quality slopes, you can stock up on a construction mixer or a hammer drill for thoroughly mixing the plaster mortar. If you have to plaster slopes not just once in a house or apartment, but constantly in industrial workshops or office premises, then you cannot do without a plastering apparatus.
Technology of plastering doorways
Preparing openings
To decide on the best way to level a doorway with plaster, you need to listen to the advice of experts. In order for the layer of plaster to lay more evenly, it is necessary to properly prepare the surface of the openings.
In order to properly finish a doorway, it is necessary to prepare the surface of future slopes in advance according to the rules:
- remove dirt and dust deposits from the surface;
- eliminate stains from bitumen, resin, grease;
- carefully prepare the corners in the area of the door leaf;
- eliminate concrete deposits;
- masonry joints will need to be cleared down a centimeter to obtain improved adhesion and increase the service life of the corners in the area of the door covering opening;
- prime the wall surface using a special solution.
Installation of guides
In order to correctly align doorways using a high-quality and safe plaster mixture, you will have to install guide plaster corners and metal profile beacons in the door area.
In order to secure galvanized beacons, use:
- solutions such as Rotband or MP-75;
- alignment with respect to the wall itself and along the slope, without shifting the position of the beacon or corner.
Selection of plaster mixture
As for the material, it is most convenient to work with dry plaster mixtures based on gypsum: these compositions, already prepared in the required proportions, only require the addition of water and thorough mixing. In addition, they dry approximately twice as fast as traditional cement plaster, are more flexible in work, and there is noticeably less dirt from them. Therefore, if plastering a doorway is carried out in a residential area and large layers of material (3 cm or more) are not required, it is best to use dry gypsum mixtures. When working outdoors or in cold technical rooms, plaster made of cement and sand, in the classic ratio of 1:3, is more suitable.
Tools and materials for work
To plaster the sides of the opening, you need:
- mixer (for mixing the mixture);
- spatulas;
- roller;
- short rule or malka;
- grater;
- level;
- capacity;
- masking tape, film;
- rags;
- sandpaper;
- paint brush;
- components for solution or dry mixture;
- primer;
- putty;
- corner profile;
- reinforcing mesh;
- self-tapping screws;
- clean cool water;
- scaffolding or stepladder;
- personal protective equipment.
How to correct sagging fabric on hinges?
On removable
The position of the blade has to be adjusted as a result of its frequent use. Dismantling is necessary to remove the door from its hinges and adjust the position strictly to 90 degrees. Depending on the type of hinge mechanisms, the installation and correct adjustment of the blade will depend. Loops are:
- card;
- mortise;
- screw-in;
- invisible.
The most common are card type loops. To remove the door from them, just open it slightly and lift it slightly. But this option is not widely used, since in addition to the card loops, decorative elements are attached in the form of plugs and covered parts.
To unscrew the hinges and allow the fabric to come off them freely, you need to open the sash slightly at an angle of about 30–40 degrees. You need to place a strong object under the canvas to fix this position. You can use a crowbar or a shovel handle. By lifting this object, you can release the canvas and achieve its complete removal from the hinge mechanisms.
In more complex structures (metal interior doors or heavy wooden ones), it is better to use a jack. This is a labor-intensive process and will require the use of additional force. It is best to handle heavy structures with two people to prevent injury.
On fixed
Non-removable mechanisms are a design for opening the canvas on both sides of the box at an angle of 180 degrees. They are multifunctional and rarely cause problems. Most often, non-removable loops keep the canvas quite level even during long-term use. But you also need to know what to do with them in order to lift the door, successfully remove it and repair it.
First you need to unscrew all the fasteners around the hinges. You often have to use special tools to help. The most convenient is a hexagon, which quickly copes with removing all excess.
If the door leaf has sagged significantly, then removing the permanent hinge mechanisms may be more difficult. Sometimes you have to lubricate the elements with oil to unscrew rusted parts and make removal easier. If deformation processes are detected, it is necessary to replace the bent retaining screws with new ones. To do this, after removing the door leaf, the strength of the fastenings is checked. Before lifting the interior door, you need to make sure you have the necessary tools and understand what kind of fastening is in front of you. Depending on the type of hinges and the material of the door leaf, it is removed from the fastenings.
Conclusion
Plastering door slopes is not difficult. The work is carried out without the use of special tools; the skills of a professional painter and plasterer are also not required.
Voted over 300 times, average rating 4.6
Comments
Unfortunately, there are no comments or reviews yet, but you can leave your...
Add a comment Cancel reply
We recommend reading
Doorway, Locks, Miscellaneous How to measure the opening for installing the front door, comply with the standards and not make a mistake? When buying a new apartment, house or building a new cottage...
Doorway, Miscellaneous Assembly of doors with frames, fittings, installation in a doorway Door structures are considered part of the interior. They have …
Doorway, Miscellaneous How to safely break through a wall and make a doorway yourself? To achieve a visual expansion of the apartment’s area, designers ...
Doorway, Miscellaneous Self-decoration of a doorway for the New Year holidays New Year holidays are happy memories from everyone’s childhood...