Property Simple Improved High quality Deviation from the vertical, mm per 1 m, no more than 321 Maximum deviation from the vertical for the entire height of the room, mm 15105 Depth of unevenness, mm, no more than 532 Deviation from the horizontal per 1 m, mm, no more than 321
Finding out what kind of plaster the developer uses is almost impossible. The sales department may lie to you, and few people in the preschool department indicate what kind of plaster will be used. Usually they write like this: “Wall finishing with plaster.”
Before acceptance, try to find out from the developer what kind of plaster he uses so that you know what irregularities you can claim for. This information is stored in the working documentation, in the “Architectural Solutions” section. This section contains a list of room finishing. If your developer is smart, he will not send you and will show you the information, although he is not obliged to.
Your task at the reception is to check whether the walls are even. To do this, you will need a building rule - this is a flat plank, usually aluminum, from a meter to three meters in length.
The walls must also be vertical. Vertical deviations are checked with a level, and if there is none, then at least with a plumb line made of thread and nut. If such a deviation is not corrected, it will not interfere with life, but a tall cabinet near such a wall will look bad. If you fix the deviation yourself, then keep in mind that a lot of building materials will be needed on the wall to even out a deviation of even 1 cm.
If your developer uses improved gypsum plaster for finishing, the walls will be smoother and there will be fewer defects. It is more expensive than simple sand-cement, but it is better leveled.
Gypsum plaster is whiter and smoother, cement plaster is gray, sometimes even with a brownish tint, and rougher.
The only place where, according to SNiPs, gypsum plaster cannot be used is the bathroom, because gypsum is afraid of moisture. Double-check that such plaster was not used in the bathroom and toilet.
Electrics
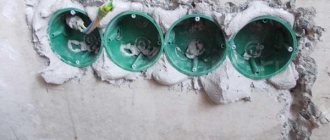
Check if there are wires for connecting the doorbell, sockets and switches. The bell, sockets and switches, if they are provided according to the DDU, should not fall out of the mounting boxes, heat up or spark.
To check if the outlet is working, use a tester screwdriver or an electrical appliance that runs on mains power.
Advice
On forums it is often advised to take a phone charger with you to check sockets. I used to think so too, but I realized that it’s not worth risking your phone: if a razor that costs 3 thousand burns out due to a power surge, it won’t be as bad as if it’s a phone that costs 50.
If the developer installed sockets for the lamps, then screw in the light bulb and check if the sockets are working. Be careful with the light bulb when you unscrew it: it heats up quickly. If the developer has not installed sockets, sockets, switches and there are only wires sticking out of the wall, don’t try it yourself - invite an electrician.
Let's say you turned on the machine in the control panel, but the bell, sockets and lighting do not work. Or your DDU says that there should be sockets and sockets, but there aren’t. These are defects, write them down in a notebook, then draw up a defect report.
Correct wallpapering according to the current SP 71.13330.2017
The wallpaper production technology is standardized in section 7.6 of the current SP 71.13330.2017 “Insulating and finishing coatings. Updated version of SNiP 3.04.01-87.”
These requirements must be observed when performing finishing work on premises of buildings and structures.
Let us highlight the most important points of these requirements that must be taken into account in order to properly hang wallpaper:
7.6.1 Before starting wallpapering work, it is necessary to prepare the base in accordance with the requirements presented in Table 7.2. The quality of the surface prepared for wallpapering must meet the requirements given in Table 7.5, in accordance with the selected type of wallpaper.
Table 7.2 - Requirements for checking and preparing the base before starting plastering work
| Controlled parameter | Description | Control (method, volume, permissible deviation) | Corrective measures |
| Presence of foreign substances and inclusions on the surface | Check for the presence of: - foreign substances on the surface of the base (dirt, splashes of solution, wood residues from formwork, soot, etc.); - limescale efflorescence on the surface | Complete visual inspection, the presence of foreign substances and inclusions is not allowed | Remove mechanically or roughen (with a wire brush, scraper or sandblasting equipment, etc.) |
| Dust content of the base | Run your hand over the surface and determine the presence of dust and dirt. | Complete visual inspection, the presence of dust and dirt is not allowed | Removes dust and dirt |
| Surface strength of the base | They pass along the base with the sharp edge of a metal tool (trowel, trowel, etc.), and note chipping and shedding. Peeling is determined by tapping method | Instrumental, at least five measurements for every 100 m2 of surface, shedding is not allowed | Peeling areas must be removed. Weak bases are cleaned to a durable layer and (or) the GS 3 primer is applied according to Table 7.1 |
| Absorbency of the base | Apply clean water with a well-moistened brush or roller; if after 2 minutes water still rolls down the wall or the color of the base does not change, the reasons may be: - the presence of form lubricant residues on the base; — exceeding the permissible values of base moisture; — the presence of substances that increase the hydrophobicity of the surface; - presence of soft and flaking parts of the base | Visual, at least three measurements for every 100 m2 of surface, heterogeneity is not allowed | The surface contaminated with grease is cleaned with water and a brush with the addition of cleaning agents, and then rinsed with clean water. Mechanical cleaning is also possible |
| Substrate moisture | The residual moisture of the top layer (20-30 mm) of the base is measured with a certified moisture meter | Instrumental, at least three measurements for every 100 m2 of surface, base humidity - no more than 5% by weight | Maintain a technological pause in summer for at least four weeks, in winter for at least 60 days at a temperature of 0°C to 5°C after removing the formwork |
| Base temperature | Measurements are carried out with a contact thermometer | Instrumental, at least three measurements for every 100 m2 of surface, base temperature - from 5°C to 30°C | Organize heating or protection from direct sunlight |
Table 7.1 - Types of primer compositions
| Type of primer | Purpose | Application area |
| GS 1 | Reduced absorbency of the base | For treating highly absorbent (hygroscopic) substrates |
| GS 2 | Leveling the absorbency of the base | For processing substrates made of dissimilar materials |
| GS 3 | Strengthening weak foundations | For treating crumbling and chalking substrates |
7.2.2 Before applying plaster solutions, depending on the type of base and the plaster materials used
7.6.2 Before starting wallpaper work, highly absorbent surfaces must be additionally treated with a weak solution of glue (the solution is prepared in accordance with the recommendations of the wallpaper glue manufacturer) or the GS 2 primer composition according to Table 7.1. This solution can also be used to strengthen dusty substrates.
7.6.3 Before applying wallpaper, you must make a vertical mark along the border of the first strip.
7.6.4 The glue is prepared in accordance with the manufacturer’s instructions. The wallpaper glue used for wallpapering must match the selected wallpaper.
7.6.5 The type of adhesive application is selected based on the markings on the wallpaper packaging:
1) glue is applied to the wall;
2) glue is applied to the wallpaper.
7.6.6 When applying glue to the wall, it is necessary to carry out work with grips slightly wider than the width of the wallpaper roll. The glue is applied evenly in a layer with a thickness of at least 1 mm.
7.6.7 When applying glue to wallpaper, you must lay it out on the work surface with the back side up and apply the glue in a layer at least 1 mm thick. After applying the glue, you need to bend the left and right edges of the wallpaper strip towards the middle (with the adhesive sides inward), then the wallpaper strip can be folded with the dry sides and left to absorb the glue. The exposure time is set by the wallpaper manufacturer.
7.6.8 After applying the glue, the first strip is glued vertically and aligned with the mark. Leveling the folds and removing air bubbles under the wallpaper is done from the center up, then down. All excess glue must be removed immediately.
7.6.9 The second wallpaper is glued along the first end-to-end, the folds are smoothed and bubbles are removed according to the procedure described in 7.6.8. The procedure is repeated until the entire working surface is sealed.
7.6.10 In the inner corners, one strip of wallpaper is glued so that it overlaps the corner by 10-20 mm. Using a plumb line, glue the next strip exactly into the corner with an overlap on the first, after which it is necessary to remove all excess glue.
7.6.11 On external corners, one strip of wallpaper is glued so that it overlaps the corner by 10-20 mm, the next strip is applied and aligned end-to-end with the previous one, after which it is necessary to remove all excess glue.
7.6.12 To glue wallpaper behind heating radiators, it is necessary to cut the wallpaper strips so that their width corresponds to the distance between the heating radiator mounting brackets. Before gluing, you need to check the alignment of the wallpaper according to the pattern. To smooth wallpaper in hard-to-reach places, use a thin roller or rubber spatula.
7.6.13 Before gluing wallpaper around switches and sockets, you must make sure that the electricity is turned off from the panel. Switches and sockets are covered with wallpaper without pressure, then a diagonal cut is made through the area of application and the edges are carefully cut out, after which the wallpaper is pressed against the wall. The final trimming of the edges at the application site is carried out after the glue has dried.
7.6.14 When performing wallpaper work, the premises must be protected from drafts and direct exposure to sunlight until the wallpaper is completely dry, with a constant humidity regime established. The air temperature when drying pasted wallpaper should not exceed 23°C.
7.6.15 Acceptance of work is carried out by visual inspection. When visually inspecting the surface covered with wallpaper, there should be no air bubbles, dents, stains and other contamination, as well as additional adhesion and peeling.
Requirements for paint work (painting) upon acceptance under SP
Requirements for plastered surfaces when accepted according to SP
Form for notification of completion of construction of individual housing construction
Water supply and sanitation
There should be no puddles or wet screed near the risers. Shut-off valves must be in the same plane as the pipes, open with force and not become loose.
Open and close shut-off valves. Repeat 5 times. The effort with which you do this the fifth time should be no weaker than the first. Photo: Biodynamic Editorial
Check if tees are installed in the bathroom and toilet. The tee connects the drain pipes from the toilet, sink and bathtub so that the drain does not go into one channel, but into three - this way it comes out faster. It is built into a wide general drain pipe that runs along the riser.
If the tee is installed correctly, you can easily get to it when installing drain pipes from the sink, bathtub and toilet.
Tile
For tiling surfaces, a special glue based on cement or polymers is used. The glue is applied to the wall, which has been previously primed and moistened. The mixture should be applied evenly using a special spatula, which is convenient for forming frequent and deep furrows - this will ensure a better fit of the tiles. The tile itself or mosaic parts can be adjusted either end-to-end or at a short distance.
As soon as the glue has dried, all voids are filled with mortar or grout, which can also serve a decorative function if chosen in contrast to the main color of the tile. Most often they try to use matching grout.
Apartment area
Before acceptance, take the DDU and make a large copy of the apartment plan. See in advance whether all the rooms in the apartment are rectangular or have irregular shapes. If there is, try dividing this room into parts so that you end up with rectangles or right triangles - it’s more convenient to calculate the area.
The length and width of the premises are measured along the walls at floor level. The area of doorways and arches is not counted if their width is less than two meters, and niches - if they are less than 1.8 meters. If you are a humanist and mathematics makes you sad, invite a techie friend to the exam.
Example
Vitalya bought an apartment with an area of 52 m² in a building under construction for 8 million rubles, and signed a contract with the developer. Upon acceptance of the apartment, I discovered that the area of the apartment was 50.5 m². There was no clause in the DDU on the procedure for compensating for missing meters, so Vitalya calculated the amount according to the law. He wrote a claim to the developer and received compensation for the difference of 1.5 m² - 230 thousand rubles.
Finishing work
Finishing work includes all operations on decorative finishing of facades and interior residential and commercial premises. This includes a wide range of design methods:
- painting walls;
- wallpapering the walls (sometimes the ceiling);
- relief plaster;
- facing with ceramic, mirror or stone tiles, mosaics;
- covering walls with wooden, plastic or metal panels;
- painting walls and ceilings, etc.
The choice of type of finishing for premises and facades depends on the complexity of the work, labor intensity and cost of materials. SNiP has its own requirements for methods of finishing work. Before painting the surface, it is necessary to apply a layer of primer. For primer, white paint or special compounds are often used. When the primer is dry, you can paint the surface. The paint is applied in several layers until the surface of the wall becomes perfectly smooth, without drips or gaps, and the color saturation is uniform.
Where and how to make comments
All defects that you noticed upon acceptance are described in the defect report:
A defect report is a document that you draw up after an inspection. This is a list of comments on the quality of the apartment agreed upon by you and the developer. Some developers call it a statement or apartment inspection sheet. If your developer takes care of you in advance, he will prepare a defect report form with his details. No - he will give you a sheet of paper, write the details by hand: the name of the developer, the name of the director.
In the act you list the shortcomings and set today's date. It must be signed by a representative of the developer. This means he agrees with your punch list.
Most likely, the developer’s employee will sign the defective deed with you on the basis of a power of attorney. Ask to see this power of attorney. In it, check that the power of attorney has not yet expired, and that the powers indicate something like “the right to sign defective acts or statements.”
When you draw up the deed, make a photocopy - have the developer sign it for you, and you give him the first copy with your signature. When the developer eliminates the shortcomings, he will invite you for re-acceptance. Take the document with you to check the list of corrections.
Rules for painting indoor surfaces
Despite the fact that it is recommended to apply the paint in several layers, their number is not regulated. Apply paint until you achieve the desired result. The layer of putty under the paint should be perfectly leveled, but if you plan to use decorative plaster as a finish, then the putty does not need to be sanded.
Plaster, like paint, must be applied in several layers until the desired effect is achieved. Each new layer is applied only when the previous one has dried.
Covering installation
Tiles and parquet can be laid on an adhesive base. Rolled coverings such as linoleum or carpet should lie in the room for some time and only then be laid on the floor. The roll base can be secured only after the waves and creases disappear.
To glue the linoleum covering onto a plywood base, a special glue is used, selected taking into account the characteristics of the base materials. You can trim the linoleum along the edges only a few days after installing the floor; usually three days is enough.
If the floor is tiled, clinker or porcelain stoneware, you need to follow the same rules as when finishing walls. The only thing worth considering is the strength of the tiles, because the floor bears a much greater load than the walls. Finishing materials should be selected as wear-resistant, non-slippery, and easy to clean.
Of course, within the framework of one article, even if it is quite long, it is impossible to list all the technologies used for finishing facades and interior spaces. You can view the full list of SNiPs on the relevant Internet resources.
How floors are installed according to SNiP
The installation of floors in accordance with the set of norms and rules must be carried out in strict accordance with the design documentation. Ground floors must be compacted. When arranging the soil foundation, the use of contaminated soil (land mixed with vegetation or construction waste) is not allowed.
The temperature at the time of laying polymer bases should not be lower than + 15 degrees; this indicator remains for 24 hours after the completion of repair work. If the raw materials for flooring contain glass or xylolite, the temperature must reach the levels specified in the design documentation. This is a temperature regime of at least 10 degrees. At 5 degrees, floors with bitumen elements are laid, 0 is the permissible temperature for the formation of soil, slag or crushed stone coating.
Rules for arranging floors:
1. When forming floors with impurities of wood waste or xylot coatings, preliminary moistening of the base is required. 2. Requirements for special types of floors (quality of materials and their properties) are factors that must be stated in the project. 3. The lower layers and screeds on a cement binder base must be moisturized within 7-10 days. 4. Cement and concrete bases are laid on a concrete layer that corresponds to the compressive strength.
