Previously, plaster was applied without the newfangled primer, but now all sellers recommend it. In what cases can you save money and do without it?
Previously, plaster was applied without the newfangled primer,
It is extremely important to understand the following:
The very “previously” that you write about is not a standard of quality.
Quite often I remove “previously” (old Soviet plaster from different surfaces), it falls off on its own only from the “sound of a working hammer drill”.
The primer that is called “100 years at lunch” was simply in the USSR, there was a terrible shortage and it (PVA + water) was most often made “from what was available.”
Nowadays, technology and the composition of plasters have changed for the better; before plastering surfaces, priming is a mandatory process, and not only the base surface is primed, but also layers of plasters.
The quality (including the strength of the plaster on the surface) today is many times better than “before”.
Primer is not an expensive material, so you shouldn’t skimp on it.
Primer for plaster: in what cases can you do without it?
On this point, it is important to know whether you are plastering for yourself, or “for sale?” (that is, you complete the order).
It is important to know what kind of plaster we are talking about.
It is important to know what surface you are talking about.
You can, for example, plaster a brick with cement-sand plaster, without a primer, but the brick must be moistened.
For lovers of vintage (everything Soviet), you can, for example, plaster wood without a primer, but you need to stuff nails and tie them with wire, you get the Soviet version of a plaster mesh, which was in short supply back then.
We add clay to the solution for viscosity, lime (this is an ancient antiseptic found in modern primers) and also slightly moisten the surface.
The conclusion can be drawn as follows:
Previously, people did this because they were forced to do so, and not because it was better, of higher quality.
From the author: Hello, dear visitors of our construction portal. It often happens that, having devoted all our efforts to the cosmetic decoration of the room, we diligently glue wallpaper, plaster, paint - in general, we give our walls a chic appearance. But at the same time, trying to quickly get the final result, we lose sight of one of the most important points. This, of course, is preliminary surface preparation.
She should be at the forefront of almost any cosmetic work. An ill-prepared or untreated surface usually leads to the fact that the entire external gloss quickly loses its appearance, the coating begins to lag behind the wall, and all efforts come down to disappointment.
Each type of finishing requires appropriate preparation. Today we will talk about something that sometimes causes controversy and disagreement. Namely, whether it is necessary to prime the walls before plastering. After all, it would seem that this material itself to some extent contributes to surface treatment, and not just gives a cosmetic effect. In general, in order to finally come to a common opinion, let’s take a look at the advice of experts who have both accurate information and vast experience.
Why do you need a second layer of plaster?
The technology of work depends on the curvature of the base. If the differences exceed 4-5 cm, the single-layer plaster will be too thick and heavy. It will move away under its own weight and become covered with defects.
Uneven walls and ceilings are plastered by craftsmen in 2 approaches. The first coating will be rough. It will improve adhesion, fill pores, roughness, and potholes. Secondly, it levels the surface and forms the main thickness along which the finishing will lie.
When laying a second layer is required
- Significant unevenness of the base, horizontal and vertical differences of 4 cm.
- Creating a high decorative effect.
- Technology requirements when working with cement plasters.
Plaster and brick in room design.
The combination of brick and decorative plaster in the interior is characteristic of the loft style. This design is suitable for a living room, adult bedroom, terrace, balcony, kitchen, hallway. You can use just one wall as a decorative accent, and that will be enough. To make the surface look like a decorative element, first the masonry is cleaned to perfect condition, and then plaster is applied for interior or exterior work on brick, imitating the old coating.
If you want elements of brick in the room, but it simply isn’t there, then it’s quite possible to imitate a brick wall with plaster.
Important! Before plastering, the brick is coated with a special compound to ensure maximum adhesion of the mortar to the surface.
The finish may look worn or crumbling, but it doesn't have to be that way. The finished wall can be painted “to match the interior” or in a contrasting color, or you can leave it as is.
Selection of plaster
Choose a material taking into account the use of the room, the type of base and finishing coating.
Types and purpose of plasters
| Type | Purpose |
| Plaster | Interior work, dry areas with normal temperature and humidity conditions: corridors, living rooms, halls, children's rooms, bedrooms. Choice of paint, wallpaper. |
| Cement, cement-lime | Premises with specific conditions: bathrooms, kitchens, unheated areas, facades, structures operated under atmospheric influences and in conditions of high humidity. Universal base for finishing. |
| Decorative, structural | Finishing work: original texture, relief, imitation of natural stone. |
| Special: waterproofing, acoustic, thermal insulation | Wet areas: basements, kitchens, bathrooms, cold rooms. Creating a soundproofing barrier and protection from external noise. Increased thermal insulation. |
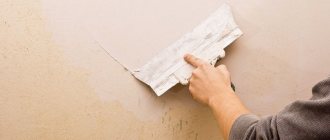
How to apply plaster
The preparatory stage before plastering affects the adhesion strength and quality of the finished structure.
Instructions:
- Clean the base from dust and dirt with a steel brush. Press the tool firmly and move it in different directions. Check the verticality and horizontality of the structure.
- Seal the seams, caulk the grooves. Tighten joints of dissimilar surfaces with strips of mesh with a cell of 10*10 or 30*30 mm. The strip should extend beyond the joint by 4-5 cm.
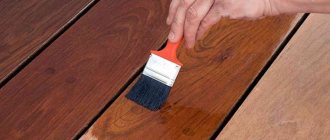
- Apply a universal silicone, acrylic or silicate based primer.
- Start plastering work: installing beacons, applying and leveling the mortar, covering, grouting.
If the ceiling is plastered, provide reinforcement. Use a 10*10 mm mesh. Stretch it onto the reinforcing steel frame, firmly securing the ends with metal wedges. Secure the mesh with soft wire, placing the nodes in a checkerboard pattern.
Do I need to prime each layer of plaster?
The primer forms a thin film and clogs the porous surface of the first coat. This prevents adhesion, but not everything is so simple.
Priming is necessary in the following cases:
- Apply a thin second layer.
- Complete drying of the first.
In both cases, the first coating will absorb moisture without soil, the second will not have time to set, gain strength and will crack. Instead of a primer, you can moisten the surface with water from a spray bottle or a roller.
Drying speed
Actual drying time depends on external factors, type of mixture and coating thickness. On average, this takes 5-7 days. The drying of the material can be determined visually - the material is uniform in color, without shadow spots.
Layer thickness
The thickness of the finish when plastering walls is 5-50 mm. Locally - up to 100 mm. On ceilings - 5-15 mm.
Application technology
To ensure long-term operation of the coating, strictly adhere to the application technology:
- The rough layer is 4-10 mm. Scoop up the solution with a spatula and throw it onto the wall. Start from the bottom, gradually grabbing the left, right sides and rise higher. Set the rule to the beacons, slowly lift the tool, distribute the solution. Wait until completely dry. Avoid exposure to high temperatures and drafts, close windows and doors.
- Second. Thickness - until the beacons are completely hidden. Scoop up the plaster with a narrow spatula and transfer it to a wide one. Apply the mixture evenly, carefully leveling.
Once dry, smooth the grout using a trowel in a circular motion.
Applying plaster to interior walls
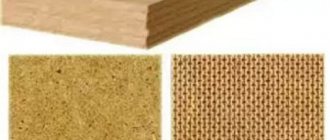
It doesn’t matter what finish will be used for the interior walls, they must be leveled. If the room is large, then to save time, choose plasterboard or gypsum fiber board. Such materials simplify rough leveling, but the finishing layer is still performed using gypsum plaster.
In order to get perfect walls as a result, adhere to the following plan for applying plaster:
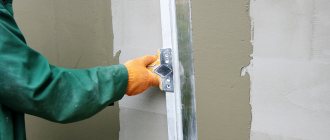
- Preparing the base. It is necessary to remove all protruding elements and fasteners. Seal the cracks with repair mortar and prime the base. On concrete or brick walls, it is necessary to make notches and deepen the seams. This will increase the adhesion of the solution and the base.
- Installation of beacons. These are metal elements that will help you perform high-quality wall alignment without difficulty.
- Spray with plaster solution. The composition is applied with a ladle or a small spatula and makes up 80% of the entire layer thickness. This part does not need to be leveled.
- Applying primer (second layer of plaster). Level the applied solution using a rule, focusing on the installed beacons.
- Performing the covering. This is the third layer of plaster, the thinnest. It eliminates all minor irregularities and imperfections.
- Grouting is the final stage of plastering. Do this before the cover dries.
Plaster can be applied manually or using a specialized device. The mechanized method of application is several times faster than the manual method. In addition, the layer turns out to be more even, which means that less effort will be needed to ensure that the walls are perfectly smooth.
How to properly apply plaster in new apartments
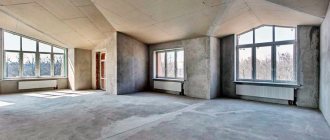
If a person buys an apartment in a new building, then he needs to be prepared for the fact that the walls in the apartment can be called even at a stretch. Builders are irresponsible in carrying out such work. Therefore, it is better to refuse such work altogether.
But if everything has already been done, then you will have to plaster the walls again. To do this, remove the applied layer to the base and carry out all the work according to the above plan. Under no circumstances should you skip the stage of deep penetration soil treatment and installation of beacons. The primer will help to more reliably bond the mortar to the base, and the beacons will simplify the leveling process.
Required Tools
Before you begin all the work, you should acquire all the tools and materials. This will reduce distractions and speed up the plastering process.
Need to:
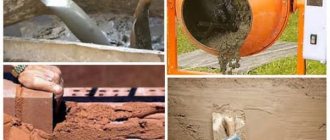
- Mixture for plastering. It may be ready-made - sold in containers, or dry - in bags and before application you need to prepare a solution with the addition of water.
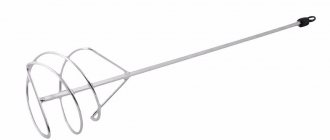
- Perforator with mixing attachment.
- Wide and narrow spatula.
- Spray bucket.
- Rule.
- Metal beacons.
- Dowels.
- Construction level and plumb line.
- Deep penetration soil.
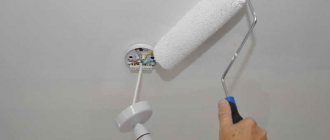
- Roller or wide brush for applying primer.
- An old ax for making notches on concrete or brick.
| Tool name | View | Material | Purpose |
| Rule | Rail with a length of 0.5 to 2 m made of metal or wood | Monitoring the correct application of the solution and leveling the surface | |
| Trowel | Metal or wood plate with handle | Throwing mortar onto the wall | |
| Falcon | Analogue trowel of a different size | Portion solution set | |
| Poluterok | Wooden or plastic plate | Smoothing the mixture over the surface | |
| Grater | Wooden or metal plate with handle | Grouting a leveled surface, creating a relief | |
| Scraper | Metal | Surface cleaning | |
| Bouchard | Metal hammer | Roughening | |
| Maklovitsa | Brush | Applying primer | |
| Plumb | Cord, weight | Definition of vertical | |
| Level | Metal | Definition of vertical and horizontal | |
| Square | Metal | Leveling surfaces | |
| Corner leveler | Metal, grater type | Aligning corners, varieties - for external and internal corners | |
| Putty knife | Metal, plastic, rubber | Surface filling, various sizes and varieties |
Techniques for applying plaster mortar
As mentioned above, plaster can be applied manually or by machine. But such devices are expensive, so it’s not worth buying them specifically. You can rent it or use the old method - do everything manually.
To properly apply the solution, you must follow three different methods:
- Spray.
- Application of primer.
- Creating a cover.
If the base does not have differences of more than 5 mm, then you can do without spraying and immediately proceed to applying primer.
Applying the first layer - spray
To complete this stage of applying plaster, you must protect yourself and other surfaces from the solution. The person performing the work wears safety glasses and a mask or respirator. The window and door panels are covered with polyethylene film.
For spraying, prepare a solution whose consistency resembles thick sour cream. It should fill all the voids and notches that were made on the base. The solution is scooped into a small ladle or trowel, and with a sharp movement of the wrist, throw it onto the base.
Please note that movements must be carried out from the same distance from the wall. But there is no need to do this too abruptly, since the solution will fly in different directions. After the entire surface has been treated, it is left to dry for some time. The solution should not dry out, as the next layer will not adhere well.
Applying the second layer - primer
To apply the primer layer, prepare a solution slightly thicker in consistency than the previous one. For work, use a narrow spatula and a rule. Using a spatula, apply the solution in small portions, which is then leveled using the rule.
If beacons have been installed, then the tool is pressed tightly against the guides. Moving evenly from bottom to top and at the same time performing oscillatory movements from side to side, the solution needs to fill all the voids that remain after spraying.
One surface is divided into several parts. First they process one, and then move on to the other. Be sure to pay special attention to the joints. After the applied solution has set a little, it needs to be rubbed off.
Applying the finishing layer - covering
After the soil has dried, you can proceed to the next stage - applying the covering. The solution for this stage is prepared carefully using a mixer. It is very difficult to make the ideal consistency without lumps by hand. It is advisable to sift all dry components to remove elements larger than 2 mm.
The finishing layer will be. If done correctly, then after the solution has dried, you can begin painting the surface and gluing wallpaper. The prepared solution must be applied using a wide spatula. This is done like this:
- Using a narrow spatula, a small amount of solution is placed on a wide tool.
- The spatula is pressed against the wall and a sweeping movement is made from bottom to top. Thus, the solution seems to be rubbed into the base.
- Some argue that arc movements are much more comfortable. But here everyone chooses the option that suits them.
- Each subsequent movement covers the previous layer by several millimeters.
The applied layer must be allowed to set, after which rough grouting and smoothing are performed.
Errors
Violations in the preparation of the solution and during the execution of work lead to the appearance of defects: peeling, cracks, tubercles.
Causes:
- The solution is poorly mixed.
- The working mixture is of the wrong consistency (the proportions are not met).
- Quickly dried plaster (effect of temperature, humidity).
- No primer or joint reinforcement.
- Thick coating - from 5 cm.
- Applying the mixture to the previously uncured material.
Plastering on damp substrates leads to peeling and cracking.
Source
When is it necessary to plaster walls, and when is putty enough?
Question: how to determine when it is necessary to plaster the surface of the wall, and when it is enough to putty the uneven areas? Answer: Putty is not a material for preparing large surfaces and is not intended for application in a layer of more than 5 mm.
If you need to level walls whose unevenness is 5 mm or more, it is advisable to resort to plastering. Small irregularities, dents and small cracks can be repaired using putty. Without resorting to plaster.
Which solution is best for plastering?
Question: Which plaster is better for plastering - gypsum or cement? Answer: Despite the fact that today you can find a very large number of different mixtures for plastering on sale, it is most advisable to opt for plaster with a cement binder. The fact is that gypsum plaster does not have such good adhesion and can peel off even with slight vibration (for example, during busy traffic near the house, door slams or other similar impacts). Cement-based plaster solutions do not have such disadvantages and reliably adhere to the surface.
Types of primer
Source: blogmart.com.ua
Now that we have found out whether it is necessary to prime and why, let's talk about the nuances of such work. The more competently you do it, the better the result will be. The first thing you need to pay attention to is, of course, choosing the right product. There are several types of primer and are used depending on the situation:
- universal - suitable for any substrate except wood and metal. It has all the necessary properties: increasing adhesion and strength, as well as an antiseptic effect. It dries quickly, has a slight odor - in general, the most suitable option in all standard cases;
- deeply penetrating - in fact, these words denote its peculiarity. This product is used on those walls whose surface is not trustworthy: too loose, crumbling, etc. It penetrates 10 cm deep and reliably holds the existing material together, making the layer more durable. The drying speed and odor intensity are the same as for the type described above;
- adhesive - this primer is aimed at qualitatively improving the adhesion of materials. It makes sense to use it on surfaces in which this property is initially underestimated. As a rule, these are all smooth: tiles, concrete, paint. After applying our product to them, the surface becomes somewhat rough, thereby ensuring good adhesion of any finishing material, including plaster. Some of the adhesive primers contain alkyd resins. Even wood can be treated with such means.
Incorrect consistency of plaster mixture
Failure to maintain proportions is another popular mistake that many people make. There is no single rule here, since dry mixtures from each manufacturer have a different composition. When mixing, you must follow the instructions on the package.
This rule is true for both cement-sand and gypsum plaster. If you haven't added enough water, the finished solution will inevitably slide under its own weight. This leads to the formation of cracks on the walls and also significantly complicates the application of the solution.
Do I need to treat the walls with something before plastering?
Question: Do I need to apply something to the wall before plastering? Answer: Modern technologies make it possible to prepare the surface for plastering using special primers called “concrete contact”. Concrete contact is a mixture based on cement, acrylic and high-strength adhesive. Concrete contact is produced by a variety of manufacturers.
The most popular primers in our country are Ceresit CT19, Prospectors, and Knauf. Concrete contact is recommended for use on smooth and poorly absorbent glossy surfaces, where a conventional deep penetration primer cannot be used.
When preparing concrete contact, the proportions should be carefully observed, since even a slight deviation from the manufacturer’s recommendations can lead to a decrease in the quality of the primer.
Cement plaster on a primed surface
Good day. I primed a wall made of red and sand-lime brick with a deep penetration primer, under gypsum plaster, but now I come to the conclusion that it needs to be plastered with a cement composition, will this primer interfere with good adhesion?? After all, it seems that before cement plaster the wall is only wetted, the same Vetonit TT40 says that the wall can only be moistened, they say no primers.
Not prevent. A properly primed wall does not have any separating layer or films. On the contrary, gpp closes the pores in the wall and will not draw water out of the plaster. Which will be beneficial by preventing dehydration of not very thick layers.
stad, shouldn’t these crystals also grow into the base during the “crystallization” of cement? And why do Vetonitites prohibit priming walls with anything other than water before plastering?
UNikolai, yes, all plastering manufacturers include a primer in their wall leveling system, it’s just that the presentation of information sometimes distorts how it should actually be - the information is either incomplete or inverted. But we are used to priming everything, sparing no primer, no time, no money, as if priming is a panacea. You can, of course, prime under cement plaster, but this is not always necessary, and this is kept silent. It is necessary to prime highly absorbent and dusty substrates, when for some reason it cannot be prepared otherwise - to bind dust and reduce hygroscopicity, water alone is not always enough, for example, silicate will not hurt to prime, but with a diluted primer without fanaticism, it will be better than dried out plaster , but in general, if you dig into the topic too deep and there are a lot of little things that seem to be in a simple job, which today is not so simple.
Simson, Well, of course, everything is not easy, there are nuances everywhere
Source
After what time can I install gypsum skirting boards on a plastered wall?
Question: It is planned to install gypsum stucco and ceiling skirting boards. How soon can I start installing them after finishing the plastering work? Answer: you should begin installing gypsum ceiling plinths and other stucco elements no earlier than. Than after the plaster has completely dried.
One of the important stages of finishing work can be called plastering - hardly anyone will argue with this. The final quality level of finishing will depend in the future on how well the plastering is done. Moreover, plaster, which is applied correctly, has a beneficial effect on subsequent surface treatments - there will be much less difficulties in this process.
Let's talk about how to properly plaster a wall. What do the instructions for work at this level look like?
Tools and equipment
To perform plastering work, you need to stock up on the following tools:
- a trowel and a plaster trowel for applying the mortar;
- falcon for feeding the mixture;
- a rule and a trowel to level the solution;
- trowel for grouting plaster;
- container for mixing the solution;
- a construction mixer or drill for mixing the components.
- with a wide brush or roller for applying primer;
- level, plumb line and level for marking and control.
Figure 2. Tools used for plastering.
It is important to keep tools clean and wash them after completing each stage of work.
Let's sum it up
In order to achieve a truly flat surface as a result of all work, beacons must be used. This is the name given to the guide rails along which the plaster rule is moved during plastering in order to properly level the applied mortar.
You can also easily prepare the composition for plastering with your own hands - from water, sand and cement. But if possible, it is better to purchase ready-made plaster mixtures, which are sold today in any hardware store (you can also choose dry finishing mixtures there). With the help of these materials, the coating will be of higher quality - there is no doubt about it. The cost of such solutions in stores is moderate - the costs will easily fit into the budget of any family.
Rating: 5 / 5, total ratings: 3
Sometimes during the renovation of a room whose walls are lined with plasterboard sheets, the question arises - how to plaster plasterboard?
Despite its apparent simplicity, the question is far from idle, since drywall is often called “dry plaster.”
It is in the subtleties of the rather complex and ambiguous relationship between coating and plaster that we will try to understand this material.
So, the first and main question is - is it possible to plaster drywall?
Today, unfortunately, there is no consensus on this issue. Many experts are inclined to believe that such surfaces (and even more so if the wall is made of a fairly cheap, non-moisture-resistant sheet) should not be plastered under any circumstances.
Sooner or later, under the influence of moisture from the composition and its considerable mass, the base will deform, which will lead to cracking of the layer.
However, there is an alternative opinion, which says that it is possible to plaster drywall. If you're careful, of course.
In this case, “carefully” means, first of all:
The only exception regarding which experts have a unanimous opinion is applying decorative plaster with your own hands. It is not only possible, but also necessary to apply it to a sheet; such a mass is one of the most popular materials for wall decoration.
How to choose the right soil mixture
When choosing a primer for treating walls, you need to consider:
- Basic components. Soil mixtures for sand-lime and simple bricks will differ in properties. For smooth sand-lime bricks, adhesive compounds are used before painting or applying plaster.
- Condition of the material. For an old, cracked or crumbling wall, it is necessary to use strengthening primers, preferably deep penetration, before applying a decorative coating.
- Location of walls. For facade walls or in wet rooms (bathroom, kitchen or bathhouse), purchase a primer with increased moisture-repellent and antiseptic properties. For simple or porous bricks, it is recommended to use moisture-resistant mixtures of deep penetration.
How to speed up drying of a wall
It is not advisable to use equipment to dry the walls, as this will increase the chance of cracks forming. But sometimes situations arise when drying needs to be accelerated.
To do this, follow the following rules:
- plastering work is organized in the warm season;
- it is necessary to ensure access of dry heat to the rooms;
- turn on the electric gun or heater, but so that cracks do not appear on the fresh plaster;
- good air exchange is ensured;
- gypsum-based plaster dries faster, so it is better to use it;
- You can turn on hair dryers, bright lamps or use hardeners.
When adding components that accelerate setting to the solution, you must follow the instructions so that the surface does not deform. If you follow all the tips, you can reduce the time for complete drying to 1-2 days. Gypsum plaster makes it possible to get the desired result faster.
Forced intensive ventilation in winter is unacceptable
Builders use the following drying methods:
- Natural. Does not require the use of technology. For natural drying, it is enough to provide good ventilation. However, in the summer, high temperatures increase the chance of premature drying and cracking of the finish. In rainy weather or winter, a draft will only do harm. Therefore, for this drying method you need to choose optimal weather conditions.
- Heat guns. They run on electricity or gasoline. Installed when the temperature is less than 10 degrees. For normal drying of the solution, it is enough to maintain the temperature within 20 degrees. during the day. The air flow should not be directed towards the wall. This will speed up the removal of moisture and cause cracking.
- Fan heater or blower heater. Differs from a heat gun with less power. However, it can maintain the room temperature at the desired level.
- Air Dryer. The best solution for quickly removing moisture from walls. The device collects moisture in a special container and does not dry out the air. You can configure it to the desired operating mode, taking into account the area of the room. This technique speeds up drying of walls by 50%. At the same time, the plaster does not deteriorate, the surface remains perfectly smooth.
A 1 cm layer of plaster using a dryer will be ready for further finishing in 12 hours.
Preparing the walls
Before talking about preparation for plastering brick walls, it is worth noting that the masonry should not be completely fresh. She needs to be given time to settle. Otherwise, even the most durable plaster will quickly become cracked and fly off. We offer you to study the entire process step by step.
Cleaning
First of all, it is necessary to clean the masonry from dirt and dust. If this is not the first finish, then dismantle the old coating and clean the space between the bricks with a brush with metal bristles.
Pay special attention to joints and corners where cracks and chips may have formed. All this must be sealed, since the ceiling allows heat and sound to pass through.
After you get rid of the old coating and clean the surface, it needs to be treated with an antiseptic in order to prevent the appearance of mold on the outside.
Primer
This stage is necessary in order, firstly, to ensure strong adhesion to subsequent layers. And, secondly, it prevents moisture from penetrating inside the bricks. It should be taken into account that all building materials of this type have different porosity. For dense bricks, a composition with increased adhesion properties is suitable. For medium-density bricks, you can use a universal primer. If it is porous, then it is better to buy a mineral-based composition and apply it in two layers.
The surface should be primed with a layer 0.2 millimeters thick.
The porosity of a brick can be determined independently. To do this you need to drop water on it. If it was absorbed almost immediately, then the porosity is large; if it dried for 5-20 minutes, it is average; if drying took even longer, then the building material is very dense.
Reinforcement
Reinforcement is done for especially uneven surfaces. You need to purchase special hooks that are pressed into the seams between the bricks. Next, the mesh is installed on the fastenings.
It will be better if you purchase a plastic product as it is not subject to corrosion. However, if you have a metal mesh, then pre-treat it with a special varnish. Otherwise, rust may appear in the future in the form of yellowish, unsightly spots.
Installation of beacons
First you need to prepare a solution on which the beacons will be attached. If you have gypsum plaster, then it is made from gypsum accordingly. However, there is one subtlety here - to make work easier, this mixture should be slightly more liquid than the main one.
As for the installation of beacons, they themselves are metal profiles with a length of 2.5 to 3 meters and a thickness of 6 and 10 millimeters. You adjust their height and quantity based on the size of the room. We recommend maintaining a distance of no more than 1.5 meters between beacons.
Next, “cakes” from the previously prepared solution are applied along one vertical line, after which the metal profile is pressed into them and leveled using a level. This is how all the beacons that you are going to plaster are made.
First, install the two extreme ones. If the surface is large and you need a lot of profiles, then stretch a fishing line between them, which will serve as a guide for the intermediate slats.
Determining the need for plaster
As you probably already understood, plastering drywall is a rather difficult task with sometimes unpredictable results. These are the characteristics of the sheet; it can really become deformed under a thick layer of finishing. Or it may last for many years.
So, when should you plaster?
- If the wall cladding has significant curvatures or displacements, finishing will not solve this problem, and in the future may significantly aggravate it. If you become the “lucky” owner of such a wall, it is better not to fight the consequences, but to eliminate the cause. Serious distortions can only be corrected by reinstallation, replacing sheets with moisture-resistant ones.
- But minor unevenness in the sheathing can still be plastered. It also makes sense to apply the mixture over dents and pre-filled seams.
- Well, the only case (we have already mentioned it above) is the use of a decorative coating. There are practically no restrictions here, since the decorative mass is applied, as a rule, in a fairly thin layer, and its composition ensures rapid polymerization and drying.
Applying plaster to external walls
Plastering the facade is a long-known way to protect the main structure from the effects of negative factors. During production, synthetic components are added to the composition, which improve the properties of the plaster.
The main advantages of this finish:
- Fire safety. Plaster will protect any base from fire.
- Duration of operation. Some manufacturers provide a warranty of 20–25 years.
- Availability - the price of the compositions is affordable, so almost everyone can purchase them.
- Sound insulation – a thick layer eliminates the penetration of extraneous noise into the premises.
- Versatility - can be applied to different substrates (brick, aerated concrete, foam plastic, penoplex and wooden walls).
- Additional components reduce the weight of the finish, so it does not create additional load on the main structure.
- Resistance to temperature changes.
How to check if plaster is dry
Plasterers recommend taking a closer look at the shade of the surface and its uniformity. Plastered walls become lighter as they dry. However, foundations with serious unevenness have damp spots at the very bottom. If the surface does not dry in a timely manner, it means that the application conditions were not followed correctly. Often the evaporation of moisture is difficult due to the layer being too thick.
A special device helps determine how long it will take the plaster to dry on the wall. If it shows 8-9%, then you can do putty or other type of finishing.
Dry plaster does not leave marks on the palm if you run your hand over it. If the wall is still damp, moisture can be felt after such manipulation.
If you drill a hole in the wall, the wet solution will stick to the drill. Dry plaster always crumbles well.
The plaster applied before finishing must always be dry. If you do not wait until it dries completely, the facing material will not adhere to the surface. The paint will crack to release moisture, the ceramic tiles will change position or begin to fall off. If deadlines are pressing and you need to complete the repair as quickly as possible, you need to consider which material dries faster and what will affect the acceleration of moisture evaporation from the plaster.
Was this information useful to you? Share in the comments!
Application technology
When applying, you must follow the work technology; the slightest violations can lead to undesirable consequences.
Preparing walls for final finishing
- We clean the surface from dust that inevitably forms during its installation. An industrial vacuum cleaner is best suited for this, but if you don’t have one, you can remove dust with improvised means.
- The next stage is filling of seams, joints and irregularities. For putty, both ready-made and dry putty mixtures can be used. If dry mixtures are used, prepare them immediately before work.
- First, fill the joint cavities and large uneven areas with putty. After the putty has hardened, apply a leveling layer.
- Now you can move on to the key stage of preparation - priming.
Primer
For bases, special primer mixtures are used (such as Tiefgrund LF or similar characteristics). Such primers penetrate deeply into the thickness of the base and strengthen it, ensuring adhesion to the mixtures.
For the best effect at this stage, it is better to use acrylate primers that have vapor-permeable properties (do not isolate water vapor).
Apply the primer in one layer using a roller or brush (for walls with a small area).
Note! Work on drywall is carried out only after the primer has completely dried! For acrylate primers, drying time is 1-2 hours.
After the seams are filled and the primer is applied, you can proceed to leveling the walls.
Applying plaster
Instructions for distributing plaster with your own hands:
The mass is applied in a thin layer (no thicker than 2-3 mm) using a wide spatula or metal trowel. If plaster is used to level out deep unevenness, the distribution is carried out in several stages. Remember that in this case it is better to apply 3-4 layers of several millimeters each than 1 thick layer at once.
Not any plaster is suitable for finishing plasterboard surfaces. It is best to use mixtures based on a gypsum binder (for example, Knauf Rotband). In order for the finish to “stick” better, you can use fiberglass mesh with a 5 mm mesh.
After the plaster layer has completely dried, you can begin finishing the plasterboard walls. In this case, it is better to use vapor-permeable materials for finishing that do not prevent water vapor from escaping from under the finishing.
Applying a second layer of gypsum plaster
04.11.2017 at 21:56
DDS88 wrote: you need to add another 3-3.5 cm in places.
Typically this layer thickness is not required. Did the developer really do the plastering that badly? What is the area of these problem areas? Is it local or is there rubble across the entire plane of the wall, for example? It makes sense to cut out the current plaster down to the base in the right places and apply the layer you need on it! Well, or make a notch with a grinder or wall chaser on the plaster, and apply a new one on top of it.
In general, I am engaged in the construction of websites and online stores.
04.11.2017 at 22:12
prime and plaster.
04.11.2017 at 22:23
DDS88 wrote: I heard that according to technology, it seems that it is impossible to apply a second layer to a smooth wall made of rotband. I would be very grateful if you could tell me what to do in such a situation.
If you are sure that this is Rotband, then why don’t you want to read what they write about it on the Knife website?
The recommended average thickness of the plaster layer should be 10 mm, the minimum – 5 mm. Single-layer application of the mortar in a layer of up to 50 mm is allowed, however, in this case, the drying time of the plaster layer for subsequent finishing increases significantly. To reduce drying time, apply the solution in two applications. First, a layer 35 mm thick is applied, which, while still soft, must be “combed” in waves with a plaster comb and only after this layer has dried, treat it with KNAUF-Mittelgrund primer, diluted with water in a ratio of 1:3. After the primer has dried (min. 6 hours), apply a second coat of plaster. Plaster ceilings only in one layer with a thickness of no more than 15 mm. The minimum thickness of the plaster layer for gluing ceramic tiles is 10 mm.__
Factors affecting drying speed
Various factors influence how long the plaster can dry before applying putty. The mixtures are applied manually and mechanically. Puttying begins only after the plaster solution has completely dried.
Let's figure out what affects the drying time:
- Components of the solution and its purpose. Mixtures with different compositions differ not only in consistency, but also in drying time. Gypsum hardens in the shortest possible time, the lime mixture takes longer to dry, and the cement-sand composition requires the longest period of time.
- The material with which the walls are covered. The concrete base does not absorb moisture from fresh plaster, so the mixture takes longer to harden. Brick, drywall or wood absorbs liquid. Therefore, the solution dries faster on them.
- A thick layer hardens longer, and a thin layer hardens faster.
- With a large volume of work in the rooms, the humidity level increases. Therefore, the walls take longer to dry.
- To hide large irregularities and create a single wide plane, the solution is applied and hardens several times.
- The temperature in the rooms affects the evaporation of liquid. To speed up the process, you need to open windows and doors and make sure the room is dry.
- The best conditions for external wall decoration are a temperature of at least +10 degrees and a humidity of 75%.
The amount of water in the solution affects the speed of its hardening and the quality of the future finish.
Every 1 mm of layer adds 1 day of drying
Technology of plastering walls using dry gypsum mixture
In order to make the finishing layer, a dry gypsum mixture is often chosen, for example, Rotband. It is attractive because the base will be white, which means it can be painted or wallpapered in any color.
Before preparing the solution, be sure to read the instructions. Manufacturers indicate in what quantities the components should be mixed to obtain a solution of the required consistency.
The application technology requires compliance with special environmental conditions:
- The air temperature, as well as the base, should be between 5 and 25 O C.
- Gypsum putty is afraid of moisture, so open bags with the mixture should be stored in a dry room. This plaster is not suitable for finishing facades and rooms with high humidity.
- The solution sets quickly, so it is prepared in small quantities.
How to apply gypsum plaster?
Regardless of whether the mortar is cement-sand or with the addition of gypsum, it is applied in the same way. First, a small amount of the substance is thrown on, and then leveled with a spatula or rule. If the gypsum composition is chosen for finishing plaster, then the solution is scooped up onto a wide spatula and rubbed into the base, which should be slightly damp.
You need to work quickly with gypsum mortar because it sets quickly. After hardening, it cannot be diluted with water or other liquids, as its properties are lost. After the applied layer has set, it is rubbed with a special tool dipped in gypsum milk. This will give the plaster strength and smoothness.
Puttying or smoothing the wall
For grouting, choose a special grater. For narrow places (near door and window openings) you need to take a grater or a smaller grater. The hand moves counterclockwise in a circle. You need to work confidently, but you shouldn’t overdo it so as not to tear off the applied layer.
Smoothing is also done with a grater, only with a rubber or metal pad. Now the movements are only vertical and horizontal. First, the wall is smoothed from the ceiling to the floor, and then horizontal movements begin. The ceiling is smoothed first along the window opening, and then across.
Decorative plasterboard plaster
To finish plasterboard surfaces, it is better to use fine-grained decorative plaster. This is due to the fact that laying coarse-grained fractions requires applying a fairly thick layer, and in the case of plasterboard walls this is undesirable.
The process follows the following scheme:
The plasterboard base must be dry and clean. Before starting work, the surface should be completely dust-free.
After the surface is dust-free, we proceed to filling the seams. We fill the seams with putty in several stages, providing sufficient time for the coating to dry and polymerize. As a result, seams and irregularities must be puttied in the same plane as the drywall.
Note! When leveling the surface of drywall for decorative plastering, you may not achieve as smooth a surface as when leveling for painting. The texture of the plaster hides all irregularities well.
Apply an acrylate primer to the putty base. For decorative plastering, the same primers are used as for finishing drywall with ordinary lime plaster. The primer is applied in one step, in one layer.
Apply plaster to the primed drywall. We apply it using a spatula or trowel, in a layer of 2-3 mm.
Immediately after the plaster is applied, we begin to form the relief. We form the relief using a sponge, a hard brush with sparse bristles, smoothers, and figured spatulas.
Note! When applying decorative plaster to a plasterboard base during the formation of the relief, do not apply excessive force. This can cause the drywall to warp.
Further processing (painting, coating with a protective composition) can be carried out only after the surface has completely dried.
The second layer of gypsum plaster on the dried first
How to plaster with gypsum plaster a wall that was previously plastered with a thin layer of gypsum plaster (about 2 months ago). Is it even possible to do this, or to clean off the old plaster?
05/01/2018 at 23:21
rosinovsky wrote: Is it even possible to do this?
It's not advisable, but they do it. Check how the old one is holding up. Mittelgrunt to the rescue.
05/01/2018 at 23:27
AndyMirror, the old one holds up perfectly and doesn’t come off. But the first layer is about 3 mm, and it is necessary to bring the wall under the lighthouse. The base is a concrete slab.
05/02/2018 at 16:30
rosinovsky, first GGP, dry, then, as AndyMirror correctly said, mittelgrunt. dry and plaster. .
05/02/2018 at 20:19
Gray, I tried it myself today, using Leroy plaster (as a base), I smeared it with it, it sticks almost completely. And the rotband is glued tightly. For the purpose of the experiment, I applied half a square, it won’t be a couple of weeks until it’s repaired, and then I’ll see the result