For most materials to last longer, they must be additionally protected with special compounds. If you use ordinary paints, you will not be able to maintain the original appearance of the surface, which is why the use of varnishes is popular. Then you can choose a glaze coating, which is a translucent solution that can protect various materials from external influences inside and outside the building. The features of the compositions, types of paints and technology for using the products will be discussed in detail below.
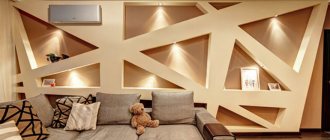
Why paint over decorative plaster?
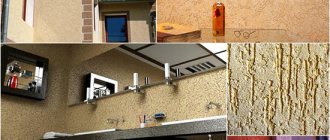
Decorative plaster is considered to be the final coating, but craftsmen often paint it, cover it with glaze, wax or glaze varnish. This is done not only to add shine, but also to protect against the effects of destructive external factors. This treatment of plaster is a good protection against mechanical influences, fading and dampness.
Advantages and disadvantages
There are not many disadvantages to the universal glazing composition for finishing decorative surfaces:
- difficulties in repairing damaged areas, since to properly repair them you need to have professional skills;
- high costs.
The advantages of glazing paint are several times greater:
- high strength decorative coating;
- resistance to sunlight, protection against fading of the surface;
- increased resistance to scratches, impacts, abrasion;
- giving additional strength to the decorative plaster coating;
- the possibility of using detergents to clean walls;
- harmlessness and environmental safety of decorative glaze varnish for plaster made with water;
- uniform laying on both flat and embossed walls;
- Possibility of removing glaze varnish with a solvent.
What threatens wood trim on the street?
First of all - moisture. Fluctuations in humidity provoke wood movement (swelling and shrinkage), as a result of which internal stresses appear. In addition, with high air humidity, colonies of mold and fungi actively multiply, which can damage the wood structure.
No less harmful are the effects of UV rays, temperature changes, and the accumulation of dust and dirt, from which the wood becomes coarser and loses strength. Therefore, manufacturers of paints and varnishes advise that after construction is completed, they immediately begin its protective and decorative treatment. The fact is that the further this process is delayed, the more contaminated and weakened the wooden surface will be and the worse the paint adhesion and the quality of the finished coating will be. This means that its periodic updating will have to be carried out more often, and it will cost more.
AlpinaGlazing paint forms a translucent coating.
Alpina
Cover paint forms an opaque finishing layer.
How to paint, choice of materials and tools
The following types of varnishes are used for processing decorative textured plaster:
- Acrylic lacquer
. It is a homogeneous milky liquid based on acrylic resins and stabilizing additives. It dries quite quickly, creating a durable, colorless film with a slight matte effect. The varnish reaches its final strength after 14 days and does not turn yellow over time. The liquid is non-flammable, covers well, is easily tinted and adheres firmly to the wall. The varnish does not emit harmful substances into the air and has virtually no odor.
- Polyurethane varnish
. For the most part, the composition is intended for processing wood, but it is also possible to process plastered surfaces. This glaze varnish also dries quickly, forming a durable coating on plaster that is impervious to high humidity. Disadvantages include high cost and poor resistance to alcohol.
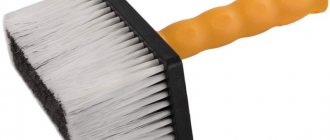
The main accessories used for glazing are brushes of various sizes.
Before applying the initial layer of glaze composition to the surface, you should prepare:
- paint brushes;
- scraps of fabric;
- spray gun;
- protective tape to cover the joints of walls and adjacent structures;
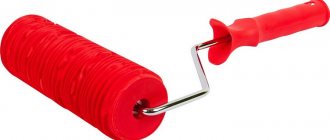
- rollers with rounded edges;
- sponges used to remove stains.
Wide brushes are necessary for processing large volumes of glazing composition in the vertical and horizontal directions.
If there are semicircular patterns on the surface of the walls, then in order to more thoroughly impregnate the decorative plaster, circular movements should be carried out.
Video description
How to properly prepare the surface and apply glaze impregnation is shown in the video:
A more expensive type of tinting antiseptic impregnation for wood or plaster is azure. Thanks to special additives, it makes the surface shiny.
The main difference between impregnation and varnish is that they do not form an impenetrable film on the surface, but penetrate into the material, filling its pores.
Oils and waxes
Oil- and wax-based compositions are the most expensive, but also the most effective and durable in terms of protective properties. They can also be colorless or tinted and create a characteristic soft shine on the surface.
Such compositions are rubbed into the wood with a sponge, brush or cloth swab so that the oil penetrates into the pores. It protects the base from moisture better than other coatings, repelling it, and also does not fade under the sun.
Surfaces finished with clear and tinted wax Source mdv63.ru
Finished surface painting technology
It is recommended to apply the next layer of paint to decorative walls after the previous one has completely dried. At normal temperatures, the drying of the glaze composition is completed after 4 hours, sometimes the process extends for 24 hours. If the temperature is close to zero and the humidity is high, the drying time of the varnish can be 48 hours.
Surface preparation
It is much easier to complete the job if painting is done over decorative plaster, which makes the wall as smooth as possible, which prevents damage to the finishing layer. Before glazing, it is important to make sure that the plastered wall has completely dried and the surface has hardened well. After this, dust from the grout is wiped off with a damp cloth and construction debris is removed. Additional priming of the walls is not necessary, but some specialists do this work as well.
The most suitable indicators for coating plaster with glaze varnish are considered to be a temperature of +5...+35°C and a humidity within 75%.
If these conditions do not exist, it is recommended to postpone painting. Before covering the walls with azure, the room is ventilated and waited until the optimal temperature is established.
Coloring
Before starting to glaze the walls with the prepared composition, it is advisable to protect adjacent surfaces by sticking masking tape on them along the entire perimeter. If the master accidentally goes over the edge, the wall will no longer get dirty, and the tape will be removed upon completion of the work. The result is an even paint job that does not affect adjacent walls. It is necessary to protect the floor covering from varnish by laying a film on it.
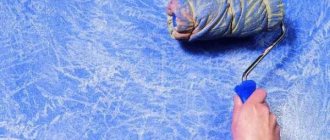
Processing a decorative wall with a roller is no different from working with simple plaster. To do this, paint is diluted in a tray to the desired consistency, a roller is immersed in it, excess substance is removed using the grooved section of the tray, after which the wall is painted. First, movements should be carried out from top to bottom, and then change direction to the opposite.
When using one roller, the application of the decorative glaze composition is uniform, which is clearly visible on the surface of the walls. With simple texture solutions, this approach is not excluded, but when it comes to complex, sophisticated reliefs, then it is necessary to use other techniques. To do this, you will need a brush that is convenient for making strokes of different directions and lengths. This will help eliminate the monotony of glazing, especially if the surface already has a decorative pattern.
It would be more correct if the movements of the brush when first applied to the wall are directed in different directions, after which you can level the surface by using a vertical roller. Together, these 2 tools are often used to cover the terrain using the “rain” technique. The brush easily penetrates into any hard-to-reach places, corners and grooves. Then, using light pressure from a roller and a minimal amount of glazing compound, the relief areas are painted over. The result of this technique is a two-color coating.
If the texture is shallow, then use a sponge and a mitten, thus enhancing the depth of the relief and emphasizing the effect of antiquity. In some cases, they resort to using a spatula, which applies an additional layer of decorative glaze. But more often this tool is used to remove excess paint from the wall. It is advisable to work joints only when they are wet, for which there is a special two-handed technique, when the work is performed by 2 craftsmen.
Despite the environmental friendliness and safety of compositions for coating decorative plaster, it is recommended to wear rubber gloves and special clothing when applying them to walls. If it is necessary to create a blurry effect, use a sponge moistened with water, which is carefully passed along the wall, soaking the composition in the right place.
Beginners may encounter a number of difficulties with the finishing process and develop defects that will have to be corrected. In this case, the damaged area is sanded and the layer is renewed.
Flow calculation
The amount of glaze varnish for decorative plaster should be calculated depending on the final goal. If protection and light coverage is required, then 1 layer is enough. The next one is used to enhance the brightness of the color scheme. You can do it in the same tone or choose a different color scheme. For 1 sq. m, approximately 100 g of composition is consumed. The amount of varnish is slightly reduced if you use a spray gun instead of a brush.
Main types: characteristics
There are many types of decorative plaster. There is a huge selection on the market.
Thanks to some, you can get a certain relief, while others require a masterful approach and the ability to create the desired type of surface.
This type of material can be either liquid or dry. Beauty is provided by various additives in the composition.
So, according to the binder they distinguish:
- Acrylic mixtures. Here the binding component is acrylic resin. The release form of such material is presented in a ready-made mixture. But, unfortunately, the acrylic mixture is very vulnerable to ultraviolet rays, which makes it limited in use.
- Mineral mixtures. In mineral plaster, the binding component is cement. The release form is presented as a dry powder, which must be diluted with water. Unlike the acrylic mixture, it is resistant to ultraviolet rays, however, it is less durable in terms of mechanical stress.
- Silicone mixture. The binder is synthetic resins. This material is considered the easiest to use. Widely used for exterior decoration due to its high resistance to ultraviolet rays and moisture-repellent properties. Release form: ready-made mixture.
- Silicate mixture. The binder is liquid glass. It has moisture-repellent properties and is also extremely resistant to external influences. The service life of such a mixture is more than 40 years. It is used both for external decoration and for indoor work. The release form is most often in the form of a ready-made mixture.
By type of filler there are:
- Modeling or otherwise textured.
- Structural.
- Venetian.
In turn, modeling and structural plaster belongs to the relief type, and Venetian plaster belongs to the smooth type, due to the fact that it forms a perfectly flat surface.
Now about each in more detail.
Modeling and its features
This type of plaster is widely used for wooden and brick surfaces. Due to its composition, it perfectly masks unevenness, cracks and other defects on the walls. The question of how to apply decorative plaster usually does not arise, since this type of material is easy to use. To apply it, you just need to clean and dry the surface thoroughly.
Modeling plaster is famous for its high strength and water resistance. This type of plaster does not lose its qualities with temperature changes, and can also imitate various surfaces, for example, create the effect of a wooden or stone coating.
Modeling plaster has its own subtypes:
- Lamb. Due to its composition, the surface becomes similar to the hair of a young lamb.
- Fur coat. This is cement plaster. On the surface it gives the effect as if short-haired fur fibers were applied to the wall.
- Bark beetle A material that, after application, creates an effect similar to the structure of wood eaten away by a beetle.
Nuances of structural plaster
In the production of this type, liquid glass and acrylic are used. It is used both for indoor work and for exterior finishing. The texture of the wall pattern is given by small shells, pebbles and quartz chips. Structural plaster is resistant to moisture, mechanical stress and temperature changes. It can be applied using a sprayer, spatula or roller.
Venetian: material composition
The basis of this material is slaked lime and marble chips. The structure of the mixture is homogeneous. When applied to the surface, it imitates natural marble and precious metals. This type of finishing is considered the most difficult to use and requires special skills and abilities. If the rules for applying this material are not followed, cracks and other defects may appear on the surface. The mixture is used only for interior decoration.
Why do you need to use wax and what types of wax it comes in?
Wax is most often used for plaster that imitates natural stone. The substance can be synthetic and natural. The first option is used for a durable matte finish, the second - to add gloss. The color of the wax is not always transparent, but special toners will give the substance the required shade.
For Venetian plaster, only the transparent version is suitable, since in this way all the nuances of the material are emphasized. If it is necessary to change the tone of the coating, use colored wax; for a brighter effect, a substance with a gold or silver tint is recommended, in this way gilding or metal coating is imitated.
Briefly about the main thing
If you need to emphasize the beauty of a tree by changing its shade and at the same time protecting it from rot and insects, it is best to use glaze coatings for this. These can be translucent paints that do not hide the natural texture of the material, varnishes that create a protective waterproof layer on the surface, as well as oils or antiseptics that penetrate into its structure and are tinted in the chosen color. The choice depends on what decorative effect is expected.
Ratings 0
Waxing for protection and shine
Wax is necessary to protect the coating from moisture, giving it smoothness and gloss. The method of application to the plaster does not matter. Depending on the thickness of the composition, use soft material, a sponge or a spatula. The main thing is to thoroughly rub in the wax, making glazing circular movements until a shine forms on the surface. Before doing this, it is recommended to make sure that there are no defects on the wall, which will then be almost impossible to correct.
It is also important to carefully remove dust and crumbs that could scratch the surface when used with a trowel. Craftsmen who love to work with this tool achieve exceptional shine, which is not possible when using a mitten or sponge. You need to work from corner to corner, without using the layering method. Despite the speed of drying of the composition, any defects that appear can be corrected within 3-6 hours.
It is worth considering that the edges of the glaze dry out earlier. The next day, polishing is done using a cloth or a grinding machine.
Glaze in painting
When creating paintings, this technique is used either independently or as an auxiliary one. In the first case, the work is created, as a rule, using chromatic shades, that is, the entire spectrum of possible shades. The second option involves creating a monochrome image, which is also called grisaille.
It allows you to concentrate on tonal transitions, creating the shape and volume of objects, without paying attention to color. Often the glazing technique is used to create underpainting in oil painting (distribution of tonal transitions).
Glaze varnish and glaze
Water-based glazing composition and wax are similar both in the method of application and in their intended purpose. The choice should be made based on the characteristics of the coating. The use of a glaze composition for plaster gives the surface additional strength; in addition, glaze is good to use in rooms where the humidity is higher than normal. Glaze for treating plaster is a fairly expensive product used for a more pronounced decorative effect.
It is preferable to glaze with a wider brush that does not have a handle. The decorative composition is applied to the wall in any direction. Thanks to a special component, a beautiful pearlescent shade will be created.
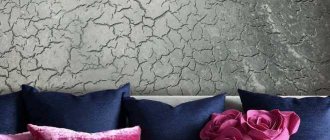
If the decorative base is smooth, then it is easy to obtain the following types of design:
- Decorating a wall in an antique way, when the first layer of glaze composition is pearlescent, and the one applied on top differs from it in saturation. Due to the varnish not completely drying, the top layer cracks, thus creating an antique effect.
- Ironing allows you to achieve a shine reminiscent of polished marble.
- Colored marble effect. To do this, you need to add a little pigment to the azure and apply a second layer of coating half an hour after the plaster has dried.
- Colored surfaces look great under a layer of azure. In order not to lose the depth and brightness of the composition, you should not cover the previous color with a layer with a different shade.
You can make a composition for glazing decorative plaster with your own hands or buy it in a specialized store, choosing it according to the desired effect and the desired color.
Step-by-step painting in watercolor
If you decide to master the technique of layer-by-layer creation of a landscape, portrait or still life, pay attention to the complexity of the plot. Choose simple options. To work from life, create a simple composition of several objects that will not change even after several weeks of your work. Do not use flowers, fruits or replace natural ones with artificial analogues.
Another option is to copy a finished painting. It's easier if you don't take a complex plot. As a first experience, you can choose to make a copy of a painting that has a step-by-step explanation of the work in photo or video format.
The general sequence of actions will be as follows:
1. Choose a subject and draw the contours with thin lines on a sheet of paper (preferably special watercolor paper). Make the first transparent background layer. It can be either one shade or created in a raw way with a smooth transition of tones.
2. Dry the first layer and begin to fill areas of the picture with other transparent layers, bypassing the necessary details along the outer or inner contour. It is better to make transitions from one color to another in one layer smooth, if these are not the boundaries of the form, as in the example of the following illustration.
3. Dry the created layer again and use the same technology to perform the third one.
4. At the final stage, the darkest and most saturated areas are created. Don't forget that they should still remain transparent.