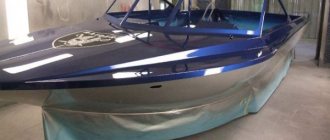
Fiberglass boats come new with a colored gel coat rather than real paint. Gelcoats fade over time and cannot be cleaned or waxed for a new look. Painting fiberglass is the only way to give a boat a new look. Preparing and painting fiberglass as opposed to preparing and painting metal or aluminum. Special steps must be followed to achieve the best paint job possible without damaging the fiberglass in the process. Learn how to paint a fiberglass boat to make your boat look like new.
NATRIEL › Blog › Painting a fiberglass body kit with your own hands
The article is taken from the Internet... In my opinion, it can be very useful...
Regardless of the manufacturer or country of manufacture, as well as the cost of the parts, everyone usually faces the same problems.
1. Pores.
Pores, microbubbles in the laminate. Carbon layer with air.
Micro-air bubbles that are so easy to miss when preparing parts.
Air bubbles or pores are quite common in fiberglass body kits or carbon parts. Usually they are not visible when working with sandpaper and when turning parts due to their very small size and rapid clogging with dust from sandpaper and putty. To detect pores before painting, when it is not too late, you need to thoroughly blow out all surfaces with a high-pressure hose using a blow gun.
The reason for the appearance of micropores in fiberglass, as a rule, is too deep grinding of the surface, when the top layer of (colored) gelcoat is pierced and gaps without gelcoat are clearly visible. In this case, it is best to cover difficult, “punched” areas with liquid putty. Another reason for the occurrence of an excessive number of micropores may be an incorrect combination of hardener and accelerator in the resin at the time of production, which is quite common in the winter, when manufacturers experience difficulties with the temperature conditions of production and speed up the process of molding body kits by increasing the percentage of hardener in the resin.
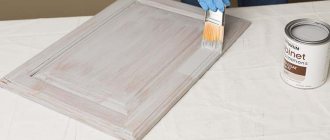
2. Preparing the body kit.
Preparing the body kit for painting. Leveling the surface. Putty.
Any fiberglass body kit, no matter how wonderful it is, requires careful preparation for painting.
All surfaces and recesses are polished and leveled “ideally”. At first glance, the smooth surface turns out to be rough and has chips and potholes. All these defects can be easily removed using a plane, sandpaper and putty. Remember to use dry development to identify large waves and changes in plane. Good advice! Never use materials! Any professional will tell you that the putties from this company are terrible, they are disgustingly processed, they crumble and sag heavily after painting the part, leaving behind a lot of problems and disappointments. We recommend buying products from the following companies: CAR System as the most convenient to use, professional and of the highest quality. Remember, a stingy man always pays twice!
Preparation with water:
Never do this! Preparing a part for painting. Never use water when preparing to paint any parts! Especially fiberglass ones.
The ancient method of “sanding” surfaces by first wetting them with water leads to terrifying consequences! When wet, putty absorbs moisture like a sponge and is able to retain it inside for a very long time. Subsequently, you will be unpleasantly surprised how bubbles under the paint begin to appear on the recently painted surface, or even worse, pockets of corrosion and rust on metal surfaces. When preparing parts for painting, use dry sandpaper and “developing” powder to control the quality of the preparation. When working with primers and liquid putties, you should also not use water. When treating surfaces, it is enough to blow the part with air from a compressor and wipe it with a cloth with a degreaser.
4. Primer for fiberglass:
pokraska_obvesa_top-tuning_ru-5 The choice of material for priming fiberglass can be anything. You can use standard primer for metal or plastic, sticky primer for plastics. However, be aware! Many plastic primers for plastic are not used alone and after their application, it is necessary to use a regular pore-filling primer, which can be processed using the usual method. It is very important! The reason is simple - the sticky layer of primer on the plastic acts as an adhesive that firmly binds the plastic and the primer-paint together. Therefore, these compositions should not be considered full-fledged primers; we would rather call them primers – (ed.). Increasingly, in practice, we are noticing a refusal to use sticky primers and a transition to conventional two-component void-filling primers. This is not prohibited and is quite viable. However, during operation, we notice the appearance of numerous chips and crumbling of paint in places of active resistance to air flow. This happens much more often on parts where primer (sticky primer) was not used, most quickly on bumpers or on sills, in places close to arches. Otherwise, when using a primer, the surface remains securely fixed and is less susceptible to chipping and destruction.
Methods for painting glass wallpaper
You can beautifully paint such canvases if you use one of the design methods. You can use borders, stencils, decorate the surface with squeegee painting, and apply glaze. Each method is attractive in its own way. This is interesting: how and with what to paint paper wallpaper.
Painting with azure
A paint combination of a base color (pastel or bright) and white or decorative flakes is used. Painting glass wallpaper in this way involves various color combinations. Glaze is applied to the dried glass wallpaper using a flat brush. Perform transverse, short strokes. After 15-20 minutes, smooth the surface with a rubber spatula. The azure flakes are evenly distributed and give the surface a beautiful appearance.
Staining with azure
Using stencils
To diversify the external background and not waste much effort, use stencils. Select a suitable pattern, ornament and apply it to the painted and dried glass wallpaper. You should first make marks to ensure that the stencils are evenly installed so that the design looks beautiful and even. There are different types of stencils. There are corner, central, combined and separate (when the drawing is divided into several parts) The stencils are secured with masking tape. After painting and drying, it comes off well and does not spoil the paint. Colors for painting drawings and ornaments are selected to match the tone of the main color. You can use contrasting colors, but the main background should always dominate.
Stencil
Squeegee staining
It is considered a simple and effective painting technique. The resulting surfaces have an original fabric texture. The dominant tone is brightly saturated. Following the painting technique, a glaze coating matching the tone is applied to the dried background layer. Various glazing materials are selected. You can resort to a translucent decorative varnish with a water base or use a composition that has a metallic effect. The squeegee painting technique requires the use of special tools. In this case, fiberglass wallpaper is painted using a plastic or rubber spatula.
Squeegee staining
Using borders
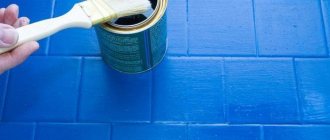
This finish will help smooth out the monotony. You can place the borders along the line of the plinth, along the line where it meets the ceiling, or in the middle (if you need to draw a dividing line between glass wallpaper of different colors). Place the curbs level on a clean, unpasted base. Use separately purchased stripes with patterns and ornaments. Mark a straight line and glue the border. Next, the main canvases are brought to the bottom line. You can install borders directly on a pasted and painted surface using similar material. You need to cut a strip with the appropriate width. Paint it in a matching color and after the wallpaper has dried, paste it into the cut-out area.
Border