Artists and sculptors know about painting techniques: it is difficult for an ordinary person to make a masterpiece out of their walls if they do not have the skills to paint surfaces on dry plaster. Although modern industry suggests using stencils, it is still worth entrusting such work to professionals. They paint designs on the ceilings and walls with special paints or tempra, which makes the house unique in its meaning. Wall painting on dry plaster is a painstaking and creative process: it is possible that it may even take several months if a panel of enormous size is required.
Technique of wall painting with paints on dry plaster.
Wall painting on dry plaster is called Alsecco. They use paints mixed with raw eggs, glue based, and water. Painting on dry plaster is more resistant to polluted air and dampness. This way you can paint the walls of buildings from the street side.
The technique of wall painting with paints on dried plaster appeared later than frescoes. Compared to light translucent frescoes, painting on dried plaster looks bright, colorful, and does not lose its original appearance for a long time.
Wall painting on dry plaster is carried out by artists. Therefore, the facade of a house with such decoration or the interior of a room looks elegant and chic.
What is unique about the alsecco technique?
Recently, wall painting on dry plaster has begun to decorate many buildings, and masters have appeared who are fluent in the specific features of this work. Unlike a fresco, painting an image on a dry wall does not require fast work, since the artist is not involved in the process of drying the wall. After all, the fresco must be applied to a damp surface, which means you need to have time to finish the painting before the surface dries. It is more convenient to paint on a dry wall. Can be done by one artist or a group. This painting technique originated in Europe in the Middle Ages and is still used today. What attracts such pictures?
- Paints are based on natural materials: water, lime. They can be used to paint walls even in a nursery. They are absolutely safe for health.
- Durability. Colors based on natural ingredients adhere well to plaster, do not crumble or fade.
- All details of the picture are carefully recorded.
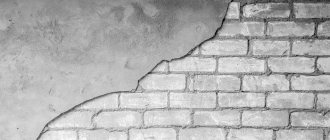
- Resistant compositions are not afraid of exposure to natural factors or sudden changes in air temperature. The alsecco technique is used to decorate plastered exterior walls and building facades, painting blank walls and solid brick fences.
The technique of wall painting with paints on dried plaster should be well mastered by a person who approaches the matter with soul and has an artistic vision.
Disadvantages of painting wall art on dry plaster.
The complexity and responsibility of the work requires its execution by a real master - an artist. This kind of work is unique, exclusive, and cannot be exactly repeated. Therefore, the cost of finishing will be higher than stencil images. The work will take a long time to complete. Therefore, you can’t count on quickly completing the decoration of a room with wall painting on dry plaster. In order for the artist to work calmly, without haste, discuss with him in advance how long you need to focus on. The functionality of the room may vary. Therefore, such expensive design projects should decorate offices, living rooms, and libraries.
How to prepare a wall surface for an artist's work.
If you want to get the perfect picture on the wall, prepare it well. The wall must be cleaned of old paint or wallpaper. Carefully repair dowel marks or other defects with putty. After this, coat the surface with a primer and plaster again. Achieve a completely flat surface. Once it's dry, prime it again and let it dry. The place for the masterpiece is ready! The subtleties of working with dry plaster are that the material is applied in several layers. Each subsequent layer is applied to the dried previous one.
Main process
The plaster solution is applied in 2-3 layers. Before doing this, it is recommended to wet the base well. If the soil has three layers, then the first one should dry well. It is then moistened with water until completely saturated. Next, the rest of the coating is applied. The technology of two-layer soil is somewhat different from the previous version. In this case, the first coating is allowed to thoroughly harden. However, complete drying is not allowed. After this, the final layer of plaster can be applied. It is he who is smoothed over for painting. This is intonaco. In order to be able to apply subsequent layers, the surface of the plaster is cleaned of the resulting limescale crust using a spatula.
Adviсe
To ensure that the image remains bright after drying, choose brighter colors. To get a high-quality image on the wall, you need to consider a few tips:
- when choosing paints, take into account that after drying the color fades significantly, you need to choose brighter colors;
- the image is selected so that if the purpose of the room changes, it is in harmony with the design of the new room. You should not choose flashy, irritating colors and paintings depicting scenes of war, etc.;
- while the plaster dries, the room must be protected from drafts, direct sunlight and sudden temperature changes;
- paint is applied with light brush pressure so as not to damage the base. Apply in a thin layer, a thick layer is not completely absorbed into the plaster;
- To depict haze, lime white is added to the pigments.
The essence of painting
In ancient times, due to the rapid drying of plaster, artists had to act very quickly, but today such painting allows for thoughtfulness and leisure.
Now you don’t need to give the wall a pattern “by eye” at all, since you can slowly come up with a design, draw it on paper, and then transfer it to the wall.
How? To do this, you will need to cut the drawing into separate parts, identical in size to the area being prepared for work for one painting session. Next, you transfer the outline of the sketch onto the newly applied plaster using a needle using the extrusion method.
There is a second way to transfer a design to the wall, using the dusting technique: you pierce holes with a needle along the contours of the design, which leaves marks on the fresh plaster. If you want the base for the image to be white, like a sheet of paper, you can apply a little diluted lime mortar to the finishing primer.
Painting on wet plaster, photo
When you have applied the outline of the design to the finishing area, start working with a soft brush, lightly pressing the bristles so as not to damage the thin layer of plaster.
If you squeeze the brush, there is a chance that some of the lime will rise and mix with the paint, which will turn white when dry.
But a thick layer of paint is completely unacceptable, since it will not be able to be absorbed into the plaster and then, after complete drying, it will certainly crumble and spread. So remember all these points and follow the work process more closely.
Features of the work
Despite the high decorative value of such decoration, it is not used too often, even when decorating modern churches. There are several reasons for this phenomenon.
- Difficulty in preparing a special base. Not everyone can plaster a wall with high quality and taking into account all the requirements. Here they use a special recipe for preparing the mixture; in addition, there are subtleties in its application.
- The process is very slow, artists cannot work from a square meter. Painting on wet plaster differs significantly from traditional painting; it is much more complex and requires compliance with many special technological conditions.
- High cost of finishing the premises. One wall costs significantly more than the complete finishing of all surfaces of the room. This makes the use of such drawings inaccessible for the vast majority of our compatriots.
Drawing such pictures on the walls requires great skill and experience.
As you can see, professional painting on wet plaster (frescoes) can only be done by a limited circle of people. But for the decoration of residential premises, all these requirements are not fundamental, so to perform such work it is enough to have a talent for drawing and basic plasterer skills. Well, if funds allow, it is best to hire a specialist for this. Now you can briefly get acquainted with the features of the technology.
Painting on dry plaster
This type of painting is used much less frequently than fresco. Drawing on a dry wall is called Alsecco. For a detailed master class on painting, watch this video:
Paints for painting are based on casein dough
Since the artist does not depend on surface drying processes, this type of work does not require speed of execution.
For painting, paints based on lime and casein dough are used. They are completely safe for health and suitable for decorating children's rooms.
This kind of work can be done by a professional artist or a person who knows how to draw well. Handmade work is unique, it costs more than drawing a picture from a finished sketch.
The surface that is the basis for drawing must be perfectly flat. Be sure to prime the walls before painting.
Before applying the image, the wall surface is moistened. Paints are applied in several layers. Each subsequent layer is applied after the previous one has dried.
Monumental art of the East
Monumental painting reached great heights in Asian countries, primarily in China, India, and Japan. Worldviews and religions that differ from European ones, as well as philosophical and emotional attitudes toward nature are reflected in this form of art.
Eastern masters decorated temples and residential buildings with images of nature and fantastic landscapes. The creation of color paintings was combined with the art of artistic carving and inlay.
In the East, easel and monumental painting have always developed in close contact. Painted screens and scrolls were widely used in interior decoration.
Preparing the wall surface
This stage must be approached very responsibly. The fact is that traditional technology prohibits the use of modern materials and impregnations to increase adhesion rates and prevent cracking and peeling. Long-term effects must be achieved by other methods.
Table. Stages of foundation preparation
| the name of the operation | Features and execution procedure |
| Removing the old layer of plaster | This is carried out only in cases where the walls are already finished using modern technology. As we have already mentioned, the building should only be made of solid red brick; in principle, other options cannot be considered. Old plaster is removed in all cases, it does not matter whether it holds up well or not. The reason is that there are strict requirements for painting on wet plaster; it cannot contain cement. In those distant times, this building material was not known, but all modern mixtures are made using it. Cement coatings do not have the physical characteristics required for frescoes. Special compounds are prepared for plastering; we will talk about them in more detail in the article a little lower. |
| Preparing the surface for plastering | All measures must be taken to increase the adhesion strength of the plaster. The surfaces are not only cleaned of dust and dirt, but also heavily moistened. If the masonry is smooth, then notches are made. The walls must be leveled, the difference in surface unevenness cannot exceed one centimeter, and the total thickness of all layers of coating is within 2–4 cm. Violation of this requirement leads to the fact that the paint unevenly penetrates the plaster, and this causes uncontrolled changes in shades after drying . |
| Plastering | No primers are used before starting work; this is a gross violation of technology, which has an extremely negative impact on the final result and durability of the fresco. The plaster is applied in several layers, the interval between them can be up to 10–14 days. The final decision is made by an experienced technician depending on the actual conditions and condition of the coating. |
| Finish coating | Most often, this is done by the artists themselves before applying the drawing. The finishing coating is carried out only with a solution of high-quality specially prepared lime. |
Now we should look at some of the steps in more detail.
Preparation of the solution
The durability of the frescoes is explained by two secrets of the oldest known painting technique: a special solution for plastering and the unique composition of the paints used. And the artistic part of the work depends on the artist’s talent. What components should be in the plaster layer?
Perennial slaking lime. Very strict requirements are put forward for it; for the most important frescoes, ten-year-old Austrian slaking lime is specially purchased. Domestic materials are not of suitable quality. Lime not only has good adhesion to brick walls, this material has antibacterial properties. This explains the absence of lichens and moss on ancient frescoes; the surfaces of such walls inhibit the proliferation of all microorganisms.
Washed river quartz sand of medium fraction. This is the main filler of plaster mortar. The presence of clay in it is strictly prohibited; it not only reduces the adhesion strength, but also causes the appearance of microcracks, which over time increase in size and damage the surface of the design.
Red brick crumb
Brick absorbs moisture and retains it for a long period of time, which is very important for painters. Due to this, the limited time for applying paint to the surface slightly increases; the plaster remains damp, but hard.
Hemp
An old analogue of modern reinforcing additives, in addition, hemp also retains moisture for a long time - improving the conditions for applying paintings to walls.
Powdered coal. Modern scientists cannot yet explain the influence of this component, but masters use it - as recommended in ancient recipes.
Procedure
Preparing the walls
The first step is to remove the old finishing materials. If, in general, the plaster adheres securely to the base, then it can be left. The wall must be cleaned of dust and construction debris. Then it is necessary to make notches about 8mm deep. To do this, use a hammer drill, chisel or axe. The density of notches is approximately 100-120 pieces per 1 m2. After this, dust is swept away from the wall.
In order for the plaster solution to adhere as securely as possible to the base, it must be primed with a deep penetration solution. After the primer has dried, a rough plaster layer is applied. Its task is to eliminate defects and level the surface. The layer should dry well, then you can proceed to creating a base layer on which the drawing will be applied.
Preparation of the solution
The secret of a high-quality fresco lies in a properly prepared solution. There is no universal recipe: each master independently selects the proportions of the components. But you can use general recommendations, adjusting them as necessary.
The basis of plaster is lime. It must be fresh, clean and of high quality. There is no need to skimp on the material: the better the lime, the stronger the base will be, and the better the paint will adhere to it. The lime must be extinguished with clean water and left for two weeks. This has a positive effect on its properties. Coarse sand is used as a filler; brick chips can be added to it.
If you are preparing a solution for the street, then the amount of crumbs should be minimal. Adding finely chopped hemp or cellulose fibers will help give the composition elasticity and protect the coating from cracking.
The solution is prepared immediately before use. The base layer is prepared in the following proportions: lime paste - 1 part, filler - 3 parts. For the front layer, take a little less filler - 2.2 parts.
Plastering technology
Fresco painting requires adherence to a certain order of plastering. The prepared surface must be moistened the previous day, repeating the moistening again 1.5 hours before plastering.
The first layer of solution is applied no thicker than 8 mm. Spread it over the wall with a grater, without trying too hard to smooth it out. Creating wavy grooves 2 mm deep every 40 mm will help improve the adhesion of the plaster layers.
The first layer is allowed to dry well (about 12 days). Then it is well moistened. The second layer will be intermediate. You can skip it, but with minimal experience in performing such work it will give you the opportunity to correct errors.
Sometimes the base surface becomes covered with a whitish coating. You need to get rid of it by cleaning and moistening the wall again. If this is neglected, the adhesion of the plaster will be disrupted, and the fresco may delaminate. When the intermediate layer dries, it is moistened and the topcoat is applied. Brick chips and fibers are not added to the solution for it. It is made with a thickness of 1-3 mm. It dries quickly, so treat the wall gradually. At the same time, a drawing is applied.
Old style fresco painting technology
The fact is that fresco as a form of art has not been used in decoration in its classical form for a very long time; instead, so-called “decorative plasters” have become fashionable.
Their advantage was that they did not require special qualifications of craftsmen or a lot of time.
This is due to the complexity of its execution, starting from preparation and ending with the final stages of painting.
We can highlight the following list of painting stages:
- surface preparation;
- transferring the contours of the design to the surface;
- preparation of paint compositions;
- coloring (“cutting”) areas of the picture and background;
- detailed painting (painting of small details, shadows, highlights).
An important point among all this is that at all stages of painting the surface must be damp, that is, the surface of the plaster is not allowed to dry, protecting it from drying by the sun, draft, etc., curtain it with damp burlap after the end of the working day. So, let's talk further about how to paint a fresco, and more specifically, how to paint a fresco on the wall.
Surface preparation
for old-style fresco painting is to level the walls using lime plaster and smooth them almost to perfection (high-quality plaster with plane deviations of up to 2 mm/2 m). After leveling the walls, they are smoothed using sifted lime milk, which is called sandless plaster coating.
Transferring the contours of the design to the surface
performed using the so-called “cardboard” or fresco card.
To produce it, the full-size original drawing is taken (usually consisting of many sheets, since the drawing is large), and the main contours are transferred to carbon paper, after which punctures are made along these contours with an awl.
The finished canvas with pierced contours is leaned against the surface, and by pressing with a cotton swab with coal dust, the contours are interrupted along the pierced holes.
Preparation of paint compositions
happens in advance, before painting the frescoes. To do this, an alfresher (a master of fresco painting) takes the original in color and rubs certain pigments on water, obtaining a different, required tonality/color of paint.
The finished mixtures are poured into sealed containers, designating each main color with a number; the number is also affixed to sections of the contours.
The pigments themselves are natural/artificial alkali-resistant compounds, and they are rubbed exclusively in water, sifted through a sieve No. 0.071 and 0.06 with 6400 and 10000 holes/cm2, respectively, in a ratio of 1:3.
Cutting sections of the drawing
- This is the first stage of painting, which involves painting with primary colors the areas marked with contours on the surface.
To do this, take paint and paint with soft brushes (so as not to damage the wet plaster), first the largest areas, then the smaller ones in descending order.
The important thing in this process is that the started area must be painted at once, excluding breaks; in addition, the work needs to be done in an orderly manner and in stripes if the areas are very large (to prevent overlaps as a result of the paint setting).
Detailed painting of areas
performed over cutting; its essence is the application of small details, highlights, shadows, textures, etc.
Again, soft brushes (squirrel or kolinsky) are used for this purpose. As with cutting, each element must be applied without interruption; the work is such that the possibility of correction is excluded, so you need to work carefully and impeccably.
As for shadows and highlights, in fresco painting there are 3-4 tones of each, that is, the shadow can be deep, medium and shallow. The same is true with lighting effects; there are several tonalities of lightening.
There is another type of fresco - “fresco a secco”
, the essence of which is painting on dry plaster (from Italian Secco - dry) with the same pigments rubbed on water mixed with milk of lime.
The technology is almost the same, however, after the plaster has dried, it is moistened with water and primed with grade 1 lime-lime mixture (MgO2 no more than 3%) – 1; water – 9. The primer is again moistened with water before painting.
The only advantage of this type of fresco is that it is possible to make adjustments and other corrections; for this, the corresponding area is moistened, a primer is applied and painted again. It is worth noting that such a fresco has duller, bleached colors (due to the presence of lime in the paints), and is also less durable than a raw fresco.
Painting a fresco
Painting a fresco should happen quickly, but without haste. In order to minimize the loss of time on alterations and reflections, the master must in advance very well imagine in all details not only the final appearance of the future image, but also have in his head a clear diagram of the order in which the work will be carried out.
In our practice, we have come to a method that allows us to roughly divide the work into three stages - creating a picture, applying local tones, and cutting up the image with shadows and highlights. This sequence of work allows you to make maximum use of the drying lime resource.
At the beginning of work, when the plaster is still quite damp, a drawing is made. The process of creating a drawing involves creative exploration and finding the best expressive “design” for the image. Technically, this means that during the drawing stage, necessary corrections can be made to the original image plan, but by the end of this stage, the boundaries of space for each of the local colors must be clearly defined.
After the drawing has been created, it is recommended to “reveal” the image by applying local colors over its entire surface, leaving no white spots. Applying a new surface layer - a layer of pigment dissolved with water will help to slightly disrupt the surface crystalline crust that is beginning to form.
When the entire surface of the future fresco has been revealed, it is necessary first of all to do shadow modeling, first on the face and open parts of the body, then on clothes and other details. It makes sense to do highlighting using finely ground lime instead of whitewash after all this, since lime dissolved in the plaster easily combines with “whitening lime,” ensuring reliable fixation of paints containing lime even on an almost dry surface.
In some cases, if there is a danger of the wall drying out, yolk diluted with water is added to the composition of paints for final descriptions and shadows. It does not compensate for the drying of the plaster, but in combination with lime it forms a kind of strong adhesive substance that firmly holds the paint on the painting surface.
During the work process, the fresco artist has to take into account a large number of features of this technique. First of all, it is important to remember that yellow ocher, glauconite and all lime-containing colors will fade quite significantly after the plaster dries. Unfortunately, it can be very difficult to predict the final tone, since the plaster behaves differently each time. This depends primarily on the nature of the medium on which the plaster is applied. If a wall, even a well-wetted one, continues to quickly absorb water, the fresco will dry faster. If the plaster is applied to a non-water-absorbent substrate, such as concrete or some kind of panel with a mesh, if a three-layer primer is used, the drying process will be much slower.
It is worth noting that when working in the fresco technique, it is extremely important not to allow the slightest violation of the integrity of the plaster surface with a brush. This happens when the painter tries to mix the applied color directly on the surface of the plaster with the previously applied color that has not yet dried. In this case, the lime contained in the plaster mortar begins to mix with the paints, and when it dries, the place of such mixing will stand out on the surface of the painting as excessive whitishness.
Application of decorative plaster
You can make paintings from decorative plaster with your own hands. They are placed on the walls and ceiling of the apartment. To work you will need:
- level;
- plumb line;
- different spatulas;
- grater;
- Master OK;
- rule;
- tool for applying relief.
You can apply artistic plaster to the surface with your own hands in the following way:
- the surface is wetted with clean water;
- use a spatula to throw a little plaster onto the wall;
- after filling the entire area, the solution is leveled with a grater;
- Using a level, the correct application of the solution is monitored.
The wooden surface is pre-filled with shingles, which act as cladding. Its cells are 4x4 cm. Before applying the material, they are moistened with water. In some cases, shingles are replaced with mesh to save time. It can be made of various materials: steel, copper, galvanized iron, plastic, twisted wire. The plaster is applied using the usual methods. If you plan to apply a panel of decorative mixture to a section of a wall or ceiling, there is no need to level the last layer. But there should be no large bumps or depressions on the surface.
To make paintings from plaster, you need to have certain tools. The most common of them is a roller, on which there is already a simple pattern or relief. It is moistened in water and rolled over the plastered area. If, after the wall has dried, you also apply paint, you can get a beautiful plaster panel.
The next tool for obtaining relief is a stencil. It can be made in the form of stamps and combs. The design is applied in approximately the same way as with a roller. But these tools cannot be called the only ones. It is quite possible to create a pattern on plaster with your hands, a plastic bag or a foam sponge. The surface must be damp. Artistic plastering of walls can be done using special compounds, which themselves leave their own pattern on the surface. The plaster composition of the bark beetle has a pattern in the form of traces left by the beetle of the same name. Such patterns look great on walls and are especially resistant to temperature changes, humidity conditions, and mechanical stress.
Marble plaster leaves relief paintings on the wall. This method has the following features:
- high strength and durability;
- fire safety;
- resistance to environmental influences.
Fur coat-like surface finishing is often used. It is done by spraying using a brush or broom. As a result, a certain picture or panel of decorative plaster is formed on the wall. Any of the above methods can be used on external and internal wall surfaces. This will not be a painting on the wall, but creating something like this with your own hands is quite simple.
Preparing the surface for painting
Surface preparation is considered the first stage of painting. Its goal is to level the wall with lime plaster and smooth it to almost perfect condition. Traces of the old coating must be completely removed. Old paint or poorly adhering plaster, wallpaper, whitewash - everything that was previously on the wall must be removed.
Today, frescoes are made using a lime-sand mortar, it is diluted in a ratio of 1:4 (1 – slaked lime, 4 – sand). But the finishing layers adhere to different proportions - 1: 2.5 (instead of sand, it makes sense to take powdered grated brick).
Why you shouldn’t take cheap lime for the plastering part of the work:
- it is made from waste and is considered lean, since it contains less calcium oxide and is extinguished more slowly;
- Due to such a slow slaking, as well as a large number of impurities, such lime will cause efflorescence, which means it may subsequently fall away from the wall, forming unattractive smudges in plain sight.
Previously, it was natural for artists to thoroughly wash and stir the lime to achieve complete slaking. But today it is possible to immediately buy pure lime and slak it at home.
The sand that will be part of the solution must be clean. The same river sand is perfect for this. It is advisable to sift it through a medium-sized sieve, because plaster compositions love fine sand, this way you can achieve a more plastic composition.
Plaster surface preparation takes place in 3 stages:
- Spray For lime mortars, a brick wall is considered the ideal base; a concrete one is a little worse. If the wall has wallpaper, everything needs to be removed; if the wall is crooked, it must be reinforced. The spraying itself is carried out either with a trowel or with a pump. The rule is to remove excess. It happens that you can see that the spray will be thick. It needs to be stretched 2-3 times to avoid cracks. And in this case, the reinforcing mesh is placed here (but first you need to get the beacons).
- Primer. Prime the wall when the spray has set a little. The thickness of the solution is important; it is applied to the wall with the same trowel, and it should be ground with a trowel. Excesses are also removed by the rule. This completes the geometric leveling of the surface.
- Cover. For the covering layer, you need to make a more liquid solution; grated brick or fine sand work well as a filler. Moreover, grated brick will still be preferable, since it retains moisture well (and this is advantageous for high-quality setting of the solution). The covering layer itself is small, no more than 2-5 mm, it is applied with a grater.
Hint: in one fresco painting technique you need to apply as much cover as you can cover with the fresco. So, for example, an experienced artist can paint about 7-9 squares (taking into account the complexity of the composition, of course). If there are many small details in the composition, productivity will be lower, which must be taken into account when applying the covering.
Decorative artist Sergiy Gusev talks about preparing the wall and painting.
Types of artistic plaster
Under the definition of “artistic plaster” we need to consider various types of plaster coating:
- decorative;
- textured;
- coating using artistic painting.
Their execution techniques differ slightly, but they all have common performance characteristics that relate to their protective properties:
- this type of coating has the property of repelling moisture without absorbing it from the environment on its surface; easy to clean with water, detergent and a foam sponge or an ordinary rag;
- under the influence of direct sunlight, the color and color scheme do not change, the appearance retains its original state for a long time;
- can be used both for interior wall decoration and for covering building facades due to high frost resistance;
- has a variety of textured coatings both in structure and in decoration;
- decorative plaster is distinguished by its adhesion strength to almost any materials from which walls are made or covered - concrete, plasterboard, bricks, primary plaster based on lime or cement, and others;
- consists of environmentally friendly components without harmful impurities;
- When exposed to open fire, it does not ignite and does not emit toxic smoke.
Monumental art in antiquity
Since early antiquity, such painting has been the most common way of decorating stone buildings. Unfortunately, practically no ancient Greek samples have survived. But those that have survived, mostly mosaics, allow us to get a general idea. They reflect the plasticity characteristic of Hellenistic culture.
In the culture of Ancient Rome, monumental and decorative painting became widespread, not only in the construction of religious buildings, but also in the design of residential buildings. In the 1st century, the famous eruption of Vesuvius occurred, wiping out the Roman city of Pompeii. Volcanic ash covered the houses and helped preserve intact a large number of unique paintings, some of which are now on display in the Naples Museum.
Frescoes and mosaics were actively used in the art of Byzantium. This, in turn, had a significant impact on the development of ancient Russian art.
Painting on wet plaster with water paints
The meaning of this technique is that the design is applied to the wall before the plaster dries. First, light colors are applied to the surface, then darker, more saturated and bright elements are alternated.
The plaster mass itself also has its own peculiarities: in its production, high-quality lime is necessarily used, which is quenched with water until the active chemical reaction stops.
Also, to make plaster you need the smallest brick chips - they are able to retain water for a long time and not dry out. The wall is also prepared in a special way: unevenness is artificially created on it to enhance adhesion to the material. During painting, the wall surface is regularly moistened so that the paint lies on the wet base. After drying, the picture will lighten a little, which is due to the presence of lime in the composition.
The quality of the finished fresco will depend on the type of surface. For example, brickwork absorbs water strongly, so the fresco will dry quickly, and without additional priming, the contours of the image may crack. On weakly absorbent bases the fresco dries slowly, as a result the painting will look more natural. The more layers of plaster applied to the surface, the longer it takes to dry.
Technology of painting on wet plaster with water paints
The technique of painting on a wet base is quite complex. It includes the following stages of work:
- Creating a drawing and preparing a life-size model.
- Cutting the workpiece into separate fragments.
- Transferring the drawing to the wall, tracing the contours.
- Whitening the main background.
- Filling individual segments of the fresco with color.
There are also simplified options for performing the technique. If you have the skill and some experience, you can do the job even at home. In the original, speed of reactions and precision of strokes are required. To make the task easier, the layout of the picture should be painted in advance as it will be done on the wall, and painted with shadows.
History of the method
Painting on wet plaster was practiced in the ancient Mediterranean. Some paintings made several centuries ago have survived to this day - they can be seen on the walls of temples and ancient buildings. In Ancient Rome, painting on plaster decorated palaces, walls in the houses of rich people, and public buildings. There were especially many frescoes in the cities of Pompeii and Herculaneum, which later turned out to be covered with the ashes of Vesuvius.
In the Middle Ages, frescoes became even more popular. Thanks to inexpensive raw materials, which were prepared from local minerals, they began to be used everywhere. Italian artists who possessed enormous skill and talent became widely famous.
Because the paint adhered tightly to the plaster, it lasted an incredibly long time and did not fade, although it became paler after drying. Until the 18th century, fresco occupied a leading position in interior decoration, and only later was it replaced by new types of art.
The essence of the process
After the plaster based on sand and lime is applied to the wall in several layers, a drawing is made on the top with certain types of paint. The latter must be water-soluble, based on lime, casein or silicates.
Gradually, the paints are absorbed into the plaster and color the lime (calcium carbonate) present in it. As a result, the painting becomes part of the wall and is not erased. It can only be removed by removing a layer of plaster.
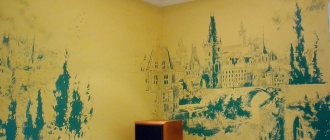
Frescoes in the apartment
A fresco is a type of monumental painting: it cannot be removed, like a painting, and hung in another place. For a fresco to truly decorate a room, it must become an integral part of the interior, in harmony with its other elements. That is why you need to think through the design of the room in advance and decide on the type of painting that will be depicted on the wall.
The dimensions of the fresco also need to be calculated
Material selection
Properly selected material is always the key to high-quality implementation of a creative idea.
- Wall painting is best done using mineral-based paints: wax, lime or oil.
- The modern assortment also includes successful analogues based on oil emulsion or PVA, distinguished by their durability and quick drying. These materials also contribute to the formation over time of a reliable layer that protects the surface from sun exposure and damage from moisture.
- For the convenience of craftsmen, special coating materials have appeared on the market that give the effect of mother-of-pearl or glow in the dark, imitate cobwebs or create “artificial cracks”.
- It is recommended to fix the painting on the surface with protective wax or varnish, which contributes to the high-quality completion of the image and helps to preserve the art longer at home.
painting
As you know, lime solution has an alkaline reaction, therefore, when mixing paints, alkali-resistant pigments are needed. What kind of pigments are these: ocher, cinnabar, ultramarine, this will also include manganese peroxide, lemon, umber, as well as burgundy, scarlet, etc. Although in relation to today there is no point in even listing the pigments: there are many more of them. The main thing when buying paints is to look at their solubility in water and their resistance to alkalis.
Attention! The pigment needs to be tested. It needs to be diluted in the composition with which you will work.
For example, in water and lime. And then the pigment is applied to a previously prepared piece of plaster. For beginners, it makes sense to conduct such testing with all pigments.
How the painting itself happens:
- If you are doing wall painting for the first time, it is advisable to make a full-size template on paper. A troublesome measure, but not at all superfluous. The template is subsequently applied to the wall and the master pierces the contours of the main figures of the picture with a needle. This is done so that an imprint of the image appears on the wall.
- After the print appears, you can trace the contours. Usually they start working with light tones, gradually moving to dark ones. Layer-by-layer application works well - this way the finishing layer shows itself more clearly.
- If there is a need to whiten light areas, this can be done with slaked lime. Only then will the primary colors be applied to them.
- If the working day is already over, but you didn’t have time to do everything (and this happens most often), the plaster, which has not yet been filled with painting, needs to be cut off diagonally with a stationery knife. Cut exactly to the thickness of the covering layer - this is done for subsequent masking of the seam.
And a little more about paint. If you decide to paint the external walls, then the best option would be paints based on liquid glass. They are spread on the palette. In contact with lime, liquid glass will give a stable, insoluble texture, very durable. Such paints outperform traditional compositions in many respects.