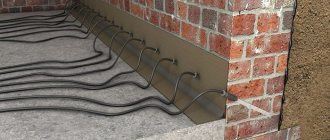
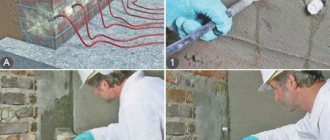
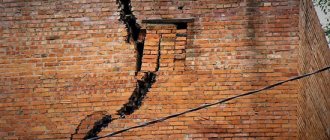
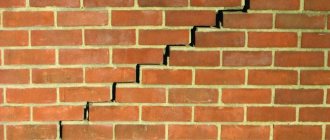
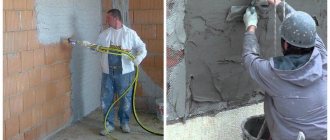
Brickwork - the surface is not smooth, often far from perfectly flat. And if the brick wall is also old, it has chips and chipped seams. Plastering brick walls will help to monolith and level the “pockmarked” surface.
The owner of a brick house being built or renovated requires various information about plastering. They are presented in this article. Let's start with the question of what is better to plaster a brick wall. Therefore, we will consider the types of plaster compositions for a brick wall.
Tool
To apply plaster to a brick wall, prepare:
- Master OK;
- ladle;
- steel spatulas (wide, narrow);
- grater;
- rule;
- trowel (for decorative work);
- level, plumb line or construction laser;
- roulette;
- pencil;
- mixer;
- containers;
- rags;
- masking tape;
- devices or tools for removing old coating;
- individual protection means.
Brick plaster for exterior and interior use
There is a great way to save on external facade finishing and get an impeccably smooth surface. Plastering a brick wall is a practical, beautiful and inexpensive finishing option. With minimal experience in the field of construction, you can cope with this work without the involvement of hired finishers.
Familiarize yourself with the features and stages of the process so as not to waste extra time on work and not be interrupted by searching for some material, tool, or thinking about what you missed. If you do everything consistently and correctly, plaster on sand-lime brick (as well as ceramic) will last so long that it will become boring.
How to plaster a brick wall with your own hands
Next we will talk about how leveling plaster of a brick wall is performed using cement-sand mortar. Information on plastering the ceiling can be found separately.
Brief step-by-step instructions include the following steps:
- Preparing the surface of the walls.
- We take measurements, calculate consumption, and determine the location of future surfaces.
- We select and purchase materials.
- We install beacons.
- We reinforce.
- Prepare the solution (mix the solution for each layer separately before application).
- We apply spray, primer, and cover in sequence.
- Rub the top layer.
- We remove the beacons, cover the grooves, and rub them.
- Dry the coating.
Work is carried out at humidity up to 65%, positive temperature range 5-35°C. Before starting work, the electrical wiring is de-energized, the recesses for sockets and switches are sealed with masking tape. Protect window and door frames with tape.
How to prepare a mortar for plastering a brick wall
The second factor on which the quality of the plaster coating depends is the correct preparation of the solution. To properly prepare a solution for plaster from a dry mixture, it is enough to strictly follow the manufacturer’s instructions.
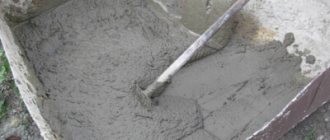
If you mix a solution you made yourself, you need to do this:
- clean, sifted sand is poured into a dry container;
- spread the required volume of cement evenly over the top;
- mix dry ingredients;
- cold water, to which a plasticizer has been added (liquid soap or PVA), is not completely poured into the container - some of the water is left to adjust the thickness of the dough;
- mix the components, adding water if the mixture needs to be thinned;
- let it brew for 10-15 minutes, then stir again.
The second step-by-step scenario for filling the components for preparing a plaster mixture using a mortar mixer. Water is poured into the rotating bulb, plasticizers are added, then sand is poured in, and cement is added last. The viscosity of the dough is adjusted by gradually adding water. The prepared mass is used until setting begins.
Primer
Is it necessary to prime brickwork and why? Brick is a porous material, so when applying plaster mortar it immediately begins to draw water out of it. As a result, the cement paste is dehydrated, and the remaining moisture becomes insufficient to ensure the chemical reactions of crystallization of the binder. The solution partially sets, and the components that have not reacted simply dry out.
The strength of the cement coating is reduced by half or more. Therefore, the brickwork is coated with a primer that fills the pores and forms a waterproof film on the surface of the wall. The second purpose of the primer is to increase adhesion.
The primer for bricks under plaster is selected depending on:
- type of brick (for silicate bricks use primers that provide increased adhesion);
- surface condition (for old walls you need a deep-acting strengthening agent);
- conditions of the foundation site (for facades and damp rooms, use antiseptic, moisture-proof primers).
Structural decoration
Wall plastering process
This type of plaster is made from acrylic or silicate components and has a thin-layer structure. Used for interior and exterior work. The end result can be either with an almost flat surface (fine-grain composition) or with a certain relief (medium grain).
To obtain various design effects, it is better to apply structural plaster with your own hands in a circular motion using a spatula. It is not recommended to use in high humidity or on a hot stove. The addition of coloring pigments to the mixture is also excluded. Structural plaster is supplied ready for use.
Differences between plastering walls outside and inside
We have already partially answered the question of what is the best way to plaster brick walls. Now we need to consider and bring together the nuances regarding the location of the work.
What is the best way to plaster brick walls inside a house?
The choice of compositions for interior walls and partitions is wider than for facade surfaces.
Here for ordinary plastering the following is used:
- cement;
- limestone;
- clay-lime;
- cement-lime;
- gypsum solutions.
For wet rooms, gypsum compositions are almost never used. Only those specially designed for wet rooms, for example, are produced by Knauf. However, they are expensive for leveling brickwork. For decorative work, dry and ready-made mixtures are produced on various bases.
How to plaster the facade of a brick house
External plastering of walls for the purpose of leveling brickwork is most often performed with cement compounds. However, cement-lime mixtures can also be used. Where salts begin to emerge, sanitizing compounds are used. Gypsum solutions are not used for plastering the outside of buildings.
Facade surfaces are finally decorated using decorative plaster solutions (facade and universal), selecting those suitable for a particular effect.
Plastering of plinths is carried out by DSP, composition proportions 1:3 or 1:4.
Differences in technology
Plastering the brick walls of a house outside according to the standards has the following features:
- It is necessary to reinforce the plaster layer with a metal mesh over the entire surface of the wall.
- Plastic perforated corners with mesh must be installed on husks (internal corners), usenki (external corners) and slopes.
- The thickness of the plaster layer is no more than 1.5 cm. The total thickness is up to 3 cm.
- After drying, the primer (base layer) is subjected to priming in 2 passes before coating.
- When plastering the base, the plaster coating is buried 5-6 cm below the surface of the sidewalk or ground. After grouting, the surface is smoothed with a trowel. The base husks are rounded or chamfered.
- All measures are taken to protect the brick wall from atmospheric or soil moisture.
The remaining differences lie in the creation of hardening conditions (listed below).
Choosing the right mixture
Although finishing brick is considered a rough job, it is a very important element in the repair. After all, it will determine how even and smooth the walls are, and how the tiles, wallpaper or other cladding you choose will look in the future. Therefore, you should take this stage of work very seriously and choose good materials.
In order to understand what composition to choose for plastering walls, you need to consider each of them separately.
Cement-sand mixture (CPS)
One of the most common and affordable types. You can prepare it yourself by mixing cement and sand in a ratio of 1:3 with a small amount of water. However, we advise you to purchase such a mixture already in stores, since it is guaranteed to have a good composition. This solution is quite easy to use, but the downside is that it hardens for about four weeks.
Limestone
You can also make it yourself. To do this, place slaked lime in a basin or bucket and add sand to it in a ratio of 1:5, then pour in as much water as necessary to obtain a homogeneous mass. This mixture is perfect in rooms where there is high humidity.
Gypsum plaster
It can be called “cosmetic”, since this material is not suitable for damp rooms, as well as where internal floors are subject to shock, vibration and any mechanical stress. However, there are also advantages - this composition hardens within 5-7 days.
After we have considered three options for plastering finishes, you can make a choice for yourself which is better for plastering brick walls inside the house. However, we advise you to stick with CFRP, since both gypsum and lime are significantly inferior in strength.
- Walls
How to properly plaster walls with gypsum plaster
Decorative plaster on a brick wall
For decoration, first select the desired effect, then select a suitable mixture. For example, textured mixtures are not suitable for bark beetle, but “bark beetle” and “pebble” mixtures are not suitable for Venetian.
Popular finishing finishes include:
- for the facade - travertine, bark beetle, lamb, American, rain, fur coat, mosaic, sgraffito or pebble, or rusticate;
- for indoors - wet silk, Venetian, craquelure, imitation brickwork, wood, etc.
You can get acquainted with the types of effects and implementation technology in the “Decorative plaster” section.
Instructions for finishing with plaster
If you decide to finish with this material, then the application technology is similar to DSP, but the main difference here is that the solution is applied by spraying and leveling it. But keep in mind that gypsum hardens much faster than the cement mixture, so it needs to be prepared in small portions and leveled quickly.
The maximum thickness of gypsum plaster is 2 centimeters; if you do more, it may crumble.
Fixing beacons
Guide beacons are an effective means of ensuring a flat surface. Products are supplied in standard sizes. In order to save time, they need to be cut to the size of the room using metal scissors or a grinder. Remember, if you plan to wallpaper or paint walls, use smaller beacons that can be easily removed from the walls after the job is completed. Install and fix the guides in the following sequence:
- prepare a building level, attach it to a long bar, which will allow you to take measurements along the entire height;
- ensure that the surface is clean from debris and moisten it generously;
- mark vertical marks from the corners of the room at a distance of 0.2 m from the edge of the room and places for installing beacons between them with an interval of 0.3 m;
- knead at low speed, using a mixer or drill, a homogeneous porridge-like solution;
- lay portions of the mortar on the walls in accordance with the markings, attach the beacons, pressing each one in turn;
- align the guides, controlling their position with a spirit level;
- remove excess mixture, fix the guides with self-tapping screws at two points, pull the thread horizontally between the outer corner beacons, fix the middle profile;
- check the position with a level applied in the horizontal and vertical plane, as well as diagonally.
Preliminary stage
The set of preparatory activities consists of the following types of work:
- Cleaning the surface, which involves removing dirt, fasteners, and old plaster down to the base.
- Visual inspection, during which cracks and crevices that increase heat loss and reduce the level of sound insulation are eliminated.
The use of antiseptics helps to avoid the spread of insects and the appearance of mold. In finishing, brickwork has its own characteristics. If you plan to do all the interior finishing yourself, then knowing them is critical - Coating with deep penetration primer that prevents moisture absorption. It also ensures reliable adhesion of the plaster mixture to the brick.
- Strengthening an uneven surface by reinforcing it with a special plastic mesh attached to hooks.
- Preparation of a binder solution for plaster in accordance with the recipe of the adopted version. A dense initial batch allows you to fix the beacons, and then prepare a more fluid solution.
What if the layer must be very thick?
When this problem occurs, the process looks something like this:
- An initial layer is applied that will hold the surface together and cover all seams.
- After waiting for it to dry (set a little), they begin to lay the reinforcing mesh. It is fixed to the walls with staples and self-tapping screws. It is necessary to ensure that there is no sagging.
- Apply a second layer. This is done by casting. The process starts from the bottom and goes gradually upward.
Leveling the mortar using the beacon rule must be done from bottom to top smoothly and without jerking - The rule is to level the resulting layer. To do this, it is pressed against the wall against the floor and, pressing down, lifted up. The solution itself is distributed over the surface.
- The reinforcing mesh must be completely immersed in the mixture.
- If you need to increase the thickness, wait until the composition dries. Then it is lightly sprinkled with water and covered with another layer. But it cannot be more than 1 cm.
- The surface is well leveled with a trowel.
On a note! The final step is mashing. To do this, take a wide spatula and moisten it with water. This is done fifteen minutes after finishing the work, just when the plastered area has set. Now the spatula is placed at a slight angle to the surface and rubbing begins with light movements. The result is a smooth layer.
Grouting plaster
