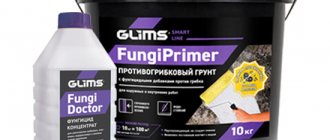
Priming the ceiling is an important and necessary process before puttying or other types of finishing work; it increases the service life of the ceiling covering. The drying time of the primer plays an important role in the finishing process. The primed surface will provide excellent adhesion to its final coating because... When dry, a dense film is created on which paint or putty adheres very well. In addition, the applied primer paint provides antiseptic, anti-corrosion and anti-fungal properties. Among other things, when some components are added to the paint, the primer can also be fire-resistant.
In order to find out how long it takes for a primer to dry, it is necessary to determine the factors influencing the drying process and at the same time know the compositions of the paints. You still need to know the answer to this question in order to correctly allocate the time for starting repairs and not waste it waiting empty near the ceiling.
- Firstly, it depends on the surface of the ceiling being treated: if it is rough or dry, then the primer will dry very quickly, if the primer paint is strongly absorbed into the surface of the ceiling, then it will take much longer to dry;
- Secondly, the air temperature in the room affects; if it is below +15 0C, then the drying time will increase significantly;
- Thirdly, before work you need to read the instructions - subject to the temperature conditions, ordinary primer paints dry completely in 4-6 hours, and those primers that contain oil paint will take about a day, alkyd paints will dry from 10 to 12 hours .
- The fourth factor in the question of how long it takes for a primer to dry is the layer of paint applied - the thicker this layer, the longer the primer will take to dry.
Do I need to prime the walls before painting?
Novice finishers do not always understand why preparatory work is carried out. It seems to them that the most important thing is to level the base, then they can safely paint. In fact, this is not entirely true. Indeed, before painting it is very important to level the coating. There should be no differences, cracks or other defects. Therefore, the first step of proper preparation is alignment. It can be made in different ways: drywall, plaster, etc.
At the last stage, finishing putty is most often applied, which will become the base for painting. The next required step is priming. It is necessary because the soil:
- Strengthens the base. It binds weak, porous and loose surfaces into a single whole, making them more durable. Deep penetration formulations cope especially well with this. They are capable of going deeper by 80-100 mm, while conventional preparations do not go deeper than 20-30 mm.
- Improves adhesion or bonding of finishing material and base coat. Thanks to the primer, the paint stays better on the surface, preventing it from peeling and cracking. Moreover, during subsequent repainting it will be easier to prepare the base for work.
- Reduces coating consumption. After treatment, the absorbent properties of the base are significantly reduced. Thanks to this, about a third less composition will be required for finishing.
There are materials with special properties. They can increase the moisture resistance of the surface, prevent mold, etc.
Special primer Tikkurila Otex Akva 0.9 l
1 567
Buy
- Walls
How to prepare walls for finishing
Preparing the ceiling for priming
Before applying the primer layer, you need to prepare the surface:
- Remove old trim. Remaining materials must be removed from a previously painted ceiling. It is most convenient to remove wallpaper with a spatula, and paint with a wire brush.
- Clean the surface. In addition to the remnants of the previous finish, you need to remove all falling off pieces of plaster, old putty and debris. You will need a chisel and a hammer, and also a broom.
- Repair large dents. If during the previous stages significant irregularities appeared, they must be covered up. Usually they use the same mixture that was purchased for priming.
- Wait for the putty to dry completely. In the meantime, wet clean the room so that dust knocked from the ceiling does not fly into the air.
After these preparatory work, they proceed to priming.
Soil types
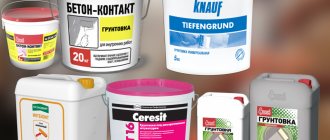
The range of primers for walls for painting is varied. Based on the type of base, they can all be divided into several groups.
- Acrylic. Universal, good for wood, concrete, chipboard, plaster, drywall, etc. Can be used for porous coatings, dries in about 5 hours, odorless. Not applicable to metals.
- Glyphthalic. Area of application: metal and wood. It dries in about a day and loses its properties in conditions of high humidity.
- Alkyd. A good option for any wood. After treatment, the fibers swell slightly, which significantly improves adhesion. Dries in about 15 hours.
- Perchlorovinyl. A universal preparation that is used for plasters, metal, plywood, wood, etc. Dries quickly and takes about an hour. It is better to choose it for outdoor use due to its high toxicity.
- Epoxy. A two-component product that significantly increases the adhesion of the base. Used for metal and concrete.
- Mineral with gypsum, cement or lime. Use for concrete or brick. Dries from three hours to a day.
- Aluminum. Used for wood. Additionally protects it from fungal infection.
The optimal and most popular option can be considered universal primers, which are suitable for almost any material. They improve the adhesion of the base and strengthen it, but do not have special characteristics. However, in most cases the latter is not required.
Interior primer Ceresit IN-10, 10 l
667
Buy
Traditional and modern materials
The choice of composition with which to prime the ceiling depends on the surface material. Let's look at the main types.
Acrylic
They do not smell and dry quickly. Such primers are suitable for surfaces made of brick, concrete, wood, and fiberboard. This is an ideal whitewash primer for ceilings: penetrating deeply into the porous structure of the lime, it binds chalk particles and improves adhesion to subsequent layers.
Alkyd
Used on metal and wooden surfaces. Certain varieties are suitable for fiberglass and tile. But alkyd primers cannot be applied to plaster and drywall.
Mineral based
Cement or inclusions of quartz sand (concrete contact) act as a binder. For indoor use only. They fit well on expanded clay and gas silicate blocks, brick, concrete, and plastered surfaces. Due to their rough structure, they are not suitable for subsequent painting and wallpapering.
There are also universal formulations . They are suitable for any type of ceiling work and are available in the form of dry mixtures or solutions, completely ready for use.
Specific characteristics of solutions
If the room has special conditions, you may need to choose a special purpose primer. This could be a primer:
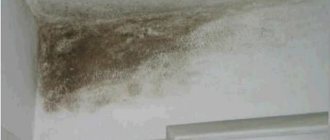
- Antiseptic. It contains an antiseptic that prevents the development of microorganisms. Protects the wall from the appearance of fungus or mold.
- Moisture-proof. Gives the surface water-repellent properties, which is necessary in rooms with high humidity.
- Deep penetration. Strengthens loose and porous substrates. Prevents peeling and cracking of decorative coating.
- Non-contact or adhesive. Improves adhesion to finishing composition. Used for non-absorbent smooth surface.
The packaging of the drug will necessarily contain recommendations for its use. The types of materials with which it is combined and the application conditions are indicated. This information should not be neglected. If the product needs to be prepared for use in some way, this should also be indicated.
Primer for dry and wet areas Axton, 10 l
324
Buy
- Walls
How to prime walls before puttying: simple instructions and tips on choosing a material
What determines drying time?
Many people know about the need to prime surfaces before finishing. But not allowing the soil to dry is a mistake that novice builders make. After all, penetration and polymerization of the coating occurs under the influence of oxygen. Without it, the liquid will work ineffectively.
Painting done on damp soil will be ineffective. Because the softened upper layers of the wall will release excess liquid onto the roller, and the paint will not lie flat. Pasting wallpaper will be difficult. The paper may come off the surfaces.
The drying time of the primer depends on:
- Microclimate. In an unheated room, the composition will take longer to dry. Acceptable conditions are from 20 to 26°C. Moisture content is not higher than 60%;
- Coating layer. A more solid layer takes a long time to dry;
- Type of mixture. The oil composition dries more slowly than the water-based composition;
- Compound. If the mixture contains special quickly evaporating elements, the coating will dry faster;
- Features of the coating. The deeper the composition penetrates, the longer it takes to dry. A loose wall will dry faster than drywall.
Drying time is indicated on the container. It is worth considering that the manufacturer writes the average time. You can add an hour to it for a more accurate result. To be more confident, you should leave the treated surface for a day.
You can check drying using polyethylene. To do this, attach a plastic strip to the wall. If perspiration appears on the inside after a few minutes, it means the coating has not yet dried.
To be more confident, you should leave the treated surface for a day.
How long does it take for primer to dry before painting?
This is a very important point that affects the quality and speed of repair work. The manufacturer always informs about the drying time of the solution. However, this is an approximate value, and almost always it is not a specific number that is indicated, but a time period during which the composition should be expected to harden. This happens because the speed of hardening of the product is influenced by various factors:
- Humidity and temperature indoors. 60-80% humidity and +15-20 C are considered optimal. In any case, you should not ventilate the room while the soil is drying. This must be done before applying it. If this rule is not followed, there is a high probability of cracks appearing.
- Quality and type of base. Porous and dry surfaces dry noticeably faster. If for some reason it is necessary to speed up the drying process of the primer, the base should be degreased before applying it.
- Composition of the drug. Products with easily volatile solvents and those with added solids harden faster.
- Number and thickness of applied layers. With each subsequent one, the time it takes for the wall to dry increases.
It is impossible to say exactly how long the primer will dry before painting. This must be determined visually. You should wait the time recommended by the manufacturer, and then touch the primer with your hand. If moisture is felt, painting will have to be postponed.
Instagram obshezhitie_slushaet
To ensure a satisfying result, you only need to paint a flat, primed, dry wall.
- Walls
How to paint walls: a guide to paint selection and application techniques
What tools will you need?
List of tools used in priming work:
- spray;
- a paint roller with a long handle (instead of a spray gun);
- a special painting bath with a ribbed surface - for the sake of convenience, pour the primer into it from a container (baths are sold at any hardware store);
- a vacuum cleaner and a broom to remove dust from the ceiling before work;
- gloves and a respirator (if you are fully confident that there is no allergy to the components of the soil, you can get by with a regular medical mask).
It is not recommended to apply the primer with a brush - traces of fibers are visible even through the layer of finishing material. But a paintbrush can be used in hard-to-reach places where the width of the roller does not fit.
How to calculate the cost of funds
To determine the approximate amount of material, simple calculations should be made. First, we determine the area that needs to be primed. This can be done by multiplying the height of each wall by its length and then adding the results together. It is important to remember to subtract the area of doors and windows. We should have a certain number of square meters.
Now we determine the rate of consumption of the product. It must be indicated on the packaging. It is rare that in such a case there will be only one number. More often a small fork of values is shown. This is due to the fact that different types of base absorb differently. Knowing what kind of coating we have to work with, we select a number and multiply it by the previously calculated number of squares.
We decide on the number of layers. If you need one, all you have to do is multiply the result by a factor of 1.15 to get some supply of material. In the case when it is supposed to apply two or more layers of primer, we multiply the calculated value by their number, and then by the coefficient. This way we get an approximate amount of primer, which we focus on when purchasing.
Instagram art_remont_stas
The required amount of primer depends on the type of base, the number of its layers, absorbency, etc.
- Decoration Materials
How to paint wet rooms: tips and life hacks
What affects the drying of the primed layer?
The time for which the mixture should be left after application depends on further actions:
- Wallpaper or paint should be applied after the primer has completely dried;
- It is also impossible to putty and plaster on a wet composition. Otherwise, the putty or plaster will peel off in a couple of days;
- The paint is applied no earlier than every other day.
The manufacturer prescribes in the instructions for use methods that reduce drying time. You can use a heat gun, adhering to the following rules:
- Do not dry individual parts at temperatures above 300 C;
- Air pressure is minimal;
- The device is installed at a distance from the surface;
- Do not forget to ventilate the room in which the gun is working;
- Use the device only if permitted by the instructions on the ground.
If you don’t have a heat gun, and you don’t have time to wait for the primer to dry, purchase special quick-drying compounds. They dry in a couple of hours at any temperature. The downside of the coating will be an unpleasant, pungent odor. The mixture may not give the next layer sufficient adhesion to the surface.
If you don’t have a heat gun, and you don’t have time to wait for the primer to dry, purchase special quick-drying compounds.
To reduce drying time without additional exposure, follow these rules:
- Apply a thin layer using a roller or spray;
- Before starting work, read the instructions carefully and strictly follow them. This applies to the preparation of the composition, preliminary preparation of surfaces. If these recommendations are not followed, the soil will lose its beneficial properties;
- Watch for smudges, the mixture should not accumulate, the composition is applied evenly;
- If priming is carried out in several layers, each new one is applied after the previous one is ready.
Apply a thin layer using a roller or spray.
Impregnation technology
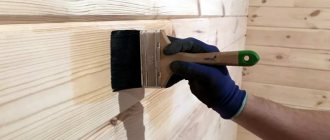
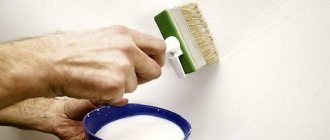
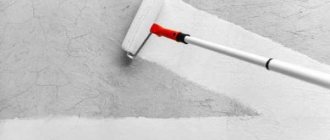
For application, use a roller with a telescopic handle or a brush. The solution is poured into a container, where a metal mesh is then placed. It traps undissolved particles that may stick to the roller. The primer is applied in vertical strokes from the ceiling to half the wall and in the opposite direction. The upper part of the surface is processed first, and then the lower part. The corners are carefully coated with a brush. The quality of the work performed is easy to track: dry places will be noticeable against the background of a wet wall. When working with a primer, you need to follow some rules: while the impregnation is drying, any temperature fluctuations are unacceptable; a draft can cause uneven fixation of the protective layer; It is unacceptable to reduce drying time by artificially heating the room. After the first layer has dried, the application process is repeated. If the surface is smooth and slightly sticky, then the walls are ready for wallpapering.
Preparatory stage of work
Before applying primer to the ceiling, the surface is thoroughly cleaned of old coating (plaster, paint, whitewash). Wooden surfaces are sanded, metal surfaces are cleaned of rust. A vacuum cleaner will help at the stage of dealing with small particles and construction dust. After this, the ceiling is wiped with a damp cloth and dried.
When you need to make a primer for the ceiling under the tiles, do not remove the old whitewash, but apply the primer as thickly as possible. At the same time, make sure that the surface is dry and clean, there are no crumbling or poorly adhering elements on it.
Results
You should not skimp on primer, nor should you refuse this type of work. In terms of finances, this still won’t justify itself; there will also be costs to correct various problems with the ceiling surface.
A beautiful ceiling in a room is quite possible if the surface is primed correctly
The secret is to choose a specialized primer for your ceiling or one that has a mineral base. Universal primers are often used for ceilings. It is important to study the instructions carefully and buy the product that will match the surface. They usually decide on the spot whether to prime the ceiling plinth. It’s better to just remove it - if it comes off easily.
Primer for water-based paint for walls and ceilings - features, selection and types
Water-based paint is one of the types of painting materials (painting materials), which belongs to water-dispersed solutions. For this type of paint, polymer water-soluble primers are used. Such mixtures, like the coloring materials themselves, are odorless and dry quickly.
Which primer for water-based paint is better?
When using water-based paint to paint a wall or ceiling, it is necessary to prime them in such a way that the following properties of the base appear:
- the surface has been strengthened;
- improved adhesive properties;
- antiseptic qualities appeared;
- A film has appeared that will save paint.
Range of primers
Primers used in finishing work are divided according to composition, method and place of use, depending on the base.
There are many primers that differ in the main component in their composition:
- acrylic;
- latex;
- silicone;
- polyvinyl acetate;
- alkyd;
- epoxy;
- shellac
Soils are also divided into mixtures for use inside and outside buildings.
Selection of soil depending on the base
Water-based paint can be applied to any type of surface. In order for the coating to last as long as possible and look the way the manufacturer intended, it is necessary to prepare the surface for painting using a primer.
Bases can be divided depending on their condition and the actual surface material.
For loose, weak foundations, strengthening soils are used. For hard (strong) surfaces, you can use universal primers, which create surface films and impart adhesive properties to the base.
Mineral surfaces such as brick, concrete, plaster, drywall, putty are primed with water-dispersed (acrylic, latex) compounds. Metal bases are alkyd. Wooden surfaces - alkyd, acrylic, shellac.
To coat with water-based paint, you must have a perfectly flat surface. Fill cracked and weak bases with putty. And then, in this case, you can use surface primers, which will ensure adhesion, save paint, and in the case of wooden surfaces or in wet rooms, they will also perform antiseptic treatment of walls and ceilings.
