Types of primer for wood
Wood mastics and impregnations include film-forming substances (resins, oils, bitumen or glue), as well as components in the form of plasticizers, pigments, etc. The range of primers for wood is quite wide. To obtain the optimal result for further finishing, you will need to select and buy a wood primer of the most suitable composition.
The following types of wood primer are available for sale:
- alkyd - this primer is used for painting wood with alkyd enamels like PF-115 and its imported analogues. The composition of this primer is similar to enamel, but includes a larger amount of organic solvents and cheaper pigments. Alkyd primer applies perfectly in one layer, creating a water-repellent coating, dries within 10-15 hours, it can be used by diluting with water;
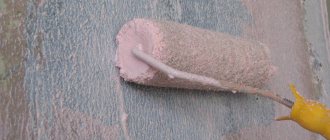
- acrylic - a penetrating water-soluble primer of this type (based on acrylic resins) is universal, as it is suitable for basic wood processing under various types of paint, it is almost completely absorbed deep into the treated material without forming a visible film on the surface of the wood. Acrylic primer for wood is usually applied in 2-3 layers. This type of soil does not have a sharp specific odor and dries in a few hours;
- silicone-acrylic primer fills the pores of the wood, strengthening it and creating a durable hydrophobizing (water-repellent) layer. This primer is suitable for preparing a base wood surface for painting with water-dispersion, alkyd, latex paints;
- polyurethane and epoxy primers based on polyurethane or epoxy resins can be used as a base for finishing with various paints and varnishes. These types of primer are similar in composition to varnish, but unlike it, they include a larger amount of special solvents and do not contain tinting additives. When purchasing such a primer, it is recommended that you carefully read the list of its components indicated on the packaging, since variations of the primer from different manufacturers may differ significantly in composition and consistency;
- shellac – this type of primer is designed for reliable isolation of knots on cuts of coniferous wood. This primer neutralizes the effect of resins released by the material being treated, which can disrupt the appearance and structure of the finish coating. Shellac primer can also be used as an insulator for waterborne stain;
- antiseptic - due to its composition, this type of soil has disinfecting (fungicidal, pesticide) and other beneficial properties. Such priming is used to prevent and eliminate damage to wood by various types of fungus and mold, as well as to protect wood from damage by various insect pests (in the form of shawarma, various wood-boring beetles);
- oil - this primer is used for previously painted surfaces or as a base for subsequent painting (for this it is enough to apply one layer of primer);
- drying oil - traditionally used as a primer for coating with oil paints for exterior and interior work. This impregnation penetrates several millimeters deep into the wood, providing reliable protection against the effects of high humidity and decay, as well as strong adhesion of oil paint to the base surface;
- styrene primer is used to create a film on the surface of wood that protects the wood material from rotting and destruction. This primer, which increases the adhesion of finishing materials to the base surface, is used for painting wood with oil-phthalic and alkyd enamels.
When choosing a material for priming, you must be guided by the work conditions, which include:
- location of the surface to be treated (indoors or outdoors);
- air humidity and temperature;
- Do you have time to process wood?
Dividing primers by functionality
Before choosing what to prime wood before painting, you need to understand not only the different compositions and types of these mixtures. You should be aware that they have different purposes.
Antiseptic
Wood primer can be used for antiseptic purposes. In this case, it is used where there is an increased risk of attack by insects or molds. In addition, antiseptic compounds are able to repel moisture and also more effectively resist fire.
After treatment with antiseptic primers, a layer of paint is applied on top of them. The adhesion is so strong that insects are unable to penetrate between the layers and cause direct damage to the wood fibers.
Used where there is an increased risk of attack by insects or molds.
Anti-corrosion
Anti-corrosion primers are used more often on metal, where the likelihood of rusting is highest. But, if wooden boards are nailed with metal nails or pressed with screws, then with high humidity and unfavorable weather conditions, there is a high probability that rust will begin to appear in this place quite quickly. This leads to disruption of the structure of the tree and also causes externally unattractive phenomena. therefore, in order to prevent such an effect, anti-corrosion primer is also used on wood where the need arises.
Anti-corrosion primer is also used on wood where the need arises.
Fire retardant
This option for wood can effectively resist the fire of the material. The following protective properties can be identified:
- Resistance to short-term exposure to fire;
- Elimination of the effect of pyrolysis;
- Prevents ignition during prolonged exposure to high temperatures.
Thus, fire-retardant impregnations for wood can provide deep and superficial fire protection of structural materials used in residential construction.
This option for wood can effectively resist the fire of the material.
Hydrophobizing
It is also called water-repellent. External wood coating with such compositions provides:
- Formation of a film that does not allow moisture to penetrate under it;
- Resistance of the material to destruction under the influence of liquid.
Today the following types of water-repellent primers are available on the market:
- According to their intended purpose, they are divided into strengthening and adhesive;
- Depending on the composition, there are acrylic, silicone, aluminum, epoxy. It is epoxy that is effective when it is necessary to create a colorless or white coating. Their chemical composition helps to make the natural color of the wood brighter and the white paint lighter.
The outer coating of wood with such compositions ensures the material’s resistance to destruction under the influence of liquid.
Universal
Universal impregnation provides a reliable layer that is capable of:
- Effectively protect wood indoors and outdoors;
- Level the top layer, making painting more convenient and economical;
- Suitable both for applying a subsequent layer of color and for applying a transparent varnish, revealing the structure of the wood.
Universal impregnation provides a reliable layer that can effectively protect wood indoors and outdoors.
Types of primer
A primer for wood paint will fully perform its functions if it is chosen correctly. Not surprising, because if you ask for a primer in a hardware store, you will immediately be asked about the type of substance.
There are two large groups of materials that differ from each other:
- Classification of primers by composition.
- Types of primers according to purpose.
By composition
Primers, according to their composition, can be divided into the following groups:
Acrylic based. The peculiarity of acrylic products is their versatility. It is suitable for chipboard, wood, concrete, brick and plaster surfaces. Used for porous materials, dries quickly (about 5 hours) and does not emit any odor
Allows the material to breathe, which is very important for wood. Air passes through its structure, the room is ventilated, and the material itself gets rid of excess moisture
Acrylic compounds are not suitable only for metal surfaces. Alkyd wood primer is considered the best option for treating wood. After application, the structure of the material becomes slightly swollen, adhesion to the surface improves. It does not dry as quickly as the previous option, approximately 15 hours. Components that prevent rust and mold may be added to the composition. Glypthalium compounds. They are mostly used for processing metal surfaces, however, the products are also suitable for wood. Drying time reaches 24 hours. There is a big drawback - it can only be used in a dry room. With prolonged exposure to moisture, the substance loses its original properties. Perchlorovinyl materials. Another universal composition used for treating wood, brick, plaster and metal surfaces. This primer for wood for painting dries very quickly; in summer the layer will dry in just 1–2 hours. However, you cannot use primer for interior surfaces, it is toxic. Polyvinyl acetate. Made from latex and polyvinyl acetate dispersion (main component). Suitable for all surfaces. True, a primer for acrylic paint or any other paint will not work. This is a prepared base for polyvinyl acetate paint only. Drying - about 30 minutes. Phenolic. Base coat for painting, applied to metal and wooden surfaces. Drying takes about 15 hours. Scope of use: outdoor work. Polystyrene. Area of use: external work on wooden and plastered surfaces. Aluminum. Apply to a wooden surface. Additionally protects the material from the negative effects of fungus. Epoxy. It is used only on metal and concrete, protecting against corrosion and improving adhesion. Shellac. Primer for painting wood. Thanks to it, resins will not be released from the structure of coniferous trees. Mineral. Made from cement, gypsum and lime. Applicable only to brick and concrete. Drying lasts from 3 hours to a day. It all depends on the thickness of the layer and the material.
By purpose
Thanks to the addition of additional components, the primer, for better painting of walls, acquires certain properties. Product types:
- Deep penetration. If the surface is loose and not strong enough, then this is the best option. The substance strengthens the wall, reducing the consumption of paint and varnish material. Area of use: impregnation of plaster, for brick, aerated concrete, foam concrete, plasterboard. It is not worth using the composition to prepare a surface that does not absorb moisture well.
- Antiseptic, for wet rooms. These include the kitchen and bathroom. The composition is supplemented with special substances that prevent fungal infection. In addition, it has water-repellent properties and increases fire resistance. After the base is primed, paint or other finishing is applied. The adhesion is so high that biological microorganisms cannot penetrate into the layers. Excellent composition for wood.
- Anti-corrosion. Used for metal, prevents rust.
- Adhesive and non-contact. This primer can be applied to old paint, as it provides maximum adhesion to smooth and non-absorbent surfaces. Adhesion is increased by adding needle quartz or sand to the composition. An ideal base for gluing heavy wallpaper.
Manufacturers indicate what type of primer it is. Just look at the packaging. There is information about consumption, as well as the scope of use.
Primer selection criteria
A high-quality primer must meet the requirements and fulfill a number of tasks assigned to it. The composition must be transparent, environmentally friendly, safe for humans, contain antiseptic components, dry quickly, and be easy to apply. It is important to consider what work is ahead: internal or external. In the first case, mixtures with an organic composition are suitable, in the second with good hydrophobic and water-repellent properties. It is important to take into account air humidity when carrying out procedures outdoors, as well as subsequent coating (paint or varnish). Primer for varnish requires a responsible approach; the surface must be perfectly smooth.
How to use primer for concrete treatment
Plaster and other finishing materials are applied to the prepared base. The primer plays such an important role because it strengthens the concrete and fills microscopic pores and cracks. The compositions are colorless after drying and are applied in 2-3 layers. Before applying, you need to wait until the previous one has completely dried.
First, dust and dirt are removed from the concrete base and damage is restored. Repainting sometimes requires completely removing the old coating. Before applying the primer, sand. You can use any convenient tool:
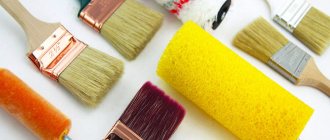
- Brush;
- Roller;
- Spray.
It is advisable to use a sanding machine to prepare floors. It will remove the laitance from the new base and open the pores. For dust removal, it is best to have a construction vacuum cleaner, but you can do it with improvised means.
It is advisable to use a sanding machine to prepare floors.
Before carrying out work, you need to make sure that the manufacturer's instructions are followed: temperature, humidity, compatibility with other materials. The maturation period for freshly laid concrete structures is at least 28 days under normal conditions. At high humidity the time increases.
Primers for concrete can be prepared by the manufacturer, or the instructions will indicate the method of preparation. Dry mixtures need to be diluted with water, two-phase components are mixed in the required proportions, alkyd ones require a solvent.
The necessary protective measures depend on the toxicity. To use water-dispersion primers, you will need gloves; for polyurethane and epoxy primers, a respirator will be required.
The maturation period for freshly laid concrete structures is at least 28 days under normal conditions.
Tips and tricks for use
Applying a primer on concrete is one of the simplest stages of work, but even here you can make mistakes, which will then affect the quality of the repair. What needs to be provided?
Primers for concrete from different manufacturers differ, so mixing them is unacceptable. You also cannot treat walls in the same room with different primers, especially if you are going to paint or plaster. This is only possible under wallpaper. It is best to calculate approximate costs in advance and purchase all materials from the same brand.
In stores you can find “primer kits” consisting of a brush, roller and tray. In the open air, the soil quickly loses its quality, so small containers are used. Apply the solution with a brush in hard-to-reach places. A roller is best with a long telescopic handle: you don’t need to stand on a stepladder. Materials:
- Foam rubber: for solutions with a viscous consistency such as “concrete-contact”;
- Fur: almost universal;
- Velor: if the surface is very smooth.
Professionals do not recommend using a spray gun, but the manufacturer may indicate this method in the instructions. Firstly, special thinners are often necessary, for example for adhesive primers. Secondly, a very thin layer is applied, and the necessary preparation will require more time. In addition, microparticles create a suspension in the air; you need to wear a mask and goggles while performing work.
Primers are colorless, but you should prepare the room in advance as for painting: cover the floors, apply masking tape, if required. Apply the primer from top to bottom or away from you. Rollers with a long handle make it easy to process floors and ceilings.
Primers for concrete from different manufacturers differ, so mixing them is unacceptable.
How to properly varnish the lining for a long time?
A home is a place of rest and therefore the furnishings in it must correspond to these parameters. Nothing should be too conspicuous; the interior should be cozy, warm and peaceful. The use of such material as decoration for interior walls and ceilings is ordinary wooden lining, which is again at the height of fashion. It can create comfort and coziness in your home, a special atmosphere of well-being and prosperity. This article describes in detail the technology of coating lining with varnish at home.
How to treat the inside of the house?
No matter what kind of wood the lining is made of, it always needs protection. Wooden paneling looks great, no doubt, but it has enemies and needs protection. The most dangerous ones are parasites, mold, dirt, sun rays, which are ready to destroy it in a short time (how to clean dirt on a lining?). How to treat the lining inside the house? The issue is not simple, but solvable.
Of course, we choose the most environmentally safe and odorless material for processing. The interior of the house is not covered with oil paints, as it looks simply terrible. After finishing the walls or ceiling with clapboard, they begin processing almost immediately, otherwise it will begin to darken and absorb dust, and then it will be more difficult to work with it.
There are many means of protection. Experienced finishing specialists recommend the following materials :
- water-based paint;
- varnish;
- wax.
Primer before painting with water-based paint
Water-based paint compositions are used for painting ceilings with increased requirements for strength and humidity. Examples include kitchens and bathrooms. The main advantage of such a ceiling is the possibility of cleaning and normal operation in conditions of high humidity. Painting with water-based paint is considered a labor-intensive and complex process that is best left to professionals.
For self-priming, it is recommended to perform a number of preparatory works:
- Sand the finishing layer of putty.
- Use a soft brush to remove any remaining dust from the surface.
- In order to better adhere the soil to the base, degrease the base with white spirit or solvent.
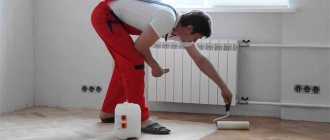
- Using a paint roller, having previously rolled out the product in a special tray - a “cuvette”, apply the primer to the ceiling in one layer.
The time for complete drying of the primed ceiling surface is from 4 to 6 hours. After which the surface is re-treated. When performing ceiling priming work, you must use safety glasses and gloves. The room temperature should be from +5 to +40 degrees with a humidity of no more than 75%.
Priming ceilings before painting with water-based paint is a mandatory procedure recommended for uniform painting and preventing overuse of paint.
Do I need to prime the ceiling before painting it with acrylic paint?
Acrylic paint is a water-dispersed suspension enriched with acrylic components. Although this mixture is a type of water-based paint, in fact, due to the polymer components, it differs from other paints in its silky appearance and excellent performance characteristics.
To ensure that the surface after painting with acrylic compounds is smooth and streak-free, it is necessary to apply a layer of primer liquid. The process of applying primer is similar to painting with water-based compositions.
Among the large assortment of primers for acrylic paint, the best priming product is CT-17, which belongs to the group of deep-penetrating impregnations of the popular brand, the flagship in the field of building materials -. If it is necessary to further strengthen the treated surface and increase its adhesive properties, use adhesive paint - ST 16 primer produced by Ceresit.
Tips for choosing a topcoat and interesting ideas
A wide selection of coatings allows you to choose absolutely any color and texture for the lining. In a country house, it is better to give preference to the most durable and unpretentious compositions that do not have to be updated frequently.
If the finish is new, then it is worth preserving its natural color and choosing transparent products for processing: varnishes, azures.
If the panels have many defects or an old coating, then thick, opaque paint is indispensable. You can improve the appearance of the base surface by removing the top layer of wood, but this is too labor-intensive and time-consuming.
The colors and shades of the lining can be combined in the decoration of one room. This technique allows you to divide a spacious room into zones. Decorate or diversify the design, place accents.
Due to the color of the finish, you can achieve some visual effects. Light shades expand the space, dark shades, on the contrary, make it smaller. The white ceiling looks higher than the brown one.
The color scheme for the lining can match the palette of shades used in the interior or contrast.
Painting a wooden floor
Wood is a natural material that can quickly deteriorate without special protection. It follows from this that the main function of the floor covering is to protect it from rot, high humidity, mildew and mold. But this may not be enough. The decor of the house, including the flooring, should please the owners so that they enjoy spending time in it.
There are many reasons to use paint:
- the paint does not allow the wood to absorb moisture or dry out;
- painted floors are not exposed to fungus or mold, and this increases their service life;
- painted floors do not require additional care - they are often simply enough to be washed;
- paint protects the material from temperature fluctuations;
- Thanks to paint and varnish products, you can easily create a beautiful and unique pattern.
How and with what to process lining at home
For interior decoration, lining is most often used, and this is not surprising, because this material has proven itself well. It is worth noting that it requires special additional treatment, which contributes to a long service life, so today we will find out how to treat the lining outside the house.
Reasons for processing panels
Most buyers of wood material are simply confident that it does not require additional processing and can be used in its original form, that is, in the form in which they purchased it.
This opinion, as you yourself understand, is erroneous, because this method of using wood is short-lived, especially since the untreated material will simply lose its original appearance very quickly.
But if you look far into the past, it becomes known that people from very ancient times covered wood with various compounds in order to protect it from external influences and factors.
Our ancestors knew how to reliably protect natural materials
The material that is used for exterior decoration especially needs treatment, because it is under constant influence of various unfavorable factors: wind, sun, precipitation, temperature changes, pest invasion, which are just waiting for the owner of the wooden structure to solve it. process.
All these factors can lead to:
- rotting;
- covered with mold;
- swelling;
- burnout under direct sun;
- covering the surface with fungi and bacteria;
- loss of its original appearance.
If the lining you purchased is made of coniferous wood, then when the temperature increases, it will begin to release resins. This process can lead to spontaneous combustion and various types of burns.
If the processing of wooden lining is carried out correctly, all of the above consequences are simply not scary for it. This procedure is the key to a durable structure that will last a long time and will not lose its original appearance. Processing of panels is carried out in several stages, which we will consider below.
Cleaning
The first thing you need to do with the purchased material is to clean it of dirt, dust and foreign parts. If the lining is processed correctly, according to all the rules and regulations, then it can be used in any room, even if the humidity in it is off the charts.
Processing of eurolining is carried out on both sides.
- First, we remove roughness from the panels; for this we need fine sandpaper, which is used to carry out the sanding process. After such an operation, the surface of the material becomes smooth and the application of various compositions to it becomes problem-free.
Photo of untreated wood panels
- We continue cleaning the surface with a steel brush, thereby leveling the wood. If there are places on the lining that are already affected by fungus or mold, they need additional treatment; cleaning of such areas should be thorough. If you are unable to completely get rid of mold or mildew, watch a training video that shows this process in detail.
- In order to get rid of fungus on the surface of the material, you will have to use bleaching agents that can easily cope with this task. After bleaching, it is necessary to cover the lining with stain so that it does not darken or change its color over many years. Very quickly, with your own hands, you can achieve the desired result if you follow everything according to the instructions.
Primer
After the boards are cleaned and free of fungi and other imperfections, we proceed to priming. This stage is mandatory in the processing of boards. There are several types of primer and you will have to choose one of them to use on the purchased material.
Acrylic primer
Designed for processing any type of material, except metal products. Typically, this type of primer is used for wood that will be used to decorate rooms and rooms from the inside, for example, on a loggia or balcony. Acrylic primer protects wood from mold and rust, which is important for rooms with high humidity.
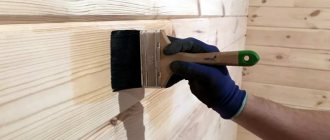
Alkyd primer
Designed for processing wood surfaces. Any type of wood material can be treated with this primer. When purchasing any protective composition or mixture, you need to consult with a specialist who will offer you the best option.
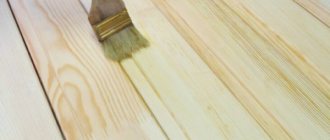
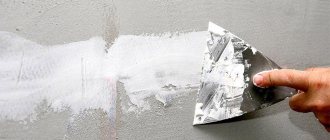
Applying a protective composition to the surface of the lining
Polystyrene primer
Suitable for wood processing. It is necessary to take into account the fact that this composition can only be used in open spaces. The instructions for such products are created so that the buyer follows its points without question and in a clear order, keep this in mind.
Advantages of a primed ceiling
The quality of ceiling finishing depends on many factors: the skill of the finishers, the correctly selected finishing materials, and most importantly, the correct technology for the work. There are no small details in construction, and if even one technological operation is missed, or unreasonable savings are made on the building materials required by the technology, then you can forget about the quality and durability of the repairs performed.
The main evidence in favor of the advisability of priming during repairs is the clear and undeniable advantages of primed ceilings:
- Filling the porous surface of the base and binding the dust particles remaining after cleaning.
- Improving adhesion (adhesion) of finishing materials. A slight roughness of the treated surface has a positive effect on the connection of layers of putty, plaster, and paint.
- Creation of an antibacterial coating. If the primer contains antimicrobial components, then the applied primer will serve as a kind of shield against the penetration of fungal diseases, eliminating the appearance of mold and unpleasant corrosion phenomena.
- Increasing the fire resistance of the final finish. The use of special types of primers with fire retardant additives contributes to the non-flammability of the final finish.
- Reducing the actual consumption by 1.5 times of generally expensive ceiling paint, which leads to a cheaper budget for ceiling repairs. The thinnest transparent film of the base primer envelops the porous structure of the base and subsequent surface treatment will require much less putty or paint.
A primed ceiling increases such an important indicator as paint coverage, and after painting the surface will be perfectly flat and smooth.
Ceiling priming is an extremely important technological process that improves the technical and operational characteristics of the finishing coating.
What is a primer composition and its use
A primer is a solution that protects wooden surfaces from negative atmospheric influences, improves their characteristics and prepares them for subsequent finishing. Priming a wooden surface will allow you to:
- achieve uniform application of the finishing coating, eliminate smudges and streaks;
- eliminate existing defects;
- will protect the wooden surface from moisture and pests;
- highlight the natural beauty of the tree;
- extend the service life of the product.
Wood primer is used in cases where:
- it is assumed that wooden products will be used outdoors;
- wood is used for finishing unheated or damp rooms;
- the wooden surface has noticeable defects that require restoration with putty;
- it is necessary to prepare the wood for finishing.
As a rule, manufacturers add components to the primer composition that subsequently form a protective film, as well as ensuring rapid drying, dyes and various additives. There are many special impregnations and therefore it is worth considering what types of primers for wood are available.
What is a primer and why is it needed?
The need for a primer before painting is due, first of all, to the fact that despite numerous attempts, it has not been possible to develop completely universal paint compositions that would at the same time be a durable decorative coating and at the same time have the necessary adhesion to the base.
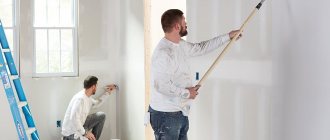
Therefore, in the vast majority of cases, the painting process consists of three basic stages:
- preparation of the surface to be painted;
- filling small pores and creating the necessary adhesion coefficient for painting (“priming”);
- applying a layer of paint.
When painting porous materials - and wood is just that - another problem arises - uneven absorption of paint, which increases its consumption and makes it difficult to create a uniform texture over the entire surface being painted.
As a result, we get several answers to the question why a primer is needed:
- To enhance adhesion between the surface to be painted and the paint layer.
- To eliminate the smallest irregularities.
- To clog pores that can absorb paint.
- To stabilize the moisture level in wood.
- And also to prevent rotting processes and protect against wood-boring beetles.
As we can see, even with the division of “responsibilities” between paint and primer, the latter is assigned too many diverse tasks, so in practice, a separate protective coating option is selected for each type of treatment.
How to repaint furniture without ruining it
- Do I need to completely sand off the varnish and old paint on furniture before repainting it?
- What kind of paint can be used for redesigning furniture?
- Wouldn't such handmade work look rough and cheap?
The search for answers to these questions was hampered by my burning desire to make a revolution in the entire decor of a country house.
I wanted to rejuvenate the interior using minimal means. The search for proven solutions took 1,000,500 hours during the lockdown. I read, listened, watched master classes, looked for coincidences and discrepancies in the recommendations. The decisive moment came when I found out about the miracle soil Tikkurila, which gave answers to my questions. I was ready to start painting. Morally. All that remained was to wait for the end of the lockdown and the opening of construction stores to purchase the necessary materials. Photo of the coffee table BEFORE repainting.
Photo AFTER repainting.
Probably some of you will say that the old version was beautiful. Yes, I agree. I painted it too. But that was 15 years ago. Tired of it.
- Why did I make the table “like a crocodile”, you ask? The decision was spontaneous; I fell in love with the stencil from the senzaria company.
- Why did you paint the legs violet? By inspiration. The internal thermometer of color therapy asked for this particular shade.
More than a year has passed since my decisive creative actions. The newly painted and freshly decorated crocodile table is still “like new.” Nothing fell off, was not scratched, did not fade. the materials and paints I used
1. Skin 220 in sheets and soft blocks.
2. Degreaser (any).
3. Axton or VGT putty, palette knife, stencil from senzaria.ru.
4. Adhesive primer OTEX AKVA.
5. Furniture paint V33 decolab made in France
6. Acrylic artistic paints.
7. Acrylic varnish VGT.
8. Brushes, rollers.
Stages of work and recommendations.
1. Washed and degreased. I sanded it by hand and with a sander. Slightly. Turned a glossy smooth surface into a somewhat rough one.
2. Then wiped it with a damp and dry cloth.
3. Using a 10 cm roller and a brush (where the roller did not cover) I applied violet-colored V33 paint to the legs. In 2 layers with a drying interval of 12 hours.
The paint is great!!! It goes on very smoothly, without any traces of movement of the bristles of the brush or roller.
4. Using a stencil and a palette knife, I applied “crocodile” pimples to the tabletop with putty. The size of the stencil is 6 times smaller than the size of the table, so I repeated this procedure 6 times.
Dried overnight.
5. The next day I covered the tabletop with OTEX AKVA Tikkurila adhesive acrylic primer. I let it dry for 3 hours and then artistically painted it with acrylic paints.
6. The next day I covered the tabletop with VGT acrylic varnish in 3 layers with intermediate drying for at least 3 hours.
- Did you notice that I did not coat the table legs with primer before painting, and did not varnish them after?
- Why?
Adhesive primer increases paint adhesion, i.e. adhesion of the paint layer to the surface. V33 paint did not require primer. I'm telling you, she's great! 3 in 1st. No primer is needed and no top protective coating (varnish) is needed. After a successful experience with the table, I repainted the country kitchen and bar stools with the same paint, but in a different color.
You are not an artist and have never picked up a brush, but have you also been dreaming of refreshing your furniture?
What do I advise you?
- Start with something small. From a cutting board, for example.
- Try to stretch the paint, varnish, and primer over the surface so that you get thin layers of equal thickness.
- Stretch the liquids, but not the process. Act as if your paints and brushes are about to be taken away from you as quickly as possible. This will help avoid layers and bumps in the paint layers.
Realize your burning desires, don’t leave them for the next life.
PS. If it doesn’t work out, you can always restart, sand it off, wipe it with a cloth and... go ahead. Good luck to you in all your endeavors.
- Come visit my store here at the Crafts Fair. Just click on my name in the top left corner of this post.
Is there a need to continue this topic?
Maybe you also experimented with repainting furniture? Share your successes and failures?
Why does wood need a primer?
Despite the large number of advantages, natural wood also has disadvantages. First of all, this is vulnerability to rot, mold and mildew, as well as insect attacks. To eliminate such problems, deep treatment with a primer is carried out. In addition, such a procedure reduces paint consumption, because it makes the surface of the wood even and smooth.
Purpose of the compositions
To make sure whether it is necessary to prime wood before painting and why this is necessary, you should familiarize yourself with the purpose of primer compositions. They are used for the following purposes:
- Disinfection. Available types of wood are susceptible to moisture and rot. This process degrades the aesthetics of the product and shortens its service life. Prolonged contact with water causes the appearance of bacteria and harmful microorganisms. It also leads to the formation of mold and mildew. To prevent such consequences, you need to treat the wood with an antiseptic additive. The substance protects the appearance of the material from negative factors for many years.
- Increased reliability. A deep penetration primer is a useful substance for strengthening the outer layer of a material. It is used for the restoration of old furniture, staircases, floor coverings or decorative items. The composition contains special resins that penetrate deeply into the fibers and prevent their delamination.
- Absorption protection. Depending on the varietal characteristics, wood has varying degrees of absorption of various substances. If you cover it with enamel without first applying a primer layer, a large amount of paint will end up between the pores. The purpose of the primer is to close micropores and create a smooth surface for the subsequent application of paints and varnishes.
- Increased service life. Wood primer forms a reliable protective layer and extends the life of wood products. It provides protection against corrosive processes, the negative effects of moisture, mold and other problems.
- Maintaining external attractiveness. The wood contains a special substance – tannin. It is a natural dye that can be released from the wood fibers and cause stains that impair the aesthetic appearance.
- Texture and color. Wood primer for exterior use can give the surface a beautiful texture and roughness. It also emphasizes the richness of paint and varnish compositions, especially if white paint is used for finishing.
Benefits of primer
There are many advantages that primer for painting has. Among them:
- Deep penetration into the pores, due to which the material acquires additional density.
- Reduced vulnerability to moisture absorption.
- Prevention of fungal manifestations and mold.
- Improving the performance qualities of wood.
Preparing the wood for painting
The service life of wood depends not only on the primer, but also on the preparatory work: how well the material was cleaned of contaminants and the base was cleaned.
Depending on which base is being primed, such preparatory manipulations should be performed.
Priming the initial paint layer
If you are painting with paint that was previously applied, then you should not bother with stripping the base.
If the first layer was made of alkyd, oil paint or nitro enamel, it is cleaned with a sanding sheet to obtain a rough base. The remaining pieces of wood are removed with a spatula, and then sanded.
For different paint tones, it is worth treating with the same type of primer. Once the primer layer is completely dry, you can move on to the painting stage.
If you are going to cover the painted base with a different type of paint, then first the base is heated with a construction hair dryer, and then cleaned with a metal spatula.
The lagging paint layer is removed with a solvent, after which the surface is primed with an antiseptic and then a finishing primer.
“Keep in mind that antiseptic is present in many all-purpose primers. It is allowed to independently add such a drug to the soil.”
Types of decorative coatings
How to paint a wooden porch to get a reliable coating? Paints and varnishes can have not only a decorative function, but also contain protective components
Before purchasing, it is important to study their properties, color, texture
Paints and varnishes can have not only a decorative function, but also contain protective components.
Paints
Colorful substances are produced in different ways, they can have hiding power, or, on the contrary, preserve the wood pattern, creating only a tint effect:
- So, outdoor wood preservative paint that creates a new color will be better suited to an old structure. It will help hide defects; I can use it to cover places where the finishing has peeled off;
- Option 2 is applicable only for the first painting of new structures.
Colorful substances are produced in different ways, they can have hiding power, or, on the contrary, preserve the wood pattern.
Varnishes and impregnations
Transparent varnishes will highlight the natural grain of the wood, creating a reliable protective film on the surface. But they are not suitable for the only means of covering stairs. They can be applied to steps only on top of the paint. A great option for painting outdoor railings.
If the dacha house itself is not painted or covered with facing material, then in order not to create a contrasting porch that will not look appropriate, you can resort to impregnation. Depending on the type, they give a glossy or matte finish. Preserving the natural grain of the wood, making dark fragments even darker.
Transparent varnishes will highlight the natural grain of the wood, creating a reliable protective film on the surface.
Comparative characteristics of dyes for external works
The choice of composition is influenced by cost, service life, and consumption. According to these criteria, the varnish has the highest cost, with the lowest consumption. Can last up to 8 years.
Enamels are cheaper than varnishes, about 2 times, but their consumption is much higher, with a service life of 6 years. Oil paints are even cheaper, consumption is approximately the same as enamels, and this coating will last 5-7 years. Acrylic products have the lowest price, average consumption, and the longest service life of up to ten years.
Acrylic products have the lowest price, average consumption, and the longest service life of up to ten years.
Which composition to choose
In order to make the right choice, you need to focus on the following criteria:
- Color, whether the property of hiding is necessary, or whether the texture needs to be preserved;
- Climate of the area, what maximum temperatures occur (lowest and highest);
- Humidity. General humidity, and frequency of precipitation.
In order to make the right choice, you need to focus on certain criteria.
Preparing a wooden surface for painting
The quality of work depends not only on the selected soil, but also on how carefully the preparatory stage was carried out (cleaning of debris, dust, grinding the surface). Preparatory work differs depending on the type of base that is to be primed.
Over old paint
If the type of old paint matches the one that will be applied, complete stripping of the surface is not necessary. We remove alkyd and oil paints, as well as nitro enamel, using sandpaper. The task is to ensure a rough surface. We remove the exfoliated wood with a spatula, and then sand such places.
If the paint colors do not match, apply a separating layer of primer of the appropriate type. We apply paint only after the primer has completely dried. If the old coating differs from the new one in the composition of the paint or varnish (for example, instead of alkyd paint it is planned to cover the surface with oil paint), heat the surface with a hair dryer and remove the coating using a metal spatula.
We remove the remaining traces of paint with a solvent. Next, we prime the surface - we start with treating it with an antiseptic agent, and finish with a finishing primer before painting.
Note! Antiseptic components are added to many universal primers. You can also add an antiseptic yourself to the aqueous soil solution.
On fresh wood
In this case, you need to perform the following sequence of actions:
- We perform grinding and scraping of the surface.
- We fill cracks and other defects with acrylic putty. The choice of this type of putty is due to its elasticity. Acrylic putties do not cause cracks when the size of the wood changes.
- Remove dust and prime the surface. The primer composition is applied to the wood using a brush, roller or spray. If we use an acrylic-based primer, then in addition to the first layer, you will need one or two more.
So, there is nothing complicated about priming wood before painting. Don't just buy the cheapest soil. It is better to save a little on paint and varnish material than on primer.
What should wood be protected from?
It is known that wood cannot withstand the influence of natural factors for long. And in order for the structure to last longer, it is necessary to provide protection from various types of damage. These include:
- Various types of natural precipitation act on the tree itself, destroying it and causing the wood to swell. All this leads to a reduction in the service life of structures;
- Exposure to ultraviolet radiation leads to loss of color of the applied coloring composition, as a result the wood dries out. Cracks appear;
- Biological effects, moisture causes mold and mildew to form on the surface, and various insects also like to inhabit the tree.
All these negative factors can be avoided by painting the surface with special means, but what is the best way to paint wood outdoors in order to get protection that will not peel off? This will be discussed below.
A tree cannot withstand the influence of natural factors for long.
Review of compositions for processing wooden lining in a bathhouse
Lining is an ideal option for a bathhouse, aesthetic, natural and warm. But the conditions in the steam room, which are so pleasant for humans, are not very beneficial for the tree, so care should be taken to protect it and treat it with suitable compounds.
Wooden panels will have to be saved from such troubles:
- rotting;
- fungus;
- loss of color, darkening;
- cracking.
Most modern materials for wood processing guarantee comprehensive protection, preserving both the “health” of the lining and its attractive appearance. But in a steam room, special formulations are needed that will be effective at high temperatures and humidity. The best products are produced by the Finns - as true connoisseurs of relaxing holidays.
Soil types
The range of primers for walls for painting is varied. Based on the type of base, they can all be divided into several groups:
- Acrylic. Universal, good for wood, concrete, chipboard, plaster, drywall, etc. Can be used for porous coatings, dries in about 5 hours, odorless. Not applicable to metals.
- Glyphthalic. Area of application: metal and wood. It dries in about a day and loses its properties in conditions of high humidity.
- Alkyd. A good option for any wood. After treatment, the fibers swell slightly, which significantly improves adhesion. Dries in about 15 hours.
- Perchlorovinyl. A universal preparation that is used for plasters, metal, plywood, wood, etc. Dries quickly and takes about an hour. It is better to choose it for outdoor use due to its high toxicity.
- Epoxy. A two-component product that significantly increases the adhesion of the base. Used for metal and concrete.
- Mineral with gypsum, cement or lime. Use for concrete or brick. Dries from three hours to a day.
- Aluminum. Used for wood. Additionally protects it from fungal infection.
The optimal and most popular option can be considered universal primers, which are suitable for almost any material. They improve the adhesion of the base and strengthen it, but do not have special characteristics. However, in most cases the latter is not required.
Instagram stroydecor777
The primer must be chosen correctly based on the type of base
How to choose soil
Before you buy soil, there are some things to consider:
- Where will the remedy be located? There are soils that do not tolerate outdoor conditions, since being in an open space, their adhesion and drying rate will drop significantly. If you live in an area with high humidity levels, it is worth buying a product with good moisture resistance.
- Consider weather conditions. Acrylic primer dries very quickly outdoors. When working in hot weather, it is worth priming in the morning or afternoon. Remember that alkyd primer dries out in a short time, so it needs to be treated with a couple of balls of wood.
- What further work will be done - varnishing or painting. The most difficult thing is to prime the base before the first type of work, since the primer should emphasize the natural structure of the wood. Also, before varnishing, you need to clean the base and get rid of lint. In addition to the primer, liquid wax or talc can be applied. As an alternative, you can try making a primer yourself using drying oil, turpentine, chalk and colorant.
Compositions for painting wood
Painting wooden surfaces can be done with several types of finishing materials. Each option differs in the composition and appearance of the resulting coating.
Paints
Wood paints are consistently popular. They allow you to renew the surface, but hide the natural texture. If the technology is followed, the result is a coating that is distinguished by individuality and a magnificent decorative effect.
The following compositions can be used in the work:
Oily. This variety is currently used quite rarely. This is due to the many negative qualities that the mixture has. Among them, the sharp and toxic odor, as well as the long drying time, stand out. The composition is used for painting wooden bases and household products.
The advantages of oil paint include good adhesion and high covering power.
Alkyd enamels. This option, like the previous one, has become less popular, but demand remains at a good level. This is because the mixture is excellent for outdoor woodwork. After application, a thin film is formed on the surface, thanks to which it is possible to emphasize the texture of the base. In addition, enamel has low vapor permeability, which reduces the risk of wood deformation when exposed to moisture. They are not durable.
Alkyd compounds are best used for outdoor use as they have a toxic odor
- Water-based (water-dispersed): Acrylic. The basis of such solutions is water and acrylic resins; they also contain additional modifiers. Due to this, the mixture turns out to be completely environmentally friendly. The scope of application is wide: it can be internal and external surfaces and even furniture. Possessing elasticity, the material prevents the appearance of cracks and damage to the wood.
- Latex. Hides surface cracks up to 1 mm wide, a good option for protecting the coating from the harmful effects of moisture.
Epoxy coatings are highly durable and resistant to abrasion, as well as various chemicals and solvents.
Thus, to the question: is it possible to paint wood with water-based paint, the answer will be in the affirmative. These products are considered the most preferable. It not only has excellent characteristics, but is also well tinted, which allows you to realize your design imagination.
Lucky
When deciding what to paint a tree with, be sure to take into account that paint is not the only option; varnish is an excellent alternative. It is a composition based on natural or synthetic resins. Various substances that determine the properties of the material can be used as a solvent. The resulting film can be transparent or change (emphasize) the texture of the wood.
Colored varnishes allow you to imitate various types of wood
Several composition options are suitable for work:
- Polyurethane. It is most in demand because it dries quickly and has excellent durability. But due to the presence of a solvent in the composition, it has a specific odor.
- Water. Suitable for work outdoors and inside the house. It is environmentally friendly, but requires impregnation of the base with a primer. It may take up to 24 hours to dry.
- Acrylic. A modern composition with good decorative qualities. The disadvantage is the high price.
- Nitrolac. It has low light fastness and is suitable for working with inexpensive furniture.
Varnish can be an independent coating or an auxiliary protective coating when applying paint to wooden surfaces. In this case, you need to choose the right foundation to achieve the best effect.
Other dye options
These may be the following substances:
- Stain. Allows you to give the wood a richer texture. For example, after treating cheap pine with a properly selected stain, the appearance of noble oak is created. Can act as a protective impregnation.
- Potassium permanganate. The solution is prepared in the proportion of 50 g of manganese per 1 liter of warm water. The mixture is well treated with the base, if necessary in several layers. If you paint the floors with this composition, they will look like dark walnut.
Regardless of the material chosen, the surface is coated with colorless varnish.
Wood primer before painting – is it necessary to use it?
Professionals involved in woodworking know how capricious this material is. To obtain a high-quality top layer, it is necessary to eliminate surface defects, improve the quality of adhesion and prevent intensive absorption of paint or varnish into wooden surfaces.
It is important to understand that some types of wood have a fine grain and smooth outer layer, while others are porous and uneven. Therefore, the first step is to determine whether the surface needs priming. To do this, the following factors are determined:
- The type of wood and the presence of additional fasteners and materials on the surface;
- Condition and age of the material;
- What you need to get as a result;
- What paint and varnish material will be used to apply the finishing layer.
As you can see, many factors influence the need to apply a primer. It is indispensable if:
- The tree is a soft species;
- It is old, which is why the structure of the upper layers changes;
- There are irregularities and knots;
- When it is necessary to obtain a smooth, even layer of enamel or varnish at the finish;
- Exposure to high levels of moisture is planned;
- It is necessary to protect the surface from ultraviolet exposure;
- Protect from insect attacks;
- Prevent fire.
To obtain a high-quality top layer, it is necessary to eliminate surface defects, improve the quality of adhesion and prevent intensive absorption of paint or varnish.
Purpose of pre-treatment
Based on the properties of the primer, we can clearly identify the properties that it imparts to the surface:
- Increases adhesive properties, ensuring high-quality adhesion of paint to wood. As a result, the paint layer does not swell or swell in the future;
- The consumption of different types of paint is reduced, which saves money;
- The surface is smooth and shiny.
The primer increases adhesive properties, ensuring high-quality adhesion of paint to wood.
What primers are used to prepare wood?
Before making an estimate for the purchase of construction chemicals, we recommend that you pay attention to the fact that not all primers on sale are suitable for wood processing. Below are the main types of protective and preparatory primers most often used during the construction of log and timber houses.
Below are the main types of protective and preparatory primers most often used during the construction of log and timber houses.
Alkyd
They are used in cases where it is necessary to reduce the porosity of wood, reduce the absorption coefficient and prevent swelling of the fibers from excess moisture.
Relevant for untreated wood, ends of log houses, as well as products made of fiberboard and chipboard. They have a pronounced “finish smoothing” effect. Drying time 12-16 hours.
There are modifications with a special additive that creates a matte surface after drying (used to enhance the color of decorative coatings).
Feature: they contain solvents, the presence of which is undesirable in residential areas.
Acrylic
Indications for use are the same as the previous version, but unlike alkyd ones, they do not contain dangerous chemical compounds.
They are well diluted with water and have a high drying speed (2-4 hours).
Used to prepare surfaces for painting with latex, water-based and alkyd paints.
Shellac
Primers of this type are used to neutralize the effect of resins in coniferous wood when preparing their surface for varnish and paint that are sensitive to the chemical composition of the base.
Often used separately for processing knots.
Antiseptic
Used to preserve wood and prevent decay processes.
Self-use is allowed (without subsequent painting).
It is recommended to use this primer to treat all wooden products that come into contact with the external environment, as well as those used for assembling particularly critical components (casing, power plate, roof support frame, etc.).
accepts orders for any types of installation, repair and finishing work performed during the construction of houses made of timber and logs, bathhouses and utility buildings. You can clarify the details of cooperation, as well as make a request for the development and evaluation of a work plan, by going to the “Contacts” section and contacting us at the coordinates published there.
Calculate the cost of painting and insulating your home right now
Compositions
Making your own primer
Recipe No. 1 (for wood with large pores)
- Heavy spar – 28%. You can use other fillers except chalk.
- K-17 (urea resin) – 50%.
- Lactic acid as a hardener – 7%.
- Water – 15%.
Method of preparation: mixing the components can be done in a glass, porcelain or metal container, adding them in any order - the main thing is maintaining the proportions. Use within 12 hours.
Recipe No. 2
- K-17 (urea resin) – 80%.
- 10% oxalic acid – 20%.
- Water – quantum satis (as much as needed)
Method of preparation: see recipe No. 1. Dries in 3 hours.
Recipe No. 3
- Oil varnish No. 74 – 21%.
- Drying oil (linseed, hemp, mulberry) – 13%.
- Pigments – 8%.
- White spirit – 8%.
- Drying agent – 3%. Filler – 47%.
Method of preparation: mixing order according to the recipe. Dries in 12 hours. It is used under nitrocellulose and oil varnishes, the color is achieved with pigments.
Recipe No. 4
- Solvents – 16%.
- Nitrovarnishes – 10%.
- Turpentine – 20%.
- Powdered chalk – 50%.
- Ocher powder - 4%.
Method of preparation: mixing order according to the recipe. This primer is used for alcohol and nitro varnishes, applied with a rubber spatula, and then wiped with a rag. Dries within 2 hours.
Recipe No. 5
- Drying oil (linseed, hemp, mulberry) – 10%.
- Drying agent – 2%.
- Turpentine – 3%.
- Rosin (crushed) – 15%.
- Powder (talc) – 70%.
Method of preparation: order of addition according to the recipe with thorough mixing. It is used under alcohol and nitro varnishes, maintaining its viability for up to 1 month. Apply with rubber spatulas, then wipe with a rag, dry in 12 hours, and sand well.
Recipe No. 6
- Nitrovarnish No. 930 – 21g.
- Solvent No. 645 -22.5 g.
- Chalk – 57
- Red lead – 3g.
- Dibutyl phthalate – 4.5 g.
- Castor oil – 4.5 g.
- Ocher – 4.5 g.
- Turpentine – 30g.
Method of preparation: all dry ingredients are mixed with nitro varnish, grinding the resulting mixture into a paste, after which a solvent with turpentine is added and mixed again until smooth. You need to use this primer within 24 hours, and it dries in 3 hours; sanding requires effort.
Recipe No. 7
- Chalk – 135g.
- Ocher -7.5g.
- Nitrovarnish No. 930 – 22.5 g.
- Turpentine – 30g.
- Dibutyl phthalate – 7.5 g.
Method of preparation: all dry ingredients are mixed with nitro varnish, grinding the resulting mixture into a paste, after which a solvent with turpentine is added and mixed again until smooth. It should be used within 3 hours, applying to the surface with a rubber spatula, and then wipe with a rag. Dries within an hour and sands fine.
Recipe No. 8
- Chalk – 85g.
- 0hr – 5g.
- Oxol (flaxseed, hemp) – 12g.
- Casein glue – 25g.
- Water – 125g.
Method of preparation: all dry ingredients are mixed with drying oil and ground to a paste. Separately prepare casein glue with water, and then mix everything. This primer can be stored for up to 5 days, applied with a rubber spatula, then wiped with a rag, dries for 4 hours, making the treated wood darker. Suitable for a variety of paints and varnishes, sands well.
Before priming
Before applying the impregnation and finishing coat, the wood must be properly prepared, which will require the appropriate tools. To prepare a wooden surface for priming you will need the following:
- a set of abrasive paper of various grain sizes;
- rubber plate;
- wooden block.
The wooden surface must be sanded, moving along the grain, and from time to time replacing the sandpaper from a coarse grain to a finer one. When working with a large area, it is advisable to wrap sandpaper around a wooden block of the appropriate size; when working with small parts, you should use a rubber plate. If there are deep cracks, then it is necessary to seal them with a special putty and sand them.