High-quality preparation of walls before subsequent finishing involves the sequential application of various compounds. Thanks to the primer, it is possible to prepare the base, increase its strength and adhesive properties. In order for the coating to be of high quality, you need to choose the right composition and apply it to the base. To do this, it is worth getting acquainted with the main varieties and their distinctive features.
Why do you need to prime the walls?
The primer mixture is actively used to prepare the base. It provides a sufficient level of protection against bacteria. If mold has already spread over the surface of the walls, choose a special composition with antibacterial properties. Thanks to this primer, it will be possible to prevent further spread of the fungus.
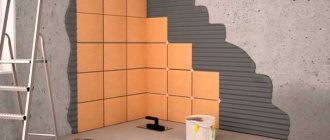
The base is primed regardless of the subsequent type of finishing treatment. A primed surface lends itself better to painting, wallpapering, tiling, and plastering. When choosing the latter finishing method, the desired color is added to the composition of the decorative material.
What characteristics of the primer should I pay attention to?
To choose the right composition, it is worth considering a number of parameters. First, you need to decide on the operating conditions. For the walls outside the building, one primer mixture is needed. When preparing the wall surface inside the house, it is different. You should also decide on the need for protection from moisture, direct sunlight, and mechanical stress.
The next parameter is the processing area. If it is large enough, it is preferable to choose a dense primer, which involves applying a maximum of two layers. This material is more expensive, but due to fewer layers the overall costs are reduced.
The material of the wall is of fundamental importance. The composition of the primer must be consistent with the base material. Mineral-based emulsion is suitable for walls, for the manufacture of which a material based on minerals of natural origin is used. For synthetic materials, choose a primer that has a synthetic base. Alkyd primer is suitable for preparing a wall painted with alkyd paint. Mineral soil is applied to the putty surface, concrete or brick base.
To prepare a wall that is used in conditions of high humidity, you should pay attention to a primer with water-repellent properties. If the base is painted, you should pay attention to a primer that contains copper sulfate. A properly selected composition allows you to etch a poorly cleaned surface, making it suitable for repainting.
If the base is porous, the coating crumbles easily or quickly absorbs moisture, you should choose a deep penetration primer based on acrylic or silicone. It is possible to use a quartz-based mixture containing dispersion additives. If you plan to paint decorative trim, you should give preference to a deep penetration alkyd composition.
To prime the metal, you will need an epoxy, alkyd or phosphate primer, thanks to which it is possible not only to prepare the base, but also to provide a sufficient level of protection against corrosion. If the metal is combined with wood, when choosing an alkyd primer, you should make sure that the composition contains solvents and stabilizers.
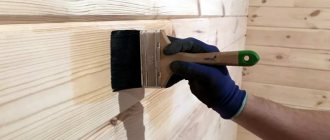
If you plan to treat a wooden base, the primer must contain an antiseptic. It is better to treat substrates with knots with an epoxy-based primer.
Attention! It is impossible to mix primer mixtures on different bases with each other, so it is worth deciding in advance the most suitable type.
How to make primer at home
If you don’t trust modern manufacturers, you can make your own primer. To do this, you don’t have to master any special skills or prepare a lot of ingredients. The main thing is to check how accurately the proportions are observed. We offer 3 options for homemade primer.
Basic tips for working with primer
Option 1: Soap and lime primer
To prepare you need:
- 7 l : clean boiled water;
- 200 g : regular laundry soap;
- 2.5 kg : slaked lime;
- 100 g : drying oil.
To prepare the mixture, grate the soap
You will also need two mixing containers and a sieve. When the tools and components for the future primer are ready, we proceed to step-by-step production:
- Pour 3 liters of boiling water into a container, add grated soap . Stir until the soap dissolves.
- When the consistency becomes homogeneous, add drying oil .
- Pour the remaining 4 liters of boiling water into the second container and add lime .
- Combine both solutions, mix and pass through a sieve .
The resulting mixture is cooled for a couple of hours, after which it is used to treat the walls.
Option 2: Primer with copper sulfate
This variation of the solution actively resists the development of fungus and makes the wall surface stronger. To be prepared:
- 7 l : boiling water;
- 500 ml : wood glue;
- 150 g : copper sulfate;
- 1 package : laundry soap, grated.
Unlike the previous method, the primer will be cooked over an open fire. Therefore, you also need to prepare the tiles. In addition, you cannot use aluminum cookware: it will react with vitriol.
Copper sulfate
To prepare the primer you need:
- Pour soap and stir until almost completely dissolved.
- Place the container with the liquid on the fire, add copper sulfate , pour out the glue.
- Reduce heat to low, cook for 30-40 minutes . Stir regularly to prevent lumps from appearing.
Remove the finished mixture from the heat and cool slightly. Then pass through 2-3 layers of gauze.
Important! This strengthening primer will well seal the porous texture of concrete walls and also prevent the formation of black mold.
Option 3: Step-by-step instructions for preparing a deep penetration solution
To make a penetrating primer you will need:
- 8 l : clean boiled water;
- 1.5 l : PVA construction adhesive;
- 1 trowel, finely chopped chalk or cement.
Step 1. Choose any containers, taking into account the total volume of ingredients. We prepare the necessary material.
We prepare the necessary material and containers
Step 2. Pour construction adhesive into a container of water, mix until smooth.
The solution is mixed until smooth
Step 3. Pour cement or chalk into the prepared liquid, stir until dissolved.
Mix with cement/chalk
Step 4. After the composition has cooled, you need to pour it through a sieve or gauze cloth.
Strain the solution through a sieve
Step 5. Apply the finished primer to the wall.
Let's start applying the primer
Important! Thanks to the PVA glue in the composition, this homemade primer will protect the surface from moisture. It also shows excellent strengthening properties.
Video - How to make a deep penetration primer
Approximate mixture consumption
The consumption of plaster directly depends on the type of base on which the product is applied. If the surface is plaster, the average consumption per 1 square will be 100 - 160 grams. To treat a square meter of putty surface you will need 50 - 120 grams. If the surface is porous and friable, the average consumption increases significantly. Its size exceeds 200 grams. If preference is given to concrete contact and similar primers, then about 0.25 liters of primer will need to be applied to each square of smooth concrete.
The average consumption of a particular primer may vary significantly. Manufacturers indicate approximate figures on each package. The parameter depends on the composition of the primer mixture. The average primer consumption per square is:
- Acrylic 130 – 150 g;
- Water-dispersed about 120 g;
- Deep penetration 160 – 180 g.
The given values are valid for one layer of primer mixture. When applying several layers, the average value is multiplied by the number of layers applied and by the area of the walls. If there are a large number of corners and protrusions, it is worth adding another 10%.
How to calculate primer consumption
To find out how much primer will be needed for a thorough study of the entire room, you will have to calculate the area of the walls without taking into account windows and doors. The final figure is doubled (two layers of primer), and then multiplied by 1.1 (taking into account unforeseen losses of 10%).
Next, we turn to the table below and calculate the approximate volume of primer that will be required to finish the room.
Table 4. Approximate consumption of different types of primer.
| Primer type | Surface character | Consumption, g/m2 |
| Acrylic thinned | iron; wooden. | 43 |
| Acrylic undiluted | wooden; OSB, chipboard; plywood. | 130 |
| Alkyd | concrete; brick. | 130-155 |
| Acrylic | anything other than wood. | 110 |
| Universal | for any type of surface. | 60-100 |
The figures are approximate; the exact volume of primer consumed can only be clarified when purchasing the composition. It is indicated on the packaging of the mixture in g/m2 or ml/m2.
Wall processing process
Types of mixtures
The purpose of primer mixtures can vary significantly. Manufacturers offer deep penetration compositions that penetrate deep enough into the wall material and close the pores, and special ones. Special water-repellent materials help prevent exposure to moisture. To increase the adhesive characteristics of the base, a special primer is used. Anti-corrosion prevents metal corrosion, antiseptic prevents the appearance of mold and mildew. A fire-prevention primer, which is traditionally used for treating wood, helps reduce the flammability of metal. There is also a division according to the type of main component and purpose.
By composition
The main varieties include:
- Mineral, which is the most widely used. It is based on natural ingredients. Most often, cement is used as a binder. Can be applied to almost all substrates. The main advantages include durability, resistance to sunlight, moisture resistance;
- Acrylic. Contains acrylic polymers. Refers to deep penetration compositions. After application, it securely bonds wood fibers and is suitable for concrete and brick. Allows you to form a durable coating that increases the service life of the base. Water-based compositions are intended for preparing walls before painting walls with water-based paints;
- Alkyd. It has a complex composition. Includes polyurethane, polyvinyl chloride, polystyrene, various additives. The composition cannot be classified as environmentally friendly. Additionally, some brands require a minimum of 12-16 hours to dry. Its main advantage is the increase in the anti-corrosion properties of the base. Suitable for processing various substrates, including glass and metal;
Attention! Varieties of alkyd primer are enamel, polyurethane and glyphthalic compositions.
- Epoxy. The base is a resin, to which special chemical components are added. The coating, formed according to all the rules, provides reliable protection of the base from moisture, mold and mildew. Not afraid of significant temperature fluctuations or mechanical stress. With its help, walls are prepared in the bathroom, toilet and kitchen. It is often used to prepare various metal elements on the wall surface for subsequent painting.
- Silicone. Allows you to form the most durable primer coating. With its help, it is possible to increase the strength and adhesive characteristics of the base. As a result, the reliability of adhesion between the finishing material and the wall is significantly increased. Especially if paint on a similar basis is chosen as a finishing material. Given its composition and characteristics, silicone primer is most often used for preparing building facades. After its treatment, the walls are reliably protected from harmful negative influences;
Attention! Due to the increased toxicity of the composition, silicone primer should be applied only in PPE.
- Silicate. The basis is potassium liquid glass. With its help, the walls outside the building are most often prepared. Suitable for concrete, brick and plaster bases. Due to its structure, it allows the treatment of wet surfaces. Often used to protect walls in underground utilities;
- Quartz. The main component is quartz sand. Due to this, the formed coating significantly increases the adhesive characteristics of the base. The formed coating has a characteristic color. The quartz sand particles included in the mixture provide a unique proportion between absorbed and reflected light. With the correct selection of the finishing coating, it is possible to achieve a unique decorative effect;
- Phosphate. Designed specifically for the preparation of metal substrates. It includes many components, the main purpose of which is to increase the anti-corrosion properties of the metal base. After its application, metal surfaces acquire a characteristic shine. Before use, an acid solvent is added to the phosphate primer, which is supplied along with the base composition;
- Shellac. A specific variety consisting of the milky juice of insects and methyl alcohol. Designed specifically for processing wooden bases. Ideal for lubricating cuts on boards and timber. After processing, there is no need to worry about the appearance of wood resins at high temperatures. This negative phenomenon is often found in saunas and steam baths. The composition is applied before subsequent treatment of the base with a water-soluble stain;
By purpose
The base material may also vary. Manufacturers offer primers for:
- Tree. After priming the surface, it is possible to significantly reduce the degree of absorption of finishing compounds, reduce the risk of rotting and the appearance of pests in the wood. The composition is applied in several layers. The choice can be made in favor of an acrylic, mineral, oil primer of a light color;
- Metal. The introduction of special additives increases the level of corrosion protection even during long-term operation in conditions of high humidity. Predominantly phosphate or shellac primers are used;
- Plasters. The plastered surface absorbs moisture well and is resistant to mechanical stress. The primer contains special components for gluing the components of the base, increasing its antibacterial and water-repellent properties;
- Various reasons. Such universal primers are used for the preparation of fiberboard, chipboard, OSB boards, plywood, plasterboard and other materials.
- Concrete. For such a base, concrete contact is predominantly chosen. It is based on latex, silicate, liquid glass or bitumen. After treatment with a similar composition, the concrete surface is well protected from moisture penetration.
Kiilto Start Primer
A primer to improve adhesion between the leveler and the surface to be leveled. Water-based.
Benefits and Features
- binds dust and slows down the penetration of water in the floor screed into the base
- economical consumption
Technical documentation
Water-based primer for absorbent and non-absorbent surfaces in interior spaces, applied before leveling work. For non-absorbent substrates, we recommend using Kiilto Fix Primer before leveling.
Kiilto Start Primer is also used for priming surfaces such as:
— Concrete and cement-based leveler (dilution: 1 part primer / 4 parts water) — Floors with old adhesive residues, such as bitumen or synthetic resin adhesive (do not dilute) — Substrates that cannot withstand moisture, e.g. gypsum and wood (do not dilute) - Floors made of building boards such as chipboard, plasterboard, etc. (do not dilute). — Non-absorbent substrates, e.g. paint and clinkers (do not dilute).
The primer has good moisture resistance and forms good adhesion between the leveler and the base. The alkalinity of the cement does not impair the effectiveness of the primer. Not used as an additive to leveling agents.
| Packing size | EAN code |
| 1 l | 6411513702017 |
| 3 l | 6411513702031 |
| 10 l | 6411513702109 |
- concrete approx. 30 m² undiluted / non-absorbent base: Primer 1 l -> approx. 10 m²
1 l, 3 l, 10 l plastic containers
recommended temperature +18–20 °C, minimum +10 °C
Three years in unopened packaging and in a dry place.
Remove cement adhesive, dust, loose dirt and grease from the base. If necessary, mechanical grinding/milling is carried out. Apply the primer in a thin, even layer, e.g. using a flotex spatula or brush. Do not allow puddles to form. Concrete and plaster-lined substrates can be leveled immediately after applying the primer. For building boards, non-absorbent substrates, and substrates containing old adhesive residues, allow them to dry after priming for about 2 hours before carrying out leveling work. Prevailing conditions such as room temperature, quality and humidity of the substrate greatly influence the drying process. Therefore, the digital values of our recommendations can only be used as initial values. The surface should be leveled no later than 24 hours after priming.
ATTENTION! Parquet glued to the base and underfloor heating: Remove all cement adhesive from the surface of the concrete floor by grinding/milling, as well as other factors deteriorating the base, such as, for example, old adhesive residues. Priming is carried out only on areas that need to be leveled (bases for block parquet cannot be primed and leveled). If the floor is made of building slab, then the parquet is glued directly to the slab (without priming and leveling).
The data presented in this technical specification is based on our tests and practical experience. The presented technical indicators were determined under standard conditions. If local conditions differ, this will affect the achieved performance and performance of the product. The method of carrying out work also significantly affects the final result. We are responsible for ensuring product quality in accordance with our Quality Management System. We have no control over whether the work is carried out properly or the prevailing conditions and therefore cannot be held responsible for the final result. Correct use of the product requires familiarization with its instructions for use and instructions for use (if any).
TOP 7 manufacturers
The quality of preparation of the primer mixture largely depends on the manufacturing company. Products are produced under well-known trademarks, the composition of which fully corresponds to the declared parameters. TOP positions are traditionally occupied by primer mixtures produced under the following trademarks:
- "Bolars." The domestic manufacturer offers dry construction mixtures produced using high-tech equipment. To ensure the declared characteristics, it provides quality control at all stages of production. The finished primer fully complies with the requirements of safety standards. The company offers compositions for glass, grout joints, and unglazed tiles. The result is a shiny coating that is highly resistant to moisture. The price of 10 kg starts from 330 rubles. For a container of 1 kg you will have to pay at least 76 rubles;
- "Knauf". The company offers high-quality products for processing wood and porous surfaces. The catalog presents products for processing various substrates. The cost of 10 liters starts from 250 rubles, depending on the characteristics;
- Vetonit. The manufacturing company provides a guarantee for all products. Primers have good penetrating ability. Provides high adhesion characteristics of the base. Increases the biological and water resistance of the base. For a container of 10 kg you will have to pay at least 1000 rubles;
- "Lakra." In terms of their characteristics, alkyd mixtures are similar to products from German manufacturers. Used to prepare the base for subsequent finishing. The company also offers a black primer mixture for metal surfaces that improves the adhesive properties of the substrate and protects it from moisture. Deep penetration primers are in demand. For a container with a volume of 10 liters you will have to pay at least 800 rubles;
- "Tikkurila". Traditionally occupies a leading position in the market. The catalog contains compositions for various bases. If the compositions are for priming wood, MDF, chipboard, fiberboard, plastic, metal, glass, tiles. The cost of a 0.9 liter container starts at 174 rubles;
- Dulux. The British manufacturer's primer is designed specifically for treating walls exposed to high humidity. Allows application at low temperatures and high humidity levels. This composition prevents wood from rotting and prevents metal corrosion. The price of a 2.5 liter container starts at 400 rubles;
- "Tex." Primer mixtures are of high quality. Allows to form a high-quality coating. They do not create problems during the application process. Mainly aimed at amateurs. Professionals most often opt for other trademarks. For a container with a volume of 0.9 liters you will have to pay 49 rubles.
Application area
As I said above, this is a quick-drying primer for metal. In particular, it is widely used in the following industries:
- Mechanical engineering;
- Construction (used for processing all kinds of metal structures);
- Shipbuilding;
- Production of railway and agricultural machinery, etc.
To summarize all of the above, this material can be used whenever metal painting is required.
In the photo - high-quality quick-drying primer from the Finnish manufacturer Tikkurila
Step-by-step application instructions
The procedure for priming walls depends on the type of base. It is worth getting acquainted with the technology of performing the work in order to avoid mistakes and form a high-quality foundation.
Concrete walls, brick wall
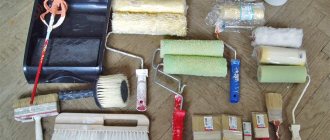
Work begins with preparing the base and tools. To work you will need:
- Roller with large pile;
- Brush;
- Bucket.
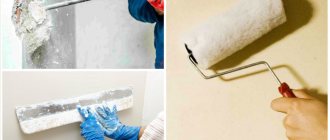
Before applying the primer, all topcoats and basecoats are removed from the surface. The wall should be completely cleaned of any remaining wallpaper, paint, or plaster. You should also remove the protective glossy layer. After that:
- Using a brush, all hard-to-reach places are treated. All corners and various protrusions on the base should be carefully processed;
- Using a roller, the entire wall is processed. The entire surface should be thoroughly treated. The roller should move from bottom to top. Otherwise, a large amount of product will end up on the floor. If any amount of the composition accidentally ends up on the floor surface, it should be wiped off immediately.
We invite you to watch a video that describes in detail how to prime a concrete wall:
Drywall
The procedure for priming plasterboard walls is slightly different. The work is performed in the following sequence:
- All horizontal walls and drywall ends adjacent to the wall are prepared. To do this, place the knife at an angle of 45 degrees and chamfer both sheets adjacent to the joint;
- The prepared seams and locations of fasteners are carefully treated with a primer. The composition is also applied to all defects present on the surface. After this, the remaining area is processed.
Watch the video to understand the intricacies of the process in detail:
Plaster on the walls
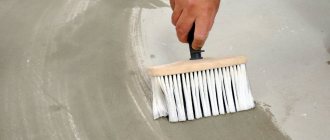
Taking into account the specifics and characteristics of the formed coating, the plaster is first prepared for subsequent processing. To do this, remove any existing irregularities with a spatula. It is very important that there are no burrs or other defects on its surface. Then the surface is thoroughly rubbed. Only after this the plastered base is thoroughly primed. It is advisable to use a brush for this purpose.
How to prepare walls for wallpapering
When you decide to replace old wallpaper with new ones, you should not ignore the correct technology for this process. Even if the walls were perfectly prepared during the previous renovation, during operation and when removing the old coating they could lose some of their properties.
The primer is also included in this process, and it is applied twice. Let's describe it in detail.
Step 1.
Removing old wallpaper. To make it easier to remove them from the walls, you need to use special solutions. They evenly moisten the surface, allow the wallpaper to soak, and peel the whole canvases off the walls, preserving the integrity of the finish as much as possible.
Removing old wallpaper
Step 2.
Primer. The product is poured into a special container, a roller is moistened in it and rolled over the walls, leaving no gaps.
How to dilute primer for walls?
Primer in a tray
Applying primer to the wall
Step 3.
Plaster defects. After the primer has dried, all potholes, cracks and uneven walls are filled with plaster or starting putty solution. He is also allowed to dry.
Plaster defects
Step 4.
Continuous alignment. It is applied in a thin layer over the entire surface using finishing putty.
Methods for applying finishing putty
Prices for popular types of putty
Putties
Step 5.
Primer for wallpaper. The putty surface does not have sufficient strength - this can be confirmed by running your hand over the dry wall. You can strengthen it with wallpaper glue diluted with water. But not in the concentration required for wallpapering, but much thinner.
Primer for wallpaper
Step 6.
Drying. Before starting the final finishing, you need to wait 3-4 hours.
Common mistakes and how to avoid them
Surface priming must be carried out according to certain rules. Violation of technology leads to deterioration of the characteristics of the formed coating. To prevent this, it’s worth familiarizing yourself with the most common mistakes that experts and beginners often make. These include:
- Wrong choice of composition. It is very important that the primer used matches the material of the walls and the subsequent finishing. It is not permissible to use dispersion or water-based paint as a primer. Do not apply alkyd composition to drywall or acrylic composition to metal.
- Savings on primer composition. Do not add more water to the composition than the manufacturer recommends. It is also unacceptable to reduce the number of layers. If you apply only one coat, there is a high chance of missing base and deteriorating the quality of the primer coat.
- Deviation from the manufacturer’s recommendations regarding the drying time of the applied layer. Each subsequent one should not be applied until the previous one has completely dried. The time specified by the manufacturer is required for the binder to evaporate, leaving only soil particles on the surface.
Thus, correctly selected primer and compliance with the manufacturer’s recommendations for its application allows you to properly prepare the base. Knowing the technology, you can form the coating yourself.
Varieties of soil compositions for non-absorbent surfaces
Non-absorbent surfaces include glass, metal, plastics and other glossy, dense surfaces. In this case, you should use adhesive liquid and mixtures that contain quartz sand. The main purpose of such primers is to make the surface rough and ensure easy application of subsequent layers. An additional advantage is that mixtures for non-absorbent bases prevent the growth of fungi and mold growth. This construction liquid is sold in metal cans and has a thick consistency.
Before application, the mixture must be thoroughly stirred and a hand brush should be selected as a tool. This mixture should be applied evenly, avoiding sagging and layering. After treating walls or floors, it is advisable to rinse all tools well in order to be able to use them in the future.