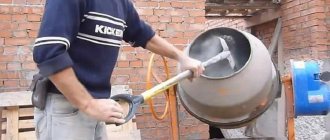
Preparing a part for body repair is one of the most critical processes. It is grinding that largely influences how well the vehicle will be painted. In this regard, many car enthusiasts have a question about how to properly sand the putty on a car. This is exactly what we will talk about in this article.
How to putty a car correctly?
Faced with this problem, I collected the material and decided to post the information, I think it will be useful to someone!
So where should you start? Let's take the front wing as an example.
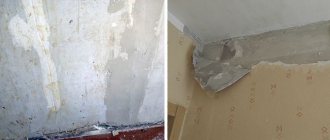
To determine the nature of the damage and draw up the correct work plan, the suspected element should be washed properly. Moreover, after water, you should wipe it with White Spirit and solvent. This action will give us a complete picture of the damage. Please note that a minor fender defect (scratches or small dents) may also result in paint chips and other minor defects. And, if you are destined to paint it, then it must be done with all dignity, regardless of the different faces.
So, we have found all the defects - what next? And then we come to the conclusion that we will have to prime the entire element. Hence, the conclusion is that we remove all defects from the surface. Let's imagine that we have a long scratch on the surface of the wing, forming a shallow dent, and several small scratches and chips. What to do? – The eternal question of the Russian intelligentsia. 1. Matte the entire surface of the wing with P220-240 abrasive. You can do it with an orbital sander, but if you can’t get anywhere, do it manually. On a matted surface, all dents and small defects seem to appear and become better visible. 2. A scratch with a dent must be sanded so that there are no sharp edges of chipped paint (If there is rust, we remove it to zero). Don't be afraid to wipe out too much. We sand the scratch and its edges with P120 abrasive (sandpaper). This is a fairly large abrasive grain, and with it better adhesion of the putty to the surface is achieved. 3. Next, sand down small scratches and chips. We expand them along the plane. To avoid sharp corners and peeling from the surface. 4. Now, it's time to putty.
If you don’t know yet, then great news for you – putty, it’s not alone! It has many varieties. Let's start in order:
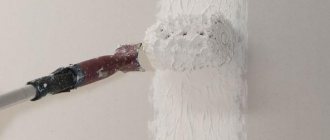
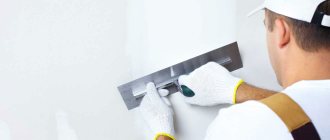
Having cleaned the repair surface with P120 abrasive, we proceed to puttying. Don’t forget to degrease the repair surface first. If there are traces of rust on the repair area, they should be treated with a “rust converter” according to the instructions on the bottle.
Mix the coarse putty with the hardener - mix thoroughly so that there are no pink streaks (usually the pink color is the hardener) and fill the repair area evenly with a spatula with light pressure. Do not try to do this procedure at once. They applied it and waited 10-15 minutes for the putty to set. Usually, 3-4 batches and lubrications are required to achieve complete filling of the defective area.
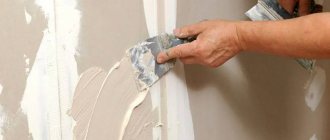
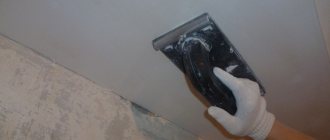
The next stage is sanding. We sand with sandpaper with abrasive grain P120. Carefully, trying not to climb beyond the repair area. (Otherwise there will be extra scratches - do you need it?)
To achieve safety, cover the repair area with masking tape, preferably in two or three layers. For better control, before sanding, I strongly recommend wiping the surface to be treated (dried putty) with black developing powder. It will be easier to control defects (where putties still need to be applied). Grinding abrasives.
1. Circular, grit P40, 60, 80, 120, 180, 220, 240, 320, 500, 600, 800, 1000. Used for orbital electric or pneumatic sanders with a soft or hard backing with Velcro.
When sanding the part, pay attention to abrasions. If metal begins to protrude, then there is no point in rubbing further - you need to add putties (to fill the gap formed between the rubbed areas).
Remember! Putty is much softer than paint (varnish), and even more so metal, so it can be wiped off with sandpaper faster and easier. Therefore, if metal begins to appear on the surface being treated, stop grinding and add another layer of putty.
Having sanded the rough putty and achieved the required result (as they say, “almost done”), you should apply the finishing putty to all suspicious areas being processed (as well as to all places marked with developing powder) and sand it on a plane with P220-240 abrasive. By doing this, you will cut (grind) the larger scratch caused by preliminary grinding with abrasive with P120 grain, and also smoothly sand all the transitions.
Now! When it seems to us that everything is fine, we apply the finishing putty (Nitrosoft in the photo) to the entire repair area with a rubber spatula (preferably white or transparent silicone - it does not leave traces of black rubber). It dries quickly and fills all small pores on the treated surface, punctures, cavities and microcracks formed when the rough and finishing putty dries. But, this is not a “panacea”; do not try to cover up the irregularities that you can feel with your hand! There is a finishing line for this.
Note: Avoid solvents! This means that after using this putty, it is prohibited to use solvents for degreasing!
We degrease the surface under the primer with Anti-Silicon. As a result, we must (and this is our main task) obtain an ideal surface. The next stage is priming and painting.
When writing the article, photographs of materials, “MIROX” and “BODY” were used. This in no way means that there are no other manufacturers and is in no way an advertisement for these companies. It's up to you to choose the line of manufacturers. I only used what came to hand. Thanks to all! Zhmpfinger!))
Source
Can putty be applied to paint?
It is not recommended to apply putty to sanded paint. According to technology, putty must be applied to bare metal. It is allowed to apply putty to the old paintwork, but it must be factory-made. That is, the surface should not be repainted. Otherwise, it will disrupt the technology and quality of repairs.
What can happen?
What can happen if you apply putty to a repainted surface? Here we can give an example of a house on a foundation. A house is only as strong and good as its foundation. If the technology is violated, adhesion problems may arise.
Experts from 3M believe that putty should not be applied to sanded paint. This can cause contouring and further development of repair marks (subsidence). The putty's chemicals may react with the paint layers. This may cause the putty to lift up along with the paint.
What are the benefits of applying putty to paint?
When applying putty over factory paint, you get an advantage in speed of repair. There is no need to remove layers of paint and primer. This speeds up repairs.
Another benefit is that the zinc coating, if present, is not damaged. Also, no moisture gets on the bare metal. Factory coating is good protection against corrosion. Conventional filling primer does not provide anti-corrosion protection.
If applied to factory paint, you need to carefully prepare it by sanding it with p80 - p180 abrasive.
The advantage of applying putty to bare metal is that it ensures guaranteed adhesion to the surface.
When applying putty to paint, there is no guarantee that further adhesion problems will not occur.
Sanding putty
The main task when sanding putty is to level the surface and create marks of a certain shape and size on it. The subsequent applied primer should fill each groove without leaving any voids.
The cross section of the mark should be close to triangular and can be achieved using eccentric (rotary-vibrating) grinders with an eccentric stroke of 5-8 mm or with hand tools.
Surface grinders are suitable for processing on large surfaces. They quickly give the surface the required profile when processing the first rough layers, and are good for reducing risk and “soft” processing before priming.
The main work of shaping and leveling is done using hand tools, which make it possible to feel the surface and understand where and how much force needs to be applied to level it. These sanding blocks differ in size and characteristics. In another way they are called grinders, graters, blocks and even planes)
Let me remind you once again that when sanding all types of putties, you cannot use water. All work is done dry only. Putty is a very hygroscopic product and absorbs moisture like alcoholic vodka. And then the moisture cannot be removed even with high-temperature drying. And then there are unpleasant consequences. Moisture reaching the metal will accelerate its corrosion. Also, evaporation from the putty can cause subsequent coatings to swell, especially during hot drying, and as a result, the paintwork will become covered with a “rash.” Hello defect)
You can start sanding 20-30 minutes after application, since the putty tends to “petrify” and sanding it later is much more difficult. This is especially true for putty with fiberglass. Well, you can’t leave it for a long time, because, as I already said, it is very hygroscopic and takes moisture from the environment. Therefore, it is advisable to prime it immediately after sanding.
When sanding, do not forget the “Step 100” rule. For processing putty, I would recommend using KOVAX abrasives, MAXCUT, MAXFILM and SUPERASSILEX series.
Ideally, the initial steps are P80-P180-P280. If you jump from P80 directly to P280, then the risk from P80 will not be completely polished, but only its tops will be cut off. Moreover, during the grinding process, the marks will become clogged with sanding dust and subsequently the paint and varnish material will sink into these recesses and sanding marks will appear on the paintwork. Hello defect)
“Step 100” is only applicable for coarse and medium abrasives up to P600 inclusive. When grinding with P600 and higher abrasives, the pitch increases significantly.
When using a grinder, it is better to use this series of gradations P80-P150-P240-P320-P500.
When the putty polymerizes, polyester resin appears on the surface, forming a crust that quickly clogs even the best abrasive. Therefore, before starting grinding, manually, with any used abrasive material, it is necessary to remove this crust. Then further sanding will take place without problems.
Surface treatment should begin with P80-P120, which will ensure uniform cutting of the putty and the ability to give the required surface profile. When sanding by hand, since it is always somewhat rougher than mechanical sanding, just try to take the abrasive material one grade higher than for machine sanding. If for a P80 machine - manually P100, for a P150 machine - manually P180, for a P220 machine - manually P240.
When processing coarse putty-filler, for continuous puttying, use a plane with P80 abrasive. Remember, after using a rough abrasive, you definitely need to regrind it.
To identify defects, you need to apply a development coating before sanding, which will greatly simplify the identification of flaws. Developers can be either dry, which are applied using applicators, or aerosol in cans.
If, after sanding, it is necessary to apply another layer of putty, the rough mark should be removed so that subsidence does not occur. To reduce the risk, use P150-P180.
Before each subsequent filling, the surface must be blown with air and degreased. Simply wipe the repair area lightly with a cloth dampened with degreaser and then immediately dry. There is no need to fill the surface with a degreaser; remember that the putty is hygroscopic.
After we have leveled the surface with a coarse abrasive material, we proceed to reduce the risk for priming. The putty area is treated with P150-P180. If you reduce the risk with a grinder, then you need to use a hard sole.
Well, the surface is almost ready, all that remains is to “break” the risk from P150-P180 with P240 abrasive. Now we place a soft plate on the sander so that it follows the general contour of the surface, knocking down the line, but not cutting off the leveled putty.
We treat the border zone (approximately 15-20 cm around the repair site) with P320. This is necessary for soil adhesion. The putty should not be treated.
Then we blow it again with compressed air and degrease it.
Now the surface is ready for priming.
Don't forget to check the putty surface - it should be smooth and even.
Source
How to use: instructions for using putties
The putty is applied only to a sanded and degreased area of the body. Sandpaper of P80-P120 fraction is usually used for cleaning. If a two-component polyester paste is used, it is better to calculate in advance the volume of mixture required for a certain area, since after mixing the components they must be used in only 1.5-4 minutes.
The moment of connecting the putty with the hardener is also important. It is very important to maintain the correct proportion (read on the packaging). As a rule, the activator is taken about 2-3% of the weight of the putty. If there is less hardener, the paste will not “set” normally; if more, the opposite effect is observed and there is a risk of cracking of the layer.
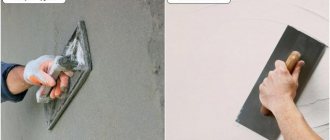
Mix the components with a spatula. In this case, the reinforcing putty with fiberglass is first mixed in a circular motion, then by pulling without strong pressure. Other putties are mixed using a regular broach. When applying the paste to the body, the spatula should be held at an angle of 30-60º. If the treatment area is large, it is recommended to use at least two spatulas of different sizes: one tool applies the mixture, the second one smoothes it out.
For polyester putties at a temperature of 20-25ºC, complete polymerization (hardening) occurs after 15-20 minutes from the moment of application. This indicator depends on the thickness of the applied layer.
Each layer is sanded and degreased again before applying the next. Everything is done dry - it is forbidden to use water. The paste, which begins to “set” before application, cannot be diluted with any liquids (it is no longer suitable). After the finishing layer has hardened, the area is sanded and can be subsequently primed, painted and varnished.
What kind of sandpaper should I use to sand putty on a car?
Preparing a part for body repair is one of the most critical processes. It is grinding that largely influences how well the vehicle will be painted. In this regard, many car enthusiasts have a question about how to properly sand the putty on a car. This is exactly what we will talk about in this article.
Putty rules:
- The putty should be applied to a cleaned and degreased surface.
- It is necessary to dose the required amount of putty and hardener for a specific putty. This skill is developed through experience. Another article about applying putty to cars shows how to properly dose putty with hardener. You can also use electronic scales. Excessive amount of hardener does not speed up the curing reaction, but may cause a defect in the future.
- Use a clean spatula. Do not use the same spatula that was used to mix the putty with the hardener. Particles of putty not mixed with the hardener on it can cause defects to appear on the repair surface when painting.
- If you need to fill a large defect with putty, then instead of one thick one it is better to apply several thin layers. The thick layer is not dense and contains many air bubbles.
- In the interval from 15 minutes to 1 hour, you can apply the next layer without preliminary sanding.
- When filling a large area, you need to apply the putty with a medium spatula and level it with a wide, large spatula.
Process Features
Before deciding which sandpaper to use to clean the putty on a car, you should understand that sanding is a rather labor-intensive task; during the work, it is important to do everything so that only a thin layer of putty remains, so leveling will have to be done several times in a row. As a result of cleaning, almost 90% of the putty will be eliminated.
It is important to do everything very carefully and seriously. You may not enjoy sanding, but without the proper diligence, quality body work will not be achieved. Before you begin sanding, prepare all the necessary materials and room.
Video review of how to properly sand putty on a car:
Recommendations:
- Mix the putty and hardener thoroughly. A hardener that does not react with the putty will subsequently appear through the coating layers in the form of spots.
- In hot weather, the amount of hardener that needs to be added to the putty is approximately halved.
- In order to dilute the thick putty, you can add a little polymer from the fiberglass repair kit to it.
- The jar of putty must be tightly closed during storage to prevent the putty from drying out, otherwise it will lose its elasticity.
- The roof, hood, and doors are body elements that are affected by increased vibration. On these elements you need to use elastic putty to avoid cracks. Putty with aluminum powder and putty with carbon fiber are suitable.
Preparatory work
If you are interested in what kind of sandpaper to sand putty on a car, then, first, think about where you will perform all the necessary work. It is important to note here that such activities should be carried out in a well-ventilated area, as many small dust particles will get into the air.
Even if you think there is no dust, this is not true. Dirt will be especially noticeable at night when the lights are on.
To get rid of the bulk of dust, it is recommended to periodically vacuum during work. It is also worth considering personal protective equipment. First of all, we are talking about a respirator and gloves.
Applying putty to the repair area
You have 5 to 10 minutes (depending on the type of putty and ambient temperature) to apply the putty before it begins to harden. As soon as it begins to harden, immediately stop puttingty, as you will no longer be able to apply it normally.
The putty is applied in two stages:
- The unevenness itself is filled. Use a spatula to press the putty well. This will reduce further drawdown. Next, we wait for the putty to dry and sand it. After sanding, remaining irregularities are revealed.
- Apply a second layer of putty to the entire repair area.
How to sand a car before painting
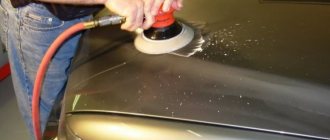
So, the preparatory work has been completed, now you should begin choosing materials for grinding. As a rule, silicon carbide or aluminum oxide plays the role of an abrasive for body work.
The question of which sandpaper to rub putty on a car consists, first of all, of choosing materials with a certain concentration of particles . The more there are, the faster the grinding procedure will occur. On the other hand, this same parameter also affects the uniformity of scratches that occur during work.
Pay attention to the number that refers to a specific material. As it decreases, the size of the abrasive increases.
What types of automotive putty are there and what does it contain?
In the life of an ordinary motorist, sooner or later a moment arises when one has to get acquainted with body repair work for the first time. And the first thing that requires a conscious purchase in this case is car putty. Since there are many products in this category on the market that differ markedly in composition and characteristics, it makes sense to first thoroughly understand this issue.
The quality of car body repair work also depends on the quality of automotive putty.
Sanding materials with mesh backing
At the same time, using abrasive paper is not the only option for how to properly sand putty on a car. In addition, there are also special mesh devices. They are made from high-strength polyamide or nylon material, which is joined with cross fibers. Abrasive elements (aluminum oxide) are attached to them.
Such materials are excellent for any type of sanding. They are characterized by increased stability, and even if water is used, the devices will not fly off during operation.
Although there is less abrasive material on the meshes, it is used with maximum efficiency. Dust does not stick to the surface of the material. Thanks to this, it can be easily removed with a vacuum cleaner.
Among the advantages of the sanding mesh are:
A few additional tips
Finally, I would like to say a few more tips that will help you when sanding before painting:
- The primer is sanded dry because it is porous and will absorb water. Paint and hard-to-reach places are sanded with water, but then the surface should be dried very thoroughly (alternatively, infrared equipment should be used);
- When processing paintwork, it is better to turn on medium speed. A soft backing will also come in handy to help make sanding more even;
- For hard-to-reach places and edges, you can use a special Scotch-Brite abrasive. Along with it, you should resort to matting paste. These elements do not remove defects, but only increase the dullness of the surface;
- before starting work, it is important to clean the body from dust and dirt;
- Don't forget to prepare a sanding block. Its role can be played by a block of rubber, as well as a foam squeegee. If you hold the sandpaper in your hands, the marks will be uneven;
- When using water, do not resort to soap. Otherwise, it may be absorbed into the soil, causing the subsequent layer of paint to be uneven.
Most popular sizes
When answering how to clean putty on a machine, you should also worry about choosing an abrasive with suitable parameters. Among the most common options it is worth highlighting:
Applying automotive putty to the ground
The only primer on which it is recommended to apply putty is epoxy. It is recommended to do this if the car has been standing for a long time, stripped to bare metal. This is usually done during restoration work. Even indoors, with prolonged interaction with air, “bare” metal oxidizes. Epoxy primer provides good anti-corrosion protection.
If the repair is carried out in a short time, then it is not necessary to apply epoxy primer. It is necessary, as described above, to prepare the damaged surface by stripping it down to bare metal, degreasing and filling.
Features of manual grinding
This solution is suitable in the absence of special equipment. In addition, hand sanding is necessary when working in hard-to-reach areas. In the course of such activities, a number of features should be adhered to:
What does putty consist of, types
There are several types of putties on the modern market. Each of them meets a number of criteria and is used in individual cases.
Firstly , it must have high-quality connecting characteristics with a properly processed area.
Secondly , the solution must be spread evenly on the surface of the machine.
Thirdly , the putty must have excellent shrinkage, and this is possible with high-quality material.
In this procedure, not only the material is important, but also the high-quality processing of the body. The mixture you choose must be compatible with the future paintwork.
There are these types of putties:
- Rough putties are applied only if serious defects form on the body - sweeps, cracks. Such material often contains some kind of filler, for example, shavings.
- This material has a number of features - easy grinding, can withstand high temperatures, and is very elastic, which allows you to level large surfaces.
- Fiberglass putties are very durable. When applied, the solution transforms into a layer of hard fiberglass, which is easily sanded. This material is ideal for covering holes caused by corrosion.
- Thin putties are used to repair minor damage, such as scratches. The final stage of puttying is carried out with this material. These include fine and nitro putties, which are then easily processed.
- Liquid materials are applied with a device - a gun, but this results in the most even layer possible. It only takes a few hours for it to dry.
- Universal putty is a replacement for the above options; you definitely can’t go wrong with it. At the same time, it is durable, has a uniform structure and is easy to process.
Owners of old cars often use thermoplastic acrylic varnish; it is not compatible with all putties; for this you need to read the instructions.
Some manufacturers are trying to produce paints and putties that are compatible with each other. Be sure to take into account the instructions, try to find out these acts in advance, which will save time and money.
The putty also varies depending on the type of base:
Nitrocellulose putties , where most are dry substances, are therefore used to eliminate minor defects. Such a base can dry in a few hours at room temperature. Since the composition contains solvents, they are toxic. Polyester putties are the best option for eliminating defects in the car body. They are easily leveled and can dry within an hour only at room temperature.
Acrylic putties are created taking into account the latest technologies, therefore they are environmentally friendly. There are no solvents in the content, the material dries instantly. Used to eliminate deep pores.
It is important to use and combine mixtures correctly. For example, if you combine them with a hardener, the coating will be damaged and work will have to start from the very beginning.
Therefore, it is difficult to say exactly which putty is best suited; all circumstances must be taken into account. How the putty dries directly depends on its composition.
For example, if you add a hardener to a two-component putty, it will dry faster - in half an hour, and the work will have to be done faster.
Epoxy putties will dry within 24 hours at room temperature.
To reduce drying time, many people use hot drying. But this procedure must be carried out carefully, maintaining the putty coating at room temperature.
To carry out all the work, you must stock up on a mask, goggles, and special clothing. This material is safe, only dust that can get into the lungs during grinding is harmful, so it’s worth considering protective equipment.
How to sand putty on a car using a sander
The use of special equipment will be especially relevant in the initial stages, when you need to remove large balls of putty. Finishing work is done by hand. At the same time, when working with equipment, you should adhere to the following rules:
Finishing layer of automotive putty
The finishing coat is applied to the entire repair area. This is a thin layer of putty. You can add some polymer from a fiberglass repair kit to the putty. Approximately the same amount is added as the hardener from the tube. Next, add putty hardener and stir. The resulting putty is easily applied in a thin layer and is well leveled. When curing, a slightly sticky layer may form on top of the putty surface. You can remove it with a solvent and start sanding.
What is the result?
So, the grinding process is the most important task during painting work. If everything is done correctly, the paintwork will adhere well and retain its attractive appearance.
We hope our set of rules will help you choose the appropriate abrasive, as well as carry out high-quality sanding of the putty before applying paint to your vehicle.
Video advice on what sandpaper to use to sand putty on a car:
Source
How long does it take for car putty with hardener to dry?
The drying speed of automotive putty is influenced by many factors:
- brand of putty;
- amount of hardener;
- ambient temperature;
- air humidity;
- etc.
On average, one layer of putty dries for about 20 minutes until it gains strength sufficient for abrasive processing. However, when applying several layers, the drying time can be reduced. The final strength is gained in 2-6 hours.
You can also speed up the polymerization process of the putty with a hairdryer or incandescent lamp. But there is one caveat here: it is categorically impossible to dry the first layer artificially, as this can subsequently lead to its cracking and peeling. And subsequent layers should sit for at least 10 minutes after application without external influences. Only after the initial polymerization has taken place is the putty allowed to dry a little.
Sanding car putty with your own hands from A to Z
An article about grinding and puttying different planes of car body parts...
Welcome, car enthusiast to the website RtiIvaz.ru!
Today’s video article by Vlad ShchCh continues the topic of body repair - “Painting a car for a complete repaint from A to Z.” Today the lesson is devoted to the selection of necessary accessories (materials and tools) for working with putty surfaces. Let's find out what types of sandpaper and bars of different shapes are needed for sanding car putty and how to combine it in practice.
It will also be shown how to work with a block on different planes, replacing the sandpaper of the required size.
HOW TO CORRECTLY PUTTY A CAR?
HOW TO CORRECTLY PUTTY A CAR?
Putty is a two-component product used to fill small imperfections in the body of a car. When the two components are mixed, a heat-generating reaction occurs that changes the chemical properties of the putty and it hardens.
Puttying is used to level out residual surface irregularities of the repaired body part.
Before starting puttying, the repair area must be cleaned down to “bare” metal with P80 abrasive. To do this, you can use an eccentric sander with a suitable grinding wheel. Next, you need to smooth out the sanding marks so that before puttying the surface has a scratch from the P120 abrasive.
To stir the putty, use a non-porous surface and a plastic or metal spatula. Do not use cardboard as a surface to stir putty. The cardboard will absorb some of the putty components. You can use plastic, metal, glass and other non-porous surfaces.
The putty and hardener have different colors. You need to mix the putty with the hardener until you get one color. It is better to mix it by stretching it with a spatula in one direction. If you stir in a circular motion, bubbles may form, which will then appear as defects on the putty surface.
Sanding putty on the plane of the wing arch
So, let's start working on putty with our own hands. First of all, we will start with the wing arch and immediately figure out what we need for work.
This is a rigid block of small size so that its plane covers the working area of the putty. The work may require other bars, this will be discussed during the video.
We will also need several types of sandpaper to sand the putty. First of all, we will use P80 sandpaper with a coarser grain, which removes putty very well. It is needed to work with the top layer and we will work with it without strong pressure in order to knock down the putty a little.
Sandpaper P80 - we need it for sanding the first layers of putty and for the initial leveling of the material. Next, the sandpaper number used for sanding the putty is P120, 150, 180. 220, etc. — further grinding and preparation for primer, each subsequent number removes a smaller layer of material and gives less risk.
After sandpaper P80 we will use number P120 or P150. Generally speaking, it is recommended to work with this sandpaper, since P80 is quite difficult to work with, because it is very rough and removes a fairly large layer of putty. With large grains, you can overdo it and reach the metal, which will require re-application of putty.
In addition, you need to remember that every paper leaves a risk, or in simple words, it’s just a scratch. And this risk, a scratch, must be removed with subsequent finer-grain sandpaper.
The 100 micron rule means that each subsequent number of sandpaper differs by no more than 100 gradation units, but it is better for us to take a difference of 50 units or less. For example, the range of sandpaper numbers for sanding putty is P40/60/80/120/150/180/220/280/320.
Because the next sandpaper should erase the previous mark. You must always remember that finer sandpaper will come next and you don’t need to remove a lot of putty! Basically, you just need to reduce the risk and leave some margin for working with small grains.
On average, 2-3 types of sandpaper are used for work...
How to properly sand planes and how to avoid possible mistakes was discussed in detail in the previous video (part #8). If anyone hasn’t watched it, I advise you to read it in order to better understand the next stages of work.
This video (part #9) will also talk about this, but not in such detail as to avoid repetition. Author of the video: Vlad ShchCh:
So, we've sorted out the theory and now let's get down to practice...
We take a block with sandpaper and begin to process the surfaces. Let's start working from the gas tank hatch, where there is a layer of putty applied on a flat surface. Master Vlad polishes the surface using the so-called herringbone pattern, without putting much effort.
We do not sand this area completely with our own hands; in the video we can see that a small edge remains at the edge. We leave it so that we can then smooth it out with the next number of sandpaper.
Next, we move on to the arch itself, not forgetting that each plane is interconnected with another plane. You need to be careful when processing each and correctly display all planes.
You should not press the block very hard, since a small layer of putty is applied to the end of the arch and you can easily reach the metal. Then we move on to the next plane, also without making much effort with our hands.
Always pay more attention to the radius of the arch, since the appearance of the entire arch will depend on its type. In this case, the edge itself can be used to display the plane of the arch radius. At the same time, when processing the arch along the radius, try not to “climb” onto the upper plane, as visible scratches will remain on it.
Constantly control your work with your hand, which helps to “find” existing irregularities.
When processing the upper plane, the width of the block does not fit everywhere on the surface and in these places it is necessary to work only with the end of the block. Since there are still small irregularities here, you need to take sandpaper for sanding the P150 putty in order to finally process the plane.
The video shows (see above) that there is a edging above this plane, and you need to work carefully so as not to damage it.
Sanding the putty of the wing “boot” plane
Next, we will continue polishing the wing on the “boot”, the master clearly shows which part of the wing bears this name - this is the lower part of the wing, turning into the threshold.
This part is quite complex, since it also has a radius part, a plane and transitional hard-to-reach places. Therefore, to process this area we will need another block.
The master showed a new block in the video...
The block has a different shape and, most importantly, it is quite soft and has radius curves on it, which is necessary for processing in such difficult places on the wing. Thanks to this shape of the bar, it is possible to process rounded parts of the metal.
We initially “stick” P80 sandpaper onto the block itself to remove the rough parts of the putty and get to work. Do not forget that you need to sand with some reserve for processing with the next number of “skins”.
We sand the straight plane in a herringbone pattern, since if you grind in a straight line, you can leave a sample on the putty.
In our case, there is no need to remove a lot of putty, since there are still places where it will still need to be applied additionally. If anyone watched the previous videos, they will remember that in this place there was a seam from welding work and the place was quite difficult.
The video shows that small “bumps” appeared along the edges of the plane, which means that a hole has formed in the center. Therefore, here you will need to apply a small additional layer of putty.
While we are finishing the rest of the arch, we work very carefully, without making much effort, especially at the ends.
Also, in places where metal protrudes, this “shows” that there is a small hole and a layer of putty will also need to be applied. Therefore, in such places there is no point in further sanding, since further work will be needed by applying an additional layer of putty.
It should also be noted that when working with adjacent planes that border, and in our case, this is a door, you must always check the transition of the planes. This is done to ensure that everything is smooth in these places and there are no holes or bumps.
In this case, the arch can be finished; then it will be processed with P150 sandpaper to remove the risks from the previous P80 paper.
Grinding the putty on a flat plane of the wing
Next, we’ll deal with grinding the putty on more or less even planes. In our example, in this area the putty is green in color, since a material with fiberglass was used.
The use of this putty was described in the previous video (see part #8). There was a difficult area here with old putty applied by the previous master and traces of rust on the surface. All this was completely removed and stripped down to bare metal.
There is a small radius on the wing itself that needs to be taken into account when processing the putty.
Helpful advice. If you are working with any plane, for example, after an impact, and do not know exactly how it should look “live,” then you can always look at this plane on the other side of the car body. Since both planes are mirrored, it can be compared to make it clear how it will look after repair.
To sand the putty, again use a hard block and P80 sandpaper. In this case, the P80 is the best fit. This is due to the fact that the fiberglass putty itself has a rather rigid structure and, moreover, a rather thick layer is applied in this place.
Fiberglass putty is quite difficult to sand due to its rigid structure, for this reason it must be sanded with P80/P120 sandpaper. It is not recommended to work with smaller skins, as this will be more problematic and ineffective.
Anyway, in the future this area will need to be replastered with finishing putty.
As always, we work “herringbone” so as not to leave a sample on the processed plane. When working, always check the surface being treated with your hand to feel any flaws (pits, bumps), thereby controlling the work process.
If a bump or visible hole appears, the grinding process in this place must be stopped, as additional application of putty will be required.
It is worth mentioning that when grinding putty on any surfaces, they must be repeated with the movement of the block. When there is a radius, it needs to be ground, repeating the bending angle; if the plane is flat, it is leveled as a flat surface under a large block. This method is applicable to all planes, and is selected depending on the specific part that we want to get in the end.
So, the preliminary grinding of the part is completed and you can already see what the end result is. Now all the holes and existing bumps are clearly visible and it is immediately clear what to do to level this area.
In the area of the wing where the putty with fiberglass was applied, we will also apply a layer of fiberglass for now, as deep pores are still visible. We will cover the upper part of the wing, above the area with fiberglass, with universal putty. In this place, the unevenness is small and the universal putty will lay down in a thin layer, which is what we need to remove the slight waviness of the part.
Dilution of putty
To dilute the composition or connect the components, use a separate metal or plastic spatula. The required portion is applied to the surface, which is then mixed with a spatula until smooth. A pigment is introduced into the 2-component materials, which makes it possible to determine the readiness of the putty by the uniform shade of the mixture. Drying time should be taken into account; application is completed before polymerization begins. The drug remaining on the tray is cleaned off and disposed of.
Basic rules for breeding:
- the hardener must be introduced in accordance with the manufacturer's recommendations;
- Mechanization of the process of mixing components is not allowed;
- The components should be connected using chopping or pressing movements, eliminating air bubbles;
- you should not mix the entire package, since it will not be possible to produce a mass before it begins to harden;
- It is impossible to re-dilute automotive putty after polymerization.
What mistakes do beginners make?
To carry out the work correctly and achieve the desired result, you should strictly follow the instructions, choose the right material and listen to some recommendations.
Beginners often rush and manage to create problems that are then more difficult to fix than applying the coating.
It is important to remember and follow these recommendations:
- Carry out all work on a dry surface, because moisture forms corrosion, which corrodes the surface. During preparatory work, when you wash the car, let it dry thoroughly;
- You cannot put putty on a glossy surface; it will simply peel off. Degreasing, cleaning and only then applying a layer of putty.
- Two spatulas are used in the work - for applying large and small putty.
- Before each application, stir your mass, because thick components form at the bottom, and resin on top.
- draw up a work plan for yourself, describe at what stage and what materials will be used, then you will definitely not confuse anything.
- You should not add hardener to the jar of putty material; try to follow the proportion specified in the instructions;
- Many people mix more putty, and then are left without material, because they forget that the material hardens in 10 minutes. During this time it is impossible to process all areas, so separate the material.
- hold the spatula at a 60 degree angle.
- acid primer, primer-filler is used in areas with corrosion, which cannot simply be left without treatment.
- To avoid the appearance of pores when applying the material, the material should be thoroughly mixed.
Puttying a car is a very labor-intensive process, especially if you decide to do it yourself.
It is important to take this issue responsibly and carry out the work calmly and confidently; this is the only way to achieve a perfectly flat surface, onto which paint can then be applied.
How to prepare a surface for puttying
Decide on the area to be painted and begin cleaning that surface. It is best to use a solvent that will help degrease body parts.
Remember, putty does not overlap the gloss, which is why cleaning work is so important. Many people use an orbital sander for this.
If the places are hard to reach, then you will have to get to them on your own; stock up on sandpaper. If you see the appearance of rust, then these places must be coated with a converter.
Only after this can you begin to create the basis of the machine; its appearance will depend on this. Dilute the rough putty with solvent, because it must be applied first.
There is no need to immediately begin eliminating the defect; it is better to apply the putty in several layers, waiting until the first one dries. The work must be done quickly and confidently, because the material begins to harden within 5-10 minutes.
If your putty begins to harden and you don’t like something, you shouldn’t level it, the situation will only get worse. Stop work, wait until it dries, and use a tool to remove the remaining putty.
If you haven't added enough mixture, it simply won't set in the right places, which will have a bad effect on the next surface sanding procedure.
You must understand that the evenness of the paintwork directly depends on the puttying work done. The better the material is fixed to the body, the longer the subsequent layer applied to it, namely the paint, will last.
The thickness of the layer depends on the recommendations of the manufacturer; try to follow the instructions. Some recommend applying a layer of 1 mm, and others 3 mm or higher, it all depends on the composition and level of damage.
For example, when applying liquid putty, a layer of 100-500 microns is formed. This issue must be approached individually.
Surface preparation
First, you should level the dent, making sure that the surface does not bend outward. After this, the area that requires restoration must be cleaned of dirt and dust deposits. This can be done with plain water or with a special wipe, which also removes any remaining paint or polishing paste. To remove paint from a car body, you can use a sanding wheel.
The washed body is left for some time. To speed up the drying process of the surface, auto repair shops use blow guns; when doing DIY repairs, you can use a regular household hairdryer.
A clean and dry area should be wiped with a degreasing solvent. This will help the putty stick well to the surface and not fall off.
To be absolutely sure, you can wipe the area with solvent several times to completely remove the fat layer from the area being repaired.
The cleaned and degreased surface should be coated with anti-corrosion primer. It will protect the putty area from rust and corrosion.