Due to the fact that gypsum board sheets are inexpensive, the arrangement of ceiling structures has become increasingly popular. However, when it comes to finishing, many users do not know how to putty plasterboard on a ceiling for painting. In fact, puttingtying a plasterboard ceiling for painting is not a difficult task. It is enough to understand the technology, prepare the surface, materials, tools and you can get to work. By the way, all processes are done with your own hands, without the help of a partner - this is a big plus for home craftsmen.
Finishing a plasterboard ceiling for painting using the express method
Puttying for painting is an important stage of finishing work. There is not always a lot of time for this. Therefore, for those who are in a hurry and cannot pay enough attention, there is a method of express putty. It will be acceptable if in the future the ceiling will be painted with several layers of matte paint.
Quick putty steps:
- Prime the surface using a deep penetrating primer. It will strengthen the surface and provide more reliable adhesion of paint and putty.
- Using a narrow spatula, fill the seams and areas with recesses with gypsum putty. Level the surface using a wider spatula.
- Glue the corners with sickle tape.
- After the putty has dried, sand the seams using a paint mesh on the holder.
After completing the work, you need to remember that quick putty will not give a perfectly flat surface.
Thus, paint can be applied to the surface of a plasterboard ceiling, but it is worth considering that small imperfections may be visible, so paint should be chosen with a matte texture.
Which primer to buy for ceiling treatment
Priming is a mandatory process before puttying a plasterboard surface. We buy a solution in accordance with the material of the outer plane:
- Acrylic primer is a universal primer in finishing work, and it is recommended to use it for drywall (average drying time is 3 hours).
- A phenol-based solution is used exclusively for priming metal and wooden surfaces.
- Polystyrene belongs to a separate category of soil, used for plastered areas and wood.
- Perchlorovinyl mortar is suitable for treating external brick and cement walls.
In our case, we use an acrylic primer. Consumption: 1 liter per area of 15 square meters, if applied in two layers. Bottom line - we will need 2 liters before the puttying process and 3 liters before finishing the drywall for painting.
Stages of applying putty
The rough layer, that is, the first, is the most important. It is usually applied in a thick layer, which allows you to hide all the defects and imperfections of the plasterboard ceiling surface, as well as seal the seams that remain between the joints of the plasterboard sheets.
Rules for applying putty to the ceiling There are two types of putty for drywall. Some choose a ready-made mixture, while others prefer to mix the solution themselves. There is a difference in price for such mixtures. Of course, the ready-made solution is more expensive because it requires less time. There is also a nuance that the finished mixture must be used for two to three hours. As for dry putty, it can be used even after a month.
The first thing to do is combine the dry mixture with water. This is done quite simply. It is necessary to pour the amount of water written in the instructions into the tank. Then gradually add the mixture. These components are mixed with a mixer. Then you should wait approximately twenty to thirty minutes. After this, the putty process begins.
When the mixture is ready for use, you can begin preparing the coating for painting. The first step is to scoop up the solution with a spatula and apply a layer to the ceiling
When the putty dries a little, you need to use the same spatula or sandpaper to scrape off excess pieces from the surface. It is important to distribute the putty material over the surface of the spatula and carefully and smoothly apply it to the plasterboard sheets. The spatula with the mixture should be placed in the corner of the wall and pull the tool with pressure in your direction until all the putty is on the surface of the wall. The maximum thickness of the putty should be no more than 0.4 millimeters. It is necessary to immediately erase the streaks left from the corners of the spatula after applying adjacent layers.
This will create a perfectly even base for painting.
If this is the first time a person is involved in the process of preparing the ceiling surface for painting, he should proceed slowly. After just a few layers, everyone will easily get into the groove and be able to carry out the procedure like a real professional. Before you putty the plasterboard ceiling for painting and begin the final stage, you should purchase finishing putty. This material will help create a perfectly smooth base for painting.
Before painting, it is imperative to check the surface for various flaws and irregularities. If any are found, you can only apply an additional layer of putty in these places. To clearly see if there are any cracks or gaps, you can use a bright flashlight or any other lighting device.
It is much more difficult to putty the surface on a concrete ceiling. Indeed, in this case, the surface structure may have large differences. Puttying a plasterboard ceiling does not require special skills and abilities from the property owner. After all, the coating of plasterboard sheets itself is smooth, and putty is only required to hold the finishing material on the coating. The video describes in detail how to putty a plasterboard ceiling for painting.
How long should it dry before applying paint?
The drying time of the putty depends on several factors:
- From temperature conditions during work. Too high temperatures can cause rapid drying and cracking. And for setting at low temperatures, special components are added to the composition.
- From indoor humidity. If the indicator is more than 50%, the material will harden more slowly.
- From the thickness of the putty layer. The thicker it is, the longer the drying time.
On average, it takes about a week for the layer to completely harden. But the longer you wait before painting, the stronger the base will be. Final strength is achieved after 3-4 weeks.
There are no special secrets in the puttying process; even beginners in repair can do it. And if you watch a couple of master classes from professionals, you can avoid unnecessary mistakes.
How to properly putty a ceiling for painting
How to properly putty drywall for finishing
Starting and finishing putty, primer.
- Primer of drywall surface.
- Putty joints between sheets.
- Sticking reinforced tape or serpyanka tape to the joints.
- Puttying joints sealed with sickle tape and the rest of the surface.
- Grinding.
- Final primer.
Stage One: Initial Primer
A water-soluble primer mixture (except alkyd) is selected, which saturates the top layer of drywall without penetrating inside. It is evenly applied to the entire surface with a wide brush, and when dry, it forms a moisture-resistant film. This is done to increase the resistance of the cardboard top of the drywall to moisture. Otherwise, it may undergo deformation with the formation of irregularities on the surface.
Stage two: sealing the joints
First of all, let's say that the dry putty mixture is diluted in small portions, because it dries quickly. One serving is calculated for approximately half an hour of work. The dried mixture is not suitable for use. Next, carefully rub the prepared putty solution into the joints with a spatula.
We make sure that all voids are filled. It is important not to have cardboard peeling off in these places. If they appear, you need to carefully tear off the paper with your hands, and smooth out the resulting unevenness on the cardboard with sandpaper. Next, reinforced tape or serpyanka is glued to the seams and corners treated with putty, which, one might say, is recessed into the applied layer, preventing the possibility of cracking later.
It is glued in such a way that the seam is exactly in the middle of the tape. Next, putty solution is applied again and everything is well leveled. It should be said that preparing drywall for painting involves applying a thin layer of putty. And each subsequent layer is applied after the previous one has completely dried.
Apply as many layers as necessary to completely level the surface. It is very important to take the work responsibly at this stage: to complete it with high quality, because subsequently the flaws cannot be corrected, only to redo the entire work again.
Stage three: putty
After all the joints and holes in the places where the screws are attached are putty flush with the rest of the surface, putty is applied to the entire surface to be subsequently painted. This is necessary due to the fact that the density of the cardboard surface and the putty surface have different densities and the paint will be absorbed differently if such surfaces are painted at the same time. Therefore, to achieve even painting, the entire structure is completely puttied.
To level out significant differences between the levels of sheets and joints of great depth, non-shrink starting putty is used. It is applied with a wide spatula and leveled with a layer 1 (to 2) mm thick. When the last layer has dried, the marks from the spatula are removed with sandpaper. As a second layer, a finishing layer is applied to the starting putty.
Stage four: sanding
When the applied putty has dried, the surface layer is sanded with sandpaper until it is even and smooth. It is important to remember that they work with sandpaper carefully, not allowing the putty layer to be completely erased, down to the cardboard. Otherwise, the damaged areas will stand out and ruin the whole look.
An alternative to sandpaper can be a special plane or grater on which a sanding mesh is attached. Be sure to use personal protective equipment for vision and breathing against dust (goggles, respirator or gauze bandage)
Stage five: final primer
The primer is applied over the putty to achieve maximum adhesion of the surface to the subsequently applied paint and to protect the surface. It is advisable to prime in two layers.
The nuances of preparing putty mortar and using reinforcing mesh
As a rule, drywall putty is sold in the form of a dry gypsum mixture. Depending on the diameter of the grains, starting and finishing putty are distinguished. Each of them has its own advantages and scope of application. To seal seams in drywall, a finishing type of material is used, since it is this type that allows you to obtain the optimal mixture for puttying a one- or two-level ceiling. Although its cost is higher compared to the starting one, in general the difference in price between them is insignificant.
To obtain the ideal consistency of the solution, 3-4 spatulas of the dry mixture are diluted with approximately 100-150 ml of water. In this case, the liquid is poured in small portions and thoroughly stirred until a homogeneous mass is obtained. The ideal option for puttying is the consistency of soft plasticine.
Scheme of puttying a plasterboard ceiling
It is this that will ensure good adhesion of the material and prevent it from flowing off the surface of the plasterboard ceiling. The joints are sealed using serpyanka mesh. If fastening points or transitions with walls can be puttied with a simple gypsum mortar, then the seam between the sheets must be reinforced without fail. The use of a mesh ensures the strength of the putty layer and prevents it from deforming. In addition, the solution is applied to its surface much better.
Dye selection
Almost any paint can be used on drywall.
However, there are a lot of certain parameters that often greatly influence the choice of dye.
- The price must correspond to the declared quality.
- The applied layer must be resistant to light mechanical damage.
- The paint must have good moisture resistance.
- The paint should also dry quickly.
- The material used must be environmentally friendly.
That is why currently paint for plasterboard ceilings on the domestic market is represented by water-based and water-dispersion dyes. These materials are very similar to each other, but have their own advantages: the emulsion offers a large number of different colors and shades, and the dispersion is the most resistant to washing.
In world practice, special enamel is used to paint drywall. However, its price is so high that even in economically prosperous countries not everyone can afford it. Therefore, the choice depends only on personal preferences and financial capabilities.
Painting ceilings
Pros of putty
Putty is considered one of the most popular building materials, without which no modern renovation can take place.
And it doesn’t matter whether the layer remains as a decorative component, or serves as the basis for further wallpapering, painting or other facing material. Puttying the ceiling in an apartment or house with your own hands has a lot of advantages. For example:
Low cost of work performed. This is especially true for dry rooms, for which gypsum mixtures can be used. They have affordable prices. The same applies to other tools and materials that will be required in the future. Although not everyone knows how to properly putty a ceiling, however, with instructions and the availability of tools and materials, even a beginner can cope with this task. The tools do not require high qualifications; they are simple and affordable. Ceiling putty is sold in a wide range. Everyone can find an option for themselves. This applies to price, quality, the main component in the composition and the texture that will remain after applying the putty to the ceiling. In addition, depending on the design, the surface can be painted in any color. The putty is environmentally friendly, does not harm health, resists moisture (not gypsum putty) and withstands use well in different rooms. The ceiling looks decent. Puttying and subsequent painting of the ceiling is acceptable even in children's rooms (if you choose a safe water-based paint and varnish material). A ceiling with putty will resist fire, since the material does not burn and does not support combustion. Excellent decorative qualities. If you read the instructions and recommendations before puttingtying the ceiling, and be careful and precise, then this is one of the best options for decorating the ceiling. It will be smooth, beautiful, in no way inferior to a stretch ceiling
And this is important, given that the latter will cost more. If the finished ceiling putty dries quickly, then all the work can be done in just 1 day
This means that the family does not need to be evicted for an indefinite period. Long service life. Since there is practically no load on the ceiling (no one touches them with their hands, it is impossible to catch it with something, as happens with walls), then putty is the best option in terms of price and quality ratio. It will last a long time, and if you also treat the surface with washable paint, the ceiling can be cleaned of dirt.
It turns out that if you putty the ceiling, you can get a lot of positive aspects. However, there are also negative sides. For example, putty will not provide the required quality of sound and heat insulation. And gypsum mixtures cannot be used at all in wet rooms. How should you properly putty a ceiling before painting? To do this you need suitable tools and materials.
Choosing paint for ceilings
Before you paint a plasterboard ceiling, you need to get acquainted with the features of the coating for it.
It should be taken into account that:
- The paint must be chosen according to the purpose of the room.
- The coating should help maintain the microclimate of the room.
The technology of applying paint to a plasterboard ceiling has its own characteristics:
These measures are necessary to identify minor defects and small irregularities for their subsequent elimination. The question of how to paint a plasterboard ceiling is being resolved?
Tip: In this case, you should not use oil-based paints.
The most suitable compositions for painting plasterboard surfaces are:
- Water-based. Manufacturers offer a wide color palette with bright, rich tones, which allows you to create any trendy and modern interior.
- Water-dispersed. This type of paint retains its appearance much better and helps protect drywall from moisture for a long time, but has a smaller selection of colors - it is made predominantly in white.
These water-based paints and varnishes are:
- They have a high drying speed.
- They are distinguished by the absence of a persistent, rather unpleasant odor.
- Non-toxic.
- They form a homogeneous, durable film; it can be periodically renewed without additional labor to remove the previous coating.
Water-based paints are available:
- Silicone. Such compositions combine the best properties that acrylic and silicate paints have. The high elasticity of the material allows you to bridge cracks whose thickness is more than two millimeters. After covering the ceiling with paint and drying, it forms a high-quality waterproof film that reliably protects the ceiling surface where the waterproofing is quite weak: kitchens and bathrooms. The surface after painting is resistant to dirt and does not require additional use of antiseptic additives.
- Silicate with a mineral composition. Used to cover surfaces frequently exposed to moisture. It reliably protects the ceiling from the appearance and then proliferation of microorganisms and does not require the additional use of antiseptics.
- Acrylic with latex (see Latex paint: how to work with it). Their price is quite high, due to the advantages, for example:
- vapor tightness;
- resistance to various coating contaminants;
- Possibility of wet cleaning with detergents.
Tip: To cover visible cracks, you will need to apply two layers of acrylic latex paint to the surface of the drywall, up to one millimeter thick.
Just acrylic. They have increased resistance to abrasion when washing and are intended for use in any room.
All of them can have their own shades and from different manufacturers; they only have their own specific advantages and limitations when used.
When painting a plasterboard surface, you must:
- Apply several layers of coatings. In this case, the instructions on the packaging label of the coloring composition must be followed.
- The required drying period for all layers of coating is maintained.
- Paint produced by foreign manufacturers is usually applied in two layers with a special roller, while domestic paint is applied in three layers.
Applying a water-based coating on a plasterboard ceiling
When choosing water-based paints, you need to decide what level of gloss should be on the ceiling. For this we use:
- glossy plasterboard ceiling paint. This coating is resistant to abrasion, the surface is easier to clean, but all defects on the ceiling surface resulting from the painting process are quite noticeable;
- semi-gloss;
- matte. This paint visually makes the room taller, helps create a harmonious and finished look for the room, removes minor defects on the plasterboard ceiling, but the coating is quite difficult to maintain;
- semi-matte.
Tip: When painting the ceiling yourself, you should choose semi-matte or semi-gloss paint.
Enamel is often used to paint plasterboard ceilings.
- Better quality.
- Dries quickly.
- High resistance to dampness.
- White.
The disadvantage of enamel is its high cost, which limits its popularity on the Russian market.
Tip: When purchasing paint, you need to carefully read the label, where the manufacturer indicates the purpose of the coating, its consumption per square meter, resistance to abrasion, and when carrying out wet cleaning.
The difference between fiberglass canvas and glass wallpaper
Many people incorrectly believe that fiberglass wallpaper with a painting web are identical materials. Indeed, they have a common origin, numerous quality characteristics, and the ability to strengthen surfaces. This ends their similarities and begins their significant differences.
- The web can be repainted an unlimited number of times, and glass wallpaper can withstand no more than 25 color changes.
- Unlike wallpaper, fiberglass fabric is not a woven material, and has a smooth structure, while wallpaper has a textured structure.
- Wallpaper is a material intended for finishing, and cobwebs are used as an intermediate reinforcing layer.
- There is a significant difference in density and weight between these materials.
- The cost of cobwebs is significantly lower than wallpaper.
Due to the fact that the material is not able to absorb dust, its care is greatly facilitated by wiping the pasted surface with a damp cloth
When choosing fiberglass to strengthen ceilings, you should pay attention to reviews from consumers who have tried the products. Direct gluing of ceilings is not particularly difficult, as it seems at first glance
Every hardworking owner, even one completely unfamiliar with construction, is capable of mastering such work.
Maybe not?
When you putty the ceiling, a logical question may arise: what will happen if you skip this procedure? After all, this saves time and materials, and therefore, effort and finances.
Yes, but not quite. You will definitely have to putty the joints of the gypsum boards and the places where the screws are screwed in, otherwise the ceiling will be uneven after painting. And since when painting without prior putty, drywall absorbs paint twice as much, the puttyed areas will look much brighter. Therefore, it is right not to refuse this type of work.
Putty is simply necessary!!!
How to putty drywall before painting
When asked whether drywall needs to be puttied before painting, the answer is unequivocal - yes.
First of all, you need to purchase:
Putty application technology
Instructions for applying putty to drywall:
- The butt seams are sealed between the sheets (see How to putty drywall joints according to technology). For this, wide and medium spatulas are used. When applied to joints, the putty is scooped up with a spatula and stretched as far as possible. At the same time, you need to make sure that there are no large drips or irregularities.
- The screws are puttied. In this case, the solution is applied in a cross-shaped manner, the substance is applied lengthwise and crosswise, which makes it possible to better fill the grooves under the heads of the screws and effectively mask their heads.
- Putty is applied to the corners. The work is carried out in stages:
- one side of the corner is processed;
- then the second one, after the previous one has dried, which will allow you to get a very even seam.
- Slopes for windows and doors must be reinforced with an aluminum angle, attached to the putty and pressed into it. Then the surface is leveled with the solution, and the outer corner will acquire the required strength, which will allow the surface to withstand mechanical loads.
- Arched passages are puttied after installing a special plastic corner. It is fastened with a stapler and processed in two stages, due to the greater thickness of the aluminum element, which is used to finish the corners. However, this does not mean that you need to take a large amount of putty mixture.
- All irregularities and roughness formed during puttying of drywall are carefully sanded with zero-grade sandpaper. It is imperative to use a respirator. After cleaning, the surface is treated with primer.
- The entire surface of the plasterboard walls is puttied after all irregularities, seams and corners have dried. In this case, a finishing putty with the consistency of sour cream and a wide spatula are used, which allows you to apply the material in an even layer.
- The layer should be quite thin.
Advice: You should not redo previously completed work. In this case, the wall will not be level or the paint will fall off from the drywall in pieces due to the lack of a strong adhesion.
- After a day, when the surface is completely dry, it is sanded with a special stone with a sanding mesh. In this case, ordinary sandpaper will not work. The resulting defects are puttied and sanded again.
- The primer is again applied to the drywall.
Is it necessary to putty drywall before painting? The video in this article will tell you how to do it correctly.
Graduated from the Faculty of Architecture of the Penza State Institute of Architecture and Construction. For the last ten years, he has been a leading specialist in a large construction company in Penza, engaged in the construction of multi-storey residential buildings. Total work experience in the specialty is 18 years. Consults on design issues, selection of materials for interior and exterior decoration, and technology for finishing work.
Let's determine which putty is best for puttingtying traditional drywall: classification by type
The building materials market amazes with a wide range of putty mixtures
Here it is important to apply exactly the one that is most optimal in a particular case. This approach is due to the fact that some solutions are effective when finishing walls and ceilings made of gypsum plasterboard, others are effective when sealing seams and chips, and still others are used only when decorating
Classification of putty mixtures by purpose
Before deciding which putty to putty on drywall, you should consider several important points, which are discussed below. First of all, the compositions are divided according to their purpose:
- Starter
– contain coarse-grained elements, therefore they are used for primary surface treatment. With its help, large defects are smoothed out, and sheet joints are also sealed. - Finishing ones
have a fine-grained consistency and are applied at the final stage of finishing work. After this, grouting and wallpapering or painting are performed. - Universal
– capable of performing the functions of both starting and finishing mixtures. However, their use as a leveling material is considered justified. In some cases, treatment with this material will be quite sufficient, for example, under ceramic tiles, decorative plaster or textured wallpaper.
Classification of mixtures by composition
Even a novice home craftsman who is interested in which putty is best to putty on standard sheets of drywall knows that solutions are divided not only by grain size. Putty mixtures are also classified by type of material:
- Gypsum
– have good plasticity and are environmentally friendly. Easy to apply and process during operation. Capable of maintaining an optimal indoor microclimate. Mainly used for smoothing seams, scratches and chips. The only disadvantage of gypsum materials is the impossibility of their use in buildings with high humidity. - Cement ones
are not afraid of moisture and temperature changes, and have high strength. Each mixture contains a certain brand of cement. The main disadvantage is a certain degree of shrinkage of the material. - Polymer
- differ from previous types in their versatility, combining resistance to mechanical stress and elasticity. The main disadvantage is the high cost.
Classification by degree of readiness for use
Manufacturers of building materials offer mixtures that vary in their degree of readiness:
- Dry - compositions that require preliminary preparation, for which they are mixed with water in certain proportions. The finished product must be consumed quickly, but in dry form it can be stored for quite a long time.
- Ready-made ones allow you to start working right away. In an airtight container, the mixture can be stored for quite a long time.
Sealing drywall seams
Having thoroughly prepared the surface, you can begin to putty the gypsum board joints. Since seams on drywall need to be sealed quickly, it is not recommended to mix more than 5 liters of the prepared solution at a time. After half an hour, the mixture loses its elasticity. Dilution of plaster or putty is carried out strictly according to the manufacturer’s instructions.
The mixture is applied with a wide spatula, evenly distributing it over the surface of the drywall. When using perforated paper, it is pressed into fresh plaster. The finished seams are left for 12-24 hours to dry completely.
To see how to seal drywall seams, watch this video:
Grouting joints after plastering
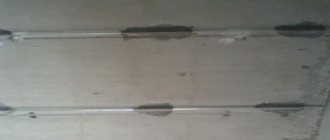
Before proceeding with finishing, it is necessary to carefully sand the dried joints. To do this, use fine-grain sandpaper or abrasive mesh sheets with a value of 120-180. Since it is not always possible to repair it correctly the first time, if serious flaws are found, they are treated with plaster again until a perfect surface is obtained, followed by grouting.
Finished seams are rubbed down with an abrasive meshSource norman-piette.com
To facilitate the procedure for grouting plaster at the joints of drywall sheets, you can use automatic grinders. The ideal choice would be to use an eccentric apparatus operating on the principle of circular grinding. The grinder should be driven smoothly, avoiding strong pressure and the sandpaper coming off onto the unplastered surface.
Preparing seams before puttying: jointing
Joining drywall joints
When you have prepared all the necessary materials and tools to get started, the first thing you need to do next is unstitch the seams. This means removing the ribs from the edges of the gypsum board at an angle of approximately 40-50 degrees. After this, the joint becomes easier to putty. Jointing is not carried out for side joints, which are usually made thinner and more convenient for puttying, as well as for edges that are adjacent to the walls, because they are usually covered with baguettes and other structural elements.
To do the jointing, you will need a painting knife. With it you simply cut off the edges of the sheets at the desired angle, thereby exposing their core, that is, the gypsum part. This work can also be done by eye: the main thing is that after jointing it will be more convenient for you to process the seams.
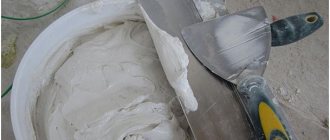
While studying the details of how to properly putty a ceiling made of plasterboard sheets, you need to inquire about how to properly mix the main working material - putty. To do this you will need to do the following:
- Fill your container (it is better to choose a metal bucket, since plastic may not withstand the blows of the mixer) with water 1/3;
- Add putty and stir the contents with a mixer. If you purchased a special drill for puttying, you can choose a whisk of any size. If you use a regular drill, the whisk can be as small as possible, otherwise the drill may burn out. To prevent the putty from splashing out of the bucket during the stirring process, switch the reverse to the drill - so the mixer will rotate counterclockwise.
- Stir the mixture until it reaches the consistency of thick sour cream. After this, you need to let it stand for 5 minutes until all the lumps are completely soaked, and beat it again. Keep in mind that after this the mixture can no longer be whipped, because its structure will be disrupted and the main properties will disappear - strength and quick adhesion.
Mixing drywall putty
There is no clear answer to the question of which putty is best for the ceiling: in fact, the products of different manufacturers differ little, and for work on this particular part of the room, where a thin layer of the mixture is needed, any will be suitable.
Sealing plasterboard corner seams
The technology for puttingtying internal corner joints is similar to the traditional method of sealing seams. Before sealing drywall joints, chamfers are cut into them at an angle of 45 degrees, then the joint area is covered with sickle tape no more than 10 cm thick. To obtain an ideal, even joint, use an angled spatula, using it to smooth out the grout mixture.
To seal seams at external corners, aluminum or plastic corner profiles are additionally used. They provide additional structural strength, protecting corners from moisture and mechanical damage. In this case, chamfers are not needed, since their functions are completely replaced by profiles. For ideal geometry, an angle spatula is also used.
Metal profiles are used to strengthen the outer corners of drywall. Source himki-remont.ru
What you will need
Tools
- Container in which the putty is mixed;
- Ladder;
- Respirator;
- Protective glasses;
- Painting knife;
- Spatulas of different widths;
- Brush, roller;
- Mixer;
- Grinding grater, set of sandpaper of different grain sizes;
- Screwdriver;
- Spotlight or lamp on a tripod.
Materials:
- Gypsum-based putty for seams;
- Finishing putty;
- Primer;
- Serpyanka.
Sealing seams without using serpyanka or perforated paper
Modern construction technologies do not stand still. Every year a new manufacturer appears who talks about a revolution in working with drywall. In his opinion, before sealing drywall seams, there is no longer a need to use a traditional serpyanka. Such statements are most often attributed to special reinforced plaster.
The special composition ensures reliable adhesion to drywall. During crystallization, such plaster seems to stick repeatedly into the sheets. In fact, this design can only be used in dry rooms without sudden changes in temperature and humidity. As a result, reinforced plaster for sealing drywall joints is used only in living rooms - bedroom, living room or office. For the kitchen, corridor or bathroom, serpyanka or perforated paper tape are mandatory attributes.
How to seal drywall joints is shown in this video:
Before you start caulking drywall joints, you must thoroughly clean the surface of the sheets and chamfer their edges. They are glued with sickle tape and a layer of plaster or gypsum putty is applied. Finished joints are rubbed down manually or using a grinding machine.
Grinding
Some craftsmen can plaster ceilings in such a way that no rubbing or sanding is required after that. But this level of skill can only be achieved with a lot of experience, so we will sand the dried putty.
This is done using a grater or sandpaper. The last option is the most labor-intensive and not everyone can do.
You can do everything with a grater much faster, and the result will be almost identical to working with sandpaper.
Grinding is one of the most critical stages. It is now that you can notice those flaws that were not noticeable before. There is a special trick for this: if you turn on all the lamps that will be in this room and place them in their places, all the irregularities and defects will become visible.
It is better to notice them now and correct them than to see flaws already when painting begins.
How to do the job correctly with your own hands?
Finishing drywall is a fairly simple job; anyone can do it without any special skills. In order for the result of the work done to satisfy you, you need to adhere to certain rules.
The technology for proper puttying consists of several steps. So let's get started.
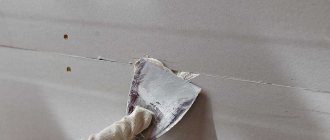
After the primer has dried, it is necessary to seal the seams. For this, a special sickle tape is used. You need to glue it so that the seam is in the middle of the strip.
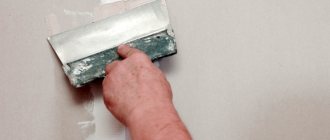
Next, the joints between the sheets are sealed. In this case, the putty is applied to the joint with a narrow spatula (120-150 mm), and smoothed along the seam with a wider tool (300-350 mm).
Next, we begin to putty the internal corners and screws. To do this, use universal or starting putty. The mixture is applied crosswise to the screws. This method allows you to better fill the recesses from the screw heads.
Puttying corners is also not a complicated process. It is necessary to glue a plastic corner onto curved plasterboard structures, securing it with a stapler.
In the case of right angles, metal corners are used, which are secured with putty. This will allow you to easily and quickly putty hard-to-reach places.
After this, you can apply the first layer of putty. At this stage, a starting or universal mixture is used. The solution is stretched over the surface using a wide spatula. In this case, you need to try to ensure that the putty is applied evenly and the layer thickness is 1-2 mm.
The applied mixture should be left until completely dry, after which the surface is treated with emery cloth to remove excess solution. A second layer is applied in a similar way, which is also sanded after drying.
Next, the surface is covered with the last layer, which is applied using finishing putty. The dried solution must be cleaned with fine sandpaper, after which the surface is primed again, and you can begin painting.
Puttying drywall for painting: video instructions.
https://youtube.com/watch?v=nSkADw_jHJ0
Expert advice
The recommendations of professionals come down to general rules:
- Don't skimp on the quality of the ingredients.
- Do not use a tool that has been dry for a long time and has been lying at home. For example, a dried roller can be revived, but how it will behave during the process of applying primer is unknown.
- Be sure to read the instructions on the packaging of the formulations and trust the manufacturer’s opinion. You should not use a polymer composition for dry rooms and a lime composition for wet ones. Do not dilute dry powder with water in larger quantities, thinning the mixture so that it lasts for a long time. This putty loses its useful qualities and characteristics. Ultimately, you will have to apply the composition in several layers, which will increase the consumption of the mixture.
- The optimal temperature for work is +5...+30 C. In cold weather, the water composition freezes, and in hot weather it can dry unevenly.
- Sanding the ceiling after puttying is a mandatory step. You need to sand every suspicious area, achieving an even and smooth surface.
If during the painting process the composition does not linger on the ceiling, the reasons are poor primer, insufficient sanding quality or dust residues. In this case, the surface is sanded again, primed, dried and paint can be applied.
As for finishing the corners, they can be reinforced with sickle tape, then puttied and leveled. And then further strengthen it with metal or plastic corners, pressing the elements into the still wet composition. It is necessary to level the corners, while excess mixture is removed with a spatula. The remaining work: priming, leveling, grouting is carried out according to plan.
How to apply putty
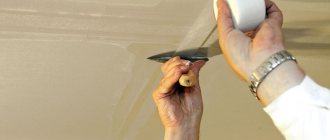
Puttying drywall before painting is done carefully to achieve the desired result. First you need to prepare a small portion of the mixture.
Experts do not recommend preparing more than 5 kg for the first time, since the lifetime of the solution is limited, and if there is no experience, it is difficult to master a larger volume. If you dilute the dried solution with water, the putty loses its quality. We use only a clean container, which should not contain any remnants of yesterday’s mixture. Using a small spatula, apply a layer of putty to the blade of a large spatula and then to the wall.
Preparing the surface
The first layer may be far from ideal, but we still try to fill all the depressions evenly and align them in the main plane. After finishing the work, wash the tools and containers thoroughly and wipe the spatulas dry. Preparing the surface Before starting work, you need to prepare the surface of the wall.
- We tighten the heads of the screws until they stop if they protrude above the surface. We twist them, and do not recess them into the drywall, so as not to create depressions. If this happens, unscrew the screws and screw in other, longer ones in their place.
- If the paper peels off from the gypsum filling at the joints of the plasterboard, it must be carefully torn off and cleaned with sandpaper. If we don't do this, the putty may peel off along with the paper, and cracks will appear.
- Now we expand the joints between the plasterboard sheets. Using a sharp knife, cut up to 5 mm from the edges of each sheet at an angle of 45°. After this, the putty mixture will adhere better to the surface, and the adhesion of the materials will be more effective.
- After processing the seams, we prime the surface with a special compound for working with plasterboard sheets. This material is applied in a thin layer, no more than 0.03 mm. When working with drywall, you cannot use alkyd primers: they deform the cardboard layer. The paper peels off, bubbles form, which then burst and turn into rags. In this case there will not be good adhesion.
The primer dries in 12 hours, and we proceed to sealing the seams. Here we need a special fiberglass mesh (sickle tape). We glue it so that the joint is exactly in the middle of the tape. Then we proceed to sealing the joints between the sheets. We do this with two spatulas: narrow (12-15 cm) and wide (30-35 cm). Apply the putty evenly over the entire seam. We take a small amount of the mixture with a narrow spatula, apply it to the joint, and stretch the solution along the seam with a wide one.
Apply the mixture
We start by filling the corners and screws. For this purpose we use a universal or starting mixture. We putty the screws crosswise - lengthwise and crosswise. This way the holes from the heads of the screws are better filled, their heads are completely closed. Puttying corners is also not difficult. On plasterboard structures with bends we glue a soft corner made of plastic, which we secure with a stapler in shape. We attach metal corners to right angles using putty. This will help us putty difficult places the first time without wasting time, patience and energy.
Now we apply the first layer of putty, use starter or universal. Using a wide spatula, we stretch the solution over the surface of the wall, trying to make a layer of the same thickness (1-2 mm). We wait for it to dry completely and treat the surface with sandpaper to remove excess mixture. Apply the second layer in the same way. After complete drying, we also sand the surface.
Then we apply the last layer, using the finishing mixture at this stage. Clean the surface with fine-grained sandpaper after complete drying. And then we prime the surface again.
Padding
This type of work consists of applying a special liquid to the wall surface, which forms a thin waterproof film to ensure strong adhesion of the paint to the wall surface. We apply primers in one or several layers, depending on the preparation of the wall. The wall must be dry.
Pay attention to shading of the primer. If rough streaks remain during the priming process, they will be visible after painting and you will have to putty the walls again
Therefore, the primer mixture must be blended so that there are no unevenness or bubbles. We shade the primer in two directions.
The purpose of primer compositions is usually strictly defined: only for adhesive or only for lime paints. Manufacturers also offer universal primers that are used for various types of paints. If we apply the primer in several layers, after applying each layer we wait for it to dry completely.
Step-by-step puttying technology
Before you begin to putty the plasterboard ceiling for painting, you need to prepare the surface. The work is as follows:
- Check the tightness of the screws. They must be recessed into the sheet; if part of the cap sticks out above the sheet, the hardware must be tightened. If the screw is recessed very deeply, you need to unscrew it a little.
- Inspect the areas where the walls meet. There should be a gap of 2-3 mm everywhere, so that when filling with putty you get a tight and even seam.
- The cut edges must be chamfered, maintaining an angle of 45 degrees; factory edges should not be processed.
- Checking external corners involves eliminating sheets protruding beyond the corner. If you run the spatula first along one plane of the corner, then along the other, the tool will pass smoothly without catching on the edge of the gypsum board. If it gets caught, remove the unevenness with a sharp knife.
That's all the preparatory work.
Reinforcement of drywall seams
The starting putty is applied only to the area where the sheets are joined. Sealing of joints and seams is carried out using serpyanka. This is a mesh tape with an adhesive layer on the reverse side. A piece of serpyanka is secured in such a way that the seam lies directly in the center of the tape.
A layer of putty is applied on top. The sealing is carried out as follows: first apply a layer of the mixture perpendicular to the seam on the serpyanka, and then parallel. After sealing the joint, the composition is leveled with a wide spatula, and at the same time, excess mixture is removed. After this, you need to hide the screw caps. Cover them too with putty, leveling the mixture.
Drying the composition takes up to 2 days. More details about drying time are indicated on the product packaging.
Surface primer
The ceiling will have to be primed several times, so there should be a lot of primer mixture. And you should choose a deep penetration primer, this ensures better adhesion of the paint to the ceiling.
However, when applying the composition, you should not be zealous; excess liquid will wet both the cardboard and gypsum layers, which will lead to the formation of wrinkles and bubbles on the surface.
The primer is applied twice. The first time along the long side of the gypsum board sheets, then drying and the second layer - across the first. You need to roll the surface quickly with a roller or brush, without stopping at one point, so as not to wet the cardboard.
Advice! The joints of complex structures, the junctions of walls and ceilings are passed with a narrow brush.
Proper ceiling putty for painting with your own hands
It is strictly not recommended to use alkyd primers - these mixtures destroy the paper and the cardboard will slide off the sheets behind a roller or brush.
Applying putty to the ceiling for painting
Finishing putty is carried out over the entire surface of the ceiling. The composition performs a leveling function and is applied in a thin layer. It is better to use a wide spatula and stretch the mixture, achieving a perfectly smooth surface. After sealing, the entire surface is dried and you can once again check the evenness of the ceiling.
If defects are found, the finishing putty is applied again, also leveled and dried.
Advice! Cement putties do not level out so well, so it is better not to use them for final finishing of the ceiling. Puttying a plasterboard ceiling for painting in wet rooms is carried out using waterproof polymer mixtures, and in dry rooms you can use lime compounds.
After sealing and drying of the mixture, the entire surface is sanded with a float and emery. Strong pressure is not necessary, it is only important to smooth out possible roughness. After all, the ceiling needs to be primed again, dried and can be painted.
Why do you putty a plasterboard ceiling before painting?
Despite the evenness of the material, finishing with gypsum board sheets leaves the joining seams and screw heads visible. In addition, when finishing, a lot of dust accumulates on the surface, and if you do not remove the unevenness by starting to paint right away, the dried surface will be rough, with visible seams and hardware.
Processing of a multi-level surface is necessary for the design of curved sections and even corners. The tools and materials used are the same as for the main plane, only the duration of the repair increases.
Complete finishing of a plasterboard ceiling for painting includes the following steps:
- plane preparation;
- primer;
- puttying corners, joints;
- sealing, reinforcement of seams;
- sealing screw heads;
- finishing putty of the entire ceiling;
- grinding;
- final primer.
All steps must be completed, otherwise you may end up with a surface with peeling and falling off paint.
Tools and materials for work
Leveling and plastering the ceiling for painting with your own hands
The master will need the following set:
- spatulas 10, 20, 30-35 cm;
- metal grater;
- grater with emery;
- primer roller;
- container for mixing dry powder;
- mixer or drill with attachment;
- sickle tape with adhesive backing;
- plastic or metal corners for complex shapes on the ceiling;
- screwdriver;
- sharp knife;
- putty;
- primer;
- ladder;
- personal protective equipment.
A piece of film to cover the doorway and protect the furniture wouldn't hurt.
How to start finishing work
If you find the right approach to the process of finishing the ceiling surface, the result will surprise even experienced craftsmen. At first glance, in order to putty a structure, you only need two tools - a large and a small spatula. But do not forget that such a process as grinding and priming cannot be done without special equipment:
- A grater equipped with a polishing mesh.
- Sandpaper is useful for smoothing out roughness in the ceiling area.
- Reservoir for mixing putty mixture.
- Thick brush.
- Perforator for mixing mortar.
- Painting knife.
- Fastening tape for masking seams.
Use additional recommendations - a mixer will help you make putty. Dilute the dry mixture with water and mix counterclockwise. This will prevent the solution from splashing onto the work area.
Surface preparation
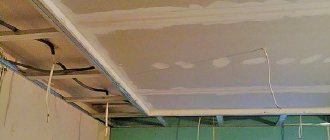
Before finishing work begins, the suspended structure must remain undisturbed for at least a week. This is necessary for the gypsum board sheets to finally take shape and occupy their final position. Also, during downtime, the ceiling covering will adjust to the existing temperature and humidity levels.
During the preparatory activities, the fastening points of the self-tapping screws, with the help of which the sheets of drywall are mounted, are covered. First, carefully inspect the surface of the ceiling and evaluate the correctness of screwing in the fasteners. If the technology has not been violated, then their caps are slightly recessed inside the gypsum board. The cavities that appear are hidden with a plaster mixture. Untightened screws that protrude above the surface are re-tightened using a screwdriver or screwdriver. Afterwards, mix a small amount of gypsum plaster (it dries the fastest), and spot-fill the cavities from the screws with the smallest spatula.
Preparing for finishing
Also, during the preparation of the ceiling for puttying, the condition of the places where the plasterboard is fixed to the frame guides is checked. The sheets must be securely fastened, not move away, and not sag down. Otherwise, the solution will not lie flat on the ceiling surface, and the integrity of the coating will sooner or later be compromised. If there are areas of cardboard detachment from the base, it is carefully trimmed, and the damaged area is sanded with the finest sandpaper.
Then they begin priming the drywall before puttying. It is impossible to do without this stage, since the primer binds residual dust, strengthens the base, and gives the gypsum board sheets greater hardness and strength. In addition, the primer increases the moisture resistance of the ceiling covering and prevents the putty from peeling off in the future.
When priming, special attention is paid to joint lines, places where screws are attached and corners. This is where the most dust and dirt accumulate, which impairs the adhesion of the putty to the base. When planning to wallpaper the ceiling, apply 2 coats of continuous priming so that the finish remains as strong as possible and does not peel off along with the cardboard.