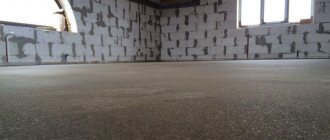
When carrying out a major overhaul of a long-used home with concrete floors, one very often encounters the need to restore the integrity of these seemingly “indestructible” coatings. Unfortunately, they are also subject to aging and gradual destruction. Over a long period of its service, a screed once poured over a floor slab can, under the influence of deforming forces (associated, for example, with building shrinkage, seismic points, operational static and dynamic loads), become covered with a network of cracks and begin to crumble. Concrete can lose its strength over time, especially if used in unfavorable conditions where there are opportunities for increased erosion.
DIY concrete floor repair
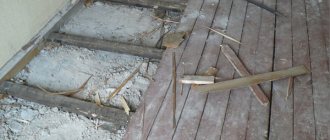
Bringing dilapidated concrete floors into “working” condition can be done in different ways, depending on the degree and nature of the damage. And we must immediately note that this is not such a simple task as it might seem at first glance. There are even situations when it is much easier to completely dismantle the old screed and pour in a new one rather than bother with restoration attempts.
So, let’s figure out how to repair concrete floors with your own hands: from the main reasons for the coating to become unusable to possible technologies for its restoration at home.
Necessity, not whim
For those who have already screeded the floor and are now surprised by its unsightly condition, we note that over time, even a perfectly executed screed will in any case become unusable, since it bears the heaviest load. Over time, it is necessary to repair the floor screed, even if it was done by a diligent craftsman, in compliance with all the technology. If the surface intended for the floor is not brought into ideal condition, this can lead to unpredictable consequences. Money invested in the visible part of the repair may be wasted if the screed, “offended” by inattention, makes itself known. An urgent need, not a stupid whim - feel the difference between these two concepts.
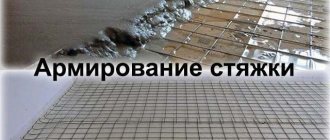
The main causes of concrete floor defects
There are many reasons for damage to the screed - these can be external or internal influences.
A typical, but even worse, damage to a concrete screed is the appearance of a network of cracks.
- Changes in the soil can have a negative impact on screeds that are poured directly onto the subgrade. Deformations are possible due to poor quality compaction of the base. the cause may be the absence or insufficiency of thermal insulation - with the advent of cold weather, the effect of winter swelling of soils is possible. Another reason is that the screed was poured without regard for the very close location of groundwater.
All these factors can lead to instability of the soil layers, which is reflected in the concrete slab. And this is without taking into account possible seismic shocks.
- Impacts of an internal nature. This item most often includes the use of low-quality screed mortar, as well as pouring carried out in violation of technological requirements. Another factor is the completely natural shrinkage of the structure, which can create very significant internal stresses in the concrete slab, leading to its cracking.
- External influence . This group includes mechanical damage due to the fall of various heavy objects, violation of operating rules (exceeding the permissible load), or from exposure to moisture for a long time.
As you can see, some factors can be foreseen, and try to minimize the likelihood of their negative impact. But there are also reasons of a spontaneous nature, as well as natural aging processes of building structures. So repairing a concrete floor can become an urgent need for any owner of a house or apartment.
Types of damage - mastering the first subtleties
Professionalism begins with assessing the nature of the damage and the amount of work to be done. The nature of damage can be of various types:
- visible cracks of various sizes, potholes, pits;
- concrete peeling off in places;
- poor coverage of the entire floor surface.
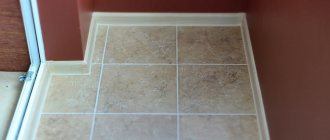
Replacing the finishing floor covering or completely removing it will provide an opportunity to see the unsightly condition of the screed in all its glory. Weakening of the material, complete or partial peeling of the screed will indicate that poor quality cement was used during the work or the technology for preparing the required solution was generally violated. The increased formation of cement dust speaks eloquently about all this. Such signs of poor quality concrete work cannot be ignored. At this stage of damage, you can still get by with a small monetary investment.
Repair of floor screed when a weak coating is identified
Connoisseurs of ideal quality in everything will begin to remove the concrete layer to the very base. If such a voluminous scope of work is not at all pleasing, then the necessary repairs to the floor screed can be made by strengthening the weak screed. So, you will need powerful hammer drills designed for professional work. Making holes with a diameter of 20 millimeters, repeated every 25 centimeters using drills with a small angle of inclination of the working groove, will help to carry out repairs using holes drilled to the very base.
You should end up with holes with a widened top and a depth equal to the thickness of the coating. The resulting holes will need to be cleaned to a state corresponding to minimal contamination.
Now you need to stock up on rods from scraps of reinforcement with a diameter of 12 millimeters. We degrease our blanks and make them to a length corresponding to the depth of the hole.
Next, we will need a special epoxy for working with concrete, called Rizopox 3500. This brand is ideal for this type of work. Pour the solution into the holes made, insert a metal rod and fill the upper bowl again. The role of the filler, which brings this composition closer in consistency to concrete, will be played by quartz sand, which must be added to the diluted solution. The result of the work done will be a screed surface reinforced with metal reinforcement, resulting from an epoxy composition consisting of two components.
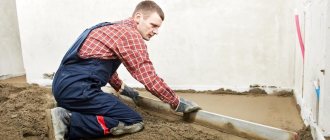
Preparing cement-sand mortar
Today on sale there is a large selection of ready-made mixtures for restoring concrete floors, the basis of which is epoxy resin or polyurethane. But given the relatively light loads and the stability of the environment in the apartment, such a mixture can be prepared independently to repair the cement screed.
Cement-sand mortar
To do this, mix one part of PVA glue well with three parts of water. PVA glue can be replaced with bustylate.
Using this emulsion, a concrete solution consisting of a mixture of sand and cement is mixed in a ratio of 1:3. You can buy a putty glue solution in a store, but a 5-liter canister is the minimum packaging volume.
If the cracks are deep, this adhesive emulsion is not suitable; to repair them, you need to purchase a special thixotropic primer for concrete. Ready-made store-bought mixtures are mixed with water, while those prepared by hand are mixed with an adhesive suspension. It is impossible to prepare such a solution without a mixer; it must be smooth, homogeneous and have a minimum amount of water. If you try to do this manually, it will take a lot of time and the solution will lose its necessary qualities.
Mix the cement mixture using an electric drill or hammer drill at minimum speed. To do this, use a special mixer attachment, the range of which is very large in the store. But instead, you can use a steel rod up to a centimeter in diameter. It is bent into a ring at the end and inserted into the perforator pipe. Mixing lasts up to 5 minutes, during which calm circular rotations are performed over the entire surface of the solution. After finishing kneading, the mixer should be immediately lowered into a bucket of water and rinsed intensively with a high-speed drill.
You can also repair with tile adhesive, replacing ready-made mixtures with it.
Peeled concrete - our actions in this case
The cause of concrete peeling may be uneven loads, as a result of which only some places are especially affected. It is possible to determine the affected areas that need injections only by ear. In this matter, the main thing is not to overdo it, so as not to add more work to yourself. We take a hammer in our hands and gently tap the entire surface. We are only interested in places that produce a dull sound. A sign of delamination is also cracks from which fountains of dust are visible. Particular attention should be paid to the edges, which traditionally receive heavy loads. All places that cause you suspicion must be circled with chalk or a colored marker. If the area of the damaged surface is large, then it will be necessary to make holes with a diameter of 20 millimeters in the screed every 25 centimeters.
As in the first case, an epoxy solution will help us. The only difference is that now its consistency will be more liquid, and there is no need to use quartz filler. A construction syringe will help us pour the solution into the holes. It may be necessary to repeat this procedure if it is not immediately possible to completely displace the air from the cavity or if most of the mixture is absorbed into the concrete. This method most quickly revives the surface of the screed, so that the next day you can begin work on laying the final floor covering.
If at the tapping stage you find that more than a third of the area has peeled off, you will have to completely dismantle the screed and being lazy in this case is very unwise.
How to deal with potholes - expert opinion
If you are removing the finishing coating, then you are, of course, legitimately interested in the question: how did a depression or large pothole form under the protected surface? Several conditions lead to such damage to the screed. Firstly, the appearance of an air bubble at the time of pouring. And, secondly, increased use of this place, for example, vibration from a washing machine. Covering the pothole with a solution over the surface will not give the desired result. Only fully opening the base around the pothole will make it possible to ensure that there is no air bubble.
The technology for eliminating potholes is as follows:
we make cuts around the perimeter of the potholes using an angle grinder or a hammer drill with a stone disc, to the entire depth of the screed;- the sawn piece is completely cleaned of dirt, vacuumed and coated with a primer;
- with a sufficiently large thickness of the screed, it is possible to apply several layers of coating after the previous layers have completely dried;
- We wait for the solution to completely set for at least a day, at high above-zero air temperatures. In cooler weather, the curing process will take much longer;
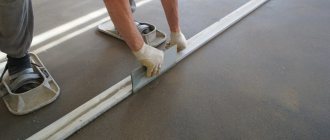
- We grind the top layer of the repair compound with a special tool.
Cracks in the screed are the most unpleasant type of damage
Uneven loads lead to the appearance of cracks, which have the unfortunate property of increasing. Repairing cracks in floor screeds is carried out as follows:
- we widen the crack and deepen it;
- clean from debris and dust;
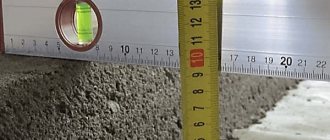
- along the crack we make perpendicular grooves 150-200 millimeters wide and 20 millimeters deep;
- fill the crack halfway with a mixture of mortar and quartz sand, install metal brackets in it;
- after the bracket hardens in a vertical position, fill the crack completely with epoxy;
- The hardened surface is polished.
Eliminating the listed screed defects using technologies recommended by professionals in their field will help you reduce costs during repairs and significantly save time. Good luck to you in your endeavors!
Tools, equipment and fixtures
All equipment must be in good working order; during work, preventive inspection and compliance with safety standards are necessary.
To repair a concrete floor screed you will need:
- pumping stations, compressors, high-pressure apparatuses;
- rotary hammers, jackhammers;
- shot-, sandblasting installations;
- industrial vacuum cleaners;
- trowels, metal brushes, spatulas, shovels, chisels;
- grinders, grinders;
- clean containers;
- construction mixer.