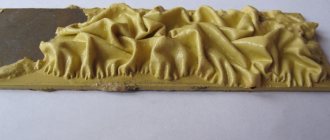
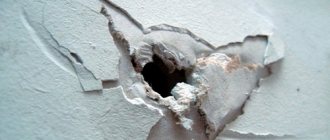
Is it possible to apply plaster over putty? This question often arises among many clients after the work of not very conscientious and responsible finishers. The fact is that the customer, when inspecting the work performed, notices obvious and clearly visible unevenness in the putty layer. If in such a situation it is not possible to correct the matter with additional putty, the customer thinks about applying a layer of plaster over the putty. Is this possible or not? If possible, then using what mixtures and tools.
Putty and plaster: what is the difference
Before you begin to consider whether it is possible to plaster over putty, you should understand the difference between these two layers:
- Plaster is a “rough” finishing layer obtained by applying a building mixture of the same name to a wall, and is used to level walls that have significant surface defects. Depending on the components used in the plaster, the following types are distinguished: gypsum, lime, cement-sand. The first two types consist of gypsum (gypsum) and slaked lime (lime). Cement-sand plaster (cement with fine river sand in a ratio of 1:4) is used for finishing walls located both inside and outside buildings. This finishing material is applied using a trowel; for leveling, the rule is a wide aluminum profile with a trapezoidal cross-section up to 3 m long.
- Putty is a finishing layer of wall finishing, as well as a paste or powder mixture of the same name, intended for the final and slight leveling of irregularities remaining after applying plaster and giving the resulting surface a smooth and aesthetically attractive appearance. To apply putty that has weak adhesion to the base, it is coated with a special primer.
Thus, the difference between plaster and putty lies in their leveling ability. The plaster consists of coarser and larger particles and is designed to level out significant wall irregularities - potholes, pits, and depressions clearly visible to the eye. Putty is used at the finishing stage and serves to eliminate very poorly visible visually visible surface defects.
Sequence of application of layers
In traditional wall finishing technology, the described layers are applied in the following order:
- Plaster (2-3 layers applied to a prepared and cleaned base with leveling).
- Putty (2-3 leveling layers applied to primed plaster).
This sequence allows you to eliminate all significant flaws in the wall and, having leveled its surface, prepare it for painting, applying decorative finishes, and wallpapering.
However, if a situation arises in which it is necessary to smooth out defects in the putty layer using plaster, this is possible under the following conditions:
- The leveling layer of putty is applied with a mixture that does not contain gypsum and other lime components.
- There are no large voids under the putty layer. In order to identify them, the entire wall is tapped with a wooden hammer handle. In those places where air cavities formed when the finishing layer hardened, the sound will be booming (empty).
- The thickness of the putty is no more than the layer of plaster required to smooth out flaws.
- For plastering, quick-drying and lightweight gypsum or lime mixtures are used.
If all these conditions are met, leveling the putty by plastering will allow you to quickly and effectively eliminate all the flaws (various irregularities) of the wall and prepare it for subsequent finishing. Otherwise, you will have to completely remove all the putty and repeat the finishing process again.
Important! Plastering of putty flaws with gypsum mixtures is carried out exclusively inside buildings. When carrying out such work on the outside, the leveling layer will quickly become damp and peel off.
Six steps to the finish
Removal of plaster from the walls is carried out until the old finish leaves a layer that is firmly adhered to the masonry. All loose parts are removed. The work is painstaking and time-consuming, so we recommend being patient.
Below is a step-by-step instruction, following which a beginner can clean the walls of dilapidated finishes, and the video in the article will help you understand the work in more detail:
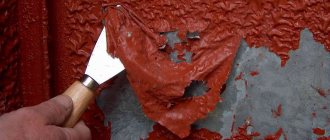
Before removing the old plaster, it is necessary to clean the surface of the old finishing coating. You can remove the paint using a wide spatula, after moistening the old composition with water. Since water is quickly absorbed and dries, the surface is constantly sprayed from a spray bottle. Readers ask how to remove plaster from a wall without dust or dirt. Use more water, so there will be less dust inside the room during work.
We take tools for removing plaster and walk along the masonry. Tap the brick surface with a hammer. In loose places, the plaster crumbles on its own; scrape off the remains with a spatula, after soaking them with water. In places where cracks form, tap more carefully. If the old layer is cracked, but the adhesion to the brick is tight, then widen the gap. To do this, tap its edges with a hammer and expand the hole with an ax.
If there are no cracks, but the layer of old finishing is too thick, then it is also better to remove it. A thick layer of old mortar will fall off due to moisture after you apply the new one.
- Third step.
Methods of applying plaster
Depending on the number and degree of flaws in the finishing of the wall, plaster is applied to the putty using one of the following methods:
- For beacons - this method involves the use of special metal profiles (beacons); it is used for differences and flaws of more than 3-4 mm.
- Without beacons - the simplest and most cost-effective method, used if the finish has slight unevenness (up to 3 mm).
Each of these methods has both general and specific stages.
Origins of the problem
At first glance, the question is: “is it possible to apply plaster mortar to putty?” may seem quite strange, even somewhat childish.
Everyone knows that these finishing materials are always applied in reverse order. However, not everything is so simple here.
For greater clarity, let's look at a couple of examples:
- When purchasing an apartment in a new building, you should take into account that very often new apartments are put on the housing market with a rough finish, which includes plastering the walls for the final finish. But sometimes the quality of this finish is far from ideal: differences in the plane can reach several centimeters.
- You decide to finish the wall yourself. However, upon completion of the work, you suddenly discovered that their quality does not suit you. The same situation can occur in the case of poor-quality work performed by hired craftsmen - “hack workers”. You kicked out a team of careless finishers, but the crooked plastered wall remained with you. How to solve such a problem?
Work technology
Let's look at the work in stages.
Surface preparation
For both methods of leveling walls with plaster, preparation of the base is very important, consisting of the following manipulations:
- Cleaning the wall - using a broom or brush with soft bristles, remove all debris (cobwebs, dust) from the wall; with a slightly moistened clean rag, wipe off all water-soluble contaminants from the leveled layer of putty.
- Removing loose areas of putty that easily separate from the wall - remove from the wall with a thin metal spatula or knife all areas that have weak adhesion to the rough plaster.
- Tapping for the presence of small voids - in order to determine the presence of voids.
- Sealing identified small voids - identified air cavities are thoroughly cleaned and sealed with quick-drying gypsum plaster.
- Applying notches - using a hammer and a small chisel, a large number of notches are made on the surface of the putty layer (from 200-300 to 1000 per 1 m2), with a depth of no more than 1.5 mm. They are necessary for a tighter adhesion of the applied layer of plaster to the putty.
- Priming - to improve the adhesion of the plaster applied to uneven surfaces, the entire surface of the wall is covered with 2-3 layers of a special primer with an interval of 4-5 hours between applications. For priming, rollers and round paint brushes are used (narrow areas in corners, near the ceiling, near the floor).
- Fastening a special synthetic plaster mesh - for this, a small layer of plaster is applied to the primed wall, after which the mesh strips are immediately tightly applied to it and leveled with a spatula or rule.
To improve the adhesion of the plaster to the leveled layer of putty, you should use a fiberglass mesh - unlike metal, it has light weight, better flexibility, and a long service life.
Installation of beacons
This stage is typical for leveling a layer of putty that has flaws (irregularities) of more than 3 mm.
Beacons are installed as follows:
- Using a long rule and a level, it is determined what maximum layer of plaster will need to be applied.
- The first beacon with a profile height of 6 mm is placed exactly in the middle of the wall - for this, the distance of half the length of the wall is measured from the upper and lower corners, and marks are made with a pencil or marker.
- The upper and lower marks are connected using a rule with a clearly visible line.
- A small amount of quick-drying gypsum putty or plaster is diluted in a container.
- The prepared mixture is distributed in small even portions along the outlined line.
- A beacon is applied to portions of the solution distributed in the line.
- While the solution has not hardened, the beacon is aligned using a level and a long rule in the vertical plane and relative to the corners of the wall (the distance from any point in the profile to the corner should be the same).
- After the central beacon, two corner beacons are installed in the same way, aligning them into one plane using a long and even rule.
- Intermediate profiles are installed between the central and corner beacons.
- After completing the installation of the beacons, to prevent them from sagging, when plastering, the profiles up to the upper edge are covered with the remainder of the quick-drying mortar.
This method of installing beacons is simpler and cheaper than using a laser level, self-tapping screws with dowels, or special fasteners.
In addition to installing guide profiles, it is very important to correctly install socket boxes and electrical boxes. They must be installed in the same plane as the beacons, otherwise serious problems will arise during further finishing and installation of electrical equipment - sockets, switches. A strongly recessed socket box will not allow you to properly install and secure an external socket; An electrical box that protrudes strongly above the plane of the beacons, even after finishing, will unattractively protrude above the wall.
Applying plaster
The technique for plastering a prepared wall differs for different methods:
- According to beacons - plastering an unevenly puttied wall along beacons involves applying 2-3 layers. In this case, the solution prepared strictly according to the instructions is applied using a trowel in small portions onto the wall between the beacons, after which, using a long rule, the applied solution is leveled, moving it from bottom to top. After leveling the wall, the beacons are left in a layer of plaster.
- Without beacons - the plaster is prepared in a large container, a trowel is evenly applied in small portions onto the layer of putty to be leveled, after which, using a vertical rule, the plane of the wall is gradually leveled, moving it from one corner to another. All excess mortar removed by this rule is cleaned from it using a trowel back into the container.
Using this technology, in addition to conventional cement-sand mixtures, you can also apply decorative plaster to putty. To do this, they do not use long aluminum rules, but wide metal spatulas and special graters.
How to prepare the base for plaster
The first stage is preparing the surface on which the plaster will be applied. The features of the process depend on the material of the walls, but there are several general rules:
- Remove old materials. If we are not talking about renovations in a new building, before plastering the surface, you will have to remove wallpaper, old dried plaster, traces of paint, etc. from it. If this is not done, the solution will not adhere properly. There are different techniques for quickly and easily removing coatings: for example, for glass wallpaper you can use special removers, and for paper wallpaper a sharp spatula is often enough.
- Inspect the area and remove defects if necessary. It is better to plaster walls that have no cracks or chips, so all noticeable defects must be repaired in advance.
- Clean the base from any dirt. If there is soot, oil stains, or other contaminants, they are removed. If there are no noticeable stains, you can simply wash the surface with clean water.
- Take care of good adhesion. Improving adhesion is an important stage of work that should not be skipped when plastering walls with your own hands. To increase the adhesion of wall materials, various methods are used.
Preparing brick walls
When plastering brickwork, you need to take into account the specifics of the material. If the masonry is old, even before starting work it is worth assessing whether it needs repairs. If there are loose, unreliable bricks that fall out, they are removed, cleaned of mortar, and laid on fresh masonry mixture or polyurethane foam. Protruding uneven areas (for example, traces of hardened mortar) are removed.
To properly plaster brick walls, you need to ensure good adhesion. A popular method of improving adhesion is notching, which is applied over the entire surface. To do this, you can use any available tools: for example, a hammer and chisel or a hammer drill. Notches improve adhesion and are especially important for walls made of smooth brick.
The last step in the preparation of brick bases is a primer for walls, which you can purchase in our store in bulk. You can choose any composition suitable for brick.
Preparation of concrete surfaces
To improve adhesion, you can also use the notching technique before plastering concrete walls. Shallow (approximately 0.5 cm) recesses do not affect the strength of concrete structures, but significantly increase adhesion. Additionally, primer treatment is performed: it creates a film on the surface to which the plaster mixture adheres well.
Features of working with aerated concrete
The aerated concrete surface to be plastered can be prepared in different ways. One option is cutting out notches and then treating them with a penetrating primer. You can also mount a reinforcing mesh, which will not only improve adhesion, but also increase the strength of the structure. Light non-metallic meshes, such as fiberglass, are well suited for aerated concrete.
If cracks or other damage to the aerated concrete masonry were discovered before plastering work, they must be repaired. For small defects on interior walls, gypsum wall putties, which you can buy in Minsk, are well suited.
Preparation of wooden surfaces
Wood has poor adhesion to plaster, so wooden structures must be prepared for work. If the house is new, you need to wait until the building shrinks before plastering the walls. In order for the solution to stick to wooden bases, shingles are stuffed onto them or a mesh is installed.
Using shingles is an old method that was used decades ago. To obtain a reliable base with good adhesion, thin wooden slats are nailed to the base crosswise, in increments of 4-5 cm. As an alternative, you can use plaster mesh - metal or polymer.
Technical limitations
When considering the possibility of applying plaster over putty, the following restrictions must be observed:
- Leveling gypsum putty with cement-sand mortar - such a finish will quickly begin to peel off and collapse due to the difference in the bearing capacity of the hardened and low-strength gypsum mortar and the heavy and durable sand-cement mixture.
- Applying a layer of plaster thicker than 20-25 mm to the gypsum putty - as in the previous case, the gypsum mixture in the solid state does not have a large load-bearing capacity and will not be able to withstand the heavy weight of the plaster applied on top of it.
It will also not be possible to level out the unevenness of the putty with plaster if, due to a violation of technology and building codes, not only the top layer, but also the rough (bottom) plaster begins to peel off.
Leveling up the old
If the plaster holds tightly, but there are minor flaws, then it is more effective to level the walls. The surface can be primed with diluted PVA glue (in a ratio of 1 to 8). In an apartment, it is more effective to use gypsum-based solutions, since the putty itself is mainly gypsum indoors. To ensure that the density of the old layer and the new layer are close, add a little sand to the mixture.
Gypsum plaster is white in color. Cement - allows you to apply any repair mixtures to it.
