But with prolonged use of the window, the likelihood of damage or wear of the slopes increases.
Let's consider in what cases they may need repairs, how to dismantle them correctly, as well as the difficulties and features when replacing slopes.
When might replacement be needed?
Replacement may be required:
- If old ones are damaged. The appearance of scratches, holes or chips can negatively affect the appearance and protective characteristics of this element of the window opening.
- If the slopes begin to deform (most often for sandwich panels or plasterboard finishing).
- Infection of slopes with mold means that moisture is poorly removed from the assembly seam.
- Another reason could be replacing the window with a new one or insulating the opening.
- When replacing one type of slopes with others (for example, to change the decor), dismantling may also be required.
Plastering
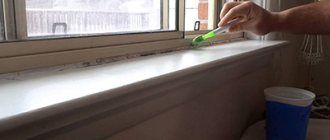
Sealing slopes with plaster is the cheapest existing option. To work, you will need a dry finishing mixture (gypsum, alabaster), a small set of tools (bucket, spatulas, roller) and water-based paint.
This method has several disadvantages. Firstly, you will have to put in enough effort to get a flat surface. If you have little experience, this may require a lot of time, since you will need to carefully study the plastering technology and watch a lot of videos. Secondly, cracks may appear, which occurs for various reasons.
The technology for applying plaster is as follows:
- The dry mixture is diluted in the required amount of water. It must be taken into account that the work must be completed quickly enough so that the solution does not lose its properties.
- The composition is collected with a spatula and transferred to the surface. If the area has significant potholes, then they should be covered first. The fact is that a thick layer of plaster will not adhere well and will also cause cracking of the material.
- To achieve perfect evenness, use beacons or even wooden blocks.
- Check the sealed area for level.
Plastering window slopes
Advice! You can use a little trick that will help keep the surface unharmed. To do this, use a narrow spatula. The purpose of the event is to create a small depression between the window frame and the applied layer. The instrument is placed at an angle and quickly moved from top to bottom.
This option is suitable when the slopes on the windows have minimal damage. That is, it is only necessary to restore the damaged areas and, after removing the old paint, cover the surface with a new composition. Please note that painting is carried out after preliminary priming.
Painting of plastered slopes is carried out only after applying the primer twice and allowing it to dry completely.
What happens if you don't fix it in time?
If the framing structure is not replaced or repaired in time, the following problems may appear:
plates on the opening that begin to twist can damage the frame or its fastenings, as well as break out of their grooves;- if the slopes are deformed or damaged, the insulation of the installation seam will suffer, which is why it may collapse under the influence of the external environment;
- mold on the seam will destroy the insulation, begin to emit an unpleasant odor, and also worsen the indoor microclimate;
- due to broken or damaged slopes, drafts and cold bridges may appear, which will increase heat loss in the room;
- in some cases, failure to replace it in a timely manner may result in equipment failure or injury if the slope falls off.
The whole rainbow of colors
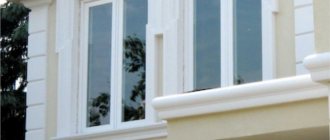
White windows are a classic. But not everyone likes traditional options. If you want variety, take a closer look at the laminated finishing of the openings, which will make the interior of the house more expressive.
We have a wide selection of shades imitating natural wood, from golden oak to black cherry, which will allow you to harmoniously decorate the interior in rustic, chalet or eco styles. And lovers of modern design will like rich monochromatic options - noble gray, elegant chocolate.
Original PVC panels are made by applying RENOLIT laminating film to finished parts. The certified coating meets European environmental safety requirements.
How to remove parts indoors and outdoors?
For dismantling you may need:
- screwdriver;
- chisel;
- hammer;
- perforator;
- screwdriver;
- individual protection means;
- hexagons;
- construction knife.
The work required to dismantle the slopes depends on what it was made of. For sandwich panels, this process will take the least time; it requires:
- carefully trim the layer of sealant that connects the frame and the plate;
- remove decorative or protective corners from the opening;
- unscrew all fasteners, since panels are most often mounted with self-tapping screws;
- if the plate was attached to the mounting foam, then the latter must be carefully trimmed with a knife;
- pull the sandwich panel out of the mounting groove;
- clean all joints and, if necessary, replace the insulation under the plate.
If you use plasterboard panels for slopes, the process is very similar, but first you will need to carefully remove the paint layer to find the attachment points.
It is recommended to remove double-glazed windows (if possible) to dismantle the painting material or putty layer.
If plaster was used, the work order is as follows:
remove or protect the glass unit;- using a hammer drill, chisel and hammer, remove the finishing layer down to the brick (or other material from which the opening is made);
- When working, it is recommended to use a respirator, goggles and gloves, since a layer of dust during the destruction of the plaster can harm the body.
When carrying out work outside the premises, the use of high-altitude equipment or the involvement of specialists may be required, since independent dismantling can be hazardous to health. It is not uncommon for slopes to be insulated from the outside, and for this purpose polymer blocks, for example, polystyrene foam or polystyrene foam, are used. To dismantle them you will need:
- carefully remove the top layer of plaster so as not to damage the frame;
- you need to beat off the protective layer until the self-tapping screws (if they were used during installation) appear on the polymer plates;
- Unscrew the screws using a screwdriver or screwdriver;
- trim the caps on the mushroom-shaped dowels with a knife;
- dismantle polystyrene foam or polystyrene foam piece by piece, since it is usually glued to a special adhesive, which, after hardening, becomes strong, like plaster;
- After the polymer is cut, remove the layer of glue until the material from which the walls are made appears.
Surface preparation
Before sealing the surface, it must be prepared for work. The process consists of several stages:
- All protruding or collapsing areas are knocked down. To do this, a hammer and chisel are used; they can do the work precisely without damaging adjacent areas.
Cleaning window slopes from unnecessary areasOn a note! Considering that the work involves the collapse of some pieces of cement or brick, it is advisable to prevent damage to the window and sill. To do this, they are covered with corrugated cardboard.
- A construction knife is used to cut off excess foam used to seal the windows. The main thing is to wait until it has completely gained volume and dries. This is done quite simply: use a blade to pierce the protruding part of the foam from above (parallel to the window) and, pressing slightly, make a single downward movement. If necessary, cut through the part that is glued to the wall.
Removing excess polyurethane foamAdvice! There is a film sticker on the plastic frame; it is removed only after all work has been completed.
- The surface is thoroughly cleaned from dust and dirt. It often happens that an old brick wall has loose bricks. They need to be placed on the solution and allowed to adhere.
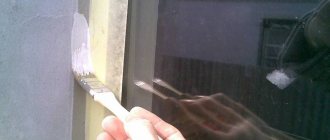
If you plan to plaster the slopes, the area is first coated with a layer of primer. In other cases, it is advisable to use antiseptics.
Applying primer to window slopes
How to change the design with your own hands?
The installation of new slopes after dismantling is not much different from the initial one. But in some cases there are some peculiarities:
- If the old sandwich panel was removed, then to reinstall it you can simply cut a new one to fit the dimensions of the slope and insert it into the old mounting groove.
This can only be done if, when dismantling the old one (or during the period of its operation), this fastener was not damaged. After installation, you need to re-secure everything with self-tapping screws and seal all seams with sealant. In some cases, it may be necessary to replace the old insulation or thoroughly sand the wall to remove polyurethane foam.
When dismantling a plasterboard slope, the procedure is similar, but you will need to first clean the wall of foam or old insulation, as well as the facing layer.
After this, you can install the plate in the old fasteners and fasten it along the existing holes.- If on the external slopes not the entire layer with polymer insulation was removed, but only the external finishing layer, then all the materials may not be changed (the main thing is not to damage the insulation too much when dismantling the plaster and glue).
For the work, you just need to level the surface of the polymer plates after the old glue, apply a new layer (if the old one was torn off along with the plaster), and also seal everything with putty and paint.
Note! The most important thing when installing a new framing structure after dismantling the old one is to thoroughly clean all joints and fastening points from old materials.
If this is not done, the lining of the opening may be installed with kinks or places of increased pressure, which is why the slope may “lead.” Also, old materials will deteriorate before new ones, which can lead to peeling or destruction of new fasteners, insulation or mounting seams.
About slopes
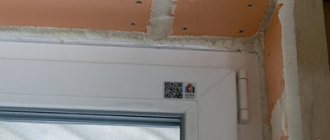
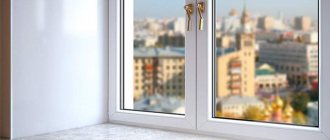
The sections of the wall adjacent to the window block are called slopes. They are internal and external. Strict requirements apply to internal areas.
The following functions are assigned to the slopes:
- giving the window structure an aesthetic and attractive appearance. Is it really possible to imagine a high-quality window that is connected to a broken wall;
- improvement of sound and thermal insulation. Window structures that do not have high-quality slopes do not have sufficient tightness;
- protection of installation elements and seams from environmental influences. A high-quality slope not only protects fasteners from corrosion, but also reduces the likelihood of windows fogging and freezing.
Thus, slope repair is a list of works aimed not only at restoring damaged sections of the wall, but also at creating additional insulation.
Basically, one of the following repair options is selected:
- Plastering the surface followed by painting. A widespread and inexpensive finishing option.
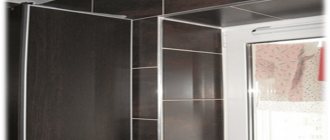
- Plastic sheathing. Plastic panels are combined with the window profile material; in addition, such repairs do not take much time;
- Installation of drywall. The option is labor-intensive, as subsequent finishing is required. The material is convenient to use for windows of complex configurations.
For any repair of slopes, first of all, high-quality surface preparation is necessary.
Difficulties and errors during dismantling
During dismantling, the following difficulties and errors may occur:
- If the window is located at a height greater than the second floor, then it is recommended to use the services of specialists to dismantle the slopes, since during the work there is a high probability of damaging the glass, frame or opening, as well as getting injured.
- When dismantling old slopes (especially those made of plaster), the corners of the opening may crumble, which is why you will have to use metal corners and concrete mixture to restore them.
- If you do not remove the glass unit, and also do not protect the frame with any external finishing (for example, paper or foam rubber), then there is a high probability of scratching or damaging these window parts.
- When refinishing, it is very easy to stain the window and frame with plaster or paint, which are then difficult to clean.
- If the old thermal insulation is damaged or worn out, it must be replaced, since it will make the slope poorly insulate the rooms from the cold, and the windows may also begin to become covered with condensation. This can lead to increased heating costs, deterioration of the microclimate or the appearance of mold (sometimes fungus).
When adding sand to a solution of plaster or concrete, you should sift it carefully, since lumps, roots and debris can reduce the strength of the material after drying, as well as worsen the appearance if they stick out from the slope.- Each layer of plaster, paint or concrete mixture must be applied to a material that has already completely dried in order to improve adhesion (stick better) and reduce the likelihood of material delamination.
Various finishing options
Do-it-yourself finishing of plastic windows is carried out using different methods:
- Applying plaster with water-based paint.
- Installation of plastic panels. They harmonize well with the materials of the window blocks and are installed quickly.
- Use of gypsum boards. This technique is distinguished by the fact that it requires high-quality further finishing.
Plastering with dry mixtures
For the work, special plaster mixtures are used, which can be sold dry or already diluted. The plaster is diluted with water in the ratio indicated on the packaging so that the resulting mixture is not too liquid. Different manufacturers produce mixtures with different components in the composition. The plastering mixture should look like porridge.
For external areas where increased moisture concentration is inevitable, it is more rational to use a composition that contains a proportion of cement. Gypsum compositions are suitable for interior work: they are convenient to apply, they harden quickly, and the consumption does not exceed permissible standards.
Attention! Before you begin interior work, you need to purchase a special mixture in the store.
Plastering with tile adhesive
This material is suitable for exterior decoration. If high-quality tile adhesive is used for the work, such repairs will significantly increase the cost of materials compared to using classic cement with sand.
Finishing advantages:
- the surface does not absorb water droplets;
- does not deform even in severe frost;
- the material quickly sticks to any base;
- material consumption is as profitable as possible;
- high quality, durable material.
Attention! In order to complete all work quickly, it is important to use waterproof and frost-resistant tile mixtures for outdoor work. They need to be applied in a thin layer in several stages.
Finishing with plastic tape
PVC tape is often used when there are problems with waterproofing a room. In terms of characteristics and external features, it is more similar to the foam rubber that was previously glued to windows, but now updated.
- The plastic tape repels water and direct sunlight and is vapor-tight. The only drawback is its fragility: the tape loses its properties 6 years after installation.
- Installed in the free space between the wall and the profile to protect joints and seams foamed with mounting foam.
- If the entire seam is filled with foam, it needs to be cut out a few millimeters.
- Then rinse, wipe the joint, and let dry.
- A piece of a given length or slightly longer than required is cut from the tape.
- The tape should not be glued at an “angle”, otherwise it will be used irrationally.
- The tread liner is peeled off from the tape and glued to the area with maximum traction. It's best to use a profile.
Application of window sealant
Some materials are used even at the stage of installation of the window frame - polyurethane-based foam wedges the window and can fill all the wall voids that are hidden under the plaster layer or slopes made of PVC or metal. Some of them can be used several days before the onset of cold weather. The cracks are sealed at the window sill line and at the junction with the wall.
One material will not immediately solve the problem with noise and heat insulation. It is important to use several tubes in combination. They are suitable for indoor and outdoor use.
Average price for work
Average prices for dismantling and replacing old slopes most often depend on the materials used, as well as the need for high-rise work. Below is the average cost for dismantling old materials:
- putty – 120 r/m.p. (linear meter);
- plaster – 140 r/m.p.;
- wallpaper – 50 r/m.p.;
- paints – 120 r/m.p.;
- plasterboard/sandwich panels – 30 r/l.m.
Installation depends on the material, depth and shape of the opening, as well as high-altitude work:
- with a depth of up to 25 cm, the finishing of internal slopes of ordinary windows will cost 650-750 rubles/m.p., and external slopes – 850-950 r/m.p.;
- installation of laminated slopes on openings with a depth of up to 25 cm will cost 1,600 rubles/m.p.
Wealth of forms
Until recently, windows were rectangular, but today almost any shape is available to you. Especially if you live in a cottage. Arched openings are very popular now. Is it possible to make high-quality slopes for them? Of course, if there is a problem, specialists are hired. In addition to standard ones, our company’s craftsmen create structures of non-standard shape:
- arched
- round
- triangular
- polygonal
All projects are carried out with the utmost care. Thanks to accurate measurements and compliance with GOST, each seam turns out flawless.
Thiokol
A material whose performance characteristics are in no way inferior to silicone sealant. Thiokol (polysulfide) compositions are based on liquid thiokol, the structure of which resembles liquid rubber. Of the most significant advantages, I will note the following qualities:
Maintains elasticity after hardening.
Immunity to oil, gasoline.
Resistance to ultraviolet radiation and sudden temperature changes.
Source st26.stpulscen.ru
Despite all the advantages of polysulfide sealants, I do not use them in my work for the following reasons:
- Incompatibility with PVC materials. The sealant contains solvents that have a negative effect upon prolonged contact with plastic.
- It is sold in buckets, in large volumes, which is not very convenient for processing window cracks, where a minimum amount of material is required.
- The composition is two-component. Therefore, it is quite difficult to predict the exact amount that will be needed to process several seams.
- The viability of the diluted composition is no more than 2-3 hours. After this period, the material simply loses its original qualities.
Thiokol sealants are excellent for sealing gaps created by installing wooden windows. They are incompatible with plastic double-glazed windows.