I planned to remove the yellowed panels and paint the window openings. This seemed to me a more rational solution than putting plastic blanks back in again. I won’t focus on brick and plastering work today. Because of the mistakes that are often made, I decided to write about how to properly paint slopes and how the materials suitable for this differ.
Source stroi-remont43.ru
A few words about slopes
Openings in the wall for windows are subject to mandatory finishing, since the structures are partially destroyed during the installation of frames. Often there is a gap between the slopes and the binding. More often than not, craftsmen fill it with foam. But it is still necessary to disguise and isolate the perimeter.
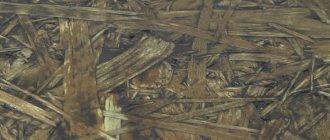
Pursuing both tasks, building materials are selected that can be used to form even planes. As a rule, preference is given to chipboard, plasterboard or plaster. If you are planning a solution that does not require additional painting, then there are ready-made panels and a system of profiles. But we will talk further about the first approach - painting the window slopes.
Source birzhaplus.ru
Preparatory work
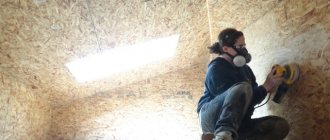
When all materials and tools are prepared, you can begin to work. The discs are first removed from the car, and it is also advisable to remove the tires. Next, the metal surface is processed with a grinder, the old paintwork and traces of corrosion are carefully removed.
If the old paint is not very outdated and does not come off, then the surface of the discs can simply be matted with sandpaper. However, for a major overhaul, you need to remove the old coating down to the metal.
When the discs are cleaned, they should be blown with compressed air or washed with detergents. After this, you need to inspect the treated surface for defects. Small scratches are removed using fine abrasive paper until smooth. If there are deep scratches or even chips, then putty will come to the rescue - the defects are covered up and sanded to perfect condition.
Paint selection
There are several criteria by which you need to choose paints. It is important to consider not only the appearance of the coating. There are also technological requirements: operating conditions, type of base, method of application. It is important to follow them so that the result is high quality and durable. It is believed that the optimal solution for window slopes is washable matte paint.
For interior work
Let's first consider how to paint the slopes on the windows inside. Since today there is a large selection of ready-to-use paints on the construction market, the first thing that is pursued is to find odorless material. Acrylic and latex-based compositions meet this criterion. They are water-soluble, so they do not emit unpleasant odors or toxic substances. They also tend to dry quickly.
These paints differ in the types of film formed and their characteristics. The table shows a comparison based on features that are important from a practical point of view.
| Sign | Acrylic paint | Latex paint |
| To the touch | Rough | Smooth |
| Vapor permeability | Breathable | Does not allow water to pass through |
| Elasticity | Low | High |
| Resistance to operating conditions | Wipeable | Can be washed |
If you need to paint plastered walls and the installation gaps are well sealed, then an acrylic composition is well suited. But washable latex paint for window slopes does not crack, copes better with condensation and icing, and can be washed using gentle detergents. That is, for a dacha and a house with seasonal residence using water-soluble paints, I would choose the second option.
Another pair of paints that are suitable for internal slopes is alkyd and oil. They are cheap, suitable for many substrates and cope with changes in temperature and humidity. They also have in common a short service life. True, this is typical only for the budget group.
Source saucyintruder.org
In terms of interior work, the difference between paints is largely considered in relation to the appearance of the coating. Alkyd enamel has high density, abrasion resistance, and water resistance. You can select materials by degree of smoothness. The oil film is rougher, “breathes” better, and is thinner. Cheap paint turns yellow relatively quickly in the sun.
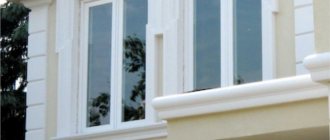
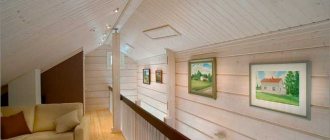
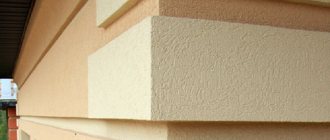
For outdoor use
On the outside, slopes are usually only plastered for painting. Therefore, it is easier to limit yourself when choosing a paint to just two criteria: façade and for mineral surfaces. There are universal compounds that can be applied, including to wood. But we must remember that universal formulations are of lower quality than specialized ones.
Source ozone.ru
Let's consider how to paint slopes on windows from the street. Here you can use latex, alkyd and oil paint, which have already been mentioned. There are other options. For example, based on epoxy resin. This is an expensive option, but the price is justified by its durability and excellent performance. The main thing is to paint quickly and carefully, since the paint dries quickly and is difficult to wash off.
Color
Usually the choice is limited to white paint. But the abundance of inexpensive tinted liquids and special equipment at many retail outlets make it possible to make other decisions. The main thing here is not to make a mistake with the base. For example, some cheap acrylic paints quickly fade after adding matting paste and are easily erased. A friend of mine painted a door like this and everything around the handle was erased, and when wiped with a rag, marks remained on the rag. So it’s better to make preliminary samples or entrust the color change and selection of materials to tinting machine operators.
Source nashaotdelka.ru
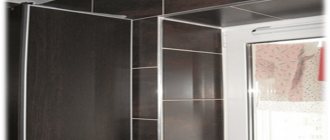
Plastered surface
Plastering slopes is a finishing method that is now not as common as, say, plasterboard, but let's look at how to paint such slopes.
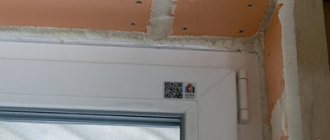
Preparatory work
As with every job, the plastered surface needs preparation.
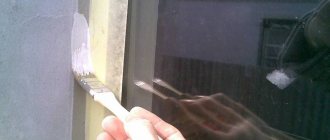
To do this, use a painting knife to cut off the excess paint foam, remove significant protruding irregularities, and apply putty in several layers. After puttying, you will need to go through an additional fine abrasive to remove minor defects.
Important! Plastering of external slopes should be done only with cement mortar, and the use of putty can only be done in the same way, on a cement base.
Otherwise, painting external plastered slopes will be no different from similarly finished internal analogues.
Slope preparation
In order for the paint for window slopes to adhere well and serve for a long time, the slopes must be properly prepared before applying it. They must be durable, serviceable and clean. I'll tell you more about each point.
Strength means the absence of vibrations, wobbling, and delamination. That is, the casing needs to be tightened and, if necessary, individual sections need to be replaced. Old plaster cracks when peeled and destroyed. It is better to check such a base by tapping. No amount of paint can hold back the pieces that are falling off.
Serviceability includes the absence of cracks, pores, old decorative coating, fungus and rust. If you paint over the existing finish, then possible defects will remain hidden. Therefore, the decor is first dismantled, cracks are repaired, loose pieces of plaster are removed, and sheet materials are replaced.
Source forum-okna.ru
After removing the debris, you need to level the walls for paint for window slopes. Plaster is used to correct major defects, and putty is used to correct minor defects. The latter cannot be applied in a layer greater than specified in the instructions. Limits may be in the range of 0.1-2 mm. But the most important thing is that before each new layer, you need to remove debris from the surface and treat the base with a primer. It is better to immediately choose formulations with antiseptic additives. They are moisture resistant and prevent mold.
Then the surface is sanded with sandpaper with a grain size of 100-120 units. After this, the walls of the slope are thoroughly cleaned and treated with a primer. Here it should be in good contact with the selected paint for the slopes. Along the window frame and window sill, you additionally need to fill the joints with sealant. It is better to choose acrylic for painting to avoid peeling of the new coating.
Source stroydvor44.ru
Select a roller.
It happens that during repairs, we think about how to choose the roller we need. We do not recommend completely following the recommendations of sales consultants in construction stores. After all, even the manufacturers do not give us any specific recommendations. The manufacturer can also indicate how smooth the surface should be. You can learn about all the intricacies of the work only from an experienced builder. Our repair instructor decided to share his experience this time.
Velor.
Its coat consists of very fine pile. It may differ slightly, but everywhere the length of the hairs will be approximately one to three millimeters. It is not suitable for ceilings and walls as it absorbs very little paint. Therefore, painting with it takes a very long time and is labor-intensive. There will be stripes and missing areas. A large amount of paint will flow and drip. Therefore, you are guaranteed increased fluid consumption. They are even more inconvenient to prime. Why might you need a velor roller?
It is best suited for varnish work. It perfectly applies and rolls varnish onto parquet, wooden doors, and wooden tables. (any wooden smooth, even structures). The varnished surface will be almost the same as from a spray gun.
With large pile.
Their pile length is from one and a half to two or more centimeters. They are excellent for structural, relief decorative coatings. For example, facade decorative coatings. Thanks to the large pile, all holes, ruts, and any small irregularities on the surface are soaked the first time. You can roll out wallpaper glue on walls and wallpaper, but not always. It applies the glue in a thick layer, so after smoothing, a lot of glue can come out from under the wallpaper. Also, wallpaper can be greatly deformed and even tear when smoothed. It can be used as a primer, but thick, long hairs do not hold it well. Consequently, a significant portion of the liquid may end up on the floor.
With medium pile.
They are the most versatile of all. The length of the hairs is approximately one centimeter. It is soft, so it holds even primer well. Excellent coverage on flat surfaces and decorative coatings with slight relief. The shagreen on the surface after painting remains small, the most optimal. Fur coats for them are also made from natural materials (sheepskin). When painting ceilings and walls, not a single fallen hair remains on the surface. They are durable and suitable for priming, painting, and applying wallpaper paste.
Foam rubber.
We do not recommend painting with them. The liquid is squeezed out strongly. Sometimes, instead of spinning, it simply slides along the surface. Foam rubber may roll to one side. You can apply wallpaper glue with it, but keep in mind that the old foam rubber is destroyed. In practice, there was one very unpleasant case: after gluing thin, smooth wallpaper in a certain direction of the sun's rays, the entire wall ended up with small tubercles. It looked terrible. I had to re-paste the wallpaper. As it turned out, there were many very small pieces of foam rubber under the wallpaper. Such debris is very difficult to notice in the glue, since wallpaper glue has a yellowish tint. But among these rollers there is one for priming absolutely any surface.
He has a thick foam coat. The diameter of the main shaft is only 10 mm. The diameter of the coat is 60-70 mm. They are excellent for priming any uneven surfaces, brick walls, corners. It holds the primer and distributes it evenly over the surface. There are also thin rollers 100 mm wide, with medium pile.
They are convenient for painting narrow slopes, niches, and hard-to-reach places.
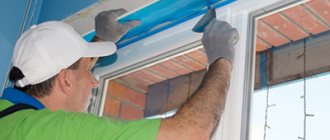
Coloring
Before painting the prepared slopes on the windows, you need to protect the window frames and window sills from contamination. To do this, use paper (masking) tape. I recommend not trying to glue it completely and doing this immediately before painting. The main thing is that the edge of the tape along the walls is secured. This way you won’t have to wash the glue off later.
Paint can be applied with brushes, rollers and a spray gun. It turns out to work cleaner with the first two tools. Painting is carried out in two layers. During the first one, you need to carefully paint all the corners with a brush and roll over the marks from the bristles with a narrow roller. Then the rest of the area is covered. The tape should be removed before the paint dries.
Source kraski-net.ru
The coating must dry completely. The second layer of water-soluble compounds can be applied, as a rule, after an hour, and with organic solvents - after 6-12 hours. Here the masking tape is applied again, the perimeter and the main part of the slope are painted. The tape is removed immediately upon completion of work.
In this video, the master talks about the features of choosing a painting tool for painting window slopes:
What tools will you need?
To make painting convenient and the work not to be delayed, it is worth preparing in advance everything that will be needed in the process.
You will need the following tool:
- roller and hair brush;
- wide and shallow tray for easy paint pick-up;
- masking tape;
- gloves (the most authentic ones are rubber ones, since lint or threads sometimes fall off from knitted ones).
You need to select a roller based on the width of the slopes. A tool that is too large is inconvenient and working with it is often accompanied by a considerable amount of splashes and drips. If there is no special tray, you can use a small old tray or similar design. However, plastic paint trays can be bought at any hardware store for literally pennies. You should also immediately purchase some narrow masking tape there.
It is better to give preference to paints with a good price/quality ratio. Compositions that are too inexpensive are usually of low quality and will require repainting after a short time. That is, new financial expenses and additional time.
Conclusions and recommendations
The color layer does not acquire strength immediately, but gradually hardens during the polymerization process. Manufacturers of washable paints do not recommend washing painted surfaces for the first few weeks. If necessary, it is better to lightly wipe with a damp soft cloth.
Knowing how to properly paint the end surface of a window or doorway, a home craftsman will do an excellent job with all painting operations.
Coloring compositions that can withstand up to 3000 washing cycles are supplied in a form prepared for application; shake the composition thoroughly and, if necessary, stir until a homogeneous consistency.
Interior decoration
To paint slopes located indoors, experienced specialists advise choosing the following types of paints and varnishes:
- acrylic latex paints. This variety is great for painting plasterboard slopes. These compositions have almost the same characteristics as water-based mixtures, however, due to the presence of latex components, the paint has a higher strength and resistance to moisture. Latex additives make the dried paint solution more attractive and glossy. They make both glossy compositions that beautifully reflect the sun's rays and color, and matte ones that effectively emphasize the beauty of the window;
- acrylic water-based. These paints are very convenient and easy to use for painting slopes; they dry quickly enough, after which they create an attractive and durable protective layer. Even a beginner can handle their application; they have good water-repellent characteristics, so they are used not only for living rooms, but also for painting slopes located inside kitchens or bathrooms. Acrylic water-based paint contains ordinary water as a solvent, so this mixture is absolutely non-toxic, does not harm human health, and produces virtually no odor during application and drying.
Painting paneled doors
The basic method for painting a flat door is with long, smooth strokes or vertical strokes with a roller. But panel doors are often installed, which must be painted in the following order:
- First paint the ends of the door;
- Next, paint the inner rectangular panels;
- Then paint the vertical stripe between the panels;
- Let's move on to horizontal stripes;
- Move on to paint the edges of the door.