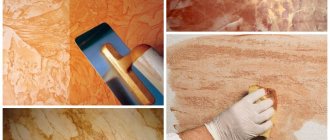
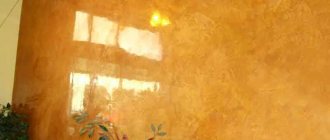
Is it possible to paint decorative items and with what paint?
To work with the plaster mixture, white paint is often purchased. You can add any pigments to it in the required quantity.
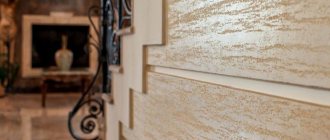
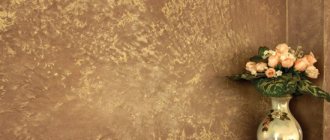
Moroccan and Venetian varieties of decorative items do not need painting. The pigment must be applied to a textured surface. To save time, many craftsmen add color to the plaster. This mixture also does not require additional coloring after application.
There is no clear answer to the question of whether decorative plaster can be applied to paint. It all depends on the components in the material. However, before you start decorating the wall, it is advisable to clean it.
Disadvantages of coloring
Painting is an additional financial and time cost: by hiring craftsmen, the savings from applying the plaster yourself will come to naught, and painting with your own hands will sometimes take more time than plastering, especially if you do it in several shades.
The wrong paint can ruin your home's insulation efforts if the plaster was applied as part of an insulation system.
Decorative paint - what to paint (which is better to choose)
The choice of composition depends on the place of its use. Silicate, silicone and acrylic facade paints are suitable for exterior work. They protect the plaster from the effects of the external environment: temperature changes, rain, wind, etc.
The following types of paints are used for interior work:
- Latex
. Such compositions are characterized by low cost. Their main disadvantage is considered to be fragility. Latex paints do not tolerate temperature changes.
- Water-based
. The compositions are used if you need to create a matte rather than glossy finish. The disadvantages include the need to apply paint in 2 layers, which leads to additional costs.
- Acrylic
. The paints are suitable for use in northern regions. They practically do not react to low temperatures. The compositions can be special, glossy and glyphthalic. The latter variety is used more often than others due to the content of acrylic resins that improve the properties of paints.
Compositions based on latex and water-based dispersion protect walls from the formation of mold and fungi that are dangerous to human health.
All types of paints are suitable for both smooth and textured surfaces. However, when covering relief walls, the material consumption is 1.5-2 times higher.
Tinting textured plaster with decorative paints
Since the plaster is white or light gray in color, it is often tinted during renovation work. This technique allows you to make small chips and cracks invisible.
Several pigments are often used for tinting. It is advisable to select dyes at a hardware store. Using a special program will allow you to find beautiful color combinations. At home, pigments are mixed using a mixer. It is advisable to do a test paint. It should be noted that after drying, the plaster solution becomes lighter by 1-2, and sometimes more shades. For this reason, you need to add more pigment.
What colors can you stylishly paint a bark beetle on a façade?
Careful choice of paint will help to stylishly decorate the facade of the building.
“Natural shades look most harmonious: gray and beige tones, muted reds, browns, yellows and greens.”
Using several shades of the same color will give the facade an elegant look. By highlighting the fronts of the building or other facade elements with darker shades, a visual impression of a three-dimensional surface will be created.
Facades painted in the same color look harmonious. But at the same time, the color of the walls should differ from the color of the roof. For example, a combination of a brown roof and beige or yellow shades of the facade will have a harmonious look.
Just white
The facade of the building, decorated in white, looks impressive. Neutral color looks good when combined with other colors and shades. The evoked associations of cleanliness and freshness will give the appearance of the building lightness and harmony.
Grey
Shades of gray are popular. Light colors transform the facade and add grandeur to the building; combination with dark or bright shades makes the appearance attractive. Dark gray color visually reduces the façade of a building; it is best used when painting large buildings. For greater expressiveness, it is advisable to use accenting light shades.
Ivory
The noble and elegant ivory color will bring a special charm to the building. Combination with brown shades and natural wood will help create an atmosphere of comfort and grandeur.
Peach and orange
Delicate shades of peach color of the building facades will create a visual feeling of warmth and comfort. A competent combination with other shades will emphasize the originality of the structure. A brighter orange color will look stylish. Using orange color you can visually highlight a building.
Blue and green
The blue color deserves special attention. Combined with neutral tones, white, light gray or beige, the structure will look elegant. For example, if the facade is painted blue or blue, then a gray roof and white windows will harmoniously dilute the bright facade. The green color in the exterior will give the building a special style. Bright shades of green will look ridiculous; muted tones will be preferable. Olive or pistachio color looks harmonious on the facade in combination with white and brown shades.
Tools for working with decorative paint
The choice of tools depends on the technique.
In most cases, masters use:
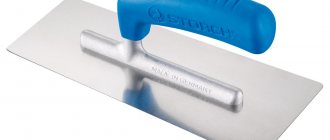
- plaster mixture (can be replaced with putty);
- paints and colors;
- foam sponges;
- brushes with different bristles;
- mixer;
- spray gun (for working with a large area);
- pieces of fabric;
- trays for varnish, paints and other compounds;
- masking tape (to highlight work areas);
- stepladder (when painting indoor walls);
- scaffolding (for working with facades).
You can use textured paint as decorative plaster. Sequins and other decorative elements are also additionally used.
Execution options
When you decide on the desired result, then you will need to choose one of the methods of plastering.
Stencil
Necessary components: stencil for applying patterns, acrylic putty (“finish”), putty “start”, color, primer and paint (acrylic).
You can purchase a stencil ready-made or cut it yourself from thin plywood or thick, durable cardboard. To do this, simply apply a design to the surface and carefully cut it out. Then the plaster is applied:
- Mix the finishing putty and color (until completely dissolved) and apply to the entire wall.
- After complete drying, level with a spatula and coat with primer.
- We apply the stencil to the wall and fill it with unpainted putty. Important: you must wait until the pattern dries and do not remove the stencil, otherwise the pattern will be deformed.
- Lightly smooth the pattern with sandpaper (if necessary).
Preparing the surface for painting
The walls must be cleaned of dust and pellets remaining as a result of applying the plaster mixture. For smooth surfaces, use a clean cloth. For relief walls, a dampened sponge is suitable. You can also use a vacuum cleaner. Then a primer is applied to the wall.
This needs to be done in order to:
- improve adhesion of plaster and paint;
- fill small cracks in the coating;
- prevent spreading of the plaster layer.
Before you start painting, you need to protect the floor, window sill and other surfaces.
Applying putty to a car
Before mixing with the hardener, the new putty in the jar must be mixed so that the consistency is the same and there is no drier putty left at the bottom of the jar.
Next, mix with the required amount of hardener and proceed to applying putty.
Too much hardener will not speed up the hardening process, but will affect subsequent layers of primer, so care must be taken to add the correct amount of hardener. Understanding how much hardener to mix with putty comes with experience. You can buy electronic scales and use weight as a guide. The ratio of putty to hardener is 50 to 1 (2% of the weight of the hardener from the weight of the putty). You can use this technique. The hardener is squeezed out crosswise to cover the required amount of putty.
utty-
It turns out to be a cross of hardener, passing through the center of the putty, to the edges. Thus, the larger the diameter of the “pile” of putty, the more hardener will be squeezed out of the mixing tube. This, of course, is not an exact way of mixing two components, but it is quite effective.
How to paint decorative items with your own hands
Beginners should strictly adhere to ready-made technologies. However, people who know how to paint decorative plaster with their own hands often combine several methods of applying pigment.
Painting walls one color over textured plaster
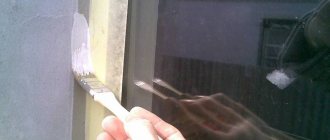
This method is considered the simplest. It is suitable for inexperienced craftsmen. The paint is applied to the surface in ribbons up to 6 cm wide. The strokes must be vertical. Excess paint must be shaded. If the surface is embossed, the strokes can be horizontal.
Painting decorative items in two colors (mother-of-pearl)
This technique is more often used in cases where it is necessary to lighten/darken depressions or relief parts of the wall. When painting decorative plaster in two colors, it is recommended to use mother-of-pearl as a complement to the main shade.
There are several options for working:
- If there are many depressions in the surface, you can apply additional color first. To do this, use a long-haired roller. After the first layer has dried, you need to apply the main color. It is advisable to use a sponge.
- A smooth surface should be painted in the main shade. You can use a spray gun or a wide brush. After drying, apply additional color with a figured roller.
- When it is necessary to emphasize protruding parts, the wall must be painted in the main tone. Additional color is applied to the bumps using a sponge or narrow brush.
DIY dry brush paint technique for walls
The technique is used to enhance texture. The result of the work is to paint the recesses in darker tones. White paint is mixed with the desired color. The shade should be bright. A long-haired roller is suitable for application. The surface must be completely dry.
For the second layer, apply the same color as for the first. However, a smaller amount of pigment is added to white paint to make the shade 2-3 shades lighter. The layer must be applied with a brush to the protruding parts. You can use a short nap roller.
Before applying the second layer, wipe the brush with a cloth or paper. This way there is a minimal amount of dye on the instrument. When applying the second layer, you can use pearlescent or metallic powder.
This technique is similar to the method of working with 2 colors. The difference is that the master does not wait for the decorative plaster to dry; painting begins immediately.
Removing paint to brighten interior walls
The technique is used only for working with relief surfaces. The task is to highlight the depressions. To achieve the result with the least amount of time and effort, textured plaster is painted in one color. After 1-2 days, all protruding fragments are removed using a grinding machine, which creates a worn effect and ages the surface.
There is a more labor-intensive method of highlighting, which includes the following steps:
- Application of the main color. It is necessary to treat a small area of the wall with water-based paint.
- Surface cleaning. The paint must be wiped off with a damp foam sponge. The color will only remain in the recesses.
- Applying additional tone. This step is optional. Relief areas are painted with a sponge or thin brush in a shade lighter or darker than the main color.
- Applying a fixative.
Venetian plaster effect on the wall
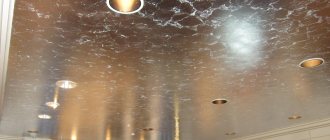
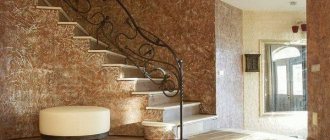
Using putty, you can imitate natural stone - malachite, granite, etc. This technique is called the Venetian plaster effect. Stone chips are sometimes used to create it. But, since this is an expensive material, it is often replaced with gypsum plaster, painted in the required color.
The technology has the following stages:
- Preparing the coating for work. This stage includes cleaning and removing minor defects.
- Applying the base layer. A long-haired roller is suitable for the job. Additionally, you may need a narrow brush, which is used in hard-to-reach places. You need to wait until it dries.
- Application of decorative coating (gilding, bronze). Inexpensive aluminum powder is often used to create a “silver” tint. The decorative layer can be applied with a short-bristled brush or foam roller. The touch should be light and the pressure should be insignificant. If the technique is followed, the first layer will be visible from under the second.
- Consolidation. At the final stage, a water-based varnish is applied to the coating. Since this substance can create a crust, it must be diluted. Water should make up no more than 20-30% of the total volume. The varnish should be applied with a foam roller.
Marble wall
The method is used for both smooth and textured surfaces. It can be used to imitate marble. Gray color is added to white paint, and then it is applied to the work surface. A roller is used for this. You can use the dry brush method. Part of the surface should remain completely or partially unpainted.
A smaller amount of pigment is added to the composition for the second layer. It is advisable to use a different roller for the job. You can cover not only unpainted areas of the surface, but also those places to which a darker shade has already been applied. It is permissible to start work before the base layer dries.
After 2-3 days, the veins characteristic of marble are painted with a thin brush. The surface is coated with acrylic varnish or made matte if it is necessary to create the effect of unpolished stone.
Using fabric
A pigment of the desired color is added to water-based paint. The finished mixture is applied with a brush or long-haired roller. A piece of fabric measuring at least 30x30 cm is moistened with cool water and wrung out. Then it must be crumpled and attached to the roller. This must be done before the paint dries. Shading is done with a soft brush with long bristles.
After the first layer has dried, you can begin applying the second using the indicated technique. In order for the “stone” to have a natural look, you should change the shade, making it darker or lighter.
You can add a small amount of mother-of-pearl to the paint for the second layer. During one session, it is recommended to work with a section of the wall whose area does not exceed 3 square meters. m.
Main stages of kneading
- Purity. first of all. Before starting work, clean the surface you are working on from dirt, dust, and other foreign particles.
- Treat the walls with a special primer - this way the putty will adhere better and will stick and not crack.
- You should also make sure that the container and attachment of the construction mixer are clean. The smallest particles of dirt can prevent the creation of a homogeneous solution and will lead to the appearance of lumps.
- It is necessary to correctly calculate the time that will be spent mixing the components. First, the powder is poured into water, then stirred and left for some time for the elements to swell.
- After about 8 minutes, begin re-mixing, which prevents lumps from forming.
- Knead in a clockwise direction, but turn on reverse from time to time if your mixer has one.
- Let the mixture sit for a while. Just a little bit, about 5 minutes. For gypsum mass - 3 minutes, since it dries much faster.
- Do not neglect the correct proportions. Experienced builders can handle creating a solution without instructions, based on their experience. Beginners should pay attention to the instructions and tips of professionals.
- The application layer must be at least 5 millimeters.
Diluting the primer
The ready-to-use solution is mixed in a container or shaken and poured into a small container. Dry primer for wall putty is diluted with water in the correct proportions. How much primer material and water is needed to prepare the solution is indicated by the manufacturer on the packaging.
Standard proportions include the use of 1 part water to 2 parts primer mixture. Builders recommend using the solution within 24 hours, because... subsequently the composition will lose its performance characteristics.
From plasterboard
Determine whether it is necessary to prime walls made of plasterboard slabs based on the quality of the base. Treatment must be done when the surface is dirty. For clean plasterboard floors, preliminary priming is not required, because the level of adhesion for wall putty and finishing will be sufficient. If there are seams and joints of slabs, you need to treat the areas with a primer mixture or putty.
Experts recommend using the primer solution only for interior work. Products must be of high quality, with high performance characteristics. Universal formulations are optimal.
How to repaint decorative material
Before repainting decorative plaster a different color, it is not necessary to clean it of the previous shade. If it is not possible to remove the old layer, it is permissible to apply a white acrylic-based primer. The texture is preserved. After drying, you can start painting. In some cases, no primer is used. For example, if you need to lighten Venetian plaster, it is enough to cover it with a layer of pearlescent glaze.
How to remove old decorative material
Experts advise removing the old layer of putty. To do this, it must be moistened with warm water and left for 1.5-2 hours. You can use a steam generator. Then the old layer is removed using abrasive materials. The walls must be dry before further work.
Breeding rules
To prepare the paint, find a clean bucket (plastic or metal). Pour the required amount of paint into it and mix everything well to the desired consistency. This can be done using a drill attachment or by hand. If the paint is too thick, add thinner.
In the next step, prepare the coloring composition. To prepare it, do the following:
- pour 100 ml of paint;
- add color to it;
- mix everything until you get the desired shade.
Pour the prepared mixture into the main mass in small portions and mix. If foam appears when stirring, wait until the liquid settles until it disappears.
Wax on plaster
Wax compositions can be:
- Synthetic. This wax has water-repellent properties and is resistant to temperature changes. Synthetic wax can be applied with almost any tool.
- Gel-like. The compositions are applied with rubber spatulas.
- Liquid. Wax is used for any type of surface. It is advisable to apply it with a cloth.
Compositions including wax are used in the final stages of painting decorative plaster.
Their use helps:
- enhance color brightness;
- give a glossy shine;
- protect from moisture;
- deepen the relief surface;
- change the color of Moroccan or Venetian plaster walls.
You can add glitter (sparkles) or pigment to the wax. In this case, the composition must be constantly stirred to maintain its homogeneity. Within 3-4 hours after application, the wax layer can be corrected.
Pigments for concrete in Belgorod
Catalog of goods and services where you can buy pigments for concrete among 11 offers from suppliers in Belgorod. Check with the supplier's company for wholesale and retail prices for concrete pigments, stock availability, and delivery costs to your region.
Pigments for concrete, paving slabs
Pigments for concrete, paving slabs Pigments are dry coloring powders, without which not a single production of paving slabs and decorative stones can currently be done. Primary colors of inorganic pigment: Blue Dark Green 234 Emerald Green 230 Scarlet 780 Lemon Yellow 590 Mustard Yellow 580 Surik Krasno- .
Iron oxide pigment FEPREN, packaging 1000g,
Colored iron oxide pigments are one of the most common types of inorganic pigments used in the production of paints and varnishes, decorative dry building mixtures, colored concrete, products made from cement-sand compositions (paving and facade tiles), for coloring sand-lime brick, self-leveling floors, plaster, clay, cement roof tiles
Interior paint for rooms with high humidity
"Alanna" LLC | With. Streletskoye, Belgorod region
. For rooms with high humidity AREA OF APPLICATION: For interior work in rooms with high humidity: plaster, concrete, brickwork, plasterboard. TECHNICAL CHARACTERISTICS: Base Acrylic dispersion Composition Acrylic dispersion, mineral fillers, pigments, modifying additives Density Not less than 1.4 -1.6.
Interior paint
"Alanna" LLC | With. Streletskoye, Belgorod region
. For walls and ceilings AREA OF APPLICATION: For interior work in rooms with normal operating loads on surfaces: plaster, concrete, brickwork, . TECHNICAL CHARACTERISTICS: Base Acrylic dispersion Composition Acrylic dispersion, mineral fillers, pigments, modifying additives Density Not less than 1.4 -1.6.
In stock / Wholesale and retail
Acrylic decorative plaster Bark beetle
"Alanna" LLC | With. Streletskoye, Belgorod region
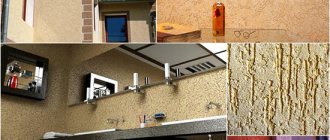
. Textured wall coating for internal and external use, as a protective and finishing layer for ordinary plasters, concrete, gypsum. pigments, modifying additives Density Not less than 1.5 g/cm3 Filler consumption and size 3.0 mm - 3.8-4.2 kg/m2 2.5 mm - 3.4-3.6 kg/m2 2.0 mm - 2.8- 3.2 kg/m2 1.5mm - 2.4-2.6 kg/m2 Adhesion to concrete.
Glaze
The glazing composition (glaze) can be applied to both textured and smooth surfaces. It is used for both internal and external work.
Using glaze has a number of disadvantages:
- It is necessary to shade the joints immediately after applying the glazing composition.
- Surfaces should be covered with the material in small strokes. For this reason, working with compositions takes a lot of time.
- Before applying the composition, you need to wear special gloves. If a person feels dizzy or suffocated, respiratory protection may be necessary.
- You can work with the compositions at a temperature not lower than 10ºС.
Is it possible to plaster sheet materials?
Slabs are best suited for rough work. They form a prefabricated screed, level ceilings and walls, and construct partitions. The slabs must be puttyed when they are laid on soft or rolled materials. It is easier to cover walls, ceilings, and other surfaces with wallpaper. They can be painted, but the resulting joints must be sealed.
The chipboard sheets themselves have an uneven, rough surface. In order to paint them in the future, glue wallpaper on them or apply relief thin-layer plaster, you need to have a flat base. To eliminate defects and bring the surface to a finished state, putty is used.
READ What material to use for bathroom walls
Under the wallpaper
First, cover the base with 2 layers of putty. Movements should be smooth, without jerking. Carefully treat the corners (external and internal) with a corner spatula. Movements are directed from the corner to the middle of the wall.
After setting, they move on to working with sandpaper. It is necessary to prepare the chipboard surface for wallpapering. The wall should not have any defects in the form of cracks, holes, or irregularities that can greatly spoil the appearance after wallpapering. The wall can be covered with a putty mixture or simple wallpaper glue can be used for this purpose.
The first layer of mortar is applied with a steel spatula. Use a small tool to scoop up a little mixture and transfer it to a large spatula. Only after this is applied along the chosen trajectory of movement. It is necessary to select a small area for processing, and then gradually expand it until it completely covers the entire work area.
Varnish
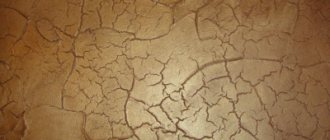
The material protects against moisture and mechanical damage. It is used when you want to add shine to a matte surface. When finishing premises, acrylic water-soluble varnishes are used. Craquelure varnish is suitable for creating artificial cracks. When working with facades, compositions based on organic solvents are used.
Before use, you can add dyes of the desired color or glitter to the varnish. After thorough mixing, apply the coating in 1 layer with a foam roller, sponge or brush.
