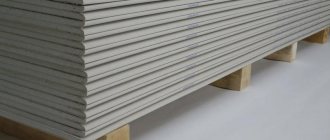
When carrying out renovations in a room, it is often necessary to finish the walls with plasterboard. This facing material is known for its universal properties: it is strong, fire-resistant, and has excellent soundproofing properties. The low cost and light weight of this base have elevated it to the rank of the most popular brands of construction plans. Despite a number of excellent qualities, this material has a rather fragile base that can quickly collapse and undergo changes. In this case, repair of the plasterboard wall is necessary. It is quite easy to do, and you can do it yourself.
Drywall, unfortunately, is a fragile and fragile material, so punching a hole in it is not difficult.
Causes of surface defects
The main reason for the occurrence of all kinds of defects on the outer layer is a violation of the rules of interaction with the gypsum base and non-compliance with basic standards.
- Providing inappropriate conditions for storing material. As a result of a jump in temperature and increased humidity, cracks quickly appear on the gypsum base and quickly destroy the surface.
- GKL sheets should be stored in factory conditions on a flat horizontal surface, in a dry place, at normal humidity levels. On the eve of installation work, the material must rest until the base is completely acclimatized. Installation is carried out at air temperatures above 10 degrees, humidity must be 60% or less.
Scheme for sealing cracks in drywall.
Plasterboard walls can be significantly damaged due to violations in installation technology. For example, the use of devices that are not appropriate for this material: fasteners, profiles, putty, backfill.
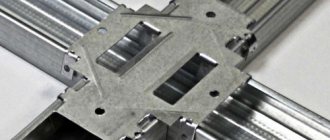
Thus, profiles on a metal base must be steel, their thickness must correspond to 0.6 mm. This metal, when in contact with air, should prevent the formation of corrosion on the surface. Reducing such numbers leads to a change in the hardness of the entire structure.
Related article: Do-it-yourself hipped roof for a gazebo, how to design and build it
To finish walls with plasterboard, special fasteners are used that do not form rust. Any of the structures is designed to be fixed by a specific element.
Failure to maintain distances. An acceptable distance between parts of plasterboard sheets will be 57 mm, and the clearance of the floor and enclosing elements is 10 mm.
If you want to hang something on plasterboard walls, use special dowels for this. Their dimensions must be suitable for the thickness of the coating. Loads with a small mass are hung on gypsum panels using hooks or nails. Massive cabinets or shelves are secured with plastic dowels or screws.
DIY repairs: plasterboard walls
Drywall is one of the best building materials today.
It is used everywhere when decorating modern apartments and offices. Professional builders, when making repairs in buildings with internal curved walls, mainly use plasterboard sheets to level them. At the request of the customer, redevelopment of premises is carried out using plasterboard. A thrifty owner, dreaming of saving money during repairs, can easily do without a team of hired workers and make walls from plasterboard with his own hands. After all, the technology for making a plasterboard wall is simple, and almost anyone can master it.
So, you've started renovating your home. You are faced with several tasks:
- level the walls in the room.
- block off a large room with a plasterboard wall, dividing it into two parts.
To solve the first problem, you will simply cover the old walls with plasterboard, which will make them smooth and even. In the second case, you will mount the wall on a metal or wooden profile. Then the erected structure will be stronger and will serve you longer.
So where to start? Of course, from the selection of tools for work. You simply cannot do without a knife with break-off blades, scissors for cutting metal, a screwdriver, an electric drill, a building level or plumb line, a tape measure, glue or mastic. The materials you will need are sheets of drywall, profiles and fasteners made from dowels, nails and self-tapping screws.
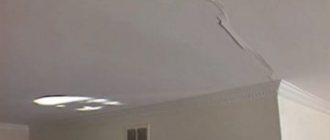
The appearance of cracks at the seams
Such manifestations are associated with non-compliance with technology in the process of suturing the frame with sheets and making mistakes. However, one of the reasons may be too sharp a temperature change, for example, in winter.
To get rid of this problem, you need to do the following:
- Expand the boundaries of the crack slightly in width and depth; a few millimeters will be enough. To do this, take a knife or nail. In this way, the gap is cleared, after which the material will firmly adhere to the base of the drywall.
- Priming the crack.
- Puttying the seams with a special compound. The space should be filled tightly with such a composition, taking into account the fact that the filling substance will sag a little. To do this, take a small spatula or construction knife. Excess putty must be removed.
- As soon as the seams have dried, it is sanded with fine sandpaper. If necessary, the base is primed and tinted.
Before work, you should outline the perimeter of the workpiece for the future patch.
When carrying out such repairs, putty can be replaced with acrylic. The technique for processing seams will be similar. It is not recommended to use silicone: it is greasy and cannot be painted.
Related article: Cladding the stove with ceramic tiles: step-by-step instructions
If the cracks occupy a large surface of the sheet, the wall is repaired using a fiberglass mesh. It is glued to the entire base of the wall with putty for treating gypsum board joints. The surface is treated with finishing putty. Then the damaged surface is sanded and primed.
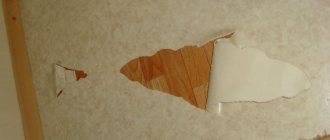
Then comes the elimination of small holes. A good reason that led to damage of this type is the mechanical impact of everyday use. Such a hole is called a dent or hole.
Wall repair in this case involves cutting off the damaged area, priming it and puttingtying it.
Choosing putty
In construction stores, consumers have a fairly wide variety of this finishing material to choose from. We strongly recommend paying attention to dry mixes. Firstly, they can be stored for a long time without losing their qualities, and secondly, they can be used in portions. In addition, pay attention to the fact that there are separate types of mixtures for finishing walls, ceilings or repairs. In our case, the right choice is repair putty. Dry mixtures come in several types: • polymer; • gypsum; • cement. The choice depends on the type and conditions of the room in which the drywall will be repaired. If we are talking about renovation work in the bathroom or kitchen, with a high moisture content, then it is better to pay attention to cement mixtures. Gypsum ones are more suitable for dry, warm rooms, but polymer ones are universal. They are more flexible and can be used anywhere. And although their price is a little higher, the cost of repair work is much less than the others. Regardless of what action is being performed, repairing drywall cracks, sealing chips or holes, a layer of primer must be applied before puttying. It promotes better bonding of the finishing material, but does not penetrate deep into the sheet itself, thereby not destroying it. The puttying process itself is carried out after the primer layer has dried. The main finishing process after repair is carried out in several stages. First, you need to apply fiberglass mounting tape to the repair object. It is important that the damage seam itself is in the center of the serpyanka. After this, you need to prepare the putty. It should be noted here that the mixture is prepared in accordance with the required quantity. Remember that the diluted dry mixture loses its shelf life and after 30-40 minutes it becomes unsuitable for further use. After this, the process of applying the component to the restored area is carried out. To do this, use two spatulas at once: thin and wide. Wide is necessary for applying the bulk and sealing damage, thin for stripping. Do not leave large drips or stains - after drying they will be very difficult to remove. Try to apply the putty evenly without any depressions or bulges. Conclusion Repairing drywall with your own hands, regardless of the degree and severity of the damage, is possible even if you have never held a tool in your hands. The main thing is to fulfill the requirements stated above. The most important stage in the repair is puttying, the correct execution of which will determine not only the aesthetic component of the treated area, but also the service life.
How to get rid of large diameter holes?
Such repairs take place in the following form:
Scheme for sealing a hole in a plasterboard wall: 1 - preparing the overlay, 2 - cutting out for the overlay, 3 - installing the overlay, 4 - puttying.
- The configuration of the defect is studied. Then, focusing on its contours, a rectangular, triangular or round outline is drawn. Using this technique will make it possible to make a template that will facilitate further work with the damaged opening.
- A stencil is made for the hole. It is made in this way: a paper sheet of a given size is applied to the hole in the wall, markings are made, and then the part is cut out. This template allows you to create a new piece of drywall.
- A small part is taken from the CD profile: its length should be much greater than the width of the hole, the difference is 5-10 cm. If the hole is significant, you need to take several profiles. They are fixed on the other side of the partition, and screwed with self-tapping screws from the outside.
- Once the parts are secure, further repairs can be made. To do this, all wall boundaries are cut at an angle of 45°. Such measures will allow the connection to be securely secured and will increase the surface area of the connection between the putty and the gypsum board sheets.
- Next, the seam along the entire base is glued using serpyanka tape. Such measures help to prevent the occurrence of new cracks throughout the entire seam.
- Once the putty layer has dried, after repairing the area, it is sanded and primed.
Related article: Do-it-yourself winches (diagrams and drawings)
To minimize the number of household mechanical impacts on plasterboard sheets, a double layer of this material should be installed.
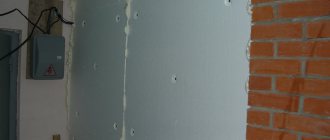
Covering old walls with plasterboard
Before starting work, you should prepare the old walls for installation of drywall. To do this, you need to carefully seal all the cracks and remove the layer of old plaster. Then measure out the exact number of plasterboard sheets that will be needed to cover the entire room.
During the process, you will need to cut the drywall, because it is very difficult to install huge sheets on the wall. The easiest way to cut drywall is with a sharp knife with break-off blades. First, markings are made on the sheet, then a ruler is applied to the line and the cardboard is carefully cut along it and the plaster is cut with a knife. After this, the sheet should be broken along the cut line and the cardboard should be carefully trimmed at the break site on the reverse side. So, the sheet is ready. Now you should attach it to the wall.
There are two ways to install drywall on a wall. At first, the sheets are fastened using self-tapping screws, which are screwed into the wall with a screwdriver. The second installation method is gluing drywall to the wall. It is best to use the Perlfix composition. The mixture should be applied in small volumes to the back side of the plasterboard sheet and glued to the wall, then using a level to level the resulting wall vertically. Thus, you can achieve the solution to the first task set before you: now all the walls in the house are perfectly smooth.
Do-it-yourself apartment renovation and leveling walls with plasterboard
During the construction of a building and the initial finishing, flaws often remain: convexities and concavities, deviations visible to the eye. They need to be eliminated. During work, a situation may arise when you have to increase or shorten gypsum board sheets. This operation is performed by sawing them or trimming them with a knife along a ruler. After gluing the construction tape with a spatula with a wide blade, remove all excess mortar from the surface, leaving the treated material to dry completely for 8-12 hours. The second layer of putty allows you to eliminate imperfections.
Work begins with markings. On the floor and ceiling, mark the finish line of the mating surface of the final sheets of plasterboard. For this purpose, it is convenient to use laser levels or levels.
You can work with a regular plumb line with a level. To facilitate the installation and alignment of gypsum boards, special types of hangers are used, which can be bent to impart rigidity during fastening, creating various shapes of profile box structures.
Repair of plasterboard walls
Cracks at the seams of a plasterboard wall are a very common defect that appears on a finished plasterboard wall or partition. Cracks appear if the installation technology of the plasterboard partition has been violated. For example, when installing the frame, no soundproofing tape was placed between the frame and the base. When covering with plasterboard, we saved on screws and did not follow the technological step between the screws.
Cracks often appear above and around doors. This means that the frame of the partition above and around the door was not strengthened enough. Local repairs are not reliable and most likely cracks will appear again. To get rid of this problem forever, you need to do a global repair of the wall (partition). The dent on the drywall is embroidered, primed and puttied the required number of times.
If the dent is very large, then sickle tape is glued between the layers of putty.
- The surface of the wall is primed;
- After the soil has dried, the wall is covered with a mounting mesh with 1×1 mm cells. The mesh is fixed to the wall with a layer of putty;
- After this layer has dried, the wall is completely puttied at least 2 times. When the surface becomes smooth, it is primed one last time and repainted in two layers.
To secure the patch, a piece of wood longer than the hole is inserted into the hole. The block is attached to the wall, from the outside, with self-tapping screws. Now you can install the patch and screw it to the block.
Repairing plasterboard walls with your own hands without a profile and with it - the correct technology for sealing seams
Let's say you are interested in the option of using drywall for the bathroom. Here you should take into account such an important nuance as the high humidity in this room. How will this knowledge help us? Very simple.
The plasterboard walls erected by your efforts will need to be additionally lined with coatings that are resistant to moisture. Here’s something else I remembered. Sometimes I heard such a turn of phrase: tension walls. I hasten to assure you: this is an undesirable use of words. The fact is that such walls do not exist in nature at all, and “it is even more impossible to stretch drywall.
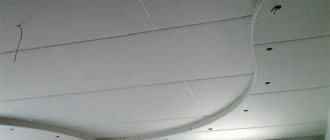
These two words can only be placed side by side in one single case: when a suspended (that’s right here) ceiling is attached to a gypsum plasterboard wall. By the way, there are three methods of such fastening:
- French . It is used provided that the rectangular sheet being laid is small in size.
- Cam . This method is optimal if the ceiling connected to the plasterboard is figured.
- Dutch . It is appropriate to talk about this fastening option provided that the canvas is either abstract in shape or round.
If you consider drywall as a material with which you plan to sheathe walls that are commonly called load-bearing, then I will tell you about two possible methods. During repairs, we may also talk about cladding with drywall. For example, to create a higher quality surface, for example, in the kitchen.
It will be possible to attach all sorts of necessary or decorative accessories to the gypsum board.
