The hallway is a space that combines the entrance to the apartment and the living rooms, so such a room must be used functionally. Most people have the habit of storing outerwear in the hallway, but it is not always possible to install a large closet there.
For such purposes, special hangers with hooks are used that do not take up much space. In addition, by hanging hanger hooks in the hallway, you can become the owner of an additional decorative element of the interior.
Hooks for hanging in the hallway
Benefits of using hooks
Using coat hooks in the hallway is not only a functional necessity, but also an opportunity to decorate your interior with unusual details, which designers actively use. In addition, some craftsmen make such structures with their own hands, creating a truly unique product.
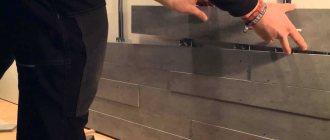
The hanger is used even for heavy items
Coat hooks are mounted on a wall or hanger, but the main convenience of such accessories is as follows:
- Hooks do not require much space. If it is not possible to allocate space for installing a cabinet or a large wall shelf, then you can always find a free section of the wall for a hanger with hooks. This is necessary in order to always have access to essential items, including: a bag, a key holder, an umbrella, a raincoat, and outerwear.
- It’s not entirely convenient to hold your things in your hands after coming home; it’s much easier to hang them on hooks and only then put them in their places.
- They have a low cost (if we are talking about simple products), so you don’t have to invest a large amount of money in such a purchase.
- Typically, such products are easy to attach, so anyone can handle such actions.
It is also worth highlighting that the hanger with hooks does not require any special care. If necessary, such a structure can be quickly dismantled.
The simplest hanger design
Features of installing a wall-mounted rod
Taking into account the shape of the rod - oval or round - purchase appropriate holders. An easy option is to purchase a three-meter clothes rail with a wall mount and then cut it into pieces of the required length.
How to divide is shown here:
Then, using flanges with a diameter of 25 mm, they are attached to the wall of a closet or bedroom.
The installation process is shown here:
If the structure is retractable, it is secured with 4 screws. This mount is not strong enough if you plan to hang a lot of clothes.
If necessary, install LED-based lighting, this allows you to carefully examine the wardrobe.
If there is very little free space in the dressing room where the wardrobe is located, then it is recommended to purchase a telescopic design. It makes it possible to place things on trempels in furniture with a depth of 31 cm. For ease of use, it extends to 365 mm, so the furniture can be placed close to other interior items, in a narrow place.
What types of hooks are there?
In furniture stores you can find a wide range of different hooks, all of them differ according to the following criteria:
- size;
- number of horns;
- method of fastening to the wall;
- color;
- material;
- registration
Table No. 1. Varieties of hooks by number of horns
| Variety, illustration | Description |
| Single-horned | Typically, such products are intended for hanging large items. They are often used for various bags and heavy outerwear. These hooks should be installed in cases where you don’t have to place a large number of different things on one hanger. At the same time, they are able to withstand heavy loads. |
| Double-horned | These are the most popular hanger hooks. In addition, they are durable and can accommodate several items at once. They are most often installed in corridors and bathrooms. |
| Three-horn | Among other similar products, it is considered less popular and durable. Therefore, when installing such products, it is necessary to correctly distribute the load. Otherwise, such a hook will quickly break. |
An equally important criterion is the choice of material from which the hook is made. Therefore, such nuances should be studied before purchasing.
Table No. 2. Materials for making hooks
| Material, illustration | Description |
| Plastic | This is the cheapest option, which can even be secured with double-sided tape. However, it is not suitable for hanging heavy objects. Typically, such hooks are used for various small items. |
| Metal | Metal products are the most reliable and versatile. They can withstand heavy loads. It is important to choose the most durable options. Thus, aluminum hooks can quickly break off because such material is not durable. Therefore, experts recommend purchasing steel products for hanging heavy bags or jackets. |
| Tree | As in the previous case, this material is durable, which is why it is very popular. In addition, various decorative products are most often made from wood. |
Forged hooks made by hand by craftsmen are of particular value. They are treated on top with special substances to protect the metal from corrosion when exposed to high temperature or humidity. Thanks to such actions, they can last for a considerable number of years without requiring special care efforts.
Forged version of hanger with hooks
Video - The process of making forged hooks
Important point! Most often, hooks are fixed at a distance of 150 to 185 centimeters from the floor level. The exact height will depend on the height of the residents. In addition, you can provide hooks at a distance of 90-100 centimeters from the floor for children's clothing.
If years ago hooks were installed in one or more rows, now designers place them in different orders. They look equally stylish on a wooden or metal hanger.
Different hooks can be used on one hanger
The method of attaching the hook plays an important role. It is this criterion that affects the strength of the structure. Therefore, you should decide in advance what items are supposed to be hung.
You can read about attaching shelves to the wall without visible fasteners in our article.
Table No. 3. Types of hook fastenings
| Variety | Description |
| Self-tapping screws, screws, nails | This is the most reliable method of attaching hooks; it is most often used to fix metal products on a hanger. The only downside is the need to drill holes. |
| Glue | Only suitable for installing hooks made of plastic or wood. However, this method of fastening can hardly be called reliable. |
| Double-sided tape, suction cups | As in the previous case, such a mount is more likely to not withstand heavy loads. The only advantage is that the fittings can be moved to another location at any time. |
| Magnets | Fastening hooks in this way is used extremely rarely. This requires the installation of a metal hanger. |
Designer hanger model
What options are there for installing a clothes rail?
I hope everyone has read this article? If not, then you may not understand what will be discussed next. So, I advise you to follow the link above and read the publication posted at this address.
So, you already know that there are three most popular types of closet rods:
- Standard closet rod.
- Retractable rod (microlift).
- Elevator pantograph.
There are also two types of rod installation: longitudinal and transverse. This figure visually shows what each installation option is:
For longitudinal installation
a standard rod and a pantograph lift are used.
For transverse installation
The same standard rod and retractable rod (microlift) are used.
And the choice of installation option for the rod is influenced by two factors: the depth of the wardrobe and the width of the opening of the section in which the rod will be installed.
External design of hooks
Even such an insignificant item as a hanger with hooks can beneficially complement the overall style of the interior, so if you wish, you can choose products of various shapes and colors according to your personal preferences.
Table No. 4. Choosing hooks according to the interior features
| Style, illustration | Description |
| Art Deco | This style is characterized by the presence of shiny surfaces with various metallic elements. Therefore, it is recommended to choose hooks made of bronze or brass. |
| Loft | Loft is a style that includes various industrial elements. Therefore, hooks in the form of various nails and pipes are suitable here. In this case, you can be smart and make products from any available materials. |
| High tech | This style includes the presence of laconic interior elements. Therefore, in this case, you can choose the simplest products possible, in solid colors. |
| Minimalism | Minimalism presupposes the simplest furnishings in the room, devoid of various decorative delights. That’s why hooks are chosen in simple shapes and discreet colors. |
Fastening with glue
Almost any adhesive such as 'Liquid nails' or universal glue is suitable for fastening with glue. You just need to pay attention to the following properties of the glue: The glue is suitable for the surface of your wall. The glue is suitable for the material you are going to glue. The adhesive is suitable for your operating conditions, for example, for a bathroom you need a waterproof adhesive, and for walls near heavy doors you need a vibration-resistant adhesive. The glue has the appropriate color and appearance, it will not be noticeable and will not stain the wall around the gluing area. The glue provides sufficient bonding strength.
Follow the instructions that came with the glue. Adhesives hold well only if they are used strictly according to the instructions. How many mirrors did I break, how many hooks did I ruin before I realized this simple truth. Read more about how to choose and use the right glue.
I categorically do not recommend using commercially available self-adhesive tapes, hooks, and double-sided tapes, supposedly intended for attaching everything to everything. The glue that is used in them is not suitable for long pulling loads, and these are the loads that occur when attaching the hook to the wall.
If such a strip is already glued to your mirror (for example), then it is better to tear it off and glue it with normal glue.
Let me remind you once again that it makes sense to glue to a solid surface that is well adjacent to the load-bearing structure of the wall.
If the fastening itself will not be visible from the outside, for example, we are attaching hooks for a picture, which will be covered by the picture itself, then I use large buttons. These buttons can easily be purchased on the construction market. They are usually used for fastening roofing felt. This is a one-on-one button, like a regular stationery button, but only large in size. I glue such a button with the back side in the right place, with the cutout facing up. I use Titan glue. I bend the tip of the button. Since I place the cutout upward, the tip will also bend upward. You can hang a picture on it (the tip).
Unusual hook options
It is not necessary to purchase ready-made hooks, because they can be made even from scrap materials:
- Perfume caps. Sometimes bottles of perfume end up with rather interesting caps that are a pity to throw away. You can try to give them a second life and use them as hooks.
- Stones. This option will fit perfectly into a hallway decorated in a marine style. For such purposes, you can use various decorative stones brought from the sea.
- Branches. Various branches from trees can serve as an excellent option for making hooks and hangers.
Options for making hooks from stones
Hanger in the hallway in eco style
Eco style is popular in Europe, America, and CIS countries. He is characterized by simplicity and honesty. The house should have a vertical garden, and the hanger in the hallway can consist of a dry branch with many branches, dried and painted.
Or resemble the wonderful labyrinth of ancient civilizations, forest dwellers: consist of identical, smooth wooden slats, some of which slide out, turning into hooks for clothes, and slide back into the general panel when not needed.
Where to install a hanger with hooks?
First, you need to select the wall where the structure will be fixed. At the same time, you should not be negligent about such an important stage, because some walls in modern apartments are made of plasterboard, which means that they can suffer from great severity. Therefore, if outer clothing is supposed to be hung on hooks, then they should only be secured to load-bearing walls.
The next step is to take measurements; you need to mark on the wall where the hanger will be attached. In the future, it is necessary to control the installation work so as not to go beyond these marks.
Even when installing a simple structure, wall measurements are required
Methods for attaching lightweight objects to drywall
If it is necessary to install elements that do not create a serious load, ordinary self-tapping screws are used. There are two fixation options.
Method No. 1
The simplest technology:
- The area on which it is planned to hang the object is determined.
- Based on the frame diagram, you need to find the nearest rack profiles and jumpers. If you don't have a detailed plan, you can use a large magnet.
- If possible, the position of the element on the surface is adjusted. It is desirable that of the two fastening points, one is on the sheathing part.
- For fixation, special screws are used, which are selected depending on the frame material.
A self-tapping screw screwed into a wall profile can easily support small paintings and other similar objects.
It is more difficult to detect a wooden beam under drywall; for this, you can use tapping.
Method No. 2
This method is not complicated, but does not always guarantee the desired result. Algorithm of actions:
- A hole is drilled into the surface slightly smaller than the shaft of the selected screw.
- The space is filled with elastic putty.
- After the solution has set a little, carefully screw in the self-tapping screw.
- If a small area near the surface is open, then grease it a little.
- After the mixture has completely dried, you can attach a lightweight object to a plasterboard slab.
It is taken into account that this method does not ensure the preservation of the position of the element if it is affected.
On a note! An excellent option is to use a dowel-nail, the sleeve of which is selected according to the thickness of the sheet. An alternative is to create an independent seat from a wooden chopstick.
Planting on a solution, just like the use of conventional dowel-nails, is justified only in the case of fixation on two- or three-layer drywall, but in any case, the maximum for such a suspension is 5 - 7 kg
Making your own hangers
Making your own hangers yourself has a number of obvious advantages:
- Opportunity to save money. The finished product will have a low cost.
- The product will be unique.
- For some craftsmen, such a hobby can be an opportunity to earn extra money.
- Opportunity to create your own interior design.
Video - DIY coat hooks
A set of tools for self-production of various designs
Perforated sheet hanger
To make such a creative hanger you will need the following:
- sheet with holes made of plastic or metal;
- any needlework thread or string;
- hooks (in our case metal with a wooden end)
Important point! You can purchase such a sheet at a hardware store. They are usually sold in large rolls.
Table No. 5. Instructions for making a hanger from perforated sheet
| Illustration | Description |
| Fabric preparation | We prepare the canvas of the required dimensions, and then using a strong thread we embroider some inscription on the surface. |
| Creating labels | You can write a name or an important date in this way. The main thing is to maintain the distance between letters. |
| Wall mount | Then you need to insert hooks into the holes on the sheet and secure the structure to the wall using self-tapping screws. |
This is the simplest option for making a decorative shelf, in which even children can participate. At the same time, the finished shelf looks quite original.
Simple wooden hanger
You can make hangers with your own hands even if you have an old board. To do this you will need the following:
- board (optimal size);
- moisture-resistant paint;
- container for paint;
- roller;
- jigsaw;
- drill;
- emery cloth or grinder;
- roulette;
- pencil.
Step-by-step instruction
Step 1. Prepare the material. You need to take one rectangular board (you can even disassemble an old pallet). If there is dirt on its surface, you will need to clean it first. In addition, a piece of wood that is too massive must be shortened in advance.
It is convenient to use a jigsaw in work
Then you should sand the surface with sandpaper. If you have a grinder in your arsenal of tools, then it is better to use it. Thus, the processing process will be much faster and more efficient. In this case, in any case, you can achieve the goal.
Step 2. Mark the holes for the hooks. Using a tape measure and a simple pencil, you need to mark the places where you plan to install the hooks. In our case, they will be located in one line, but if desired, this can be done differently.
Marking is done strictly along the line
Step 3. Make holes in the wood for the hooks. It is necessary to double check that the marks are correct so that the width between the hooks is optimal. Next, you need to make holes and clean the board from any remaining wood shavings (they will interfere with further painting).
The material must be sanded first
Step 4. Paint the board. You must first decide on the type of paint and its color. It is advisable to use acrylic paint, which has water-repellent properties.
Recommendations from the experts
You should paint the board in several layers of paint and leave it like that until completely dry.
Important point! It is recommended to pre-treat the wood with an antiseptic solution to protect it from fungi. This will extend the life of the hanger.
Step 5. Insert fasteners. On the back side of the board you need to insert fasteners with which the hanger will be fixed to the wall. You can use special hooks as fastenings (as in our case).
If desired, you can decorate such a hanger with various additional elements, inscriptions, patterns
Hanger with straps
This unusual version of the hanger will fit perfectly into the interior of the hallway, kitchen and even living room. The peculiarity of the design is that it is not only functional, but also decorative. In addition, you will have to spend very little time on its manufacture.
To make the structure you will need the following:
- soft leather belts;
- 2 fragments of leather (harder);
- thick wooden stick (branch);
- curly metal hooks in the shape of the letter S;
- thick needle;
- strong thread.
Step-by-step instruction.
Step 1. Prepare the belts. It is necessary to cut leather belts so that their length is the same. Then you should measure the diameter of the branch and wrap it with a belt. Then you will need to carefully sew the belt to fix the branch in one position. This must be done on the other side of the hanger as well.
In order to hide the seam it is necessary to make decorative elements from additional pieces of leather
Step 2. We secure the hanger structure. Holes for fastenings should be punched in the upper part of the belts. You can install the hanger on pre-prepared hooks or nails.
When punching holes, be sure to protect your hands with thick gloves.
Step 3. Attach hooks. Next, you need to hang the required number of hooks on the branch and you can use a hanger.
This design is suitable for various small items
Pallet hangers
This is one of the easiest ways to make a hanger. This design can be installed in any room, including the hallway. Its main advantage is that in addition to the wooden base, you only need hooks and fastenings to them.
It is not necessary to paint the wood; you can leave it the original color or use a clear varnish
If desired, even using ordinary acrylic paint you can give the product an unusual look.
Elements of a hanging storage system
Base
It includes four elements.
- A pipe with a standard diameter of 1.6 cm. The length can vary, sometimes up to several meters.
- Fasteners for connecting to the wall.
- Plugs - they need to be inserted along the edges, protecting open areas from water and dirt. They prevent the metal edge from deforming.
- Adapters connecting two rods if necessary.
Manufacturers supply parts in one set, as well as separately.
Accessories
There are several common solutions found in most cases.
- Hooks for towels, spatulas, skimmers and ladles. They are suitable for frying pans and pots with a hole at the end of the handle.
- Straight and inclined shelves - they have different designs. These can be holders for plates, napkins, cups, bottles, cans.
- Special stands - cup holders, devices where it is convenient to put knives, matches, bar soap.
- Multi-tiered products that perform several functions at once.
Before installing roof rails in the kitchen, you should calculate what accessories are needed and plan their location.
Decoration
In order to give the product an unusual appearance, you can decorate its surface.
Table No. 6. Ways to decorate hangers
| Method, illustration | Description |
| Craquelure | This is the name for a method of decorating furniture in which the product is artificially given an aged look. |
| Glizal | Glizal is a special paint that, after drying, begins to crack and forms a special texture. It is first diluted with water and then applied to a clean surface. |
| Acrylic painting | If you have the ability to draw, you can decorate even the simplest hanger. In addition, acrylic paints of various shades can be found on sale. It is important to start working by drawing out large elements, and then small ones. After which the surface can be varnished. |
| Decoupage | This is a common technique for decorating surfaces. For such purposes, you will need to prepare napkins with patterns and glue. It is important to note that the surface of the hanger must be clean and free of dirt and dust. |
Let's study the wall, its material and decoration
The most common fastening methods are the following: screws and glue. Self-tapping screws can be used if the wall consists of dense, durable material. The adhesive is applicable if the outer surface of the wall is strong and securely connected to the load-bearing base material. So, with self-tapping screws you can attach it to a wooden, brick or concrete wall that is plastered with durable plaster, tiled, wallpapered or painted. It can be attached to glue if the wall is wooden, brick or concrete, tiled, plastered with very durable plaster or painted with paint that adheres securely to the wall. If you have the ability to glue directly to bare concrete or brick walls, then this connection can be very strong. If you glue to plaster, a painted surface or tile, then the strength is limited not so much by the strength of the adhesive seam, but by the reliability of adhesion of the plaster, tile or paint to the load-bearing structure of the wall.
If the wall is paneled, plastered with soft plaster, or consists of thin panels (for example, slate), then it is better to refrain from attaching anything to it. An exception may be very light things that can be attached with tape or buttons.
The nuances of installing a hanger
Improper installation of a hanger can lead to the following negative consequences:
- Formation of extra holes in the wall.
- Violation of the integrity of the hanger, the appearance of various cracks, chips and other damage.
- Poor stability of the hook, which is why it quickly falls off.
- Damage to the electrical wiring located in the wall.
- Wrong choice of hook type, due to which the fittings quickly wear out. This usually happens when there is excessive load on the structure.
If you are not confident in your abilities, it is better to contact professional craftsmen who will help you choose the right material and fittings for making the structure.
The heavier the items that will be placed on the hanger, the more reliable the installation should be
Self-tapping screws
The main difficulty of fastening with self-tapping screws is that it is not always possible to drill a hole in a concrete wall and install a dowel exactly in the place where it is needed. This is due to the structure of concrete. Concrete includes gravel filler and pebbles that prevent drilling from starting in the right place.
If your structure (for example, a painting) must be attached to one screw, then you are in luck. A slight deviation from the calculated position will not spoil the appearance. It is much worse if you hang a carpet or a mirror or the same picture on several screws. Then the deviation of one will lead to a distortion of the entire structure.
Useful tips for making your own hangers
Before you start making a hanger of any configuration, you need to study some useful recommendations:
- Don't be afraid to experiment with different design shapes and styles. There are several varieties of different hooks you can use. In addition, as an addition, it is recommended to install a small shelf on the hanger.
- It is necessary to prepare all fasteners in advance before starting installation of the structure. In addition, it is recommended to carefully process the wood in all cases.
- When sawing wood, it is important to wear safety glasses and gloves, because small shavings can get into your eyes, and burrs often injure the skin of your hands.
Wearing safety glasses when working with wood will help protect your eyes.
For many craftsmen, homemade furniture is a source of pride and an opportunity to implement creative projects. It is important to select the right materials and all the necessary accessories, including hooks. Then the hanger will serve for many years without any doubt.
Installation of decorative shelves and paintings
Heavier objects should be hung using special fastening devices.
Up to 10 kilograms
With such a load on the plasterboard surface, the ideal solution would be to use a “butterfly”. This option is a dowel consisting of a plastic sleeve with two spread legs on a rod and a threaded screw.
The product is attached according to the following diagram:
- Based on the size of the sleeve, a suitable drill bit for a screwdriver or drill is selected.
- Mounting points are outlined.
- The tool attachment is directed strictly perpendicularly. The resulting hole should be smooth, without deformation of the edges. To prevent such damage, you need to correctly set the power of the drill.
- The legs of the plastic element are straightened, and the sleeve is carefully inserted. It is not recommended to press hard, as the gypsum board may be damaged.
- To completely sink the product, a hammer is used, since there are two protrusions at the neck that fix the position of the part.
- The screw is screwed in. Due to this, on the reverse side the paws rest against the sheet.
After installing all the mounting points, you can hang a picture or mirror.
To use a standard butterfly mount in a plasterboard wall, you need to drill a hole with a diameter of 8 mm
Up to 30 kilograms
It is recommended to fasten massive objects that create a load of up to 25–30 kg per fixation point using a special dowel - Driva. Its structure is similar to the previous version, but the plastic element has a “snail” shape. The part is equipped with a sharp tip and thread located on the surface of the body. A special screw is used for fixation.
Fastening a shelf or other item is carried out according to the following algorithm:
- Installation points are marked and holes with a diameter of 6 mm are drilled. It is taken into account that the seat must be exactly perpendicular to the surface.
- After preparation, you need to screw on the plastic elements. This will require some effort, because the snail thread cuts into the structure. A screwdriver will make the process much easier. The neck of the dowel should be almost in the same plane with the wall.
- Depending on the fastening device of the item being hung, installation occurs by installing and tightening the screw.
Installation diagram for “Driva” fasteners
It is taken into account that Driva is divided into categories: plastic options are recommended for plasterboard bases, since metal ones do not provide reliable installation into such a surface.
Unusual and designer hangers
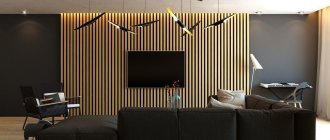
An interesting option is with folding hooks. They are made either from metal frames or wooden planks. How many hooks are needed are bent, the rest form a single composition with the body. Interesting…
Hallway wall hangers with fold down hooks
Stylish hangers for stylish hallways
Simple and unusual
It's closer to hi-tech
Modern style
Stylish, modern, unusual Hanger-decoration
They even make stylish hangers from water pipes. Is there anything left from the renovation? And this will go into action.
This is definitely unusual
And this is an option. Can withstand even a good load
You can present ordinary things in such a way that you will fall in love with them. For example, a hanger in the shape of a chair... Undress and you can sit down.
Cool - hanging chair?
Interesting design
Hangers with animal prints
Don't know where to leave notes so they can be found right away? Hooks with clothespins are a great solution.
Hooks for hangers with clothespins
For music fans - a hanger in the shape of a piano.
In principle, there are also folding hooks, but the design changes everything. Piano hanger