A wall covered with plaster usually has several layers. The wall sheathing is behind two layers of No. 1 special construction waterproof paper.
A welded or woven metal mesh is attached on top of the paper. It is nailed with galvanized nails, but not with aluminum nails, since aluminum is extremely vulnerable to corrosion by cement.
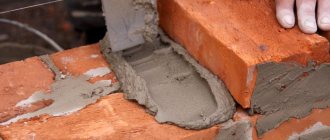
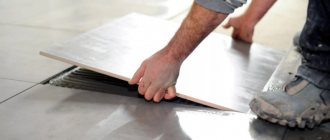
How to apply cement plaster
The cement plaster itself is applied in three layers: base, substrate and finishing. The base is applied to the mesh in a layer 9.5 mm thick so that it penetrates into the mesh. The surface of the base is smoothed and, after waiting a little for it to harden, horizontal furrows are made using a trowel 3 mm deep.
The substrate is applied to the base only after the latter has completely dried. Drying the base takes from 10 to 12 hours. Before you begin applying the base coat, the base needs to be moistened again.
Plastered wall construction:
- metal grid;
- the basis;
- substrate;
- exterior decoration;
- metal drainage channel;
- construction waterproof paper;
- sheathing
Some craftsmen also apply a binder to the surface of the base before applying the substrate. The substrate itself is applied in a layer of 9.5 mm and rubbed using a wooden trowel. Thus, its surface becomes slightly rough. After the substrate comes the exterior finishing, but before applying it the wall must be left for at least one day.
Applying putty to old plaster.
The finishing is applied to the substrate in a layer 3 mm thick. Often the work of applying this layer is carried out with a steel trowel. However, if there is a need for a structured surface, a special tool can be used.
Just remember that you can apply it after applying the main layer of exterior finishing. The surface of the wall must be kept wet for three days, so it must be sprayed daily. You can also add a variety of coloring pigments to the exterior finishing solution.
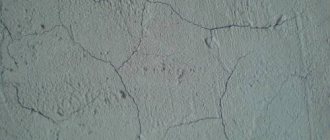
Why does plaster crack when drying?
Plaster allows for high-quality repairs in almost any room. The material is quite cheap and even a novice master can handle its application. This does not require the use of any special tools, so there will be no special financial costs. During the work, cracks may appear in the plaster, which will lead to serious complications. In this article we will look at the reasons why plaster cracks when it dries and how to deal with this problem.
How to stay safe?
A huge number of different rules have been invented, the strict implementation of which will lead to quality work done. It is important to give them due attention before applying the mixture:
- Before applying the mixture, wet the base with plain water. Use a spray bottle to make this task easier;
- The air temperature in the room where finishing takes place, allowing the work to be performed at the highest level, should be less than 24 degrees. If the conditions are met, the cement plaster will not crack, but just give it a reason;
- Such seemingly harmless little things as a draft and direct sunlight will certainly cause irreparable consequences that you will have to regret. Their access should be denied;
- A solution applied to a work surface with a thickness of more than 2 cm must be secured using beacons;
- Before applying a new layer of the mixture, you need to make sure that the plaster of the previous layer has not cracked and has firmly set;
- The gypsum mixture must be less than 1.5 centimeters thick, the cement mixture less than 2 cm;
- Everything matters in finishing. To the question: “Why does the plaster on the walls crack?” out of mind, the working surface and its features should be taken into account in the same way as the characteristics of the plaster. Therefore, it is necessary to remember that the solution is applied to brick, stone and concrete bases with a thickness of less than 0.5 cm, and on a wooden base - less than 0.9 cm;
- Be sure to pay attention to the recommendations indicated by the manufacturer on the bag of future plaster;
- It is important to create a solution of the correct consistency, so it is necessary to follow the order of mixing the components.
Compliance with these simple rules will have a positive effect on the work performed. Further sealing of cracks in the plaster may be necessary only in cases of subsidence of the house.
Causes of crack formation
Often plaster cracks due to any mistake made. Before use, you should carefully read the instructions; they may provide recommendations for preparing and applying the mixture. Many people neglect this, relying on personal experience and ingenuity, as a result of which mistakes are made, which lead to the plaster on the wall cracking.
Let's take a closer look at all the causes of cracking and look at how to correct the situation in one case or another.
General principles and rules of repair
Now we know everything about how to repair cracks in plaster on a wall. Repairing cracks is also a process, and if some rules are not followed, new defects may appear.
We plaster, following the rules:
- We begin repairing cracks caused by shrinkage of the structure by repairing the supporting structures or waiting for the end of natural stabilization, otherwise the new coating may soon also crack;
- We repair cracks that appear due to dampness and high humidity after eliminating the causes;
- We do not cover up broken plaster of poor quality, but clean it off the walls and replace it with new one;
- We are looking for repair compounds from the same manufacturer and the same brand as in the old coating (if impossible, we select those that are similar in properties);
- if we apply a cement coating, we do it without interruptions over the entire wall in one pass;
- Repairs (outdoor and indoor) are carried out at temperatures above 5 – 35°C, humidity up to 80%;
- when choosing a composition, we focus on those whose vapor permeability is the same or higher than that of the base material;
- if gypsum concrete partitions are made of two layers of slabs, we connect them to each other with bolts placed in the middle of the slab in a row at a distance of 1.5-2 m (the entire length of the partition).
Plaster quality
All types of plaster mortars contain cement, but its proportion may vary depending on the type. It is thanks to cement that the mixture adheres well to the wall and ensures the quality of the coating.
But the proportion of cement in the composition of the material must be taken extremely seriously. Although it has a positive effect on the properties of the solution, it should not exceed 1/3 of the total mass of the mixture. If this indicator is exceeded, cracks will almost inevitably occur. Therefore, before purchasing, carefully study the composition to ensure its quality.
PromAlpForum
- Links
- PromAlpForum Rules
- Unanswered messages
- Active topics
- Search
- our team
wet facade is cracking
- print version
wet facade is cracking
- Quote
Post by midshipman2 » Jul 28, 2013, 11:27 pm
Re: wet façade cracking
- Quote
Post by Uncle Vova » July 29, 2013, 00:12
Re: wet façade cracking
- Quote
Post by VeCher » Jul 29, 2013, 00:46
Re: wet façade cracking
- Quote
Post by midshipman2 » July 29, 2013, 4:10 pm
Re: wet façade cracking
- Quote
Post by Andrey Goryunov » July 29, 2013, 04:58 pm
Re: wet façade cracking
- Quote
Post by midshipman2 » July 29, 2013, 6:35 pm
Re: wet façade cracking
- Quote
Post by kopernick » Jul 29, 2013, 7:30 pm
Re: wet façade cracking
- Quote
Post by Uncle Vova » July 29, 2013, 21:42
Re: wet façade cracking
- Quote
Post by midshipman2 » July 29, 2013, 21:47
Re: wet façade cracking
- Quote
Post by Uncle Vova » July 29, 2013, 21:53
Re: wet façade cracking
- Quote
Post by Andrey Goryunov » July 30, 2013, 11:29 am
Re: wet façade cracking
- Quote
Post by Uncle Vova » July 30, 2013, 12:05
Re: wet façade cracking
- Quote
Post by Ul-promalp » 01 Aug 2013, 22:13
Re: wet façade cracking
- Quote
Post by VeCher » 02 Aug 2013, 00:44
Re: wet façade cracking
- Quote
- print version
- SECTIONS
- Main forum
- Safety
- Equipment
- Tools and equipment
- Materials
- Work technologies
- Black pages
- Job offer
- Job search
- Flea market
- Hall of Fame
- Memorial
- Photo - video
- PromAlpHumor
Who's at the conference now?
Currently browsing this forum: no registered users and 5 guests
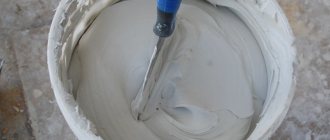
Preparation of the solution
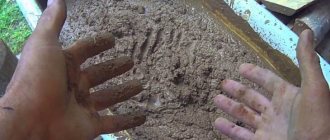
Clay or cement plaster is made from various components, their proportions are perfectly aligned, and there is no doubt about the effectiveness of such cladding. But if lumps of sand or cement remain while mixing the solution, this will lead to cracking of the coating. Therefore, during preparation, try to stir the mixture as best as possible until a homogeneous mass is formed. If the work turns out to be difficult, we recommend using a construction mixer. It can easily cope with mixing. Also, before preparing, read the instructions again, they may contain useful tips.
Peeling plaster from the wall surface
This defect is eliminated by carrying out work to completely dismantle the layers that are peeling off and applying a new layer of plaster. In this case, it is necessary to determine the reason for the detachment of the old layer. And at the beginning of repair work, eliminate it.
A professional approach to plastering work and timely repair and sealing of plaster cracks will significantly increase the service life of this coating.
Dust on the walls
To avoid cracking, be sure to remove dust and other contaminants from the wall surface before applying. The presence of dust will greatly impair the adhesion of the plaster to the wall and, over time, the formation of cracks is inevitable.
You don't have to remove all the dust by hand; this process is quite labor-intensive and time-consuming. We recommend that before applying the plaster, simply wet the walls with a spray bottle; this will be enough for further processing.
Conclusion
The reason why plaster cracks can be any slightest mistake during finishing. Therefore, we recommend that you approach the process of wall cladding with all responsibility, so that later complications do not arise. Use only high-quality materials and carefully follow the manufacturers' instructions. Also, before work, be sure to clean the wall of dirt and dust and treat the surface with a primer. If you follow all the tips given in the article, you can avoid the formation of cracks. We also recommend watching a special training video, in which you can see how to avoid cracks on plastered walls:
Source
Repairing damaged sections of the wall
If the area of damage to a section of plastered wall is quite large, it should be repaired immediately. Repair of such an area must be carried out carefully and carefully so that its appearance and maintenance are no worse than before the damage. It must be waterproof and match the rest of the wall in other respects. To ensure that the repair is carried out efficiently, we recommend following the following procedure.
To seal a crack of this size, you need to prepare all the necessary tools.
Before you begin the actual repair work, you need to first of all take care of your safety. To do this, wear a mask on your face and leather gloves on your hands.
Removing old plaster
Then you can begin to remove the plaster that does not adhere well to the mesh. To do this, you can use the weapon of most masons - a chisel or chisel. This work can also be done with a carborundum blade from a circular saw. The solution remaining on the mesh can be beaten off using a hammer and chisel.
Chisel and chisel for working with brick, concrete and plaster.
The exposed part of the mesh, which is most likely rusty and clogged with pieces of plaster, should be cut out with metal scissors and torn off from the sheathing using a pry bar. Any remaining protruding nails must also be removed.
The mesh must be cut in such a way that approximately 102-152 mm of mesh remains at the edges of the knocked-out sector. The exposed cladding must also be cleaned of any remnants of old plaster. If you find that the casing is damaged, it will also have to be replaced.
Installing waterproof felt
Next, the sheathing should be covered with a layer of waterproof construction felt. It needs to be laid along the bottom and sides under the existing construction paper.
Waterproof construction felt is often used to restore old plaster walls.
Some craftsmen use two layers of construction felt. Then prepare a piece of mesh of appropriate size and, using washers, nail it to the sheathing. Use galvanized nails. If the cladding of your wall is a rigid foam material, the nails must be driven into special plugs.
Finally, it remains to apply three layers of plaster and everything is ready. We discussed the process of applying plaster in detail in one of the previous paragraphs.
Repairing a damaged area of plaster.
- Cut out the plaster from the damaged area.
- Cut out damaged mesh and felt.
Step three: a new mesh and felt are attached to the damaged area.
Repairing cracks in the plaster of internal walls: why does the plaster crack when it dries on the walls?
Plaster has gained popularity not only among many builders - finishing work is preferred by most home craftsmen. In addition, this is a sure way to decorate and insulate the walls of a building both outside and inside. However, trouble can often happen - cracks appear on the walls. They can be seen on fresh coatings or old finishes. But what is the reason for such aesthetic “discomfort” and is there a way to eliminate such a problem? Fortunately, there are a number of techniques to correct the current situation. But first, it’s worth understanding why this happens.
What do you need to know about the types of putty?
Content:
- 1. Putty is usually divided into:
- 2. Facade putty
- 3. Compositions for interior work
Leveling surfaces is the most important stage in construction before finishing.
Therefore, it is very important to create a high-quality coating that can be easily wallpapered, painted and whitewashed. Often, a layer of plaster is not enough, especially when a perfectly smooth base is required for expensive or very thin decorative materials. Therefore, it is necessary to apply another layer of putty. If this is neglected, small cracks, potholes and irregularities will remain, which will spoil the appearance of the wall or ceiling. In our online store you can buy putty in dry or ready-made form. As a rule, the first one is chosen for large volumes of work: leveling the facade, ceiling and walls. To prepare the solution, dilute the powder with water and mix thoroughly. The dry mixture is usually sold in paper bags and is affordable. The second one is purchased by practical owners for repair work, for example, they need to repair cracks in window frames, level out small depressions from self-tapping screws in drywall, etc. The advantage of using a ready-made composition is that you do not need to mix it and calculate the proportions of dilution with water.
Putty is usually divided into:
- Basic – designed for preliminary leveling of problem areas, sealing deep cracks, connecting seams, and depressions.
- Finish - has a smaller grain size and is applied to the base layer, completely covering the entire wall or ceiling, forming a perfectly smooth surface that can be painted.
But the signs by which putty is distinguished do not end there. To achieve the best result and durable coating, you need to choose the right composition with properties suitable for use in various conditions. So, we’ll tell you in order about what requirements apply to putty for leveling surfaces inside and outside the house, and what materials are suitable for this.
Causes of cracks
Residents of absolutely any residential building run the risk of encountering a mesh pattern on plastered surfaces, regardless of the year of construction. In relation to old buildings, the reasons are natural - wear and tear of building structures. As a result, the walls settle and become deformed. In new residential complexes, cracks in the plaster appear due to natural shrinkage.
The plaster coating itself, due to its low elasticity and high fragility, is not capable of deforming along with the base, and therefore it is covered with cracks. But they can also appear due to a number of other circumstances that are associated with violations of work technology.
Wall treatment in one layer
It is necessary to apply the coating in several layers - this is a mandatory requirement! Otherwise, you shouldn’t be surprised why the plaster suddenly cracked. Most home craftsmen decide to cover everything at once with one thick layer. In this case, the surface will dry quickly, but the composition inside will need more time to harden due to the lack of air access. Uneven physical conditions arise, which ultimately leads to the formation of microcracks.
Attention! The technology involves applying at least 2-3 layers of plaster with different consistencies and textures. With a thick single layer, a strong connection between the plaster and the wall is not formed.
Number of layers
To avoid cracks, decorative plaster should be coated with at least three layers. The first layer (spray) is applied by spraying over the surface of the wall - there is no need to rub it in. The result is a base coating with a characteristic roughness. Next, primer is applied (layer 2), which forms the main coating. Finally, a third finishing layer is applied. The number of applications may be greater if you need to create a special pattern or texture.
It is enough to lay gypsum plaster in two layers. This composition has good adhesion to the wall and this coating has an attractive appearance.
Neglecting the primer layer
It is the primer that determines how durable the wall covering will be. Unfortunately, many people ignore pre-finishing, but this is a way to increase adhesion so that subsequent facing materials adhere well to the surface.
The soil (in other words, the middle plaster layer) absorbs most of the loads during wall shrinkage. When using cement mixtures, you cannot do without a primer layer.
Using poor quality or old mixture
Plaster, regardless of the manufacturer, has its own shelf life. If the composition is not used for a long time, the beneficial qualities are lost, which negatively affects the ability to stay on the surface. This must be taken into account at the stage of purchasing finishing materials - if the expiration date is closer to the date of purchase, it is better to refuse such a purchase. Otherwise, this promises unjustified expenses.
No less important is the composition of the solution. If the sand content in a cement-sand mixture (CSM) exceeds a third of the total volume, the solution turns out like fatty clay, which will burst during the drying stage. If the component is small, then the required strength will not be achieved. The ingress of silt particles also negatively affects the quality of the solution.
An excess or lack of water also leads to the fact that the solution is no longer recommended for use. Liquid is necessary to ensure chemical reactions, and its quantity directly indicates what can happen in the end:
Note! When using a low-quality mixture or a violation of the ratio of the components of the CPS, it inevitably leads to the formation of cracks.
Incorrect mixing of the solution
When cement plaster cracks, it may be caused by the way the mortar was prepared. The instructions for dry construction mixtures contain detailed information regarding their mixing. To obtain a high-quality solution, it is important to consider many factors:
The solution still needs to be stirred periodically during its application to the walls in order to lift settling heavy particles. When using a construction mixer, the main thing is not to allow the speed to be too high. This especially applies to silicate plaster.
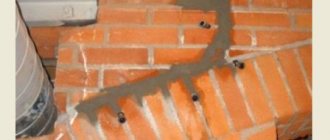
Lack of reinforcing frame
Another common reason why plaster on walls cracks is failure to install reinforcing mesh. This element is made from different materials:
The choice of a specific type depends on the thickness of the plaster layer. In relation to fragile bases, as well as surfaces where there are seams, the presence of a reinforcing frame is a strictly mandatory condition. The same applies to drywall, where it is planned to glue wallpaper after sealing. The thicker the layer is needed, the stronger the reinforcing mesh should be.
Dirt on the walls
Often walls become covered with cracks due to poor surface preparation. Due to remaining greasy stains, dust, and dirt, the adhesion of the material to the base surfaces is reduced. Due to such wastefulness, the plaster is not only covered with a peculiar mesh pattern, but can peel off or crumble.
Advice! It is important to thoroughly wash the walls before work using detergents and solvents. This gives good adhesion, and the composition will adhere more firmly to surfaces.
Clay and sand plaster
The inclusion of clay in the solution gives it fat content due to the characteristic qualities of this component. It does not stick well to walls and is difficult to smear. These compounds have an extremely low level of adhesion. If there are many uneven areas on the surface, it is extremely difficult to level it with clay plaster. In areas with bulges, the composition will begin to peel off completely over time. For this reason, it is better to use cement mortars for the rough layer, and only then clay mixtures.
There are rooms where there are regularly high levels of humidity or temperature changes. In such conditions, the plaster can crack faster, and clay compositions do not tolerate moisture at all. For this reason, they are suitable only for dry rooms, and for the bathroom it is better to give preference to moisture-resistant polymer or cement analogues.
The mistakes of many beginners lie in applying too thin a layer - less than 5 mm. During the drying stage, moisture quickly evaporates, causing the coating to lose its strength. To prevent the layer from delaminating and cracking, its thickness should be 10 mm.
Ultraviolet and heat
After applying the solution, it needs time to dry and gain strength. In this case, suitable conditions are needed:
Often, during facade work, the coating is exposed to direct UV radiation. As a result, the applied solution loses moisture too quickly, which leads to uneven drying of the finish. And when the material dries, the plaster becomes covered with cracks of various sizes.
Attention! To avoid these troubles, interior work should be carried out with the windows closed with thick curtains. As for the treatment of the facade, it is better to choose cloudy but dry weather.
Moisture ingress
Excess moisture has the same negative effect on plaster as excess heat. There are several ways to do this:
If at least one of the listed points is observed, then in the future we cannot exclude a high probability of plaster peeling. Any such factor disrupts the drying process of the coating, which negatively affects its strength.
Cracks due to damage to load-bearing structures
Deformation of load-bearing systems is usually subject to old buildings, whose service life is several tens of years. A situation may arise when a cosmetic procedure will no longer help and you definitely cannot do without a major overhaul.
First, it is necessary to assess how badly the integrity of the load-bearing structures themselves has been destroyed. It is necessary to begin finishing the walls only after they have been reinforced. In this case, the strength of the base should be higher than that of the finishing. Otherwise, the decorative surface will quickly become covered with cracks.
Foundation deformation
There are times when all the rules for preparing the mixture and applying it to the surface are followed, but the finish still breaks. Owners of private real estate face this problem. The first thing you should do is check the foundation of the building for strength. If necessary, carry out repair work as soon as possible. In this case, ordinary crack sealing will not bring the desired result! It is necessary to carry out repair work and reinforcement of the structure.
Shrinkage of the structure
During the first two years of operation, new buildings shrink due to natural processes. Moreover, this applies not only to concrete, but also to brick buildings. The mortar, which is the layer between the rows of building elements and on which they are held (bricks, blocks), also dries out over time.
Actually, this explains why shrinkage cracks began to appear on the plaster in new houses. The use of elastic compounds will eliminate such problems. Or wait until you can use mineral materials.
Drying the plaster
There are many reasons why the coating cracks during the drying stage. The main one is that shrinkage internal stresses appear. This depends on compliance with the technology conditions.
If the application of the plaster was carried out according to the rules, all that remains is to let the solution dry. Therefore, ensure the required temperature range, which is regulated by the mixture manufacturers, including the humidity level. There should be no drafts, and the coating should not be exposed to direct sunlight. It is highly not recommended to use heating devices - the plaster should dry naturally.
What are the types of cracks?
Based on the type of origin, the following types of cracks are distinguished:
- Constructive. They arise from overloads due to design errors, improper operation of the building, and the use of inappropriate grades of cement.
- Unconstructive. They appear due to violations of drying technology and unfavorable conditions for crystallization of solid concrete.
- Created during a fire. Exposure to high temperatures contributes to the formation of delamination of the material due to the expansion of the reinforcement and the large temperature difference between the external and internal layers.
Non-structural cracks are divided into several types:
- Consequence of plastic shrinkage. Caused by the high drying rate of concrete. Outwardly, they look like barely noticeable cracks as thick as a human hair and up to 75 centimeters long.
- Consequences of temperature shrinkage. Crystallization under high temperature conditions causes the appearance of strong stresses that destroy the top layer. The direction of the rupture is from outside to inside. The width of the gaps ranges from tenths of a millimeter to several millimeters; there are cracks that are centimeters wide.
- Corrosion cracks.
Formed due to corrosion of reinforcing bars located close to the surface. Most often they are the result of a violation of pouring technology or improper assembly of reinforcement. They appear after several months of use.
Most of the resulting ruptures are of a non-structural nature and occur on almost all foundations.
The absence of cracks is characteristic of the foundations of special structures of high responsibility, created using special technologies from a specific material. The permissible values of deformations and breaks are clearly defined by SNiP, which regulate the size and depth of possible surface disturbances.
Other plaster defects
There are two main types of defects in nature:
In the first case, they arise due to non-compliance with building codes and recommendations. Which often manifests itself in improper mixing of the solution. Operational defects usually include cracks and peeling that appear due to wear and tear of building structures.
Dutiki
This is a technological defect that is associated with improper preparation of the solution. This problem occurs when using lime compounds. In particular, the addition of quicklime or it was prepared poorly.
Due to the unextinguished particles, the process continues inside the plaster, resulting in the formation of swellings (bumps) on the surface with a white spot in the center. The entire coating loses its strength and evenness.
Areas with tubercles must be moistened generously and removed, cleaned well, and then reapplied with the plaster mixture. Lime milk or slaked lime should be passed through a sieve with cells of 0.4x0.4 mm. This will prevent any unquenched particles from getting into the solution.
Swelling and peeling of plaster
Peeling and swelling are rare, but they do occur. Basically, this problem occurs when using gypsum and lime mixtures. There is a violation of technology here - little time was given to dry the layer. The damaged coating must be removed and then allowed to dry. Only then can the building mixture be reapplied.
If the selected composition does not correspond to the parameters of the current level of humidity in the room, it should be replaced with a suitable option - sanitizing, waterproofing analogues.
Cracks in the husks
There are several reasons:
Before processing joints of dissimilar materials, they must be pre-reinforced. Dry wooden surfaces should be moistened with water before plastering. Any structure must be firmly fixed, which should be ensured before finishing work.
Efflorescence
Efflorescence is also known as efflorescence. Their appearance is associated with high levels of humidity in the room. This is a clear sign of insufficient ventilation and what you need to pay attention to, otherwise fungi will begin to develop on the surface of the walls.
To combat deposits, you should try dissolving them in water. Special tools that are available in any hardware store will do. The work cannot be done without the use of metal scrapers, brushes, and rollers.
Rust spots
Rust stains and other traces of other origins can turn into big troubles. The reasons for the defects that arise are as follows:
The first reasons require a complex approach - in order to remove beacons or eliminate pipe leaks, it is necessary to trench the surface. Next, re-cover the damaged area with a new solution.
Foci of biological damage are neutralized, then the area is washed, primed, and putty is applied. Grease stains can be easily removed with any degreaser (white is suitable). Next, the area to be treated must be coated with primer in 2 approaches and dried. Then cover everything with white paint and observe whether the stains appear again.
How to restore the integrity of plaster?
Plastering defects and methods for eliminating them can only be accurately determined by a specialist. At the same time, he must adhere to certain rules. Among them are:
- thoroughly kneading the solution;
- periodic wetting of the plaster at high indoor temperatures;
- creating a layer thickness of no more than 1.5 cm;
- reinforcement of corner and joint areas with a special nylon mesh;
- preparing a more elastic mixture for ceilings than for walls.
Small plaster defects can be removed using finely dispersed putty. It is sold ready-made in tubes or jars. Dry material has a larger powder fraction. Acrylic paste is suitable for repairing microcracks. Removing large cracks is a serious job and is carried out using grouting with a solution of gypsum and chalk. First, all the plaster along the crack is removed to the base.
A strip of parchment up to 20 cm wide is placed along the exposed section of the wall. A strip of corrugated metal is fixed to it, the location of the edges of which should be perpendicular to the crack line. Then spraying is carried out with a solution, then with soil, and finally with a covering. A special problem is mold and mildew, which are still quite difficult to combat. Delaminations in places with high humidity are corrected using waterproof putty. But before this, the old plaster is removed, the surface is disinfected and an insulating mixture is applied.
Methods and technology for sealing cracks
If there are a large number of cracks and a weak coating, the finishing layer is removed completely and the entire surface must be thoroughly cleaned. If there are only a few such defects, then one putty is enough. Cracks can be repaired in two ways:
It is important to complete the preparation, which consists of several stages:
Advice! When cracks open up to 5 mm, it is better to fill their cavities with PVA glue or mounting compound.
We use sealant
The main advantage of the hermetic composition is rapid polymerization. Due to its good ductility, the product penetrates into narrow crevices, due to which it has a wide range of applications in sealing surface defects. After drying, the sealant retains its elasticity, which causes it to deform, just like the walls of the crack.
Just before using the product you need to make sure that it is compatible with the binder component of the building mixture. If the composition of the plaster is unknown, it makes sense to carry out a test in an inconspicuous area.
The sealing procedure using sealant is simple and includes a number of operations:
With safety glasses and gloves, you can protect yourself from getting the sealant on your skin. It is difficult to remove without a solvent.
Sealing with plaster mortar
Plaster mortar differs from sealant in that it takes several days to dry. And in terms of price, this method of eliminating the defect is cheaper. Sequence of operations:
If during preparation the area for subsequent treatment increases significantly, a metal or synthetic mesh should be used. It needs to be cut to the shape of the area, but the area must be primed before installation. The defect cavity is filled to the brim with a spatula, and then the recess is leveled and excess mortar is removed. In case of extended cracks, holes should be drilled for dowels (hammering them is not recommended at all).
Note! If the depth of the cracks is large, it is better to do the work in two approaches. After the base layer has set, it must be cleaned with a spatula, primed, dried and the topcoat applied. When this layer dries, it is sanded.
Repair of plaster in separate places
Plaster is not an eternal thing. Owners of houses and apartments are faced with a problem when it begins to crack or fall off in places. What to do? We will look at the reasons for this phenomenon, as well as how to repair plaster walls in individual places and surface restoration technology.
Defects on the surface, causes and method of restoration There are a number of defects that are formed when the proportions of the components of the composition or the technology of its application are violated. The list is as follows:
What is the reason for such defects? Bulges and bumps may appear if the limestone composition is unseasoned and has unslaked particles. How to repair lime plaster in this case? It is necessary to withstand the plaster until the lime is completely extinguished. The defects are exposed, abundantly moistened with water and filled with plaster mortar. All that remains is to wipe the surface.
Sedimentary cracks are formed when the composition is poorly mixed and when there is an excess of binder. Precise adherence to proportions and dosage in accordance with the packaging will help solve the problem. All that remains is to thoroughly mix the plaster and level the surface.
When the base has not been prepared, cleaned, rough, too dry and dusty, fresh plaster may flake off when applied. To solve this, you will need to pause work and start preparing the surface. The application technology is as follows: notches are made on the surface for better adhesion (or shingles are made), the wall is cleaned of dust and dirt. In addition, it is moistened with water. Then the mixture will not peel off, and repairs to the plaster and surfaces inside the building will not be needed for a long time.
If the problem is cracks throughout the entire thickness of the plaster layer, then there is exactly one reason - there is no reinforcing mesh between the wall and the plaster. The base material is not rigid and is not reinforced in any way. The technology for applying the mixture is that the subsequent finishing layer should be less durable than the previous one, that is, it contains less binder. To prevent the intermediate layers from drying out, they must be moistened with water and reinforced with mesh.
The last defect is spots and stripes. They most often appear on walls from the outside. The cause may be a very damp or wet surface. Especially when the plaster is applied after rain. The solution is to treat the dried walls and waterproof them to prevent moisture from being drawn up from the ground. Local repairs of plastered walls are performed differently. The technology is simple, but requires careful consideration.
Methods for eliminating defects on different surfaces
The presence of cracks in the coating not only spoils the appearance of the walls, but also reduces functionality. If you ignore the defects and cover them with wallpaper or tiles, the destructive process underneath will not stop. Over time, the finish will begin to peel off in areas. That is, it is initially necessary to eliminate defects and only then proceed to further finishing work.
Plaster repair
Plastering of surfaces is carried out using cement-sand mixtures, which have low elasticity. For this reason, cracks on walls are not a rare occurrence. Step-by-step algorithm for repairing plaster:
Heaters and other similar devices must not be used during repair work. The treated areas on the facade should be covered with a canopy to avoid direct sunlight.
Brickwork repair
When cracks are caused by damaged masonry, the problem can only be solved by a radical method. If nothing is done, the kinks will begin to deepen and widen over time.
To correct the situation, you need to remove all the plaster composition from the gap cavity, as well as from the adjacent areas. The crack itself should be expanded to the brickwork. Then the cavity is filled with one of the following:
Advice! Instead of cement mortar, you can buy dry tile adhesive and dilute it as indicated in the instructions. It is not recommended to use silicone-based glue, as the composition will not stick to it.
Repair of plasterboard structures
Most private property owners, as well as residents of multi-storey buildings, prefer to use plasterboard boards to level walls. It is easy to use, but beginners often make mistakes that lead to the characteristic mesh pattern. This often manifests itself in poor fastening of the frame and other installation problems.
Problems that arise due to high levels of humidity and flooding require drastic action. The drywall sheets will be deformed and will have to be replaced. Eliminating improper sealing of joints will not bring difficulties:
It is optimal to completely cover the entire sheet with fiberglass, then putty and sand it. Only then can finishing work begin. It's expensive, but practical and effective.
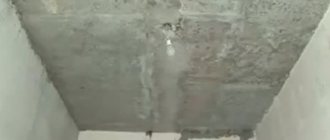
How to repair a crack in concrete
It is permissible to deal with such a defect only after the final shrinkage of the building, otherwise a new and deeper gap will appear, and in the same area. A strong cement mortar or epoxy resin is used to fill hairline cracks.
When the building has completed shrinkage and the gap stops growing, the problem can be easily eliminated in the same way as when repairing brickwork. To stop the growth of cracks, epoxy resin is used:
It is better to add plasticizers to the solution to make it fluid. Due to this, it will fill all the cavities for rigid fixation.
What to do if cracks appear?
Problems arose on aerated concrete:
Correction is useless when the cement plaster cracks, you have to remove it and start finishing work from the beginning. Now, knowing the basic rules, you will be able to do it correctly. It is important to use materials designed specifically for aerated concrete work.
Helpful advice! When performing the initial finishing of this material, it is advisable to first finish the finishing inside the room, and then take on the façade of the building. This mistake is extremely popular when hairline cracks in plaster behave strangely, constantly appearing and disappearing, but their size is quietly increasing.
Problems due to variable humidity:
- Cracks that appear due to constant changes in humidity levels require urgent identification of the cause of these jumps and its elimination. After closing the source of moisture, thorough drying is necessary so that the plaster does not crack again and the question disappears: “What to do?”
Poor quality or old mixture:
- The only correct solution would be to completely remove the finish and replace it with a new one.
Mechanical characteristics of the working surface:
- It is necessary to study this problem in more detail and pay special attention to the nuances. Perhaps the appearance of hairline cracks in the plaster was influenced by ordinary subsidence. Some impatient citizen was busy applying the solution, completely lost sight of the importance of waiting the required time, and this is the result. However, this case allows you to simply repair cracks in the plaster, this time withstanding the full subsidence time recommended by the manufacturer.
- A vertical deviation is an incredibly unpleasant and heavy thing, requiring strengthening of the structural parts itself. After which it is possible to seal cracks in the plaster.
Helpful advice! Use beacons made of ordinary paper tape so that mechanical changes in the design are always under control. This method is simple and reliable. You need to stick the tape on the problem area and wait. A torn tape will indicate that the structure is moving, which means that the destruction process could not be stopped. The only correct conclusion is that you will have to get to work to fix the problem. If the tape is in perfect order, then you can safely start covering thin cracks in the plaster so that they don’t warp.
How to prevent cracks from appearing
Removing cracks is much more difficult than carrying out timely prevention. The main thing is to follow the plastering technology. The condition of the walls can be easily assessed during routine cleaning or during cosmetic repairs (re-wallpapering, painting, etc.).
If cracks are found, it is worth finding out their nature. Unstable cracks (opening, closing) indicate deformation of the building. Individual stable defects (which do not change size over time) are easier to cover up immediately. Water-soluble plasters and water-based emulsions will protect brick buildings.
Before starting plastering work, you need to study the walls, as well as their operating conditions. It wouldn’t hurt to find out the year the building was erected. This will help to comply with the technology and avoid the appearance of cracks. The service life of the finish will also be long.
Did you manage to learn something new? Share in the comments!
Prevention measures
Eliminating cracks after plastering is more difficult than taking preventive measures. Failure to comply with plastering technology and sedimentation are the main causes of cracks. Cracks due to wear of the coating during operation are less common.
Therefore, adherence to technology during construction and plastering is the main preventive measure. The condition of the wall surface is usually paid attention to during cleaning and cosmetic repairs (painting, wallpapering). If cracks appear, the degree of their stability should be determined. Unstable cracks (can open and close) often indicate current deformation of the house. It is better to cover up stable (not increasing over time) individual cracks without waiting for preventive grinding of the wall.
If you have a plastered house, then the appearance of cracks in the plaster coating is not a reason to panic, since even a beginner can cope with them. About what to cover and how to repair cracks in the plaster on the wall of a house is described here. Information on the preparation and application of solutions is available in the sections Types of plaster and Plastering.