To make the foundation of a building under construction stable, with high density and a long period of operation, you need to adhere to the rules for forming a place for its foundation.
It is necessary to dig a foundation pit according to a specially developed plan, with a drawing and engineering calculations, using not only transport, but also manual labor.
It is best to entrust the work to professionals, as they will properly prepare the area and complete all the necessary work in a short time.
What is a pit pit?
An excavation in the ground of a certain size, provided for in the excavation plan and intended for arranging the foundation of the building being erected, is called a foundation pit. It has its own sizes and different shapes.
Its dimensions - height, width, area and volume are directly dependent on:
- geographical features of the region;
- soil level;
- operating conditions of the future building;
- ability to soil freezing.
Recesses in the ground take on the load from the structure being built, so they must be made deep and securely.
Here are the meanings:
- period of work;
- size and shape;
- planned course of action;
- choosing the right technology.
The excavation plan may look like this:
The correct organization of digging the ground consists of taking into account indicators of the groundwater level, as well as taking soil samples for the purpose of studying it. Chemical and geological experiments are carried out in laboratory conditions to determine the quality and density of the soil material. Such studies help with the permissibility of building a house in a particular location, on the basis of which the engineer designs a drawing.
The development of the pit is carried out according to all the rules. At the beginning and end of work (handover of the finished object), reports must be drawn up, with an attached estimate of the costs of machinery, equipment, and the number of workers involved.
The shape and dimensions of the future planned pit always depend on the type of base, the choice of which belongs to the customers.
Who does the development?
According to the current urban planning legislation, mandatory documents in a project for the construction of an object involving the construction of a foundation pit are considered to be projects for the performance of work and the organization of construction, which are abbreviated as PPR and POS, respectively.
According to Code 12-136, issued in 2002, the above documents are developed as part of a complete project in order to coordinate design decisions with organizational activities during implementation.
The design of PPR for development and PIC must be carried out by professionals with the proper education and experience. The PIC is developed by the designers and included in the project, and the PPR is ordered by the general contractor and agreed upon with the customer, technical supervision and organizations to whose balance the object will be transferred.
Types of foundation pits and requirements for them
Construction recesses must be selected taking into account the characteristics of the planned building.
Varieties for foundations are pits:
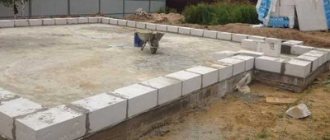
- for slab structures;
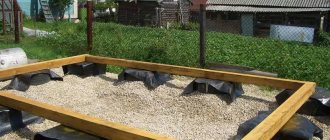
- under columnar bases.
There are also pits with or without slopes that require strengthening, inclined, with steps, vertical, rectangular, round and trapezoidal, as well as tape and glass.
Such a pit is made for multi-story buildings. The pit for monolithic slabs is prepared from concrete . In appearance it is a rectangle or trapezoid. The vertical recess of the walls will always be more than 50 cm.
This type of foundation is suitable for excavation work using stepped technology. The soil is removed evenly layer by layer, according to a given thickness of the layers - 50 cm. The next level, after the first, is dug in such a way as to create steps, the width of which is 25 cm per unit.
This process can be traced using the example of digging a hole at a given depth of 100 cm:
- A rectangle is marked along the earthen plane, the dimensions of which exceed the dimensions of the future building on all sides by 0.5 m.
- According to the given markings, the earth is removed to a depth of 50 cm, while simultaneously forming vertical walls.
- At the bottom of the pit, make a rectangular marking, with a distance of 25 cm from the sides.
- Then the soil mixture is removed to a depth of 50 cm.
The same principle applies to digging for very deep excavations.
The engineer determines the surface dimensions of this type of construction pit using a very simple formula:
- L = l + 25 N / 50, where:
- L – specified length or width; l – length of the building (width); H – depth.
Large holes for columnar foundations are made according to this principle:
- Carrying out preparation work (cleaning, leveling and marking the territory).
- Digging a trench for the foundation of a house according to a given marking, determining the location and future installation of pillars, along the joints of internal walls and the entire perimeter of the building, at steps of 1.6 - 2.2 m.
- Formation of trench depressions with a depth of up to 40 cm and a width of up to 100 cm.
- In the places reserved for the installation of pillars, squares up to 70 cm in size are dug, with a depth corresponding to the plan.
- If necessary, the pits are secured from the inside with shields and rods made of wood or metal.
The foundation pits for the pillars are made manually with a shovel. If the ground is very difficult to dig, use a pick or crowbar.
For this variety, a hole in the soil is dug according to the same principle as a slab one:
- First, they make preparations: clean the area and remove a layer of fertile soil up to 20 cm.
- Then, according to the project plan, markings are made for the walls of the excavation, as well as for the trenches, the depth of which should be 50 cm.
Experts recommend 80 cm for future load-bearing walls of the building. The walls of dug holes in the soil should not be vertical. The main requirement is that they should externally resemble slopes and be located at a certain angle (slope), the dimensions of which are indicated in the project.
It is best to mark the base using stakes . They need to be hammered into the corners, at the end of the building perimeters (wall joints). After that, the required width of the trench is marked and cords are pulled, which mark the minimum boundaries in the pit.
Digging and sampling of soil begins from the largest angle in height. When the depth reaches 70 cm, panels with spacers are installed on the sides, which will later be useful when installing the formwork.
To mark the pit for strip bases, use a tape measure and a metal ruler. Control can be carried out using a building level.
For strip base
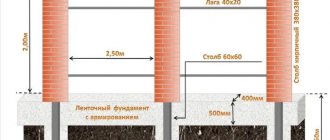
The most common type of foundation is strip foundation. It consists of an iron frame installed along the load-bearing walls and filled with concrete. This design is not very expensive compared to others, and at the same time is almost universal for all types of terrain (except for those where groundwater is too close to the surface).
Such a foundation could be:
- shallow - 0.5-1.5 meters;
- recessed - from 1.5 meters.
Accordingly, the dimensions of the pit, as well as its appearance and operating procedure, depend on the specific type of strip base, which will be discussed in detail below. But we will not ignore others: slab and columnar.
How to determine what kind of hole is needed and its dimensions?
The design of the excavation pit takes into account the foundation on which the construction will take place.
The location of the project itself depends on some natural factors:
- type of land and the level of its possible freezing;
- dimensions and weight of the future structure;
- type of selected base;
- seismicity;
- level approach of water in the ground.
The work process begins at the site only after geological exploration and laboratory research of climatic conditions. In this case, the norms of SNiP 3.02.01 are always taken into account. The chosen shape of the excavation (tape, round, pile or rectangular) also matters.
The volumes of the excavation are calculated using the following formula:
V = (H / 6) (ab + cd + (a + c) (b+d), where:
- N – specified depth;
- a, b - width + length of the bottom;
- c, d - width + length of the apex.
When a pit is developed using a mechanized method, the absence of a mark up to the design indicator of 0.1 m is taken into account. The shortfall is necessary to avoid disturbances in the natural soil. Therefore, only manual work is used here. During backfill processes, the volume of the base is subtracted from the resulting volume of the entire development.
Let's consider several options for recesses and how to make the correct calculation in each specific case.
Excavation with vertical walls
- Width (L1), m – 4.
- Length (L2), m – 6.
- Height (H), m – 2.
- Volume (V) = 48 m3 – V = L1 * L2 * H = 4 * 6 * 2 = 48 m3.
- Area (F) = 24 m2 – F = L1 * L2 = 4 * 6 = 24 m2.
Recess with vertical walls, with different vertex sizes
- Beginning of the form.
- Width (L1), m – 4.
- Length (L2), m – 6.
- Height (m):
- (H1) – 2.
- (H2) – 2.
- (H3) – 2.
- (H4) – 2.
- Volume (V) = 48 m3, V = L1 * L2 * (H1 + H2 + H3 + H4) / 4 = 4 * 6 * (2 + 2 + 2 + 2) / 4 = 48 m3.
- Plan area (F) = 24 m2, F = L1 * L2 = 4 * 6 = 24 m2.
With slopes
- Width(L1), m – 4.
- Length (L2), m – 6.
- Height (H), m – 2.
- Selected soil: loam > coefficient. m = 0.5.
- Recess volume (V) = 70.667 m3.
- Top width (L3) = 6 m2.
- Top length (L4) = 8 m2.
- V = (H / 6 * (2 * L1 + L3) * L2 + (2 * L3 + L1) * L4) = (2 / 6 * (2 * 4 + 6) * 6 + (2 * 6 + 4) *8) = 70, 667 m3.
- L3 = H * m + L1 + H * m = 2 * 0.5 + 4 + 2 * 0. 5 = 6 m.
- L4 = H * m + L2 + H * m = 2 * 0.5 + 6 + 2 * 0.5 = 8 m.
The main rule for constructing an excavation is the following: the base of the building being constructed should not be closer than 50 cm from the water in the ground. The higher this value, the better.
In order to correctly make calculations for earthworks, you must always remember that the indicators (height, width and length) of the perimeter are simply multiplied together. - This is the volume.
To make engineering calculations, you need a specialized education (engineering). For example, when approving a plan, the slope angle is calculated, which depends on the type of soil. Only a specialist can calculate it correctly.
The table SNiP 12-03-99 indicates the soil depths that are used when determining the volume of work according to the loosening coefficients, drawn up according to the tables in these rules.
The composition of the soil is determined using geodesy methods. Calculation of soil resistance is determined by the formula indicated in the photograph:
Example: Calculate the resistance of clay at K porosity e = 0.85, fluidity IL = 0.45, foundation width b = 2, depth d = 2.5 m and specific gravity above the base γ´ = 17 kN/m3.
Look at the soil indicators in the table and insert the values.
The main formula for calculating soil resistance in this case looks like this:
R0 refers to foundations, with width b1 = 1 m and depth d1 = 2 m, therefore:
Answer: 265 kPa
The level of soil location, its seismicity, groundwater and ability to freeze are determined according to GOST 24847-2017. You can view them on the website. According to this document, measurement methods and types of work with the ground are selected under certain conditions. Seasonal freezing is measured by the Ratomsky permafrost meter (MP) using special drilling methods.
Before deciding to dig holes, calculations are also carried out on the bearing capacity of the soil. To do this, use the following formula:
а=f/a (plural /m*m)
The load of the house is always divided by the area of the lower part of the foundation. To determine the area of the reinforced concrete base, the approximate indicators are divided into the soil value and the permissible load indicator.
The development of a space-planning solution for the building under construction and the preparation of the project must be approved by specialists from the architecture department of the local authorized authorities.
How exactly a drawing of a pit plan, developed for a specific foundation, is made can be seen in the document in the photo:
If special transport is used during excavation work, the density of the stale soil layers is disrupted. Therefore, when making calculations, it is always taken into account that when developing land, a K value of 20-30% is used. This coefficient is considered a correction factor.
With soil removal
- Length – 70 m
- Depth – 5 m
- Width – 30 m
- Total volume = 70*5*30 =10,500 m3
For land removal, the total volume will always be greater. To do this you need:
10,500 m3*20% = 12,600 m3
Answer: 12,600 m3
The accuracy of calculations and taking into account all factors of technological, laboratory and natural significance determines the correctness of earthworks and the durability of the structure.
Foundation trenches come with vertical, inclined and reinforced walls.
What is executive photography?
Geodetic executive survey is divided into the following types.
- Intermediate, carried out throughout the entire cycle of construction and installation work and confirms the accuracy and quality of the construction and installation work performed and is an integral part of the as-built documentation.
- The final one completes the construction process, records the actual geometry of the object and its location on the ground, and serves as the basis for making changes to topographic maps of the area.
Executive shootings are:
- The object as a whole allows you to determine its location with details of all communications (wells, cables...), buildings, access roads, etc. More often used by designers, based on the data obtained, a digital terrain model (DTM) is compiled, on which the project is designed and developed.
- Underground and overhead communications, their presence, direction of passage, connections, intersections, additional network elements are examined. This makes it possible to protect highways from damage during construction, as well as to use them for the needs of a given facility.
- Excavation pits are carried out after excavation of the soil and its cleaning, the position of the axes, the marks of the upper and lower points are determined, and the volume of excavated soil is calculated for further foundation work.
- Column-shaped structures, deviations of vertical structures, walls, power lines, masts, etc. are monitored.
- Longitudinal and transverse profiles of roads and railways, the geometric and altitude position of the embankment, as well as its structural elements (culverts, filter embankments, etc.) are controlled.
Each stage of construction ends with a control survey and execution of the as-built plan.
Carrying out geodetic as-built surveys in construction makes it possible to ensure technological control at each stage of construction, which contributes to the reliability of the structure under construction and its safe further operation.
Also on the site there are many examples of execution of executive diagrams for various structural elements and structures, which can be downloaded both in PDF format and in DWG development format.
Process and technology of dimple formation
Digging begins with preparatory and geodetic work, development, calculations of the depth and size of the hole, and adoption of a plan. As soon as the technological map is ready, excavation work begins.
For this, special equipment is used:
- machines that dig pits (single- and multi-bucket excavators);
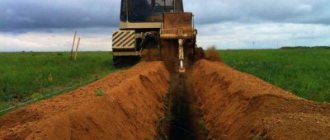
- transport and earthmoving (bulldozers, graders, ditch diggers).
They also use manual labor - specialists monitor soil sampling, form slopes, compact and fill the excavation pits.
Builders must know exactly:
- the expected load that the foundation must withstand;
- type of building foundation;
- soil features;
- end point for possible soil freezing;
- the amount of expected annual precipitation and the level of soil moisture.
Experienced specialists recommend carrying out work at a favorable time of year: early May - late October. At this time, the soil is soft and pliable, and digging a hole is easier than during the cold period, the cost of work in which increases several times.
The digging depth must be taken into account, taking into account soil freezing. If this occurs, then the bottom of the pit must be lowered to 40 cm. The location of the groundwater also matters. The notch should always be higher, 50 cm.
After determining the type of soil, when calculating the depth, the following moments (in cm) are taken into account that allow digging:
- sandstone – 1,100;
- sandstone – 1,300;
- clay and loams – 1,400;
- dense soil – 1,800.
If the numbers are higher or lower than the listed indicators, then work is prohibited. But this rule applies to too deep a foundation. If the foundation is shallow, then the recess should be 40-70 cm.
Before digging, be sure to do the following:
- Check the place for the absence of underground communications. This can be clarified with the local administration when submitting and registering the drawing (during the preparation of documents for construction).
- They cut off the fertile structure (up to 40 cm) and leave it in the place from which it will be disposed of, while restoring order in the surrounding area and arranging the landscape, at the end of the stand.
- Surface water is pumped out or drained using pumps (if necessary).
- Mark the place. To do this, use a theodolite or level, secure the corners (use stakes, pull marking cords).
- They start digging from the bottom side.
- Strengthening is done at great depths.
- Excess soil is removed.
General rules for carrying out preparatory work, development and digging exist for all main types of foundations (strip, monolithic and columnar). The nuances lie only in individual sizes and calculations. For the required small volumes of pits with low depth (strip and column foundations), excavation work is carried out manually. For massive and slab foundations, excavators with reverse and direct buckets, as well as loaders, are used.
The foundation pit walls are secured using:
- cementing (for dense buildings);
- tongue and groove (suitable for sandy, weakened and waterlogged soil);
- piles (permissible for deep holes).
The bottom of the pit must be leveled. Therefore, at the end of the work (the remaining 10 cm) you need to finish it manually. It is better to fill the sinuses with a draining soil mixture.
If there are other buildings near the marking site, then development should be carried out below their foundations.
Geodetic tablet
To record information obtained during a geodetic study of the area, cadastral engineers use special tablets. They consist of whatman paper glued to a hard surface, usually aluminum or wood.
The device is convenient to use when:
- ground field work, for marking outlines, taking measurements of existing buildings on the site and for applying survey justification. To obtain accurate information about an object, a surveyor uses specialized tools, including GPS instruments and total stations;
- creating copies of existing geodetic plans;
- processing of materials obtained during land surveying, including the creation of a pencil image of the area and additional calculations.
A geodetic tablet at the stage of drawing a terrain plan looks like this:
Main difficulties and mistakes
In order not to make mistakes when digging recesses, it is necessary to act in accordance with the developed technological map, which contains the necessary calculations.
The development stage is considered an important process, since it takes into account the nuances that will help accurately lay the foundation in the dug pit, because the future fate and operation of the structure depends on it. Due to improper digging, the foundation may sag.
Some of the main pitfall pitfalls are:
Perekok, due to the selection of land below a given elevation . Here it is worth paying attention to the functions performed by the excavator, which should be monitored by specialists.
If excavation work is carried out below a given level, and more soil is taken than necessary, then it will be very difficult to compact it, since the overall density will suffer. If a mistake is made, you will have to fill the hole with medium-grain gully sand, followed by compacting it with a vibratory compactor.
- Incorrectly made slopes . It is worth paying special attention to this point, since if the slopes are made too steep, they may collapse. And in order to carry out restoration, separate installation work will be required, which will lead to additional financial costs. In this case, you will have to use manual labor.
Therefore, in order to avoid mistakes, it is necessary to develop a sequence of actions in the work:
- Conduct soil reconnaissance and laboratory testing.
- Calculate the level of groundwater remoteness.
- Properly prepare the site by removing debris, green spaces and topsoil.
- Make markings according to the approved work plan.
- Use equipment and labor of experienced builders (crews).
- Comply with the required standards and technologies.
- Monitor safety precautions and labor protection.
- Remove soil layers gradually and evenly.
- Upon completion of work, dispose of unnecessary soil and clear the construction site.
Any subtleties in such work are important, and the development of the plan should be carried out by a qualified specialist. To fill the sinuses of the pit, waste soil, sand or ASG is used, which are compacted as much as possible.
If necessary, water can be pumped out of the excavations, walls can be strengthened, and peat can be removed.
Executive diagram of the pit
Download the as-built diagram of the pit (DWG format) at a survey scale of 1:1000 Download the as-built survey of the pit in PDF format
Executive diagram of excavation pit
To achieve the highest accuracy in determining the volume of excavation work, you should first perform a surface survey of the site, the future pit. In most cases, depending on the area, the surface layer is initially removed, after which the survey is carried out again.
Let us assume that the surface (fertile) layer develops a depth of 1 m to 1.6 m over the entire area of the pit. After the survey, the difference between the surface before development and the removed layer is determined. Unlike other rocks, part of the fertile soil is retained near the construction site, since over time it is used to backfill individual areas and landscaping elements. So we carried out two surveys before and after development, as a result of which we obtained a difference in surfaces. To accurately calculate the volume of removed soil, you can use the Digitals Delta software environment. More information about the program’s functions can be found at
Craftsmen offer to download
a working version of Digitals with a detailed description of its installation. If you wish, find out about.
Now regarding the calculation. Ate from memory. data is downloaded from a tacheometer (as a rule, the excavation can be removed from one station, which simplifies processing, with tacheometers that have a transfer function in the form of XYZ coordinates). The resulting file with the .CSV extension can be renamed to .DAT and easily opened through Digitals). It is necessary to survey the construction site as a whole, even before the intervention of equipment, because in addition to the main pit of the building, several sites can be developed for technical structures, a retaining wall or other buildings. There will also be a soil storage area - surveying the surface of the storage area is also necessary. From personal experience, there was a case when, after the transfer of the plan-elevation base for construction, the relief surface marks and hydrographic elements on the site did not coincide with the drawings regarding the actual topography. In such cases, the design organization should be immediately notified with the provision of visual comparative surveys, which will indicate the differences so that serious shortcomings may be encountered in the operation of future drainage, sewerage, drainage and improvement systems in general.
Digging price
To determine how much it costs to dig a pit, as well as to calculate the costs spent on arranging a hole for laying the foundation, you need to take into account the methods used for digging (manual, mechanical, transport), the type of soil, the time spent, means of production, the number of people for the contract.
On average, the price for digging one cube is from 180 to 250 rubles . In areas with heavy and rocky soils, the cost of excavation work will always be much higher.
At the same time, transportation and disposal of the soil mixture, when it is removed by a dump truck (10 m3), will cost from 400 to 700 rubles.
The arrival of heavy equipment (excavator, tractor, loader, Kama or dump truck) is paid for as a separate item, directly depending on the type of machine used (in terms of power), as well as the distance covered by the vehicle to the work site. In the central regions of the Russian Federation, prices for heavy equipment services range from 10 to 30,000 rubles per day.
The creation of the project by an engineer is considered at a separate cost. Many construction companies that provide these services combine excavation development with the main type of work and disposal of excavated earth, giving clients good discounts.
On average, project + preparatory work + digging + soil removal = 500 rubles. / m3.
It is more profitable to pay not for the cubic capacity of the excavated earth, but for the time spent digging with an excavator. In this case, the hourly wage will be 600 rubles, and a day of work – from 5,000.
General recommendations for carrying out work
You will greatly simplify your task if you follow simple recommendations that are valid for all types of pits:
- The first step is to study the landscape. It is advisable to obtain information about how the soil behaves at different times of the year, how often earthquakes and landslides occur, where groundwater is located, how much the ground freezes, what is the average air humidity. Special expertise will help you with this, as well as your own observations or conversation with the indigenous people if the area is unfamiliar to you.
- All calculations must first be made on paper and a drawing drawn up, even if you are sure that you perfectly understand the result.
- Even before starting to dig a pit, you need to remove trees, stumps, bushes, roots, etc. from the site, and level the surface as much as possible.
- Do not ignore strengthening the walls of the trench and creating slopes if the hole is very deep. Collapsed soil can seriously injure people working at the bottom of the pit.
- If you rent special equipment, make sure in advance that it is convenient for it to drive up without creating inconvenience or risk to your neighbors.
Some types of trenches can be dug yourself, but if you can’t, then it’s better not to risk it to save money. The amount you will spend on the work of an excavator operator will be approximately 600 rubles per cubic meter.
If you have already had experience building a house, tell us in the comments what kind of pit you provided and whether you were satisfied with the result.
Why is an executive diagram of the pit drawn up?
Engineering and geodetic as-built survey of the pit is carried out with the aim of ensuring quality control and accounting for the volume of work performed. As-built diagrams allow you to compare the actual situation with design data, identify possible inconsistencies and eliminate any deviations found from the design. Analysis of the prepared diagram gives builders the opportunity to accurately determine the amount of excess of standard construction tolerances, establish the cause of the deviation (errors are possible both during the implementation of the project and during the operation of earth-moving equipment), and make the right decision to eliminate the detected deficiencies.
An executive plan for the development of a pit should be drawn up when construction and installation operations for laying the foundation have not yet begun. Otherwise, eliminating possible defects identified thanks to this scheme will become more expensive and more difficult.
Who is developing the project?
During construction, digging trenches is indispensable. However, it is not always possible to draft them yourself. Ignorance of legal requirements can lead to an administrative fine, or even more severe punishment.
The preparation of design documentation that affects the safety of capital construction projects can only be carried out by individual entrepreneurs or other legal entities that have a certificate of admission to carry out work of this kind.
These include:
- Studying the area and the possibility of solving assigned tasks in current conditions.
- Identification of possible threats and difficulties that will be encountered when laying trenches. When choosing a route, you need to take into account the possible presence of other communications laid earlier along the way.
The company can carry out all the work independently or involve other organizations for these purposes. The person involved in the design of the project is responsible for the quality of the documentation provided, taking into account current legislation.
ASG compaction coefficient
Sand-gravel mixture (SGS) is a natural or enriched (OPGS) mixture of sand and gravel. The composition of the natural mixture is standardized by GOST 23735-2014; according to GOST, the content of gravel grains with a fraction of about 5 mm should be within 10...90%.
This material is rarely used for filling a sand and gravel cushion under the foundation; it is more often used for the production of medium and heavy concrete. Accordingly, the grain size and percentage composition of the mixture greatly influence the compaction coefficient of concrete.
The ASG group must be taken into account according to the table.
Materials used
For different types of foundations, it can use both local compacted soil and imported materials. Most often, local semi-rocky and sandy soils are subjected to compaction. Already loams, and even more so clayey soils, must be removed to the depth of the pit and replaced with a cushion of sand and gravel.
In this case, the base layers must be subjected to compaction, the effectiveness of which depends on the following factors:
- layer material. For crushed stone of different types, gravel, gravel-sand mixture (GSM) and sand, the compaction coefficient is very different;
- fractions of material. The larger the fragments, the more difficult it is to compact them;
- tamping method - manual, mechanized - and the force applied;
- height and total volume of the backfilled layer;
- the presence of material with a grain size less than that specified by the lower limit of this class (for example, for crushed stone of fraction 5...20, the content of stone up to 3 mm in size inclusive is about 5% - such a discrepancy will have little effect on the degree of compaction. If the percentage is ¼...1/4 volume – adjustments will have to be made);
- flakiness (for crushed stone). This parameter expresses the ratio of the content of cuboidal stones to flat ones. The lower the flakiness, the more cubic elements and the more densely the crushed stone can be compacted;
- layer moisture.
Why is the executive scheme for backfilling a pit performed?
Along with the as-built diagram of the prepared excavation and the plan for surveying the structures placed in it, an important document is the as-built diagram of the backfilling of the pit or trench, drawn up upon completion of all excavation work. A geodetic survey of the earth's surface resulting from backfilling is carried out in order to calculate the volume of soil mass used to fill the free space of the excavation after laying foundation elements, pipes, etc. in it. Calculation of the space filled with soil is carried out by comparing the results of this survey with previous executive schemes.
All types of executive surveys of excavations, up to the final survey of backfilling of soil, are carried out using one system of plan coordinates and heights (in the Moscow region this is MSK-50), as well as a single geodetic alignment base.
Topographic and geodetic documents such as an as-built diagram of a foundation pit, a diagram of trenches for laying underground communications or other excavations for engineering purposes can be ordered in any corner of the Moscow region.
How is the compaction factor calculated?
This requires laboratory or, for private housing construction, home tests.
A sample of material is compacted to the extent that will be organized on the construction site, after which measurements of the compacted sample are compared with measurements before compaction.
The general principles of testing, the equipment and methods used are described in GOST 22733-2016 and GOST 8269.0-97.
For a more complete understanding of the process of checking the degree of compaction of bulk materials, we recommend watching the video.
You can also use more accurate soil density meters.
Preparatory activities
Preparing the site for digging a pit
Development of a foundation pit includes the following steps:
- drawing up diagrams and drawings of excavation work on the site (qualitative analysis of the soil for its composition and density, determining the level of groundwater);
- clearing the area for construction from old communications, buildings, debris and other obstacles (in the case of existing communication systems, it is necessary to coordinate their relocation);
- performing geo-survey of the site and marking.
Having finished carrying out these types of work, you can begin to directly dig the pit. The presented construction procedure is carried out both manually and through the use of special equipment.
Of course, the first method will significantly save money, but it greatly affects the installation time. Fast shipment, removal of excess soil, combined with high-quality soil leveling, significantly simplify the procedure for preparing a pit, so it is most rational not to skimp on this issue and use the services of special equipment.
Briefly about the main thing
Before digging a trench or pit to construct a foundation, you must first perform all the calculations. Their parameters depend on the characteristics of the soil, the depth of soil freezing and the level of load from the load-bearing structures of the building.
To carry out excavation work, you can use an excavator or dig everything by hand. The choice of method depends on the volume of soil excavation, the need to load it for further removal and other nuances.
When constructing a pit for a foundation slab, soil development is carried out in stages. The soil is dug out layer by layer, taking into account recommendations for strengthening the walls.
