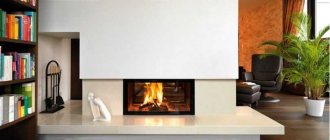
You can create a luxurious interior with ceilings and walls imitating natural marble using Venetian plaster, which imitates expensive natural material. Venetian marbled plaster, which is more affordable, is successfully used both for interior decoration and for building facades.
Modern materials for applying Venetian plaster are manufactured using new technologies. Mostly synthetic materials (acrylic or polymer compounds) are used as binders. For interior decoration, small stone chips are added as a filler, and for facades, slightly larger ones. Then a finishing coat of natural (very expensive) or cheaper synthetic wax is applied.
Low-cost options are widely used - putty mixtures without stone chips with a finishing coat of acrylic varnish.
Surface preparation
To prepare the surface, you will need a trowel, a trowel, a level, a plumb line and a trowel. The surface preparation process includes the following steps:
- Cleaning the surface from traces of old wallpaper, paint or putty.
- If there are chips or cracks on the surface, they should be puttied.
- Check the walls for evenness using a level and plumb line. If there are strong differences, it is necessary to level the surface.
- Applying primer to the walls.
After completing the last stage of surface preparation, you must allow it to dry completely.
Applying the base layer
Decorative plaster made from ordinary putty is an excellent way to decorate any surface.
Base coat application steps:
- Dilute the mixture with water according to the instructions. It is necessary to prepare such a quantity of solution that you can apply it in one go.
- Applying the first base coat. The mixture layer should be about 1.5 mm to match the texture layer.
- Distribution of putty.
After applying the base layer, you can proceed to creating a decorative surface.
Creating a textured surface
To create a decorative surface, you can use the following tools:
- Roller. When working with a roller, it is easiest to achieve a textured surface. It turns out most beautifully if you walk along the entire length of the surface without lifting the roller.
- Brushes and curly spatulas. It is enough to run a spatula over the putty, leaving broken or wavy lines. Brushes allow you to get a fine or coarse texture.
- Stencils. They need to be pressed into the base layer so that the pattern remains. There are special stencils for flat surfaces and corners.
The choice of tool for creating a textured surface depends on the desired effect, as well as on the availability of skills in their use.
Finishing
In order for decorative plaster to retain its beautiful appearance for a long time, the texture should be protected. To do this, it is recommended to use two layers of paint. In addition, the use of paint will highlight the beauty and depth of the texture.
It is worth noting other features of the finishing:
- Before finishing the surface, you must wait until it is completely dry. If you rush, when painting a wall you can spoil the integrity of the texture, so it is better to carry out the work a few days after creating the texture.
- It is necessary to select two paints that will differ in color by 2-3 tones.
- First you need to apply a dark coat of paint. The work is best done using a long-haired roller.
- The second coat of paint must be applied only after the first has completely dried. The second paint should be lighter. For the second coat, use a short-nap roller.
If there is no special roller for applying paint, you can use regular brushes. In this case, it is better to choose the widest brushes so that the paint goes on more evenly. Brush painting steps:
Pour some paint into a convenient container that you can always hold in your hand. Dip the brush into it, removing excess paint on the container. Additionally, you can wipe the brush on a piece of paper or cardboard. Paint the surface using sweeping movements to ensure the paint is applied evenly. To paint decorative putty plaster, strokes need to be made across, slightly touching the wall. No need to completely paint the wall
It is important to lubricate its convex surface in order to visually make the texture even more voluminous.
Regardless of the method of painting the surface, the last stage of surface design is the application of a transparent water-based varnish. In order for the varnish to penetrate better into the decorative plaster, it is recommended to dilute it with water. The varnish also needs to be applied in two layers.
Creating decorative plaster from putty is not a difficult task. In this case, you can even use improvised materials. The main thing is not to be afraid to experiment and show your creativity.
Fur coat
Decorative finishing “like a fur coat” is used for external and internal work. It depends on whether the dry mixture is used on a cement or gypsum basis. The fur coat is applied:
- roller,
- cartouche pistol,
- manual sprayer.
To apply the fur coat, use a roller with a “polka dot” attachment. When prepared, the solution is immediately colored and brought to the consistency of liquid sour cream using any technology.
The mass is applied from bottom to top in a continuous, even layer with simultaneous rolling out in all directions. The relief of the fur coat is formed by round holes on the nozzle.
Using a cartouche gun or a hand sprayer, the fur coat effect is obtained immediately by applying the mixture to the surface in a thin layer. The work resembles shotcrete.
Recipe - 2 (materials)
- Dry putty 1.79 l.
- Marble chips 1.79 l.
- Liquid soap base 30 g.
- Flaxseed oil 359 ml.
- Water 179 ml.
- Coloring pigment.
When using it to imitate a marble pattern, you must have 2 types of colors with contrasting tones. To prepare the solution, take 2 containers, a drill equipped with a special attachment, soft brushes and sandpaper. To imitate marble, during the mixing process, the dry components are first combined and only then the liquid is added. Stir until a homogeneous mass is obtained.
Very often, to imitate marble, improve the quality of the material and give the coating optimal properties, additional components are included in the mixture. For example, in this way it is possible to influence the degree of flammability of the coating. The mixture to imitate marble texture includes various types of crumbs, sparkles, and mother-of-pearl.
Materials are divided into groups depending on the grain size to imitate the structure of marble:
- With a small type of grains having a granule diameter of 0.2 to 1 mm.
- With medium grains, the fraction of which ranges from 1 to 3 mm.
- With large grains ranging in size from 3 to 5 mm.
This type of coating has a number of advantages, among which, first of all, are:
- Environmental friendliness, because All components included in mixtures to imitate a marble surface are safe for humans, which allows them to be used indoors.
- Fire resistance. This type of material practically does not burn.
- Versatility. Marble imitation putty is suitable for all surfaces, including various grades of concrete, drywall, brick and starting putty coatings.
- Quick preparation for application. Features of texture imitation allow this type of finishing mixture to be applied to walls that have defects, including cracks and potholes.
- Long terms of use. Such putties do not crack over time and are not afraid of temperature changes and high humidity levels.
- Variety of composition. In construction markets and in stores you can find a large number of different mixtures, differing in color and texture.
- Possibility of damage restoration. If the integrity of the coating is damaged, there is no need to remove the putty from the entire surface; cosmetic repairs are carried out only on the damaged area.
Secrets of the masters
When carrying out finishing work, each master has his own rules that must be followed.
Let's note the main ones:
- Decorative putty should not be applied to crumbling surfaces or areas with dirt: the material will not stick to them for long.
- A concrete base with oil paint will cause a lot of problems during finishing - it is necessary to wash off the dye.
- If adhesion to a given surface is questionable, use a sickle mesh (it can be glued to the surface using PVA).
- It is undesirable to dilute the composition with a construction mixer: the better the mixture is whipped, the faster it dries.
- Wash off the remnants of each used portion completely: remaining particles of the old composition will cause the new portion to quickly harden.
- If you are going to paint a finished relief surface, do not do this earlier than a day after decorating the surfaces with plaster.
- Please note an important point: it will take twice as much to create a deep relief of plaster than to create an almost smooth surface (for example, Versailles).
- Strong pressing will not give the desired effect. If you press hard on a roller or other tool, you can expose the base of the wall, which is unacceptable.
- The structural relief of the surface must be the same in any part of the finish, the thickness of the pattern layer must be identical, and the pattern must be applied once (not repeated twice in the same area).
- When creating a design, you can use special stencils (for example, leaf moldings or special forms with which you can even create brickwork).
Preliminary stage
One of the basic rules for wall finishing is surface preparation. The wall must be absolutely clean and level. Initially, it is necessary to clean the surface of the old finish and degrease it. Afterwards, if the wall has defects and unevenness, it needs to be leveled and the cracks filled with gypsum plaster. You can use regular sand-cement mortar. But a quick effect (drying) is achieved by a mixture of gypsum. The surface will dry completely in a couple of days.
The process of applying plaster with your own hands
The main feature of applying marble putty is that this type of work is performed only by hand. If you need to apply putty over large areas, you can mechanize the process. When using 2 shades of putty, first apply a light mixture to the surface with a wide spatula in small strokes in different directions, wait until the coating dries completely.
Then the wall is sanded and the resulting dust is removed with a brush. Only after this is it possible to use a second shade of putty. It is applied at an angle of 30º and also in different directions. The randomness of application creates the desired effect of a marble surface. Then you need to wait until it dries completely and clean it. At the final stage, the last white layer is applied to the surface, through which the darker layers appear.
To preserve the imitation of marble texture, the wall is coated with varnish or special wax. Additionally, the surface acquires a glossy shine, which creates a stone effect. Experts do not recommend using varnish indoors; it is applied only to facades. Inside buildings, only wax is used to imitate marble, because... varnish contains toxins that are harmful to humans in confined spaces.
To imitate marble, it is most convenient to use Venetian plaster. It is sold in buckets ready for application to walls. Creating a marble texture from it takes very little time and has a number of features. 2 or 3 shades of the mixture are applied to the spatula at once. You can mix them up a little.
The amount of material should be small, sufficient for one movement of the tool along the surface. The putty is applied in one direction, slightly moving the tool from side to side, which should be done with slight pressure. This is necessary so that the layer of plaster is as thin as possible, and the main shade of the wall is slightly transparent.
To do this, do the same, only apply smaller amounts of Venetian plaster of different shades to the instrument and add a pattern of a second layer of finishing. Very fine veins and cracks are applied with a brush; if necessary, acrylic paint is used.
Painting work
Walls can be painted using brushes or rollers. Using paints you can create a variety of designs and patterns.
To imitate marble you need paint of 3 different colors. One shade will become the background. The color of this paint is selected taking into account the predominance of which shade should be obtained. It is recommended to buy paint with a glossy, semi-gloss or semi-matte sheen. But the base background should always be the darkest shade. To obtain a lighter background, apply white paint or a material with a small amount of impurities of other colors.
Walls with a combination of yellowish-white, light gray, and yellow-brown shades will look great. For example, to imitate the popular green marble, dark green, gray-green and black paint are used. The most difficult part is creating the veins that are a feature of marble. They are made with paints of colors close to white.
If necessary, you can use shades of light green and light gray. These colors are more contrasting. You should adhere to the principle that 2 additional colors should be close in shade, and one color should act as a contrast.
Plaster composition
The material contains marble or granite chips, slaked lime, special binder fillers and mineral pigment. Creating a particularly durable coating is possible using a plaster mixture containing granite chips. If the plaster mixture contains two such important components as granite and marble, then the result is practical, high-quality granite plaster.
It is advisable to use this composition of granite-marble plaster to create the outer plinth of the facade or in places of high traffic, for example, in underground passages.
Putty with filler
The types of fillers and requirements for them are given above. Mosaic decorative plaster is made using fillers in the mixture.
Buy ready-to-use putty with filler for exterior or interior work in the store. It is difficult to make and balance the composition yourself, and filler of the required fraction is sold extremely rarely.
The finished putty is applied to the prepared surface in small portions in one pass; crumbs may fall. The milk that appears on the surface cannot be removed immediately.
After drying, the mass is smoothed, the excess is pulled off and removed from the grater. Smooth in any direction, achieving a smooth, even surface. Complete drying of the model mass with filler takes up to 3 days.
Crafting Recipes
You can turn putty into a decorative material yourself at home. This will not be difficult, although it will require additional expenses. However, today it is not difficult to purchase the necessary components: brands offer a wide range of products in the public domain.
Let's look at the basic manufacturing recipes.
With PVA glue
To create the mass, take 6 kg of a powder mixture of ordinary putty and pour it into a previously prepared clean container. Add 2 liters of water, knead the mass, then pour 0.2 kg of PVA glue into it, after which it is mixed again.
If there is no PVA glue, you can replace it with a plasterboard grout mixture in a 1:1 ratio.
With primer
For this method, use a powder composition (6 kg), mix it with a primer to the consistency of homogeneous sour cream, then add joint grout to the mixture. The composition can include colored grout or paint of the desired tone.
For this recipe you need to use a white primer.
Gypsum based
Some craftsmen use white gypsum powder compositions to transform simple putty into decorative ones. To do this, take 6 kg of gypsum mixture, add 2 liters of water at room temperature, mix until smooth, then add a glass (0.2 liter) of PVA glue.
With marble chips
This recipe is suitable for decorating surfaces using the “bark beetle” technique. To create decorative plaster, you will need a simple putty, which must be mixed with marble chips in a ratio of 1: 4 (1 part crumbs to 4 parts putty). The mass is diluted with water and kneaded to the consistency of sour cream. It is not recommended to add dye immediately - it is better to do this after the plaster has dried.
Venetian
This manufacturing recipe requires the purchase of a special putty. In order for the surface to accurately reproduce Venetian plaster, you need to purchase a mixture with quartz, marble, malachite chips, add slaked lime and dyes to it (you can use the color of the desired shade).
Versailles
This recipe consists of the following components: starting and finishing powdered putty, acrylic paint and aluminum powder (silver). The powders are combined in a 1:1 ratio, water is added and stirred.
Then leave for a few minutes, then stir again. If necessary, you can add color (if the area to be treated is small). Silver is used for finishing decoration after the drawing has been completed. Its presence is mandatory for this style.
To learn how to make decorative versailles plaster, see the following video.
Versailles
Finishing in Versailles requires high-quality surface preparation, a deep penetration primer with quartz sand. Versailles plaster from ordinary putty is prepared to the consistency of thick sour cream and immediately painted with color. The model mass is applied with a wide 60 cm spatula in a layer of 2-3 mm and smoothed. Traces from a spatula are allowed.
The drawing is made with a plastic trowel, without waiting for it to dry, using arched strokes with a separation of 5-10 cm. Gaps are not allowed. Pay attention to the coincidence of the picture with the previous section. The result is a kind of relief texture. Fill the corners with a spatula. After applying the design over the entire surface, leave it to dry for 2 days.
The next stage is treatment with a deep penetration primer with a dye to obtain a shade. The primer is applied with a roller until the entire wall is evenly painted. Leave for 2 hours to dry.
Dilute the primer with silver in a ratio of 1:1, go over the surface again without pressing along the tops of the relief.
The last stage is treatment with a glazing composition with glitter. Apply with a foam roller, constantly stirring the glitter that settles to the bottom.
Creating a decorative surface
Using a roller
Roller, “bark” texture
An original decor can be achieved using a special embossed roller or a regular one with long pile. The range of decorative tools with patterned surfaces is very large, and they are inexpensive. But even with an ordinary foam roller with large pores you can get original grainy textures. If desired, you can cut out your own patterns on it with a sharp knife.
You can make a decorative roller yourself by wrapping a thick cord or clothesline around the tool. When imprinted, it forms an unusual pattern on the wall. You can attach, for example, a crumpled plastic bag to the roller. Any textures can be combined by changing tools.
Using a Notched Spatula and Trowel
You can use a spatula with U-shaped or V-shaped teeth. Depending on the size of the stroke and its direction (with a spatula you can make straight, wave- or arc-shaped or chaotic movements), unique patterns are obtained on the walls. There are rubber shaped spatulas on sale with teeth that allow you to imitate the texture of wood.
Figured rubber spatula “wood texture”
But even with a standard trowel you can create decorative patterns. For example, by pressing and moving the trowel away from the wall, they create a “fur coat” type texture on the putty. Then, if part of the relief is smoothed out, you get stone-like plaster.
Available means
The most unusual means are often used as a tool for drawing at home: a crumpled sheet of paper or film, combs, pieces of foam rubber, etc. For example, using crumpled film, you can achieve the effect of silk. If you “comb” the wet surface with a comb, you will get original weaving. The blotting movements of the foam sponge create a grainy texture.
The result obtained also depends on the grouting method - the movement of the hand can be vertical, horizontal, or diagonal, circular or spiral.
Putty with filler
Sand can be added as a filler to create the texture of the plaster (several fractions of sand grains of different sizes are added to one solution), stone chips, flocks (chips), synthetic fibers, foam balls, sawdust, etc.
Such mixtures of simple putty should be spread evenly over the wall. If desired, the design can be complicated by using a notched trowel or a roller with a pattern.
Stencils and stamps
There are many stamps (silicone molds) on sale for creating embossed decorative plaster. They are quite simple to work with. The putty is slightly moistened with water. The stamp (seal) is pressed against the wall and an impression is left on it. This is how various patterns and textures are obtained: stone, wood, brickwork, leather, leaves, etc. As a rule, stamps are made in such a way that the subsequent pattern can be matched with the previous one.
Working with stencils is a little more difficult. The drawings are applied as a second layer onto already dried plaster (and sometimes already painted). The stencil sheet is pressed against the wall, and putty is placed in its slots, which is smoothed with a small spatula.
After the mixture begins to set, the stencil is removed. If you need to cover the entire wall with decorative ornaments, then the sheet is transferred to the next section and everything is repeated. You can also create individual drawings that complement the finish.
Painting, varnishing
Colored plaster can be used both to create stylish interiors and to decorate facades. Before painting, the surface is coated with a primer and left until completely dry.
The putty can be painted in one tone or several. The following method will help you highlight the texture well:
- First, the wall is evenly painted in a single color using a brush or long-haired roller.
- After the paint has dried, the second shade is applied with a short-haired roller, painting only the protruding parts of the relief.
- The painted wall is coated with acrylic varnish to fix the dye and add gloss. You can add glitter (sparkles) to it.
Some tips
- In order to learn and gain initial skills in surface treatment with decorative plaster, invite a specialist to perform a volume of work on an area of 10-12 m2. Ask him to be an assistant or carefully monitor the technology for performing each stage of the process, from preparing the surface and preparing the solution to painting or applying wax.
- As an option, study articles, watch videos on the Internet on the chosen type of decorative finish. Don't start working on the walls right away. Practice performing the processes step by step on 50x50 cm sheets of drywall. This will give you the opportunity to acquire certain skills in the work, get sketches of the future finish and their correspondence to the desired result of the color scheme after drying. Learn the practical preparation of a solution of the required consistency, fluent use of tools for various methods of applying model mass and forming a decorative surface, working with colors, wax, and various fillers.
- Follow safety rules, production standards, and keep your workplace and tools clean. Applying the solution and preparing it is a dusty, wet process. It is recommended to immediately cover the floor and furniture with film or other material.
Forming decorative plaster is a fascinating activity, but it requires skills, patience, and artistic taste. Perhaps you should think about it and invite a specialist. If you do all the work yourself, it will be nice to show the finished plaster to your neighbors and acquaintances and enjoy it yourself.
Composition of finishing material
The advantages of ready-made formulations include optimally selected proportions, a precisely calculated amount of water for a certain volume of dry mixture (or a creamy consistency already prepared for use), the same color and texture in one batch of goods.
Taking into account the high cost of high-quality compositions and the relative simplicity of their components, you can make decorative plaster from ordinary putty with your own hands. This requires:
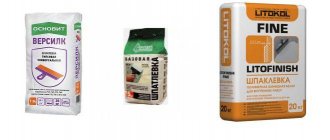
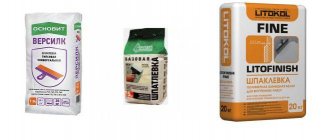
- finishing putty. It is the finishing one, since the fraction of solid particles included in the mixture is much smaller than that of the starting one, and the consistency itself is more plastic and convenient to work with. It is better to use polymer or gypsum mixtures;
- plasticizers. They are necessary if the putty sets too quickly and it is necessary to extend the hardening period;
- dyes. They can be added to the composition or used after creating the desired texture. In the first case, you need to take care of the compatibility of the components, in the second - about the possibility of applying the selected paint to acrylic or gypsum putty, and the nuances of preparing for painting. In addition to coloring pigments, glitter is also used (for example, powdered aluminum);
- fillers. This can be sand of one or different fractions, stone chips or dust, crushed shells, fibers of plant or artificial origin, glass beads, etc.
Since the technology for making decorative plaster yourself from putty has been developed for quite some time, we offer several recipes for creating mixtures of a certain color.
Possible combinations of components in percentage terms (anhydrous mixture).
| Desired color | Base and additives | Shares, % |
| White | White Portland cement | 7 |
| Marble flour | 70 | |
| Marble chips | 13 | |
| Lime | 10 | |
| Light gray | Portland cement | 5 |
| Quartz sand | 74 | |
| Lime dough | 20 | |
| Manganese peroxide | 1 | |
| Terracotta | Portland cement | 10 |
| White quartz sand | 58 | |
| Fluffy lime | 15 | |
| Ground brick crushed stone | 15 | |
| Iron minium | 2 | |
| Green | Portland cement | 15 |
| Green marble chips | 60 | |
| Fluffy lime | 15 | |
| Green pigment | 5 | |
| Chromium oxide | 5 | |
| Yellow | Portland cement | 20 |
| Marble sand | 40 | |
| Yellow mountain sand | 15 | |
| Marble flour | 10 | |
| Fluffy lime | 10 | |
| Mummy* | 0,5 | |
| Pink | White Portland cement | 4 |
| Marble sand | 73 | |
| Fluffy lime | 20 | |
| Mummy* | 3 | |
| Cream | Portland cement | 8 |
| White lime sand | 60 | |
| White sand marble | 18 | |
| Fluffy lime | 12 | |
| Golden ocher | 2 |
*Mummy is not the name of a famous film, but the name of a natural dye of yellow-red-brown color.
As can be seen from the table, these options are created on the basis of cement - regular or white.
If gypsum (alabaster) or acrylic putties are used instead of a cement base, you should calculate the percentage yourself, selecting the composition so that it is sufficiently plastic and does not “drip” from the wall being treated.
You can change the color saturation by increasing or decreasing the amount of dye (in the table, manganese peroxide, ocher, red lead, chromium oxide and mumiyo are suggested as dyes). It should be noted that:
- Adding chalk or lime will help “whiten” the mixture;
- ocher produces colors ranging from light yellow to brown;
- manganese, depending on the amount, can give shades from light pink to almost black;
- yellow and red tones are given by chrome (crown yellow and red), natural sienna (“burnt” gives a chestnut color), “mummy”, red lead (red tone with a transition to brown);
- natural umber gives a brown color with a green tint;
- to obtain blue and cyan shades, ultramarine and glaze are used in combination with chalk;
- compounds of chromium and lead produce various shades of green;
- gray and black tones can be obtained using soot, graphite, charcoal;
- metallic shades are provided by powder bronze and aluminum.
For convenience, we provide approximate combinations of various colors to obtain new shades.
Mineral fillers – sand and stone chips – are selected using the same principle of color compatibility.
Fractions of mineral additives are selected depending on whether the plaster will be used outside (on the facade you can take larger chips, 5...10 mm) or inside (a size of 1...5 mm is more appropriate); one composition may contain grain of only one or different sizes .
Features of putty and plaster
At the moment, both of these finishing options have certain material features. Both substances are used to level the surface, but differ significantly in cost and application option. Before considering the procedure for making plaster from putty, you should consider a number of features regarding these materials:
- It is much easier to make plaster yourself, since various components can be used here.
- Both finishing options have certain material characteristics, which allows you to equip the surface of the structure.
- These devices harden quite quickly, which is why a small amount of solution is used for work.
- Coating can be done by following the appropriate technology for applying the composition to the surface.
- Unlike a layer of putty, plaster is typically pre-mixed with water to prepare for work.
- As a rule, putty can be presented in different shades, depending on the pigments (colors) present.
- To create the desired pattern on the walls, you should use plaster, as it is easier to work with.
In practice, there are a lot of peculiarities regarding these building mixtures for surface treatment. The principle of working with solutions is partly similar, but the thickness of the layer applied to the surface, as well as the preparation method, differs significantly.
Choosing the right adhesive
Variety of construction adhesives
To follow all recommendations, you need to choose the adhesive composition correctly. For gluing tiles on the floor, its viscosity does not matter much. For walls you need glue of special viscosity. In order to glue granite surfaces, you will need a transparent adhesive that does not leave marks. Adhesive compositions can be found in retail outlets and quite a lot. We should be interested in a composition at a reasonable cost and high quality. Let's look at some of them.
The most common option is based on cement with various additives. It is affordable and easy to use. The epoxy version costs 3 times more. It is frost-resistant, white or transparent. It is used for grouting joints, treating stones, lining fountains and pools, and laying mosaic paintings and transparent stones.
Ceresit glue is of good quality. But you can get a fake instead. For this reason, Ceresite has now fallen out of favor as an adhesive for marble and granite. It is better to purchase Unis Granite. Its advantages:
- the life of the finished solution is measured in three hours;
- it is able to withstand slabs up to 70 kg/m²;
- has high moisture resistance and frost resistance.
Advantages
What are the advantages of do-it-yourself plaster?
- First of all, of course, saving money spent on the most important material (plaster), of which you will need quite a lot.
- Long service life (about 25-30 years). At the same time, the strength of the coating only increases over time.
- Environmental safety of the material. All ingredients are completely natural. This plaster is suitable for residential and public premises, including children's institutions.
- Easy maintenance. The plastered surface can be washed without fear of it being damaged.
