Types of lining
The classification of lining is made according to the material from which it was made and its grade. Also, finishing boards are divided by profile, that is, their appearance and method of connection.
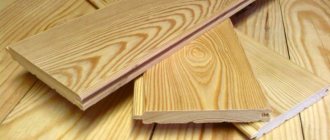
- Wooden. This type of finishing boards is made from deciduous or softwood, such as ash, aspen, beech, pine and others.
Wooden finishing lining
- Plastic. This type of lining is made from PVC materials using extrusion. This is a method of giving an object the required shape by extrusion at the optimal temperature.
Lining made of plastic
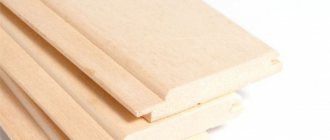
- From MDF. This type of lining, unlike wooden lining, is not planed from full wood, but glued together from wood chips without adding harmful impurities. Thanks to the production method, it is particularly dense.
MDF lining
- Aluminum. This lining is used exclusively for external cladding. Its advantages are light weight and not susceptible to corrosion from external factors. But low thermal insulation and insignificant protection from physical impact make it absolutely unsuitable for indoor use.
Aluminum lining
Separately, it is worth mentioning the classification of wood depending on the type and quality of the material produced.
The highest class is designated as “zero” or “extra”. Lining of this class does not contain the core of wood, as well as any defects in its structure.
Wooden forcing of the highest class
The lowest is the third class, also designated as “C”. Such linings contain only non-through cracks, at most two knots that do not fall out, resin bags, spots of excellent coloring and mechanical damage.
Wooden lining of the lowest class
The profile determines the appearance of the boards, as well as the connectors for connecting them. Each type of lining is produced in variations with different profiles. The most popular at the moment are “standard”, “Soft-line”, “blockhouse” and “American”. They differ in the joint component, the presence or absence of an air gap and many other characteristics.
Classification of wooden lining
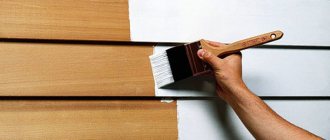
Treatment with paint or varnish
In order for the room to take on a finished look, the wooden lining is painted with varnish or paint. These different bases have different composition and structure of the substance. There are varnishes:
Acrylic
Acrylic varnish dries quite quickly. It is easy to apply to the surface. Protects from moisture and dust. Easy to clean.
Polyurethane varnishes
Polyurethane varnish is the most profitable option. There are quite a lot of options to choose from in stores. The color range varies from light to dark tones. When choosing this product, you must purchase a primer in the appropriate color.
Alkyd varnishes
This varnish takes a long time to dry and leaves behind a pungent odor that does not immediately disappear. To speed up the drying process, there is a specially developed product. One of the advantages of this varnish is the creation of a microfilm on the surface of the wood.
Acrylic-polyurethane substances
Made from recycled resin. The composition includes a urethane component, which dries quickly and protects the coating from aggressive environments.
Water based
This varnish is a more environmentally friendly product compared to others. Dries quickly and washes well. Contains water-repellent components. The price of this product is much higher, but the safety of use makes it the most popular in use.
Advantages and properties
Lining made from each material has its own set of distinctive properties and advantages. And, accordingly, they are used for various facing works, in accordance with their characteristics
Wooden lining
These boards are made from whole wood species, which makes them environmentally friendly and therefore completely safe for human health. It is treated with special compounds that do not allow water to seep into the lining. This makes it rot-resistant and increases the overall durability of the material. Plus, it provides good heat retention.
Finishing a room with wooden paneling is completely safe for humans
Wooden cladding boards have a pleasant, light smell of trees, which will have a calming effect on those who smell it.
It is also often called eurolining, for its full compliance with European quality standards.
Wooden eurolining
It has a pleasant and natural appearance. Thanks to special treatment, wooden lining can be given the external properties of any color of wood. The use of such lining in the interior of a country house will make its appearance more “expensive” and attractive.
Finishing the room with painted wooden paneling
Perhaps its main disadvantages will be the high price for boards made from “extra” quality wood, as well as the need to regularly update the color and special composition on it.
Plastic lining
This lining differs from wooden lining in its non-natural origin. Nevertheless, PVC material is absolutely harmless to human health. It is hollow inside, which makes it not so reliable, but much lighter.
Finishing the premises with PVC lining
The material from which the lining is made is moisture resistant, without the need for additional processing. But, it is unsuitable for installation in rooms with elevated temperatures. In such rooms, over time, the plastic will begin to melt.
PVC lining is resistant to high humidity
Sound insulation and heat retention are at the same level as the wooden version, thanks to the air layer inside the PVC.
The price of such lining is much lower due to non-natural materials of production. Plus, it doesn’t require as much attention as a wooden one.
MDF lining
This type of finishing boards is an intermediate option between PVC and wood. The material is environmentally friendly, because it consists of wood shavings. It has an increased density of structure, which means that water will not seep inside, does not require special care, just wiping with a damp cloth is enough. It is also worth highlighting the pleasant appearance of the boards.
Living room trim with MDF paneling
Aluminum lining is not considered, as it is completely unsuitable for interior cladding of a house.
In terms of price, this is something between a plastic lining and a wooden one.
The general advantage of these finishing boards is that you can hide wiring behind them without any problems. Also, installing the lining with the proper approach will not pose any difficulties. And the variety of appearances will allow you to fit into the interior of any country house.
Advantages and disadvantages
The advantages of lining include:
- environmental cleanliness. The material is made from natural wood, completely safe for people;
- high thermal insulation abilities;
- simplicity and high speed of installation;
- the possibility of partial replacement of sheathing elements without the need for complete disassembly of the canvas;
- visual appeal, the possibility of finishing with various types of paints and varnishes;
- Possibility of use on internal and external surfaces, for cladding residential and office premises.
Disadvantages of the material:
- wood tends to absorb and release moisture, which leads to stress redistribution, warping, and bending of individual boards;
- wood is fire hazardous;
- the material rots, becomes covered with mold or mildew, which requires monitoring of operating conditions;
- the lining changes the volume of the room and creates conditions for insects or rodents to live under the cladding.
These shortcomings partially influenced the attitude of users, whose interest in lining in the 90s of the last century decreased significantly. And today, lining is considered primarily as an attribute of the design of a country house, although a lot of alternative solutions have appeared.
Expert opinion
Kukushkin Anatoly Sergeevich
Repair specialist
At the same time, the negative aspects of the material practically disappear if you use it creatively and under proper conditions.
Selection of lining
The choice of lining should be primarily based on the customer’s budget, personal preferences, home decor style, and the specific installation location. For example, if funds are limited, then instead of purchasing “C” grade wooden finishing boards, you may prefer a cheaper plastic counterpart. For bathrooms or baths, you should choose lining made from a material that is more resistant to moisture. The correct choice will increase the overall service life.
Bathroom finishing with plastic lining
The higher the quality of the lining material, the higher its price will be. Choosing MFD boards instead of full-fledged wooden products will allow you to save money, with a slight loss of quality, but while maintaining a presentable appearance.
Finishing with MDF paneling is more economical than wood
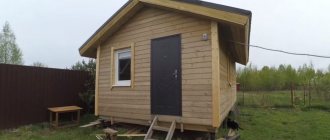
Low-quality lining should be used to decorate all kinds of outbuildings at the dacha that are not intended for living there, since they do not require special maintenance properties. Or utility rooms inside the house.
Balcony finishing with low grade clapboard
By analogy with these situations, a choice should be made; the use of lining in the interior of a country house that meets the specified characteristics will make it as accurate as possible.
Cost of repair work
Finishing with clapboard inside the house does not require special skills or training. The installation work can be carried out by one person. If you do not have enough time or desire to carry out the work, then you need to order a team of professionals.
Rough finishing of premises will cost less than finishing. Decorating the interior of the house with clapboards with your own hands will help you save even more on repairs. About three hundred and fifty rubles per square meter. meter. Finishing uneven walls will cost from seven to ten thousand rubles per square meter of space.
Installation
In order for the lining to become an excellent decoration for a country house, provide good sound and heat insulation, look presentable, without any curvature or cracks, it must be installed correctly. For greater efficiency, installation can be combined with general repairs, in particular cable laying. The lining will serve as excellent insulation for wiring, making it completely invisible, but, at the same time, protected from mechanical influences.
Preparatory stage
Installation of the lining begins from the moment of calculations and selection. It is necessary to find out the quantity, size, and material of the boards required for cladding, and then order them.
Measurements to calculate wall area
Afterwards, you should clean the surface on which the lining will be placed from dust, dirt, remnants of wallpaper, paint and other debris. Next, you need to assemble, install and secure the sheathing over the wall, floor or ceiling. It will be the connecting link between the plane and the facing boards. The sheathing will consist of many fixed slats, in increments of fifty centimeters. Their position will depend on the future method of installing the lining. If it is planned to be butted vertically, then the slats should be installed parallel to the floor. If horizontal, then everything is exactly the opposite.
Lathing walls for installing lining
Most often, the sheathing is made from various lumber, such as timber. Such slats are easily attached to the lining, but are less reliable than metal profiles. But it is difficult to connect.
When installing the sheathing, you should also take care of additional insulation and insulation, as well as hiding the wiring.
Lathing with thermal insulation
The preparatory stage ends when the slats are secured.
Installation of lining
After installing the sheathing, it should be treated with an antiseptic substance. Next comes the installation of the lining. When using wooden cladding boards, give them at least one day to dry.
Installation of the lining begins from the corner, in the case of a vertical arrangement, or from the top or bottom point of the room, in the case of a horizontal arrangement.
Installation of lining starts from the corner
The first board must be attached to the sheathing slats. This can be done simply by hammering a through nail into it or screwing in a bolt. This method is simple, but makes it impossible to subsequently dismantle the lining without compromising its integrity, plus this will spoil its appearance.
Fastening the lining to the wall with bolts
An alternative would be to use clamps. This is an element of fittings, which, due to its structure, is easily put on the lining profile, followed by reliable fastening. And with the possibility of removal without compromising the integrity of the facing board. The kleimer is attached to the lining, and then screwed to the rail.
Wooden lining with clamps
This way, only the first and last board will be secured. The intermediate ones will be connected to each other end-to-end thanks to the profile design.
If the lining is installed vertically at a distance from the floor, then it is better to use a pallet to support it. It can be made as a convex strip that will rest on the sheathing.
The use of clamps will increase the final cost of installing the lining, but will make it “reusable”. That is, during a major overhaul it can be removed without any problems and then returned to its place, or simply moved to another room. The integrity of the board itself will not be compromised, and its appearance will not deteriorate.
Fastening the lining with clamps will make the finishing reusable
Bolts and nails are suitable for a cheaper option for installing lining, but without the possibility of complete dismantling. But, if you do everything very carefully, the appearance of the facing board will not be affected.
Fastening the lining with self-tapping screws
How to sheathe it yourself
You will need to complete the following stages of work:
- Prepare the lining.
- Prepare the wall.
- Assemble the sheathing.
- Attach the clapboard to the lattice frame.
- Finish the covering with skirting boards and, if necessary, other elements.
The panels are processed first. Depending on the place of application, any class of lining can be processed. It is always necessary to prepare the surface of class C products. The same applies to lining made by yourself. Preparing the walls consists of leveling them and applying markings for the sheathing. It is not necessary to level it; instead, you can do other manipulations. The crucial point is the installation of the sheathing. The timber itself and the distance between the elements are selected. The configuration completely depends on the planned method of laying the lining. Different approaches are used to fix the panels. The main thing in the work is caution, because inaccurate driving of the fastener can lead to the appearance of serious defects in the material. When the sheathing is ready, installation of baseboards and finishing begins.
How to prepare the lining
If necessary, the panels are treated with fine-grained sandpaper to eliminate roughness. Further processing begins with cleaning the surface of the material. If you plan to apply wax or varnish to the lining, stain is first used. It will preserve the color of the wood for a long time. There are 3 types of stain: oil-based, alcohol-based and water-based. Antiseptics will protect the wood from moisture penetration and mold. If the installation location is a bathhouse, waxing will be required. It is applied in small quantities, in the direction of the fibers. This procedure must be repeated several times. Then the products are polished. Among other things, the color of the boards will become deeper. There is a large selection of wax impregnations on sale, which are also suitable for preparing lining. The last stage is applying varnish. You will need at least 2 layers. The material must be perfectly dry before installation.
Grease stains can be removed using a 25% acetone solution.
Preparing the walls
You will need to make markings on the wall for the sheathing. This action is performed using a pencil and level. The configuration of the cladding and the direction in which the lining will be placed are determined in advance. The bars are always placed perpendicularly. If everything has already been decided about this nuance, you can start treating the walls with antifungal agents and marking the surfaces. If something happens, the pencil is replaced with chalk. The width of the sheathing step is selected depending on the purposes. For strength, it is advisable to make it as small as possible. Usually this figure is in the range of 35-60 cm. If in the future it is planned to insulate a room, the step is determined based on the size of the insulating material and should be slightly less than it. To ensure that the frame structure is level, you will need to use a plumb line and fishing line. A visualization is created, along the edges of which bars are then placed.
We create a sheathing for fasteners
This is one of the most important stages, which has a significant impact on the final result. Only sometimes the lining is attached directly to wooden walls; in other situations, lathing is necessary. At the very beginning, we select the timber. For this sheathing, a block with a cross section of 40×20 mm is the best option. We install the frame one level at a time. If necessary, we level each individual wall. You can use another method - determine the most protruding place on the wall. Then a small piece of timber is placed there and the sheathing is mounted from it. From this point the thread is pulled parallel to the planned direction of laying the panels. At the extreme points of the wall, 2 load-bearing beams are placed. If necessary, install spacers between the wall and the beam. If a row of lining will be mounted from 2 boards, another beam is needed at the junction.
Other important nuances:
- when securing the structure, you need to check the level;
- if there are door or window openings, the beams must be fastened around them;
- Installation of lathing on the ceiling is done in the same way as on the walls.
Fixation methods
The lining is secured using staplers, clamps or fasteners (screws, nails). During installation, care must be taken to avoid splitting the wood and causing cracks. Full insertion of the nail head into the material and accuracy of work are ensured with the help of a hammer. When installed in a hidden way, the panels are nailed to the frame at the junction of the tongue and groove. The simplest and easiest assembly method is to fasten with small nails in any places, but it is better to prefer a neat method that involves hammering nails into the grooves to hide the connection. The highest quality fastening is ensured by metal clamps. They come in different sizes, shapes and are designed for a certain board thickness. The fasteners are connected to the sheathing on one side, and cut into the grooves on the other.
Fastening the lining to the ceiling requires careful steps, so it is better to do this together with a specialist!
The process of fastening the lining
If the sheathing is installed correctly, the process of installing the lining will go without complications. A level may be needed when attaching the first panel. The first question before installation is which side to start laying the boards on. You can determine the answer by finding out how smooth the surface is. If it corresponds to the level, then you can start laying from any side: top, bottom, right, left, corner. The first board is then placed level. If the surface is slightly “overwhelmed” or some corner is uneven, the boards cannot be installed this way. Otherwise, they will visually emphasize the curvature. The lining will need to be assembled in a different way. The first board is attached flush to the corner, the rest - with a slight inclination in the desired direction. Sooner or later some panel will become level. All boards “fill up” to the same extent. The first one needs to be placed with the spike towards the corner.
Rules for installing skirting boards on a wall with lining
For an aesthetic appearance, the sheathed walls are decorated with floor and ceiling skirting boards. Sometimes they need to be mounted on the wall (corner). When finishing corners, they are guided by the following rules: if there is an adjacent unsheathed wall, then the plinth is installed on it, and when placed between two sheathed ones, it should be attached to the shorter one. These measures should not prevent thermal deformation and drying out of surfaces that are most susceptible to them. If the wall is decorated with clapboard, then the baseboards are fixed using finishing nails. They hammer it through the body, the narrow cap goes into the mass. These areas are then treated with a wax pencil. If the surface is not flat (for example, log), nailing a regular baseboard will not always be possible. Gaps may remain. It is likely that in the corners the baseboards will not meet at all. Instead, you can use flat platbands. They fit tightly on the wall, and you can make them yourself, including from clapboard.
Care
Finishing with MDF lining will be a real pleasure. Thanks to the excellent external characteristics and properties of the material, it can be an excellent decoration for a country house. But the main advantage will be that you won’t have to spend any significant amount of time caring for it. It is enough to wipe the dust occasionally with a damp cloth.
MDF paneling is low maintenance
Caring for plastic or MDF lining will only consist of regularly wiping it from dust. With wood it's more complicated.
Over time, the varnish composition will come off the board, and the color will also be lost. Accordingly, this needs to be monitored. It is best to restore the external qualities of the lining by dismantling it.
The paint layer of wooden lining needs special care
The first step is to prepare the space indoors. Its temperature should be approximately room temperature (20℃), and the humidity should be between 50 and 70 percent. Next, you should lay the floor in the room and place the dismantled lining there. Remove the layer of varnish and paint from it, and then process it. Then it should be painted twice, allowing it to dry both times. And then apply the varnish, let it dry for two days and re-install it on the sheathing, having first cleaned it too.
Photo of the lining inside the house. Wood used
The quality and texture of the tree depends on the type of wood used, as well as its age category, the soil in which it grew, and the climate. As a rule, eurolining is made from coniferous trees, and it is used to decorate any premises, regardless of the level of humidity. In addition, for its production they use: aspen, oak and linden, as well as other deciduous trees. The highest quality part of wood for lining is between the core and bark.
Oak lining is very popular; it is durable and very stable. In addition, it looks incredibly beautiful and has an interesting color, and is easy to process. As for ash, it is brown-yellow in color, very hard and viscous. At the same time, it is difficult to process, and under the influence of vapors it will easily bend. It will not crack during drying, but is capable of rotting.
- Where to sell cast iron for scrap in Moscow at a good price?
- Comprehensive development of web site design
- Advantages of timber houses
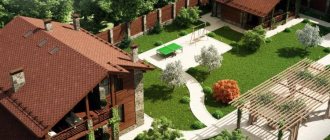
Variations in the use of lining in the interior of a country house
Boards of this type are a universal option for finishing work. They can be used everywhere in a country house. With proper use of lining in the interior of a country house, you will get a unique combination.
Traditional wooden clapboard decoration of a country house
Advice from a master decorator:
A rather interesting solution would be to cover each room of a country house using lining of different colors. It is desirable that the color scheme of different but adjacent rooms contrast. But not in the case of too dark shades, they will make a depressing impression and it is better to avoid them altogether in the interior of a country house.
Non-standard orientation
The use of lining in the interior of a country house does not necessarily have to be installed exclusively horizontally or vertically. With a correctly assembled sheathing from facing boards, you can create various variations of ornaments. For example, the outer perimeter will be square, and inside the lining will run diagonally. Thanks to this approach, combined with experiments in color palette, it is possible to turn the interior decoration of a country house into something unique and inimitable. Something that will delight both guests and hosts every day.
Ornament with wooden clapboard on the ceiling
Cladding a living space is a very important action, since the interior appearance of the house, as well as the impression and mood created, will depend on it. The more pleasant the home looks, the more comfortable it will be to be in it. This is why the use of lining in the interior of a country house is so popular
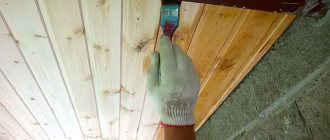
Painting and processing of lining
After finishing the cladding, as a rule, another important problem arises: how to protect the lining from inside the building? This factor should under no circumstances be ignored. Currently, shopping centers provide their consumers with a significant variety of impregnations, also of different compositions, in order to protect the cladding.
In some cases, eurolining is varnished if the building does not stand out due to any criteria. For example, if the conversation is about the walls of a steam room or sauna. It will be necessary to use protective measures that can not only protect against the negative effects of humidity, but also protect against high temperatures.
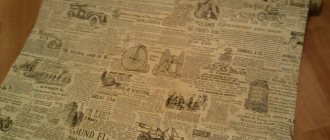
Method of painting inside the house: paint is applied, then rubbed. After ten minutes, if it is soaked, remove excess oil with a gentle, lint-free cloth. The image appears more clearly due to the fact that the azo pigment remains in the grooves, but is removed from the ascending lobe.
In addition to paints, classic stains are used. Aqua solutions shade a variety of tree species; you just need to choose the appropriate tone. Be sure to embellish or compensate with wax in order to remove the pale tone. Wood stains in a dry base can be used as the main coating.
Photo gallery - lining in the interior
We correctly calculate material consumption
Before you start decorating your house with clapboard, you need to clearly calculate the area that you will cover. This is done very simply: multiply the length by the width of the sheathed plane. From the obtained result we subtract the dimensions of the door and window openings. Then we measure the area of one profile. Usually its dimensions vary within the following range: length - from 100 cm to 600 cm, width - 15 cm, thickness - from 1.2 cm to 2.5 cm.
For example, let’s take a profile 3.5 meters long and 15 cm wide, then the area of one panel will be 0.525 m².
Once we know the area of the surfaces to be covered and the area of one panel, it is not difficult to calculate the number of panels required.
The lining is packaged in a special protective film, which allows you to preserve the material not only from damage, but also protect the appearance of the product from dust and other influences. Of course, it is advisable to take the material with a small margin, since defects are possible, both in the packaging itself and during operation.
Work order
Wooden lining can be used to decorate residential premises made in virtually any style.
Wall finishing with clapboard is carried out in the following sequence:
- Preparation of the structure begins with insulation and waterproofing work on the outside of the building.
- A selection of finishing materials and profiles or wooden beams for sheathing.
- Installation of electrical wiring in the room.
- Leveling the surface, installing lathing and insulating material on it.
- Finishing the premises with this material, according to the scheme initially determined by the owner of the house.
- Installation of sockets and electric lamps.
- Installation of corner profiles, skirting boards and door frames.
Specific executions
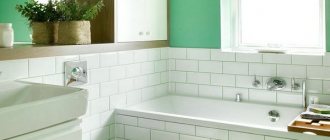
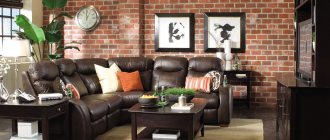
Interior solutions with such a seemingly simple material are applicable for premises of any purpose. For example, using wooden lining rather than plastic is appropriate even for bathroom design. Surface treatments with protective properties allow you to turn your bath into a real spa and relaxation area.
One accent wall, for example made of light rocks, is enough to change the perspective of perception and move away from the banality of tiles and plastic in the interior. Scandinavian style and minimalism take on a special resonance in the bathroom, which is only enhanced by painted lining. For small rooms, such a textured material is simply a salvation: it will add the necessary relief to a very bright space, preventing the interior from becoming monotonous.
Bedroom design projects made from lining put the sleeping area in the first place. Non-standard and different design options for the headboard: a decorative stylized mini-fence, in the form of a strip going to the ceiling. Almost any wooden headboard for a standard bed will go well with a ceiling or walls made in the same tone, and a smooth, contrasting matte paint covering the exposed surfaces will help to add more style. An option to complement the bedroom interior with lining: a special wall panel behind the bed, but unusual, but soft, made not only of textiles, but also of leather, or panels with a 3D effect.
To decorate the kitchen interior with clapboards, designers give certain recommendations:
- For a combined kitchen-dining room option: the wall cladding in the dining area should be combined with the kitchen furniture and then style unity will be ensured.
- For the ceiling, any finish is selected, but not wooden lining, in order to avoid problems with maintenance in case of natural contamination, which is typical for this area.
- The modern materials produced perfectly reflect fashion trends. Paradoxically, porcelain stoneware slabs are produced that successfully imitate wooden lining. This option is just for perfectionists who are trying to design even the kitchen apron area within the framework of a certain style concept.
Why you should choose lining: the advantages of the material
Interior designers say that using lining is not just fashionable and creative, but necessary. This finishing material has thermal insulation properties, which helps keep your home warm in winter and cool in summer.
Other advantages of using lining include the following factors:
- The natural structure of the material allows it to fit organically into any design and environment.
- If you apply paint, you can easily change the color of the finish.
- With the help of lining, various combinations are created on the walls, making the room original.
- The material is durable and long-lasting when compared to wood or plastic.
- The lining is combined with various materials.
- You don't need a professional for installation; you can do all the work yourself.
- Acceptable prices.
Despite the fact that the use of this material for interior finishing work has a visible advantage, it is worth noting the minor disadvantages of the lining.
Firstly, wood lining is not resistant to fire, so before installation the material is carefully treated with special solutions and compounds.
Secondly, in regions with high humidity, the material will quickly deteriorate, rot, and become moldy. Before use, the lining must be treated with substances that cope with rotting processes.
Thirdly, it is worth using only high-quality materials for finishing. Inexpensive lining will only spoil the impression of the repair; it will not last long and will quickly deteriorate.
Before using the lining, it is recommended to think through the interior design of the room to the smallest detail. Properly selected lighting, mirrors, furniture, and shelves can highlight all the advantages of the material.
What tools will be useful?
When the material has been selected and purchased in sufficient quantity, it is time to collect all the necessary tools. In order to successfully complete the job, you will need:
- screwdriver;
- drill;
- saw;
- mallet;
- level;
- screwdriver;
- pliers;
- marker.
As you can see, all materials can be purchased at any store or borrowed from friends. There is nothing highly specialized or worth a lot of money on the list. When all the necessary tools have been collected, you can begin cladding the outside of the house with clapboards.