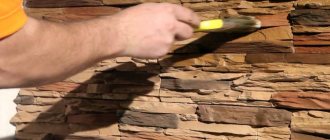
Hello, dear friends! Today we are talking about clapboard nails. I’ll tell you about their varieties, alternative methods of fastening, as well as the tools used for nailing.
In addition to nails, a clamper can also be used. I’ll also tell you a little about him separately. You can do it without a clamper. It all depends on the characteristics of the lining itself.
Nails are a convenient and practical fastening material used for installing wooden panels. It is important to understand that these are finishing nails. Their main distinguishing feature is their smaller diameter head. This allows you to attach the panel to the wall without sacrificing appearance.
Types of nails
First, about clapboard nails, which can be bought at almost any hardware store.
They come with virtually no caps and are mounted vertically as well as horizontally. Sometimes at an angle. Depends on the design of the building itself.
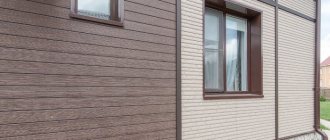
Lining is not only an external finishing material. It is also used to cover interior spaces, terraces, dressing rooms and many other buildings and structures.
There are 6 types of lining nails available.
- Galvanized
. They are not afraid of corrosion, which allows them to be used in wet rooms; - Copper-plated
. Resistant to moisture. They are distinguished by a reddish tint. Suitable for installation on a terrace, in a steam room, as well as in a sauna; - Brass
. Or rather, with a brass coating. This is a decorative nail with an attractive appearance. Used when installing high-class planks; - Chrome plated
. Widely used when installing skirting boards and glazing beads. Upon contact with water, rust does not begin to form; - Black
. The most affordable. Prone to corrosion. Suitable for dry rooms only; - Bronze
. The heaviest and most expensive. Only suitable for decorative panels.
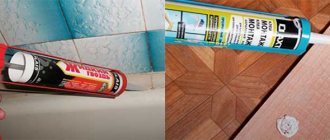
You can also use a clapboard stapler. But usually this type of fastening is used for plastic lining. This is due to the lighter weight of the PVC-based material.
All these nails for lining are regulated by GOST. That is, the sizes are standard. Most often, the head diameter is 1.4-1.8 mm, and the length is from 20 to 55 mm. But you can find nails of other sizes. It all depends on what kind of lining and where we attach it.
How to attach it to the wall
Indeed, there are some nuances in how to fix the lining in the bathhouse - on the wall or ceiling. The principle itself, of course, does not change , but where to start, how to finish and how to work in cases where you need to leave a hole is worth describing.
As for how to fasten the paneling in a bathhouse to the wall, the options are those that have already been described - with nails or self-tapping screws, or staples, through clamps or without them.
Since we have two directions for laying the lining at our disposal, we can use any of them, remembering, however, that horizontal laying in wet rooms is more profitable, because damage over time concerns only a few strips, which are easy to replace, whereas with vertical laying the ends of all may deteriorate (!) planks.
Horizontally
Cut off the tenon from one of the planks. She will be the first.
IMPORTANT! According to the rules, the first plank goes from above, from the ceiling. And it should face the groove down. In this case, the connection is kept dry - water will not flow into the groove.
The final bottom strip is usually fixed not through the groove (you can’t crawl into it), but right through from the front side. It is assumed that these places will not be visible later anyway, because they will be covered with a plinth.
If the last board cannot be installed , they do this: they connect the last two or three planks separately, then they install everything at once as one, usually it works. Fastening, unfortunately, is only through the front side.
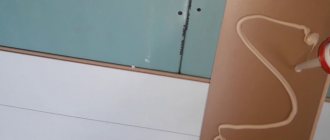
There is one secret that not everyone knows about yet. It happens that everything was done perfectly, but after several fires the wall began to “wave”, the planks at the junction points began to rise like drawbridges.
Here is a visual demonstration of the process, with torn screws:
The reason why this happens is simple - when you mounted the boards on the wall, they were in a dry state, they had one volume. And when they heated the bathhouse and turned on the steam, the wall became damp, the lining swelled, and there was nowhere for it to go, so it swelled.
BY THE WAY! This applies to both horizontal and vertical installation methods.
tongue-and-groove joint does not have to fit perfectly when the parts are put together. There should be a small empty space between the top of the tenon and the bottom of the groove - the tenon does not seem to reach the bottom of the groove. Only in this case will you avoid trouble when the wall goes into “waves” after moistening. Watch a video that talks about just this.
But here’s the difficulty: if you push the slats too far apart, then during the swelling-drying process, cracks may form. There is only one way out - take a lining with a long tenon, so that you can retreat even a millimeter, and so that there is still enough left.
Another option is to use linden wood. It practically does not change dimensions when moistened - that is why bath doors are made from it, because a swollen door usually does not want to close, and a linden door does not swell. Linden shelves are popular in bathhouses. A separate publication about them provides all the useful information for those who decide to make shelves for a bathhouse from linden: what do you need to know about linden wood? what to process? Antiseptics and impregnations are not the only means for treating wood; do not forget about the possibility of painting.
Yes, and the wood, which is called “thermowood”, does not change its dimensions, that is, dried in a chamber with a high temperature until the bound moisture is almost completely evaporated. But such lining will be very expensive. !It is important not to confuse thermowood with impregnated wood.
Vertical
You can start attaching the paneling in the bathhouse vertically from any angle. It is advisable to cut off the tenon of the first board. There are no problems with securing the first board, but the last board can cause some inconvenience.
Firstly, it may be wider than the remaining distance. In this case, there is no other choice but to cut to the desired width . Of course, it’s better to calculate this in advance and make sure it ends up in the least noticeable corner.
Secondly, it will not be possible to mount the last board on the wall in the same way as the previous ones were mounted. Therefore, you will have to nail it right through the front side, as in the case of the last horizontal one. If you plan to cover it with a decorative corner, then the fastening will not be noticeable, otherwise it is better to cut off the heads of nails or screws. Or drown them and fill them with a mixture of wood dust and PVA. (Dust can be collected from a sander.)
You can learn how to make holes from this video:
Advantages and disadvantages
When choosing nails for lining, you should consider what strengths and weaknesses this fastening material has.
Let's start with the plus:
- Light weight
. The fasteners will not load the structure. The weight of 1 thousand fasteners with a length of 20-50 mm is 350-800 grams; - Decorative effect.
Due to the fact that the cap is driven into the material, it remains almost invisible. This allows you not to disturb the appearance of the lining; - Corrosion resistance
. Relevant for all types except black nails.
But there are also certain disadvantages.
To be more precise, clapboard nails have two disadvantages:
- Dismantling without damage is impossible
. It is impossible to pick up the recessed small head with anything. The panel will probably be damaged; - Use of a puncher
. Without using a hammer, you won't be able to drown the head. An ordinary hammer or air gun is not enough. A combined approach is needed. Using 2 tools requires more time and care.
But judge for yourself how significant these shortcomings are. I think if you know how to nail it correctly, these disadvantages can be avoided in practice.
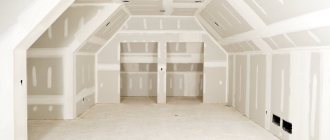
Stage 2 - frame construction
Before nailing the lining, it is necessary to build a solid foundation:
- First, you need to check the base with a level to find out how crooked your walls are. Next, the lines for the location of the bars are marked. Remember a simple rule - if the lining is mounted vertically, then the frame is positioned horizontally and vice versa ;
The easiest way is to sketch out a design diagram in advance to have a clear idea of what it should look like.
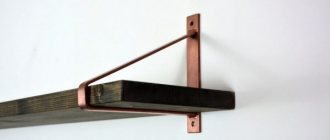
- A block is attached along the lines; if the walls are smooth, then you can fix it directly to the wall, and if there are unevenness, then it is better to fix the hangers every 50 cm. Then the hangers are bent, the block is placed, leveled and fixed in the desired position. See also the article finishing the kitchen with clapboard.
With the help of hangers, setting the frame level is not difficult
An alternative to nails - clamps
Not only clapboard nails can be used during installation. There is also such a fastener as a clamp.
Kleimers are metal plates that have holes for nails/staples, as well as a tongue of a given shape. The latter allows you to hold the lining by its groove.
Clamps or clamps are suitable for installing lining and ventilated facade systems, including PVC panels, MDF panels, chipboards, wooden block houses, etc. The fasteners are reliable, ensuring hidden installation of finishing.
Claimers are good because high-carbon steel is used for their production. Then comes the galvanized coating on top. This allows you to withstand severe loads from water, moisture, temperature, etc. Plus, due to the special design, the fasteners are invisible, but at the same time strong and reliable. Here it is important to choose the correct size of the clamp.
No. 5. Fastening the lining with a stapler
This is a variation on the theme of the previous method: instead of nails and a hammer, they use a construction stapler, which has enough power to drive the staple into the lining. This device makes the job much easier, but requires some skill, so it’s better to practice first. If everything is done correctly, the bracket will fit tightly into the wood without interfering with the installation of the next lining element. The stapler can also be used when fastening with clamps.
How to nail
See also
Estimate for facade insulation: how much does it cost to insulate the facade of a house
Again we have clapboard nails that need to be installed.
The master's task is to drive the nail and then sink its head. For this you need the appropriate tool. It's called a doboynik. This is a metal rod with a cone shape.
The working end has a small diameter. That is, when driving, it contacts only the head. It does not touch the wood.
There are 2 types of finishers:
- With grooved recess
. Goes to the end. Used for nails that have a notch on the head; - With a recess for the cap
. The rod clings tightly to the nail, which prevents it from coming off when striking.
If there is no puncher, a large nail or punch can replace it. Only then will you have to grind or trim the lower end a little. Some people use lathe-turned bolts.
If you need to carry out a large amount of work, you can arm yourself with an air gun. He is also a nail gun or nailer. Manufacturers produce finishing nailers of different calibers. They are adapted to work with fasteners of certain sizes and with small heads.
A nailer is an expensive device. But it has a number of advantages. Namely:
- reduces finishing time costs;
- has low weight;
- fits comfortably in the hand;
- the nail enters the lining in one blow to the required depth (no hammer required);
- the mount does not bend;
- the probability of misfire is minimal;
- no physical effort is required during installation.
But keep in mind that the nailer is tied to the outlet and is also connected to the compressor. In certain conditions, it will be inconvenient to carry out work.
Stage 1 – preparation
To begin with, you should stock up on everything you need, the list is shown in the table.
| Material | Recommendations for selection |
| Lining | Use material with a humidity of no more than 14%, otherwise after fastening you risk finding deformed elements |
| Bar | A frame will be created from it, most often the version with a section of 30x30 or 40x20 mm is used. The material must also be dry |
| Nails | Let's figure out what nails to nail the lining with. For work, a finishing option with a reduced head will be used; the length should be at least 30 mm, if the finishing material is thick, then the entire 40 mm. Galvanized nails are excellent, they resist corrosion well, and the price is lower than other options |
Finishing nails are the best solution when attaching lining.
The technology for nailing lining with your own hands requires the presence of a certain set of tools:
- A regular hammer will be used for fastening. You need to use small options weighing from 300 to 500 grams;
There is a hammer in almost every home
- In order not to damage the lining with a hammer, it is necessary to use a special device - a hammer. With it you can hammer nails without hitting the wood;
Advice! If you don’t have a hammer at hand, you can make one from a nail; you just need to cut off its tip.
A homemade finisher can be made in a few minutes
- The material is cut using a hacksaw with a small tooth size;
- The frame can be attached in two ways. For concrete and brick walls you need a hammer drill and dowels. For wooden surfaces - self-tapping screws and a screwdriver.
Installation of insulation
Insulation material is placed in the space between the slats. Most often, mineral wool is used to protect the premises of a private house from the cold. To prevent sagging of the insulation, it is better to secure it with twine.
A vapor barrier layer can be installed on top of the insulation. It should be positioned with the rough side towards the insulation. This is not necessary, but such a decision will have a positive effect on the microclimate of the room.
The sheathing is also attached around all openings. If the room is quite warm, installation of insulation material is not required. When using MDF or plastic lining, no insulation is used at all. Communication networks are placed in the gap between the finishing material and the sheathing.
Kinds
The lining can be wooden or plastic. Wooden is used for interior or exterior decoration:
- residential houses and cottages;
- dacha;
- gazebos;
- saunas or baths.
For the manufacture of lining, wood of the following species can be used:
- ash;
- beech;
- aspen;
- spruce;
- alder;
- cedar.
Wooden is divided into several classes:
- “Extra” or “0-class” class - has an ideal appearance and a minimum amount of roughness on the surface.
- Class “A” - for every 1.5 m of the product, one knot, one resin pocket and several cracks are allowed.
- Class “B” - up to four knots per every 1.5 m are allowed, as well as several cracks and resin pockets.
- Class “C” - there may be resin bags, blue spots, stripes and mechanical damage.
Plastic is mainly used for finishing:
- interior spaces;
- building facades;
- roof overhangs;
- ceilings.
Can be divided into:
- laminated panels, patterned like wood, metal, granite or marble;
- panels with a single color and shade;
- panels with or without seams.
In addition, plastic may differ in profile shape. Depending on the form, this could be:
- panel type, it is simple and imitates a wooden beam;
- Eurolining is distinguished by a deep tongue-and-groove joint, with an increased tenon size, which allows for good ventilation and moisture evaporation, and is used for finishing facades;
- calm lining has an almost ideal smooth surface;
- lining - American - the main difference is recesses on the inside, it is installed with an overlap, thanks to this there are no seams between the panels, it is made only from wood and is used for exterior finishing;
- block house - made in the form of convex bars, imitating a wooden building.
Watch the video: Wall decoration with clapboard
DIY corner cabinet
Previous post
How to build a terrace with your own hands
Next entry