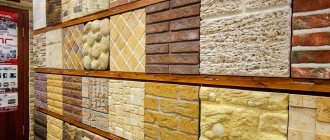
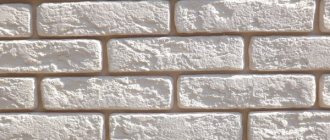
Due to its many advantages, tiles made of gypsum (alabaster, selenite) are a common decorative finishing material.
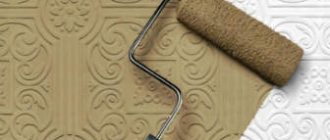
Using a special coating for tiles, you can create an individual design
Here is an incomplete series of positive properties of alabaster and products made from it:
- relatively small specific gravity;
- the ability to manufacture products of any configuration by hand casting;
- ease of processing and adjustment of alabaster tiles and stucco;
- fire resistance;
- environmental friendliness;
- dielectric properties;
- resistance to chemicals;
- ease of restoration work;
- possibility of artistic design of products.
However, gypsum also has serious disadvantages that impose restrictions on the use of selenite tiles:
- hygroscopicity (the ability to accumulate moisture from the environment);
- low moisture resistance (destructs with prolonged direct contact with water);
- low resistance to impact (even a light impact will leave a chip or shell on the surface).
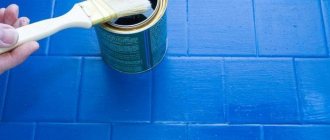
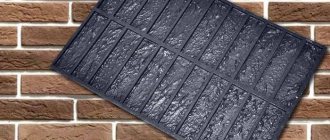
If you initially planned to have a light coating, you need to take into account that the varnish gives some darkening
These disadvantages make selenite tiles unsuitable for exterior finishing work and cladding of rooms with high humidity and, especially, open contact with water.
By using modern technologies for additional processing of gypsum tiles, it is possible to minimize these disadvantages and successfully use gypsum finishing not only in dry rooms, but also in rooms with seasonal humidity fluctuations.
Materials and tools
To complete the work, you will need inexpensive materials to imitate brickwork and simple accessible tools, namely:
- spatula width 200 mm and 80 mm;
- flute tassels 5 and 3.5 cm wide;
- paint roller;
- paint tray;
- building level 2 m long;
- long metal ruler;
- tape measure and pencil;
- cardboard brick template;
- primer;
- masking tape 1 or 1.5 cm wide;
- dry mixture Rotbant;
- tex paint;
- color tex: red-brown, red, orange, black;
- matte acrylic varnish;
- electric drill with whisk;
- kitchen sponge;
- sandpaper #180 and 240;
- bucket for mixing the solution;
- container for mixing paint.
In addition to this tool, to imitate brickwork with your own hands, depending on the complexity of the work and the quality of the wall surface, you may need additional tools and materials. The purchased spatulas must be prepared for work: sharpen the sharp corners with sandpaper and sharpen them. You can use #180 sandpaper to sharpen spatulas.
Preparation for painting: important requirements
When carrying out work on painting the surface, it is worth considering that brick is a porous material. To completely dry and weather the wall, the house must stand for a long time in its original form.
For external work
When choosing to paint an external brick wall, you should consider the following points:
It is not advisable to paint fresh masonry. The surface must fully go through the stages of drying, weathering and leaching. This may take a year. Before painting, prepare the wall surface; it must be clean. What color should I paint the decorative plaster in the hallway? To do this, remove salt stains, wash with soapy water and allow to dry thoroughly. Excess moisture will evaporate from the surface within a week. Painting brickwork creates a modern and trendy home style
Attention is diverted from small defects in the walls. You can choose a paint color that matches other buildings on the site.
For interior work
Large and clearly visible imperfections are better to be filled or plastered. Although the brickwork should be rough with a surface without large cracks or chips, it is easier to paint this way, and the wall looks neater.
The surface should be carefully primed. Choose a deep penetration primer that creates a dense water-repellent film.
Brick, as a building material, is not entirely suitable for painting. This is due to its porous structure. In the future, removing paint from it and plastering the surface will be quite problematic.
The only option is to repaint the wall a different color.
No. 1. Types of protective materials
All types of coatings have the following properties:
- Preventing the penetration of moisture and chemicals into building materials. Brick perfectly absorbs moisture, be it dew, rain or condensation. The varnish coating has water-repellent properties, which improves the performance characteristics of the structure.
- Strengthening. The product penetrates deeply into the material , thereby strengthening it.
- High temperature protection. Heat-resistant varnish will eliminate the possibility of destruction of the stove wall , which is under constant exposure to high temperatures.
- UV resistant. The paint layer favorably emphasizes the structure of the brick and makes it more expressive. Based on the purpose of its purchase, manufacturers offer matte, glossy, semi-matte and semi-gloss options.
- Preventing the formation of fungus and mold. In shady, damp areas of brick buildings there is a high probability of fungus formation. A coat of paint will help keep the building dry .
- Protection from dirt and dust. By applying varnish to the surface, a strong, smooth film is formed on it, on which dust does not settle.
Using a varnish coating can improve the appearance of a brick wall. The choice of the appropriate option depends on where you will use it: for finishing external and internal walls or for treating fireplaces and stove structures.
What about other ways to decorate brick walls?
On the modern building materials market there are many other finishing materials with which you can decorate the interior walls of a room with brickwork. Thus, flexible tiles made to resemble bricks are produced from polyvinyl chloride. Sometimes you can find collections of decorative panels made of MDV/PVC. These types of panels and tiles are characterized by the fact that they are not separate elements, but a kind of panel, the area of which reaches several square meters. All this can be mounted either directly on the wall or on a metal/wood sheathing. The cost of such panels is lower than the same decorative brick, and they are definitely easier to work with.
How to choose the right material for making gypsum tiles?
Gypsum is a material that has long been used for construction and finishing. Its source is natural deposits of this sedimentary rock. These deposits are quite numerous, so gypsum is inexpensive and available to everyone. Construction stores sell rock mined from the depths of the earth and crushed into powder. The gypsum used in construction work does not contain artificial additives, is environmentally friendly and completely safe for humans.
Advantages of gypsum as a finishing material:
- does not emit harmful substances;
- has an affordable price;
- does not burn or be destroyed in the presence of fire;
- has good sound and heat insulation properties;
- takes any form.
The powder packages have markings indicating the parameters of a particular product. The degree of grinding is indicated in Roman numerals:
- coarse grinding – I;
- medium – II;
- small – III.
The strongest and highest quality castings come from finely ground varieties, but this material is more difficult to mix. Coarser grinding is easier to work with, but products made from it are inferior in strength to those cast from fine gypsum. To make tiles, it is recommended to use fine or medium grind powder.
Compressive strength is indicated by numbers from 2 to 25. The higher the number, the stronger the material. The best option is gypsum with a strength of 10 or higher.
Based on the speed of hardening, gypsum is divided into class A (sets in 6 minutes), B (from 6 to 20 minutes) and C (over 20 minutes). The hardening speed can be adjusted by adding various plasticizers during mixing. The hardening process slows down when adding lime, wallpaper glue or washing powder. If you add table salt, the solution hardens faster.
Recommendations for the use of VEPOX epoxy 2-component water-based enamel
Substrate requirements: The concrete base must be clean, free from traces of oil, areas of old coating and contaminants that impede adhesion. Fill defects and cracks with repair compound, sand and remove dust. Can be applied to damp concrete. New concrete floors must be at least 2 weeks old. Work can be carried out at air temperatures from +10°C to +35°C and humidity no more than 80%
Asphalt base: The surface must be clean. Do not contain oil, fat, be dried. Apply the material only if there is no deformation of the base during operation. When applying to asphalt, do not add water or prime!
Preparation of material: Ratio of mass parts of components A:B 100:17 Open the buckets with components A - (large bucket) aqueous dispersion of epoxy resin with additives and pigment. B- (small bucket) hardener. Using a low-speed drill with an attachment, mix component A, lifting the sediment of pigment and fillers from the bottom for 3 - 5 minutes. and pour into a clean bucket, making sure that there is no sediment left in the bucket from under component A, otherwise, repeat mixing. With the drill running, pour component B (pre-mixed) into the same bucket and stir for 3-5 minutes. Pour the resulting mixture into the empty bucket and stir for 3-5 minutes. Let it sit for 10 minutes. The life time of the material after mixing the components is 4 hours at a temperature of +20°C. During this time it is necessary to carry out application work and therefore you should not prepare more quantity than can be produced!!!
Application method: To improve wetting, the surfaces can be slightly moistened, but without puddles. Apply with a nylon roller with short pile (8-12mm) in a thin layer with a consumption of 200g/m². When performing the 1st (primer) layer, it is allowed to dilute the material with water (the recommended amount of water is 5–10% of the total mass), but only for the primer layer. Interlayer drying is 16 hours, but should not exceed 24 hours at t + 20°C and no more than 18 hours at t +25° - +30°C. Recommended number of layers is 2. If the air and base temperatures are below +15°C, a slower reaction and an increase in curing time must be taken into account. Pedestrian traffic is possible after 24 hours. Full loads after 5 days. VEPOX can be used as a primer layer on wet concrete and surfaces with capillary moisture suction under: PU-555 soil, Monourethane, PU-555 floor and similar PU materials. They can be applied 24 hours after applying VEPOX
It is important to remember that an impermeable barrier to moisture will be formed and it is necessary to provide ways to drain water from the concrete body. Ensure room ventilation
Cleaning of tools: Cleaning of tools after work must be done immediately with water. Subsequently, use solvent R-646, and after complete curing only mechanically.
Safety precautions: When carrying out work, use personal protective equipment (safety glasses, rubber gloves). Provide ventilation. In case of contact with eyes and exposed skin, rinse with plenty of water. Once cured, the material is safe.
Storage: Store in original packaging in a cool, dry place at a temperature not lower than +5°C. Shelf life: 6 months from the date of manufacture.
Coating Methods
Qualified construction workers use different methods of painting decorative gypsum stone:
- mass staining;
- surface application of paint;
- custom coloring to imitate different textures.
Each of them has features of the work and nuances that should be taken into account when painting.
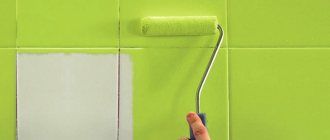
Painting gypsum stone with a brush
To create a decorative coating for stone walls, the classic method of painting using a brush can be used. This surface method is considered the most labor-intensive, but when using an airbrush it becomes faster and easier.
An airbrush is used to apply the pigment more evenly. It is a tool that sprays paint. To adjust the saturation of the shade, it is enough to change the distance from the airbrush to the surface being treated. This technology is used when it is necessary to make smooth transitions between shades or create darker convex areas. You can use multiple airbrushes with different paints to save application time and get unusual results.
Airbrush advantages:
- creates a thin and neat colored layer;
- applies paint more accurately, which protects adjacent surfaces from unnecessary contamination;
- possibility of changing shade;
- the ability to smoothly transition from one color to another.
There are various types of sprayers available for sale. The most affordable airbrush is considered to be a spray gun. If you choose a model with a high-quality compressor, the quality of painting will not be inferior to the result of a more expensive model.
Painting in bulk with an airbrush
This method of coloring is used when independently carrying out work on the production of the material. The technology involves adding a coloring pigment to the solution. Thus, coloring occurs from within the material.
Typically, a proportion of 0.5 parts of pigment per 200 ml of water is used. The resulting mixture must be mixed with an acrylic primer. After drying, a matte varnish should be applied to the surface of the stone to secure the painted layer.
The pigment can also be added in powder form directly to plaster for casting stone. This allows you to eliminate unpleasant situations with small chips on the resulting wall: the white base will not be visible. Working with such products is also convenient, since you don’t need to be afraid that minor defects will be obvious.
The technology is considered the simplest, since the surface should not be covered in several layers. However, along with the advantages, there is also a disadvantage: the surface loses its natural appearance when painted in this way.
Applying pigment to molds
You can do it even simpler and apply the pigment inside the mold. To do this, you need to dilute the pigment and apply it to the entire form or individual areas using a brush. Gypsum solution is poured into the prepared forms. The result is a material with an unusual color.
In some videos, decorative gypsum stone is painted using impregnation, which is also applied to the molds.
Types of varnishes and their application
To improve the performance characteristics of gypsum tiles, they should be varnished. The following products are considered the most popular on the market and in construction stores:
- oil-based varnishes;
- yacht varnish for gypsum surface;
- protective acrylic coating.
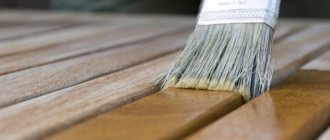
Oil based varnish
The composition of oily varnishes includes a solution of artificial resins and a collection of plant herbs. The substance is brought to an oily consistency and combined with additional materials, which as a whole form a varnish. Due to its texture, the coating forms a thin film on the surface, which, after complete drying, protects the gypsum tile from physical and mechanical damage.
Oil varnishes can be transparent (colorless) and are also available in a variety of shades. Therefore, when purchasing, compare the color of the original material and its future coating. To give the surface different effects, you can purchase glossy or matte varnish. It should be noted that if you varnish (even colorless) a plaster surface, it may become slightly darker than it was originally.
When covering a wall decorated to look like stone, try to protect your body and face from getting paint and varnish. Wear protective clothing, gloves, goggles and a respirator, as the composition has a specific pungent odor.
On video: varnish for stone.
Acrylic composition
When purchasing varnish for gypsum tiles, most builders want to get a material that will combine “two in one” characteristics. That is, initially it is a protective coating, and only then performs a decorative function.
All desired requirements will be met if you cover the tiles with acrylic varnish. In construction stores or on the market you can purchase ready-to-use material, which, when applied to the surface, forms a durable thin film.
Acrylic varnish is a “protective shield” for artificial stone. It is moisture resistant, reflects UV rays, and is resistant to various detergent compositions and temperature changes. The material has no toxic odor, dries quickly, and if excess needs to be removed, this can be done using a special solvent. If the acrylic varnish is too thick in consistency, it can be diluted with plain water.
Acrylic coating is divided into three types:
- matte;
- semi-matte;
- glossy.
If you use matte acrylic varnish to cover the plaster, the imitation of rough stone will be preserved down to the smallest touch. After application, the composition penetrates into all existing cracks and recesses, and as it dries it takes on a transparent matte texture.
Semi-matte plaster varnish has similar characteristics to the previous material. The coating has only one drawback - after drying, you can notice a light light coating on the finish. Of course, if you choose a varnish that matches the tone of the tile, this effect can be avoided, but colorless compositions can present an unwanted surprise.
When choosing a glossy finish, keep in mind that in a brightly lit room the surface will be very shiny. Consequently, the interior decoration will be distorted due to glare.
If, according to the designer’s plan, the gypsum tile will be painted with water-based paint, then for better adhesion of the material to the surface, add acrylic varnish to the solution. The paint should be applied with two salts, and after complete drying, open with one layer of varnish.
Yacht varnish
The most durable material for treating gypsum surfaces is yacht varnish. Based on the name, you can guess that this material is used to cover wooden surfaces on yachts. Its composition will give gypsum tiles 100% waterproofness.
Before applying to the surface, the product must be thoroughly mixed with solvent. The solution is distributed on the tiles with a thin brush or roller, and the surface should be evenly exposed, avoiding smudges. The material dries in about 24 hours, depending on the room temperature.
To achieve maximum protection, decorative gypsum stone is coated with 2 layers of varnish. But before application, minor cosmetic errors should be carefully sanded with sandpaper. The second coat will take about the same amount of time to dry. After this treatment, the relief surface of gypsum tiles is easier to keep clean. To do this, you just have to wipe it with a damp cloth.
Brick wall decor options
Instead of real brick, other materials are often used for interior decoration in modern decor, the structure of which strongly resembles a brick surface.
Brick walls can be finished using materials and technologies such as:
The advantage of such materials over real brickwork is that they are much lighter than brick and occupy much less volume.
What type of decor is best to choose to reproduce a brick wall? Let's take a closer look at the most popular options for finishing brick walls. Knowing the features of each of them, you can easily create a unique wall decor at home.
Brick construction panels
Construction panels are a real leader among “bricks”, famous for their strength and water resistance. This finishing material has long conquered the exterior finishing market, and has now found its application in interior spaces.
Such imitation panels are made of plastic. This means that they are not afraid of dust, moisture, mold or rust. In addition, such brick panels are highly resistant to alkalis and acids and are not at all afraid of hot droplets of fat, which is why they are often used in the kitchen.
Advantages:
Flaws:
Some panels require additional sheathing, so this design takes up a certain part of the usable space.
Brick panels are mounted both horizontally and vertically, so the pattern on them depends on the method of placement. They are mounted on nails, screws or self-tapping screws. Most of these wall panels are mounted directly on the wall.
In decorative brick panels, each element has its own independent fixation, so an accidentally damaged part of the “bricks” can be replaced in half an hour.
Brick look tiles
An excellent alternative to brick for wall cladding is clinker tiles. This is an inexpensive and very beautiful analogue, made from raw clay. In terms of its characteristics, laying method and thickness, brick tiles are no different from simple tiles.
The surface of the clinker tile is covered with glaze, so the natural color of such a “brick” will remain for a long time, and the matte relief is difficult to damage even with a strong blow.
Advantages:
- the porous structure of this tile is identical to the structure of brick;
- perfectly retains heat indoors.
Flaws:
The clinker tiles are attached to the wall, previously coated with an adhesive solution. A mandatory step is the presence of crosses between the tiles. These crosses fix the seams between the bricks, into which a solution of a mixture of large fractions of cement and sand is then applied. This solution further emphasizes the naturalness of such brickwork.
Brick wallpaper
If you really want to freshen up the room, but time and finances for repairs are limited, brick wallpaper comes to the rescue. This interior looks unusual everywhere:
- in the kitchen;
- in the corridor;
- in a luxurious living room;
- in the little room under the stairs;
- on the balcony;
- in a strict office.
Interior ideas
When choosing a brick finish to decorate a particular interior, it is important to choose the right area, as well as the color of the material, which will optimally suit the palette of the interior and furniture. Let's take a closer look at how to organize the decoration of different rooms with decorative bricks.
Decorative brick in the living room
This is a special room in the apartment that requires a careful approach to decoration - after all, this is where festive events with friends and relatives and family gatherings will be held. In newfangled interiors, you can often find living room designs with an emphasis on brick walls. It is worth noting that the masonry itself is an excellent decorative element that does not require additional decorations. If desired, you can display a gallery of family photographs, a display of artwork or posters on a brick wall.
You can choose any color of brick in the living room - the main thing is that it is in harmony with the interior. In this way you can decorate one of the walls or individual sections. The decoration of the room will be a brick fireplace or a niche in the wall, creating a special atmosphere of comfort. If the living room is combined with a kitchen, a good option would be a small brick wall that acts as a zone divider.
Decorative brick in the bedroom
Considering the fact that brick looks quite warm and attractive, it is perfect for decorating a bedroom. The material combines well with other types of cladding. Often, brickwork is used to decorate the wall at the head of the bed or the one on which the television panel is installed. If the bedroom is narrow and the bed is located with its back side to the long wall, it is this wall that is decorated with brick. This technique helps to visually move the wall away and expand the room.
Decorative brick in the hallway
In small corridor spaces, white decorative brick with a glossy surface will look best. This design will help increase the area and make the space freer, which is typical for modern minimalism, as well as the Scandinavian style.
It is better to decorate with red brick in fragments, decorating in this way corner areas, areas at the junctions of walls, arched areas and doorways. Masonry can take part in zoning a spacious hallway.
Decorative brick in the kitchen
The kitchen, even if it is quite spacious, is not recommended to be completely covered in brick, so as not to end up with a basement interior. It is much better to use masonry as a link between different types of finishes. Determining the wall where the brick will be located occurs according to the following principle: where natural light falls, there is a place for masonry. For a wall made of red brick, which has the ability to absorb light, it is better to consider additional lighting.
Since the hygroscopicity of the material does not allow it to be used as an apron, here you can use imitation cladding - PVC panels or brick-like tiles.
Decorative brick in the bathroom
The bathroom has a specific microclimate, and decorative brick is not the best option for cladding. In extreme cases, the masonry will need to be coated with agents that prevent the formation of mold, as well as antibacterial compounds.
From an aesthetic point of view, the combination of the rough surface of decorative bricks with snow-white plumbing fixtures has a very attractive appearance. Instead of brickwork, moisture-resistant wallpaper, tiles or plastic panels that imitate it are also used in bathrooms.
vote
Article rating
Dye application technology
Km is applied to decorative stone in three ways.
There will be no economical use of dye if it is applied with a brush or roller. The layer does not lie evenly on the gypsum stone. It is convenient to perform several actions with a brush: creating a mosaic, drawing veins, inclusions, emphasizing contrasting areas, restoring individual places.
Working with a brush is not difficult. The pile is immersed in the composition, and the accumulated mass is applied to the tiles. It takes a lot of time and effort to complete the decor; the stone is painted unevenly, but the tiles will visually look like natural material. A brush is convenient for applying varnish to torn areas of the surface, increasing or decreasing the shade by halftone, and defining veins.
The consumption of CM is significantly reduced and the quality of the coating does not decrease if it is applied using a spray gun. Another plus is that the time required for painting is reduced, regardless of the surface texture. An even layer is applied with a spray gun, the color saturation and its depth are adjusted.
How to paint decorative stone
To paint gypsum artificial stone, you should follow the stages of work. The sequence consists of several steps:
- Selection of material to be painted.
- Selection of tools.
- Preparing the stone surface.
- Applying paint.
- Drying.
This step-by-step process will allow you to get the desired result.
Tool selection
If the paint material has already been decided, you can start choosing a tool. The most important thing is a brush or airbrush. An ordinary sponge can be used for work.
In addition to the main tool you will need:
- container for mixing pigment;
- gloves and protective clothing;
- rags;
- additional brushes for decoration.
Sponges can be added if necessary.
Preparing the stone
Before painting a decorative gypsum stone, it should be prepared. To do this you need to perform several manipulations:
- Remove the previous layer of paint.
- Sand the surface.
- Blow off with a compressor or treat with a rag.
- Apply primer at least twice.
When working with new material, you need to wash and saturate it.
Coating
When painting, you should take into account the recommendations of builders:
- Fragments must be processed separately.
- When working with a finished wall, a relief is used or covered in two tones. This will prevent homogeneity.
- It is better to use a spray gun to increase the speed of work. The surface becomes evenly colored. It is considered inappropriate to work with embossed surfaces with a brush.
- If conditions permit, you can immerse the parts in the coloring composition.
- If we are painting a decorative stone made of gypsum, we should not refuse to test paint. This way you can evaluate the result in advance.
These tips will help you avoid problems when painting.
Process
On the one hand, there is nothing complicated or tricky in this process, so even a child can handle it. At the same time, it is one of the most important and critical stages that can affect the appearance of artificial tiles. Therefore, you cannot approach the work without a serious approach and a bit of imagination, otherwise you can simply ruin the entire project, including the casting.
Make sure that in the second case the material is not stained with glue or joint filler. If you don’t want to worry about this, open the tiles first with varnish.
Water-based acrylic paints for working with decorative gypsum stone
Painting each tile separately is best done by those who do not yet have the proper experience in this craft. If you are already skilled at this, paint it directly after laying it on the wall. In this case, you will be able to better see the final drawing; the gypsum tiles will be colored more naturally and therefore fit better into the interior.
Remember also that this method requires:
- responsible approach;
- preliminary sketching of a painting plan;
- correctly selected color combinations;
- calculations of light and shadows.
In this situation, you will get some more shades of these colors, so you should not mix many different shades. Be aware that plaster absorbs paint differently, so one color can produce multiple finishes.
Paint application process
There are a sufficient number of technologies for painting artificial gypsum tiles, including airbrushes and spray guns. In this article we will look at several effective and at the same time simple methods that will show how to paint artificial stone at home or in production.
Improving the performance of gypsum finishes
Manufacturers of alabaster cladding most often offer consumers products that have already undergone a process of improving characteristics and are varnished. The price of such material is higher due to the cost of additional processing. Knowing the optimization technology, you can purchase gypsum cladding without protective treatment, for example, the popular hand-made Monte Alba decorative tiles, and independently improve the properties of the material, and then varnish it. Let's consider what the pre-treatment of gypsum products is before applying varnish, types of varnish compositions and methods of their use.
Impregnation of gypsum tiles with hydrophobic agents
To neutralize the hygroscopicity of gypsum products, they are hydrophobized, which consists of impregnation with water-repellent compounds (hydrophobizers) based on organosilicon polymers. Due to the deep (up to 20 mm) penetration of water repellents into gypsum without the formation of a film, porosity is reduced, but the vapor permeability of the products is maintained, the degree of hygroscopicity and the susceptibility of tiles to mold are reduced.
Impregnation allows you to preserve the attractive appearance of stone and decorative stone tiles for a long time
Water repellents are offered by manufacturers in the form of ready-to-use solutions, as well as concentrated formulations that require dilution. The method of use is indicated on the packaging of the mixture.
The general requirement for the use of hydrophobic compounds is that they be applied to completely dry gypsum tiles that are free of dust. Gypsum products are processed on all sides in two layers until saturated, without waiting for drying. This processing method reliably isolates the cladding not only from the humidity of the outside air, but also from the moisture of the base material. For application, depending on the area of the surface to be treated, a brush or roller is used.
Water repellent Tiprom
The treatment should be carried out wearing protective glasses and gloves, avoiding contact of the composition with exposed skin. Contamination of adjacent glass and metal parts with a water-repellent agent must be promptly eliminated, as the composition hardens quickly.
Examples of well-proven hydrophobic compounds include:
- water-repellent silicone composition White Hill;
- silicone impregnation “Optimist C405 – Natural stone”;
- a range of Tiprom water repellents.
Silicone waterproofing impregnation – Natural Stone
Varnishing the plaster finish
After hydrophobization of the alabaster tiles, the base is faced by laying gypsum products on an adhesive mixture selected in accordance with the type of wall surface. A day after installation is completed, they begin to decorate the finish with paints.
To protect the artistic layer of the cladding, it is necessary to cover the tiles with a protective varnish layer. This operation begins after finishing the decoration, but not earlier than 5-10 days after finishing laying the tiles, so that the tile adhesive under the finishing not only hardens, but also dries.
To apply a protective coating to gypsum tiles, acrylic or oil varnish is used. These materials differ in properties, so we will consider each separately.
Protecting alabaster tiles with acrylic varnish
Acrylic varnish is a ready-to-use aqueous dispersion of resins, a milky liquid, the application of which to interior and exterior decoration is used for protective and decorative purposes. This solution is resistant to cracking and forms a durable, transparent film on the surface, which after drying can be removed using a special solvent.
The acrylic-based coating is resistant to detergents, moisture and ultraviolet radiation, and temperature fluctuations. The composition is odorless, harmless to humans and the environment, dries quickly and becomes transparent. Acrylic varnish is diluted with water to the desired consistency and applied to the surface with a brush, roller or spray.
Varnish for natural and piece mineral surfaces
Acrylic varnish is available in three types: glossy, matte or semi-matte.
When applying a glossy solution to gypsum tiles, it should be taken into account that the cladding will receive shine and glare from the lighting, which will distort the colors of the tile decoration.
Matte acrylic varnish will preserve the velvet surface of the tile, imitating rough-cut natural stone, without changes. This composition is an ideal protective coating for Monte Alba tiles.
The semi-matte type of varnish occupies an intermediate position between the two described types in terms of its effect on the cladding.
When dry, a thin film is formed that prevents moisture from being absorbed into the plaster.
When decorating gypsum cladding, which was painted with water-based paints, 10% acrylic varnish can be added to the emulsion to enhance adhesion to the gypsum. After covering with two layers of such paint, only one layer of varnish can be applied to the alabaster tile.
Important! If you do the opposite, add paint to the acrylic solution, the coating will end up with paint-colored stripes, which is not always desirable.
An example of a successful choice of protective and decorative coating for gypsum finishing is Finnish paint and varnish products.
Coating gypsum tiles with oil varnish
Oil varnish is a solution of natural or artificial resins in oils of plant origin. After application to the base, such varnish first forms a film on the surface of the layer, and then dries throughout its entire thickness and serves as a strong protection for the surface from mechanical and physical damage.
Oil varnishes, like acrylic varnishes, are available in glossy and matte finishes. To bring the solution to the desired consistency, special thinners are used that do not change the characteristics of the varnish. Oil-based varnishes are available colorless or transparent, but have some tint, so when choosing a material for coating gypsum tiles, you need to take into account the compatibility of the varnish shade with the color of the alabaster finish. All oil solutions, including colorless ones, darken a little after drying, which also needs to be taken into account when decorating gypsum tiles.
Using yacht varnish
The most durable coating is provided by yacht oil varnish, so its use to protect plaster cladding is most advisable. After thoroughly mixing with the thinner, the varnish is applied to the finish in a thin layer with a brush or roller. The solution should be well distributed over the surface, avoiding the formation of drips. Yacht varnish dries, depending on the room temperature, in about a day.
Varnish for gypsum tiles is an indispensable thing for giving the surface the desired shade or glossy shine.
After the first layer has dried, the cladding is inspected for the presence of drips, which must be carefully sanded with fine sandpaper before applying the second layer. The second layer of varnish also dries for about a day, after which the varnished finish is wiped with a clean, damp, soft rag to eliminate any residual adhesion.
Decorative tiles "Monte Alba", covered with a protective layer of yacht varnish, despite the corrugated surface, are easier to keep clean and last longer.
How to paint false bricks
The imitation of masonry can be made in a single color - white, light brown or beige. The most natural look will be imitation of silicate, clinker or red brick. Using the same method, you can update a boring monochromatic plaster coating with imitation bricks or “wild stone”.
If the artificial masonry looks somehow “boring”, you can manually lighten or darken individual blocks. The most attractive look is the combination of fragments that are more different in saturation in one color scheme - milky, terracotta, sand or rocky gray. You can add pigment to the water-based whitewash for bricks on the corridor wall. The surface can be slightly shaded with a sprayer with a bronze or metallic effect.
Depending on the desired effect, coloring is carried out using different devices:
- Spray bottle;
- Spray paint;
- Paint brush;
- Whitewash brush;
- Porous sponge;
- Roller with decorative attachments.
To treat a solid wall, it is recommended to treat it with a primer or special impregnation. Finish coating – acrylic, silicate, any interior paint recommended for decorative plaster (same base).
The most natural look will be imitation of silicate, clinker or red brick.
Advantages and disadvantages
Painting decorative stone has its pros and cons:
| Advantages | Flaws |
|
|
Attention Painting requires not only creativity, but also skill. To select the future appearance of the cladding as accurately as possible, you can use online works, which are presented with step-by-step instructions.
How to treat a stone to make it shine?
The oldest and easiest way to make a stone shiny without mechanically polishing it is to rub it with wax. Currently, wax has been replaced by paraffin and silicone, which in various combinations form the basis of most polishes and polishing pastes for stone.
Interesting materials:
What shrubs can grow in the shade? What bushes bloom yellow? What is the distance between honeysuckle bushes? What is the blueberry yield per bush? When is the best time to replant a currant bush? When is the best time to prune bushes? When is the best time to plant berry bushes? When is the best time to plant shrubs? When is the best time to plant raspberry bushes? When is the best time to plant bushes?
Hard tile bricks
An imitation of a brick wall can be successfully achieved using hard tiles. There are various options for hard tiles; as a rule, they are all installed using identical technology.
Types of hard tiles
The following types of decorative bricks are considered the most popular:
- Gypsum tiles. Such tiles are most common among consumers. Due to the plasticity of gypsum mortar, bricks of various textures are produced. The disadvantages include the fragility of the material, as well as the inability to use in rooms with high humidity.
- Cement tiles. This material will be more expensive than gypsum tiles, but this type has a number of advantages, such as high strength, the possibility of installation in wet rooms, and susceptibility to care and washing.
- Clinker tiles. The most similar imitation of brick will be on the wall when using the clinker variety. The price tag for this tile is significantly higher than other options, but the difference in cost is offset by the following advantages: the possibility of cladding facades, high strength, resistance to abrasion and ultraviolet radiation.
Gypsum brick tiles
Tile installation technology
The rules and technology for facing a wall with hard tiles differ little from the technology for laying soft material. The difference will be hidden behind the thickness of the glue and the process of cutting the material. According to the first point, the thickness should not exceed 0.5 millimeters, and hard tiles can only be cut with diamond-coated circles. The exception is gypsum tiles - they are easy to cut with a knife.
Installation of rigid brick tiles
How to make a mold for casting plaster tiles
Brick finishes can be made from homemade tiles. To do this, you need to take an impression from several individual bricks, thereby preparing the mold for casting. A gypsum solution will be poured into the resulting form, after which the finished decorative stone can be mounted on the wall.
The side of the brick that is taken as a sample is covered with grease or heated wax mixed with kerosene. This is necessary in order to prevent the silicone from sticking to the surface. As soon as the layout dries, the treated side is covered with a layer of silicone sealant, 1-1.5 mm thick. The mold is set aside until the silicone has completely polymerized.
After the silicone has hardened, the mold is coated with polyurethane foam. After the foam has hardened, the sample is removed and the bottom of the mold is leveled.
A gypsum solution is poured into ready-made molds, which sets very quickly and takes on the appearance of a finished finishing material. If you have 10 molds, you can make several square meters of decorative stone in a couple of days.
Brick tile mold
How to glue
The structure of gypsum stone always remains the same, only its shape and size differ. This means that the composition of the glue used will depend on the base on which the stone will be installed. Among adhesives, three groups can be distinguished:
- special compositions with a gypsum base;
- compatible styling compounds;
- improvised means.
Each of them deserves special attention, so it is worth considering them in more detail.
Special adhesives
When decorating interior or exterior, you most often have to attach gypsum stone to plaster, pure concrete or drywall. In this case, the best solution would be to use special mixtures. Manufacturers and sellers call these compounds gypsum adhesives. In the original, it is a dry mixture that contains gypsum or alabaster, as well as special additives called a plasticizer. Their task is to make working with glue easier. With these additives it acquires good plasticity and hardens longer. This glue is also used to repair damage in natural stone. When choosing an adhesive, you should pay attention to three parameters:
- presence of quartz sand;
- required amount of water;
- hardening time.
In addition to the main components, quartz sand can be added to the glue. This is done to increase the volumetric mass and reduce the cost of the production process. Quartz sand works well as a filler in ordinary cement-sand mortar. But for gypsum glue it has practically no benefit. That is why it is better to purchase a composition that does not contain sand. It will cost more, but installation of gypsum stone will be easier. The quality of a particular glue sample depends on how much water is required to prepare the mixture. If less than 0.3 liters per kilogram is needed, then we can judge that the percentage of alabaster in the composition has been reduced and the amount of other additives has been increased. It is better not to purchase such glue. It all depends on the fact that for high-quality and reliable fastening of the stone to the surface, a sufficient amount of gypsum is required.
When choosing, you should pay attention to the drying time of the solution. Manufacturers who are responsible for quality try to achieve a target of 30 minutes. This allows the installation of gypsum stone to be carried out quickly, since you do not have to hold it with your hand for a long time near the wall. In this case, the glue can be prepared in smaller portions, which eliminates its overuse.
The recipe for making gypsum glue is usually applied to one side of the package. The dry mixture is measured according to the specified parameters and poured into a container with water. After this, it must be mixed thoroughly. A powerful drill or a special construction mixer will help with this. It is important to achieve a homogeneous mass without lumps. After this, it is important to let the mixture sit for a few minutes to allow the hydration process to occur. Manufacturers may indicate not only different amounts of water, but also the time to reach working condition.
Before finishing the surface with gypsum stone, it must be coated with a primer. In some cases, several layers may be needed. It is important to allow time for complete drying. If installation will be carried out on a brick wall, then the seams need to be aligned. The primer is required to prevent water from leaving the glue too quickly. To work, you will need a flat and notched spatula. Using an even spatula, gypsum glue is applied to the stone. To remove excess it, you need to go through it with a comb. In this case, the thickness of the glue for proper installation should not exceed 1.5 cm.
To gain full strength you will have to wait a day or more. Everything will depend on the humidity and temperature in the room. In some cases, the time period increases to one week. It is better to wait this period without additional processing of the stone.
Compatible formulations
In addition to gypsum adhesives for facing stones, you can successfully use adhesives for ceramic tiles or liquid nails. There are no special recommendations for using the first one. It is prepared in the same proportions as for use with tiles. In terms of tensile strength, tile adhesives have high performance, but this does not have any practical benefit for gypsum stone. When using tile adhesive, you should keep in mind that it takes longer to dry than gypsum adhesive. In this case, the stone may change color because it will draw moisture from the gray composition. The price of such compositions is higher than that of gypsum glue.
Installation of gypsum stone can also be done using liquid nails. But this applies more to those cases when it is necessary to repair a small area or replace several stones. Liquid nails are applied to the gypsum stone in spots or in stripes. After this, you need to wait a few minutes for partial setting and apply the stone to the surface. Liquid nails are an environmentally friendly material, so they perfectly complement gypsum stone. In addition, this glue does not need to be prepared; just squeeze it out of the tube and use it.
Available means
Alabaster is most often used for putty work. But it can be used for gluing gypsum stone to various surfaces, except metal. Before using this method, it is necessary to prime the surface with latex primer. Alabaster dries quite quickly, so to delay this process, you can add glue or soap to the diluted composition. Another non-standard option for gluing gypsum stone is finishing or starting paint putty. It must be mixed in the proportions recommended by the manufacturer. It is applied to the stone in a layer of no more than 1 cm. This option is also great for gluing several fallen stones.
Old marble
If you like the effect of aging, you can treat the product so that the material becomes similar to old marble.
The work is carried out in a certain order:
The purchased stone will need to be kept for two days in a dark room. If you created the product yourself, dry it thoroughly (maximum at 55 degrees). Warm up the drying oil
This should be done very carefully and you will need to use gloves when working. The material is applied using a flute brush. It is recommended to apply it in 2 layers
Try not to leave unimpregnated areas: the product should be processed evenly. After some time, the surface will look like old marble.
Why paint a brick wall?
Artificial ceramic stone is a popular material for construction work. For the construction of walls, ordinary brick is used, the surface of which is rough and unattractive. When choosing masonry as a decorative element, it is necessary to improve the aesthetic perception of the surface. Painting brick white looks great in rooms decorated in loft, modern, and high-tech styles. The characteristic relief of the walls is preserved, but its presentability is enhanced.
Photo 1. Painting bricks white makes the room brighter
Brick facades of buildings are painted for various reasons:
- As a result of long-term use, the original appearance has been lost.
- The masonry has partially collapsed; repairs require plastering and color restoration.
- Construction of extensions where the creation of an overall harmonious composition is required.
- The desire to change the decorative appearance of the structure is also a powerful argument (photo 2).
Photo 2. Changing the decorative appearance of the facade by painting
Tools and materials
After you have decided on the painting material, you need to prepare your working tools. Usually a brush or an airbrush is chosen. Painting can be done with any tool, for example, to create a coating, some use an ordinary sponge. But the advantage is on the side of the airbrush:
- creates a thin and neat layer of paint;
- does not smear surfaces during operation;
- when adjusting the spraying distance, one and the same paint looks different on gypsum stone;
- The surface color is even and uniform.
So, for painting you will need:
- dye;
- containers for water and mixing paint;
- gloves;
- rags;
- brushes and sponges (for decoration);
- airbrush (if the work will be done by him).
Tip: Construction stores offer a wide selection of airbrushes. They are suitable for painting almost any surface. You can also choose a cheap option - a spray gun, it will cope with painting artificial stone
The main thing when buying is to pay attention to the following: the strength and power of the compressor.
A brush is not the best option for painting for the following reasons:
- leaves streaks and drops;
- professionals don't use it;
- a thick layer of paint remains;
- individual gypsum elements may not be saturated with the next layer.
It is better to use a brush when it is necessary to treat torn areas.
We paint the product “to look like stone”
A short lesson in painting like a stone.
We are not interested in painting to look like brick or just rubble stone. The question is how to paint specifically for decorative stone, marble, jasper, malachite, and so on. This algorithm and sequence is the basis of the direction. By understanding and trying, you can learn to imitate different options and textures.
What we need for painting: 1) Brushes 001, 1,2 2) A sponge, or a piece of foam rubber, or a toothbrush 3) Acrylic or oil paints, whichever you prefer. Oil paints allow for deep, layered textures and require more experience working with paints. For a beginner, you can start with acrylic or practice on paper with simple watercolors. 4) Well, actually, what are we going to describe?
1) Step one
We apply matte white primer to the product we need. Then we apply the first primary color, which we will use for painting. In our case it is black.
2) Step two
Using a sponge, a piece of foam rubber or a toothbrush, apply the first texture. The color of the texture depends on what we want to get in the end. To imitate jasper, you can use white, gray and purple colors, applying them one after another. In our case, we will use two colors: light green (pale green) and light green (variations and color shades of green can be any, do not be afraid to experiment with color). Apply the first layer and let it dry. When using acrylic paints, this will take 10-15 minutes.
3) Step three
After the prepared base has dried, we begin to draw lines. It is advisable to draw lines with brushes of varying fineness from 001 to 2 (brush size). Direction, discontinuity, thickness of lines - it all depends on your imagination. To make it easier, imagine that you are drawing lightning breaks
The color of the lines also depends on what stone you are imitating. In our case, we mix a little green into the white color and draw lightning.
After complete drying, we apply a layer of glossy varnish.
An example of painting under “gray marble”.
A small, as they say now, life hack
If you have no desire to paint the surface like a stone, then you can create an imitation of the structure of an ornamental stone by simply mixing two different colors of polymer clay
I hope the lesson was interesting and instructive. I invite you to visit my page and see my work.
Varnishing rules
Varnishing, like painting, is the final stage of laying tiles. But, if before painting the gypsum stone, the cladding is allowed to dry for 24 hours, then you will have to wait 1-1.5 weeks before varnishing. By this time, the glue will be completely dry, and the fixation will be as reliable as possible. To get the best results, it is useful to use the following tips:
- A water repellent is first applied. It penetrates into the plaster without forming a film, increases moisture resistance, and gives the material antiseptic properties.
Applying varnish to an uneven surface Source zhkpribrezhny.rf
- The varnish is applied with a convenient tool in two steps. The second layer is applied only after the previous one has completely dried.
- Leaks are almost inevitable. After drying, they are carefully cleaned with sandpaper (before applying the second layer).
- If necessary, the varnish layer can be removed with a special solvent; the plaster will not be harmed by this.
- The drying time of each layer depends on the type of varnish and is indicated in the instructions. The lower the temperature, the longer the coating takes to dry.
- After the second layer of yacht varnish has completely dried, the surface can be wiped with a damp cloth to get rid of residual stickiness.
Varnishing improves the aesthetics of the finish Source idei.club
List of tools
To create a decorative element that attracts attention with your own hands, you need to use tools that allow you to paint. The main devices include:
The main devices include:
- airbrush or spray gun;
- brushes and rollers;
- sandpaper or sanding machine.
Most often, an airbrush is used for painting.
With an airbrush, you can give the stone different shades - to do this, you simply adjust the flow of paint and the distance from the tool to the working surface. For painting the material, a conventional airbrush with a compressor equipped with oil cooling and an automatic pressure regulator is suitable.
It is very rare to paint the entire facing stone with a brush, because the device leaves streaks and unsightly stains. A brush is an excellent tool for highlighting certain areas.
Painting artificial stone proceeds efficiently, without any hiccups, if a set of tools is prepared in advance. It differs in the number of required items depending on the quality of the surface. For the old finish, more of them are prepared, for the new stone cladding - fewer of them. Basic list of tools:
- remove dust and dirt from the surface with a vacuum cleaner;
- the coating is sanded with sandpaper or a grinder;
- hard-to-reach places on the wall with decoration or its individual elements are painted with a sponge and brush;
- saves money and applies CM evenly with a sprayer.
Briefly about the main thing
Gypsum for decorative stone is used in almost every modern design. This material is a budget and modernized version of conventional brick. It is lighter, easier to install and suitable for all types of surfaces
That is why when choosing an artificial surface, attention is paid to gypsum stone
A large assortment allows you to choose the material for each room. But the types are very different from each other, so it is worth studying in detail the properties of each and comparing them with the technical characteristics of the room
You can do the installation yourself, but it is important to follow all the rules and strictly follow the instructions. Only then will gypsum tiles become an excellent addition to the interior of the house
Advantages of treating brick with varnish
LKM (paint and varnish materials) for brick are currently the most widely used.
All thanks to their properties. They can be used outside and inside the house to treat vertical, horizontal and inclined surfaces. In its own way, paint and varnish for bricks is universal - it is not only widely used, but also does not cause difficulties during application. It also does not roll down or become deformed. Under the influence of moisture, bricks that are not treated with varnish quickly lose their properties and begin to collapse. This mainly affects the walls outside the house. Using brick varnish, you can several times reduce the negative impact of snow, rain, and hail on the facade of the house, thereby extending the life of the brick, and avoid major repairs to the walls.
Another noticeable advantage of the varnish coating of bricks is its resistance to high temperatures. This is especially noticeable on fireplaces and stove masonry. Heat-resistant brick varnish is used to coat them.
A fireplace or stove treated with varnish takes on a completely different appearance and looks very beautiful.
The varnish can also protect your home from salt and dust stains. By treating the facade of a house or a fence with brick varnish, you can be one hundred percent sure of their protection from such untidy phenomena as salt, dust accumulation and fungus.
The variety of paints and varnishes is very wide. Varnishes with enhanced shine will effectively highlight the facade of the house against the background of other buildings or simply make it look like a tower from a fairy tale. Walls treated with varnish look very impressive.
Stone impregnation
Make sure the surface of the stone is clean and dry. You can start hydrophobic impregnation.
Impregnation of artificial stone prevents chipping, protects against excessive moisture, premature abrasion, closes pores and strengthens the structure of the stone. Without soaking, the paint will lie unevenly, with “camouflage” spots, and its consumption will also increase significantly.
Hydrophobic compounds come in different forms. It is better to select the most suitable composition for your stone model, for example, choose latex impregnation.
Impregnate the stone at least twice, in as uniform a layer as possible, using brushes, a roller, a sponge or a spray gun for this purpose. After processing, while any of the layers dry, do not allow water to come into contact with the stone.
Care after applying varnish
After treating the surface with brick varnish, it becomes easy to care for. The wall practically does not get dirty, dust does not settle on it. If there is a fireplace or other appliances nearby, the surface does not become hot. This coating is not afraid of water, it does not wear off for a very long time. During cleaning, it will be enough to wipe the surface with a damp cloth. You can even do without cleaning products. This wall can withstand many washing cycles.