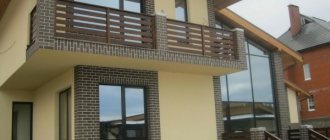
What is even more traditional for building or decorating a house than brick? If the appearance of the building no longer satisfies the property owner, it’s time to think about what material to choose for upgrading the facade. If preference is given to brick, you should become more familiar with how to choose it correctly for such work, lay it according to technology, and also repair it if damage occurs. The difficulty may lie only in the loss of individual new products from the overall design concept.
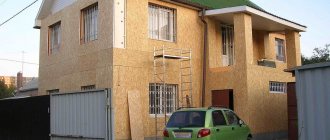
Finishing a house with brick not only looks presentable, but also allows you to protect the walls from external influences, increase the service life of the entire building and additionally insulate the facade if necessary. But it is important to know that these works are carried out only after the house has been kept for two years at the end of construction. In addition, it will be necessary to form a 40 mm gap, which is necessary to ventilate the space between the walls. And above and below there should be vents, the dimensions of which are selected taking into account the area of the wall.
Features and Benefits
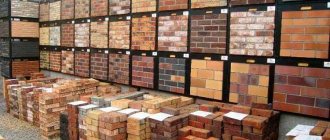
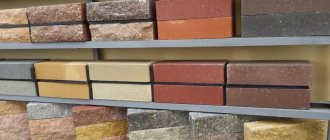
You should not assume that the color of brick for exterior decoration is limited only to the traditional terracotta shade. The appearance of products can be very different. On sale you can find material with a textured pattern, roughness, and even an antique effect.
The rich palette will be able to satisfy the most demanding buyer. You can choose a brick from the lightest to darkest tones. As for the size of the cladding, it usually has standard dimensions, but European trends contribute to the spread of building materials on the market that look very unusual in appearance.
As for the advantages of exterior finishing, it improves the operational characteristics of the building and makes it look new in appearance. The good thing about cladding is that it can be used under difficult conditions, for example, low temperature, sudden temperature changes, and high humidity. Exterior finishing is ready not only to protect the main walls from negative influences, but will also last for decades.
Slag or slag-pouring house
Brick cladding in the case of buildings using slag is used more often when cracks spread along the walls. This happens mainly when the slag has exhausted its resource and began to crumble. On average, its service life is 50 years, it is reduced if the humidity of the walls is high.
Brick cladding of a cinder block (cinder block) house will only delay the inevitable: it will slow down the destruction, but will not stop it. The duration of the delay depends on the condition of the material and the measures taken. On average he is 8-15 years old. It is hardly possible to do without consulting a specialist: the cost of a mistake is too high.
In most cases, it is recommended to build a frame around the house, on which to transfer part of the load of the floor and roof, and carry out waterproofing work. One of which is the external protection of walls from precipitation using brick cladding. The brick is selected with the lowest water absorption. For greater protection, the masonry can be impregnated with a hydrophobic compound (but does not create a vapor-proof film). Penetrating hydrophobic impregnation of the main wall will not be superfluous. To do this, you can use impregnations such as “Penetron” and analogues. They will simultaneously strengthen the material and significantly reduce water saturation.
Watch the video about the practice of facing old buildings with bricks.
Kinds
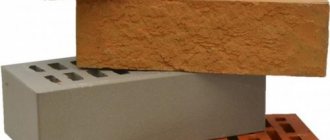
For exterior decoration, you can choose one of four types of bricks, namely:
- clinker;
- ceramic;
- silicate;
- hyper-pressed.
These products differ from each other in physical and mechanical properties, ingredient composition, cost and appearance.
Decorative brick is a separate type of exterior decoration. It can be represented by different collections, for example:
- Chester;
- Bergamo brick;
- Argo;
- Zealand brick;
- Tivory brick.
As for “Chester”, these are products that are also called aged brick. With their help you can decorate a house in the style of old England. “Bergamo brick” is an elongated brick with a pronounced texture. The uniqueness of these products is that they are painted by hand and also have the appearance of aged brick. After cladding, the wall turns out to be heterogeneous in color, which gives it calories and attracts attention.
Graphic bricks from the Argo collection allow you to get the effect of old but durable masonry. There are all kinds of irregularities and potholes on the surface of the products, which creates the appearance of clay bricks. An additional feature of this decorative finish is that the products are laid with a wide seam. For lovers of ancient Scandinavia, Zealand brick is suitable, which has a different thickness from product to product. The cladding can be combined according to your own preferences, laying stones with wide joints.
Ceramic
Ceramic bricks are often used for exterior decoration of houses, which can be immediately recognized by their appearance. It is based on clay, which is fired at high temperatures during the production stage. The material can have different colors and textures, which the manufacturer manages to achieve by mixing different types of raw materials. An additional bonus of such decorative finishing is the possibility of using one-and-a-half or single products.
The cladding will resist frost well, demonstrate the qualities of strength and low water absorption. By decorating the outside of the house with this material, the consumer will receive a building with excellent weather resistance.
Clinker
Some consider this facing brick an ideal option for finishing a house. This is due to the fact that the material is frost-resistant, has high strength and low porosity. The cladding will be ready to last for quite a long time, showing resistance to external factors. But the walls will need to be additionally insulated, since brick has a high density, and therefore impressive thermal conductivity. But the finish behaves well in climates with high humidity and low temperatures. The consumer should not be afraid that the products will become saturated with water and collapse in the cold. The low porosity of the brick will not allow this to happen.
Silicate
This brick has been known for several centuries, but is still popular. However, it did not begin to be used en masse immediately. Today, the consumer has appreciated the advantages of this material. It is strong in compression, has low thermal conductivity and good sound insulation.
When purchasing silicate stone, you can count on precise geometry, frost resistance and the ability to breathe. In order to diversify the appearance of a brick facade, when framing window openings, you can use products with a decorative coating.
Hyper-pressed
If you like the look of a brick house, you should also consider hyper-pressed material for its exterior decoration. From one type of cladding brick to another, many positive qualities are retained. In the case of the described stone, it can be noted that it exhibits the following characteristics:
- environmental friendliness;
- frost resistance;
- duration of operation;
- moisture resistance.
The cladding looks very attractive. It is durable and has the correct geometry in products. On sale you can find colored analogs that are made by adding pigments to raw materials in the form of:
- ultramarine;
- chromium oxides;
- minium;
- ocher.
Quite often, this cladding is compared with silicate and ceramic products. It surpasses these analogues in strength. The master will definitely like that the hyperpressed brick adheres well to the mortar, which means there will be no problems with the masonry.
Attention! Hyperpressed brick can be made from mineral dyes, Portland cement and a mineral component. It is the latter that acts as a filler. In order to improve the appearance of products, the manufacturer uses microadditives.
Flexible
This brick-like material for exterior decoration consists of filler and polymers, so it can only be called an imitation of its natural counterpart. The cladding can be in the form of flexible tiles, the thickness of which is 6 mm maximum. The main advantage of such external brick imitation is that it can be laid in hard-to-reach places. The decorative layer will be resistant to damage, fire and moisture. It is durable and wear-resistant.
Attention! If the speed of work is important in the process of exterior finishing of a house, you should choose flexible brick, since its installation takes three times less time than conventional brick.
Installation of panels on the wall: facade cladding
Let's look at an example of how a façade is faced using brick panels.
Step 1. First you need to prepare the walls of the house. It is necessary to thoroughly inspect the house and make sure that all other work related to the facade has already been completed. If the facade is wooden, then it is important to cover it with protective compounds that prevent the onset of the rotting process and repel insects.
Preparing the walls of the house
Application of a protective composition
Step 2. Next, you need to purchase the required quantity of panels and be sure to read the instructions for them before starting work. There, the main aspects of installation are usually indicated and several tips are given on how to decorate the facade quickly, beautifully and without unnecessary movements.
Instructions for facade panels
Step 3. Also, before starting work, you need to acquire all the necessary tools that may be needed in the process. This is a construction level, a tape measure, a pencil, a plumb line, a coated cord, a hacksaw or a saw with fine teeth, and a jigsaw is also suitable. A grinder, a knife-cutter, metal scissors, and a screwdriver will come in handy.
Tools required for work
Step 4. Now you need to measure the base of the building relative to the horizon and identify the high and low points of the wall located above the horizon. A water level can simplify the task of identifying points.
The basement of the building is measured
Step 5. Before installing sheets of material, it is recommended to cover the walls with modern thermal insulation materials. This measure will increase the heat level in the house. First you need to install a wind vapor barrier; it can be attached to a wooden base using a construction stapler. Separate strips of material are attached with an overlap of 10 cm. Holes for windows in the material can be cut after its installation is completed.
Fastening wind vapor barrier
A stapler is used for fastening
Step 6. Now you need to mount the sheathing on top of the walls. The pitch of the main sheathing (vertical elements) should be no more than 40 cm. The sheathing can be made from wood or galvanized profile. In this case, a wooden block is used. It needs to be treated with protective compounds, just like the facade of the house. The block is fixed to the wall using self-tapping screws. At the moment, only the vertical sheathing bars are attached.
Next, the sheathing is installed
The bars are fastened with self-tapping screws
Another photo of the process
Step 7. Next, you need to tightly lay the insulation between the vertically installed sheathing elements.
Laying insulation
Step 8. A layer of diffuse membrane must be mounted on top of the thermal insulation layer.
Installation of a diffuse membrane
Step 9. Now you can start making the sheathing for the panels, vertical and horizontal. This time it will be made of metal profiles, each of which must be leveled before fixing. Fastening is carried out along previously installed wooden blocks using special fasteners and self-tapping screws. Vertical profiles are mounted taking into account the dimensions of the panels themselves.
A metal profile is used for the lathing
Each cut is carefully aligned
Profile fastening
Step 10. To install the horizontal lines of the sheathing, you need to draw a perfectly horizontal line in strictly marked places around the building. A water level and coated thread will make the work easier.
A horizontal line is marked
Marker used
Step 11. Next, you can install the horizontal sheathing inserts, which will be necessary for attaching the starting, J-profile and the horizontal part of the panels. Fixation is done using self-tapping screws. The distance between the slats will depend on the width of the selected panels.
Horizontal sheathing inserts are attached
Step 12. Starting profiles need to be installed on horizontally located sheathing strips along the entire perimeter of the building. They are still attached in the same way - with self-tapping screws.
Start profile
Profiles are fastened with self-tapping screws
Step 13. At the corners of the building you need to install special corner starting strips, guided by the applied markings. The corners will be mounted here.
Starting strips are installed in the corners
Step 14. You need to install all the decorative elements of windows and doors, and then attach the J-profiles vertically. They are needed to hide the joints of the edges of panels of different textures.
Decorative elements of windows and doors are installed
J-profiles are attached
Step 15. Now you can begin installing the panels. It is done strictly from left to right, starting from the bottom corner of the building and moving upward. The first panel needs to be cut to the desired shape in accordance with the geometry of the house.
Let's start installing the panels
This is how the first panel will be installed
Panel cutting
Step 16. Next, you need to install the lower part of the panel on the starting profile, and then secure it with self-tapping screws at the top in the holes provided for this. Self-tapping screws must be screwed in strictly in the middle of the hole. A gap of 1 mm is left between the screw head and the panel, which is necessary for freedom of expansion (occurs when the temperature fluctuates).
Panel installation
The panel is installed in the starting profile
Self-tapping screws are used for fixation
It is important to leave a small gap
Step 17. The next panel in the row must be installed in the starting profile with its lower part and inserted into the grooves of the first panel. It also needs to be secured with self-tapping screws.
Installing the next panel
Step 18. The remaining panels need to be installed in the same way as the previous ones. The edge panel must be cut to the required size and secured at the top.
The rest of the panels are installed in the same way.
Advice! To obtain a natural imitation of masonry, you need to move each subsequent panel in adjacent rows to the side by an arbitrary length.
Step 19. When the installation of the panels is completed, you can begin installing the soffits on the eaves of the house.
Installation of spotlights
Step 20. Now you can mount the corner strips. The corners must be installed on the corner starting strips and secured at the top with two self-tapping screws.
Corner
Video - Installation of brick panels
Design
Brickwork may look so that, by looking at it, you can immediately understand what material the walls are decorated with. But the appearance of the products can be so diverse that the facade turns out to be truly unique. You can achieve an unusual effect using glazed, smooth or embossed brick. But engobed products have a smooth surface and a special production method. Using these products, you can clad the facade using bricks in unusual shades, for example, purple.
Smooth
If the aging effect is not suitable, you can choose smooth brick as the façade cladding. It can be based on different ingredients, and the color can also be selected from a wide variety of shades. But the appearance of the cladding allows you to decorate the walls in a classic style. Quite often, texture or its absence allows you to save money, because products from designer collections are usually more expensive. If the budget is limited, smooth brick is just right.
Embossed
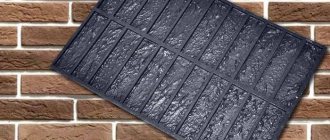
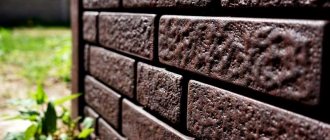
Aged brick has a relief that makes the product look like cladding made centuries ago. Brick with relief can imitate natural materials, for example, wild stone.
Glazed
If you want to give the facade a shine, you should choose this cladding effect. It is usually combined with other trim or brick in a different color, size or shape. Glazed bricks usually have unusual shades. It is the wide range of colors that is their main advantage.
Engaged
Modern architects quite often began to use engaged brick for the reason that its appearance immediately catches the eye. The products can be successfully combined with other cladding options, giving the building sophistication and unique charm.
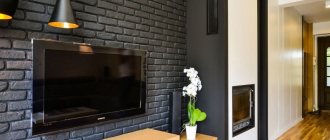
Pros and cons of imitation brick walls in an apartment
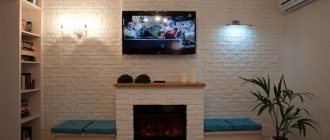
Decorative brick for walls in an apartment is, first of all, beautiful and fashionable. Among the advantages of the material are:
- small mass. It will not increase the load on the overall structure of the building;
- ease of care;
- resistance to mechanical stress;
- high degree of strength;
- if necessary, property owners can update only part of the surface;
- an extensive pricing policy, so every consumer will find their product from a category acceptable to them, this is an undeniable plus in our time.
In such an interior it will look out of place in any room.
The downside is the fragility of the decorative material. Therefore, before you make a brick wall in your own apartment, you will need to make sure that you can handle it with care during the laying process.
The color of the masonry can correspond to the taste preferences of the owners.
Dimensions
If ordinary brick is used for cladding a house, it will have standard dimensions - 250 x 120 x 65 mm. But decorative products can have a variety of dimensions. Flexible stone, for example, is supplied in separate sheets.
When using decorative brick-like tiles for work, you should lay them after there is a layer of thermal insulation and additional steam and wind protection on the frame. As for the sizes of such products, their height can reach 15 cm and length – 24 cm. The thickness of such stones does not exceed 25 cm.
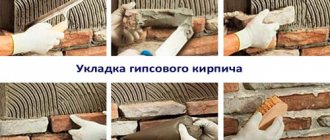
Stages of decorative brick finishing
The first important stage is preparing the working surface. Depending on the base, different surface preparations are carried out. Common to any surface is the mandatory plastering of the surface using fiberglass mesh.
If the wall has already been finished, you need to completely clean the surface, then apply the primer in an even layer, without gaps. After this, you can begin installation.
They start laying decorative bricks from the bottom, first mark the first row and put down control strokes so that all rows are the same height. The corner elements are laid first.
Using a notched trowel, the adhesive solution is applied both to the surface and to the back side of the tile. Then it is applied to the wall, moved slightly from side to side and pressed firmly. To achieve better adhesion to the surface, tap with a rubber mallet.
Depending on the chosen material and design idea, decorative bricks can be laid seamlessly or with jointing. Seamless installation imitates stone cladding; with this method, it is important to apply the solution to the end surfaces of the elements in order to hide traces of their joining. And the jointing imitates traditional brickwork. In this case, it is important to maintain the same distance between elements. After the glue has completely dried, grout mixture is applied to the gaps.
Review of manufacturers
There are a great many brands selling bricks. Russian manufacturers offer more affordable products, while foreign companies have a range of finishes that meet European quality. But such cladding is quite expensive.
Braer
This Russian company is based in the Tula region and supplies the market with high quality clay products. The company has a unique technological line with a capacity of 140 million bricks per year. Products are made by robots, which ensures ideal geometry. The company's management states that at every stage of production, bricks undergo technical control.
LSR
This domestic supplier is not only a building materials company, but is also active in the residential real estate field. The company has been operating since 1993, and has representative offices in three major cities of Russia. Representatives of the company say that the technological process of bricks is constantly being improved so that the consumer can appreciate the quality of the product, creating a unique home design and emphasizing its individuality.
Wienerberger
One cannot help but highlight the fact that the company has 200 brick factories in 30 countries. The company produces facing and building bricks, which are offered in a wide variety of shades and textures. The company is a leading international manufacturer of building materials. In Russia the company has 2 subsidiaries.
Tiileri
Each company positions itself differently. Tiileri describes itself as the most modern manufacturer of facing bricks. If you want to purchase products of an unusual shape, you should choose this company. It supplies high quality products that successfully pass Russian tests.
Nelissen
Nelissen started as a family business and has grown to become an international market. The company fights for environmental friendliness and high quality products, worrying about the exhaustibility of natural resources. The company itself is engaged in the extraction of clay, which is used in production and is also used for molding bricks by hand.
Domestic and “Terbunsky Potter”
Ecoclinker is a domestic manufacturer of clinker bricks. The company is the only one on the Russian market that supplies domestic consumers with clinker bricks. The manufacturer offers ready-made solutions for households and decorative products from several collections.
"Terbunsky Potter" specializes in facing ceramic bricks. This plant is considered the largest in the Black Earth Region. It was launched recently - in 2006, but works successfully using automated German equipment in production. It allows us to produce up to 40 million products per year.
German companies Hagemeister and Feldhaus klinker
Hagemeister has been producing quality products for a century or more. As often happens, a family business has grown into an industrial giant with unimaginable capabilities. Every year the company produces 120 million units of brick, which is used not only for finishing facades, but also for arranging horizontal surfaces - streets and sidewalks. If you need facade tiles or clinker bricks, you should consider the products of this company. She uses refractory types of clay in production, which eliminate voids.
Russian consumers have recently increasingly chosen German quality. Feldhaus klinker supplies hand-molded brick and tile products. The main advantages of the products are aesthetic appeal and good durability. Thanks to unusual textures, bold combinations of colors and shapes, the master manages to implement all kinds of architectural projects.
German brands Janinhoff and ABC
Janinhoff offers for sale traditional clinker, which is manufactured in Germany. This is another family business that helps bring bold façade solutions to life. An additional bonus for the customer is the opportunity to purchase products from a limited batch according to their own drawings.
ABC is a German concern that has been operating in the market for 160 years. It supplies ceramic building materials, which are made from its own raw materials.
How to choose
The outer walls of a building need protection no less than the foundation of a house. If you decided to choose brick for cladding, then before purchasing it you should take into account several nuances. Firstly, you should look at the product - it should not have unevenness, cracks or chips. There should be no defects at all on the surface of the facing brick, since it is used to improve the appearance of the facade.
If whitish spots were noticed on the surface, this indicates the presence of lime in the composition. In the future, such a flaw may destroy the brick. This happens due to poor grinding and lime getting into the clay. It is this place that will subsequently become a source of moisture absorption.
Attention! If you decide to choose a ceramic brick, you should not only inspect it externally, but also knock on it. If a ringing sound is heard, the product can be purchased. Whereas if there is a dull sound, it can be argued that the buyer is looking at an unburned product.
You should not place all the responsibility for protecting the walls of your house on the brick. It is usually laid, supplemented with heat and vapor barrier. And if there is also no wind insulation, this can reduce the life of the building. When the material for all internal layers has been purchased, you can proceed to purchasing the cladding. For the facade, it must belong to the same party, otherwise you may encounter a discrepancy.
Wood paneling
If you want to sheathe the outside of your house cheaply, then the option using planed boards is the most budget-friendly
Wood has been used in construction and decoration for centuries. This material has a beautiful appearance and is able to regulate humidity. In the photo you can find many options for wooden cladding of the house. Most often, a house block, lining for exterior finishing, or a board with imitation timber is used for this.
Externally, the block house very accurately imitates the surface of a rounded log. Any wooden finish is attached to the sheathing, then sanded and coated with protective impregnations. If desired, the finish can be varnished or painted.
If you want to sheathe the outside of your house cheaply, then the option using planed boards is the most budget-friendly. It is attached to the sheathing so that the bottom edge of the board overlaps the previous element by 1-2 cm. This herringbone finish looks impressive and is inexpensive.
However, wooden house decoration has several disadvantages:
- It is susceptible to rot, damage by insects and microorganisms.
- Without proper care, wooden cladding quickly darkens and loses its decorative qualities.
- This type of finish requires regular annual maintenance. If you want to clad your house and not have problems with maintenance, then this option is not suitable for you.
Tips for working with the material
- Laying should begin from the corners, guided by the beacons and periodically checking the horizontal level.
- In order for the masonry joint to be uniform, you should use a calibrated metal rod with a square section. This method is one of the simplest and most accessible today.
- The connection with the main wall can be realized with a masonry mesh. In this case, no reinforcement is performed.
Attention! If the masonry is supplemented with colored mortar, this will make the facade more original and attractive.
Choosing a dressing method for laying facing bricks
The dressing is the order in which the bricks are laid out relative to each other. When constructing walls, they are placed on top of each other to form a strong and stable structure. Correct placement of elements allows you to evenly distribute the load and reduce the percentage of settlement or deformation.
There are several options for dressing the brickwork of the facade:
- single-row - bricks are arranged lengthwise, offset by half a brick on each row. This option is suitable for walls no more than five meters high, as it is not very reliable;
- three-row - in the first row, bricks are laid out in width, in the next three - in length.
This type of masonry is good for constructing columns;
- multi-row - every fifth row is laid out horizontally. This option is the most durable and is suitable for houses with several floors.
Direct masonry
Direct laying is the simplest finishing method. Bricks can be connected to each other using any method. You only need to ensure the uniformity of the seams - the quality of the finished wall depends on them. By alternating different options for dressing bricks, with this type of masonry you can get an interesting pattern.
Decorative masonry
When molding decorative masonry, a pattern can be obtained both by using different colors and by varying the seams. To create a relief, bricks can be placed edgewise or flat. Here are several options for decorative masonry:
Another decoration option is to use bricks of various shapes:
To emphasize the originality of the design, craftsmen use a colored solution. You can prepare it yourself or buy a ready-made mixture in the store. The use of pigments allows you to create an original cladding without high costs.
Repair of brickwork of external walls
If the brickwork partially fails, it may be considered unsafe. Otherwise, repairs can be made. To do this, the site is cleared and individual bricks are removed. External seams should be cleaned and frayed edges removed. The most convenient way to do this is to use a hammer drill and a grinder. To increase adhesion, priming should be done. New bricks are installed in place of the removed bricks. Their laying is carried out using mortar. The bricks are pre-soaked.
Spectacular examples in the exterior
Some modern consumers refuse to decorate their houses with bricks for the reason that this cladding seems very ordinary to them. But, looking at the spectacular examples, you can understand that the facade can turn out to be so original that a better material for the walls simply cannot be found.
- So, if the house has an interesting architectural design, for example, columns, they can be faced with bricks of the same color, and the rest of the external walls can be decorated with textured products of a contrasting shade.
- When a house has a simple shape, it can also be decorated in a very unusual way. You can use bricks for masonry, combining their texture and shades. Contrasting colors look good. Dark bricks can be laid in the lower part, continuing the tab on top with products in light colors.
- Even if brick was chosen as the cladding, there is no need to decorate the entire facade with it. You can complement the decorative finishing with stucco, which will turn an ordinary house into a real palace.
- Classic brick is often combined with imitation natural stone. And if the windows and doorways have an unusual shape, such a combo will not only highlight the appearance of the house from all other options, but will also make the building the envy of the neighbors.
DIY installation rules
Laying decorative bricks does not require any special skills, except for attentiveness. It's easy to do it yourself. But if you have doubts or want to get quality work, use the services of professional craftsmen.
If you decide to do it yourself, here are the instructions:
- Before starting work on laying stone, prime the wall you plan to work on.
- After it dries draw rows to avoid mistakes when gluing the tiles.
- Start laying bricks from below , preferably starting from one corner and moving gradually towards the center of the wall.
- Don't cut the tiles straight away, finish the row. When the turn reaches the last one, adjust its length.
- If you are laying gypsum brick in a damp area, be sure to coat it several times with a moisture-repellent solution.
