There is no need to guess how long it will take for the glue to dry after laying the tiles - just look at the packaging. The manufacturer is obliged to indicate in the instructions the features of the use of the material in various conditions. The drying time of the glue depends on factors such as:
- Air humidity;
- Temperature;
- Chemical composition of the mixture;
- A type of glue.
By comparing this data with the manufacturer's recommendations, it is easy to determine exactly how long after installation it will be possible to walk on the tiles without fear.
What affects the drying speed of tiles
Parameters indicating the drying time period are indicated on the labeling of the adhesive, but this is indicative information; they are significantly influenced by the conditions under which manipulations are carried out.
Temperature
The ambient temperature must be in the range of +5-30 degrees, only such values will help the coatings fully adhere to the time stated by the manufacturer, the ideal figure is +20. When the thermometer shows minus, no laying is carried out.
Complete drying also depends on:
- Temperature differences outside the window and in the room. In the warm season, this will happen faster in a day or a little more. In winter, this period doubles, but artificially heating the space is not recommended.
- Floor heating, the higher it is, the better.
Additional wishes - the room is protected from drafts and excess direct sunlight.
Room humidity level
High environmental humidity significantly slows down drying; this figure should not exceed 60%, so we can confidently say that tiling the bathroom will require a longer drying of the surface before putting it into operation.
What is taken during the drying time of the adhesive composition?
Before deciding how long it takes for a tile to dry, it is important to understand the existing stages of hardening of the adhesive solution. In this case, there are 3 stages of glue hardening:
- installation condition (life period of the solution);
- primary setting (partial drying);
- final hardening.
Having understood this issue, you can clearly determine the amount of mixture to be mixed at one time and when you can walk on the tiles after laying.
Installation condition
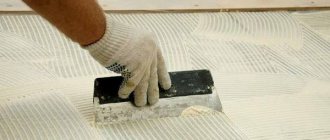
After the master has diluted the mixtures in the required proportions, there is a limited period of time to work and adjust the position of the tiles. This takes into account such characteristics as:
- period of use after dilution;
- working hours after applying glue to the wall;
- adjustment period.
It is important to understand that the adhesive solution takes longer to dry in a bucket than on the surface. The solution can remain in the container for about 5 hours, and after laying on the wall it begins to set after 30 minutes. It takes no more than 15 minutes to adjust the tiles.
Primary setting
The primary hardening stage implies a period when the tile is in a static state and the mortar has already hardened. However, the tile still cannot withstand heavy loads. The drying time for tile adhesive on the floor is about a day. At this stage, you can start grouting and cleaning the tiles. At this stage, you can already walk on the tiles, but you need to do this carefully.
Final hardening
The third stage is final hardening. The coating reaches the required hardness only after a week and the tiles can be fully used: place heavy objects and expose them to the necessary impact. The drying period for tile adhesive may vary: some solutions take longer to harden, so it is necessary to study their composition.
Signs of drying tile adhesive
Experts advise turning to two proven methods.
- One of them is to lightly tap the slabs with a rubber hammer; places with an insufficient layer of glue will sound muffled.
- Another way is to pry the tile by the corner and apply a little force to move it.
If this is successful, it means that the adhesive layer has not dried out, and the load is temporarily eliminated. It is advisable to do this operation in a corner, so when samples leave, returning them to their previous state is much easier to carry out than in the center.
How to determine the end of a process
There is no universal way to check the hardening of a solution. Professionals work with one brand of glue, so they know approximately the polymerization time. There are ways that help you find out the process completion period yourself.
The easiest way to check the drying of the solution is with a rubber hammer. Gently tap the ceramics in the corners. If the tile remains in place, then the glue is dry. The coupling can be identified by its sound. When struck with an instrument, the polymerized solution produces a very loud ringing sound, while the wet solution produces a dull, barely audible ringing sound. Air chambers formed under the very ringing tiles. Such elements will have to be dismantled and reinstalled.
Popular methods Source skarvit.ru
The cardinal method of determination is very rarely used. The tile is pryed with the edge of a spatula, torn off from the surface and the quality of the adhesion is checked. If the ceramics come off, then the glue has not dried. To make it easier to restore the coating, it is better to remove the elements from the corner parts.
The importance of complete drying
Only inexperienced craftsmen start grouting without waiting for it to harden. Ignoring this rule leads to poor adhesion and deformation of the coating.
Unaesthetic seams will force re-installation. Even if you are confident, it is not a bad idea to play it safe and reschedule the grouting work to the next day.
The optimal time after which you can walk on tiles
First you need to determine the drying time of the glue under optimal conditions. Room conditions are considered the norm
To do this, you need to pay attention to the microclimate of the room.
Optimal room indicators:
- Temperature – from 22 to 26 degrees;
- Humidity – 60%;
- No drafts;
- Lack of temperature indicators;
- The tiles should not be exposed to direct sunlight.
However, the indicators may differ. The main thing is that they are within the numbers specified in the instructions for the adhesive composition. A completely normal temperature is considered to be from 5 to 30 degrees and humidity within 50-70%. If you follow all the rules, you can walk on the tiles after a day.
The exact time it takes for the tile to dry is determined by the glue manufacturer. Therefore, these figures may vary from manufacturer to manufacturer. This is determined by different composition and manufacturing technology.
You must always follow the instructions exactly. Do not exceed the prescribed drying time. For insurance, you can begin further work by slightly increasing the specified period.
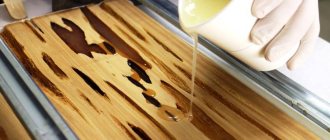
Selecting an adhesive base
The drying time is determined by the components of the glue. Typically, manufacturers indicate a period of 12-24 hours on the product packaging. For the universal type, this segment is quite enough.
If large-sized samples are placed, an enhanced action product is used, which dries up to 36 hours and can withstand even natural stone and porcelain tiles.
Exterior cladding requires a frost-resistant composition that takes at least half a day to dry.
In bathhouses, bathrooms, and swimming pools, a waterproof substance is used that dries within a day. The “white” adhesive consistency is suitable for mosaic designs and glass blocks, it will take a little longer than the previous version. Dry varieties are mixed with water following the instructions.
Why does the composition take a long time to dry?
Typically, the glue manufacturer always indicates on the packaging how long the composition will take to dry. This indicator should be considered conditional, because it is an approximate period of time that can be influenced by many factors. So everything is individual.
To create ideal conditions for the glue to dry, you need to ensure the room temperature is between 20 and 22 degrees, and the humidity should be within 60%. Then the composition will adhere well to the tile and surface. But if the house is being renovated, it will be difficult to achieve these conditions.
If you do not observe the required time and start using the tiles earlier, cracks and breaks may occur, because this material is subject to serious stress, including not only from movement, but also from the installation of heavy objects.
There are 3 indicators that will affect the drying speed of the composition:
- Room and outdoor temperatures are one of the main factors. If the weather is warm and dry, the glue will dry faster. The process is often speeded up by heating. In summer, the glue will dry in about a day; in winter, this figure can reach 2;
- When you lay tiles, be sure to look at the floor itself and its temperature. Usually it differs from the room one. Usually in warm weather this figure is 20 degrees, it can be lower, but not less than 5 even in cold weather. So this is also worth taking into account; more time will be needed when laying floors;
- If the air is too humid, the composition will dry more slowly. Therefore, it is necessary to evaluate the premises where renovations are taking place. For example, in the bathroom this process will take longer than in the hallway.
TOP-best tile adhesive
- Unis;
- Seresit;
- Knauf.
The leading position remains with the usual sand-cement screed, to which mineral components are added that increase adhesion and reduce water release.
Residential premises are finished with just such an accessible technique, waiting for hardening after 5 days.
- The components may include epoxy resin with organic ingredients and a catalytic additive.
- This is a durable mass that is not afraid of low temperatures, moisture, and can withstand significant mechanical stress. Its only drawback is its high price.
- Dispersion adhesive includes synthetic resins and organics; it is a budget option, sold ready-made, it is plastic and hardens quickly.
Liquid nails contain rubber and polymers, but they have a pungent odor and are used only for restoration purposes.
Air humidity
This is the next important factor. In the case of humidity, another rule applies: the higher it is, the longer the drying process.
If we are talking about the bathroom, then here, of course, the hardening time increases from 10 to 24 hours; in the kitchen, the drying process of the tiles will happen much faster.
- If the humidity is very high, then on such objects the drying time generally takes up to 7 days. This leads to a completely logical and obvious question: “How can you determine that the glue has dried and you can proceed to the next stage of repair?”
- To check whether the tiles are dry, there are two methods. The first option is to select a tile in the corner and try to lift it. It is better to do this manipulation in the corner of the room, because if you succeed in removing the tiles, then it will be easier to eliminate this defect in this place.
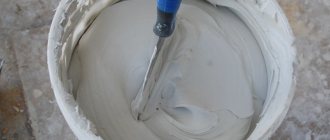
Tile adhesive layer thickness
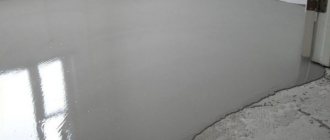
Initially, the floors are leveled, this will save costs. Differences are possible within 1-1.5 cm. At low points, the adhesive mixture is applied in larger quantities.
By the way, thickening the layer does not increase the hardening time. The volume of liquid in the composition is directly related to its plasticity, speeding up drying, but if water is absorbed at an accelerated rate, then strength is reduced. There are self-leveling solutions that have the property of self-leveling the plane to perfect evenness.
When there is no time to wait for the solution to dry
There are mixture options that harden quickly and allow you to walk on the tiles - this is a quick-drying tile adhesive. Thanks to its unique composition, it is able to completely harden within three hours, after which grouting can begin immediately.
Fast drying adhesive tile adhesive
It is often used in combination with a branded self-leveling floor, thanks to which the fast-hardening tile adhesive IVSIL EXPRESS+ allows for complete installation, including all floor leveling work, in just one day.
Approximately these minimum deadlines must be observed. But we repeat that these are only manufacturers’ indicators, that is, the period for comfortable conditions, average temperature and humidity. Accordingly, if there is a deviation from the norm, drying may increase.
Dependence on tile sizes
Small tiles set faster, which promises quick use. This reduces glue consumption. Large specimens are characterized by the frequent occurrence of voids, increasing the load on the adhesive base. You should not rejoice at the rapid hardening.
It is possible that the priming work was carried out with errors, and water was drawn out of the base, without providing the material with adhesion, and this is a threat of peeling.
Walking on the floor is allowed after 24 hours, but to do this the following conditions must be met:
- Shoes should have a soft sole without a heel.
- Avoid accidental falling of large objects.
- Postpone arrangement of furniture.
You can lay a plank or plywood bridge to mitigate the negative impact on the fresh surface.
How to check if tiles are dry
It is impossible to determine one hundred percent whether the tile is stuck or not. Some try to disconnect one part of it, but it is better not to do this. You can also knock on the tiles - a duller sound indicates that there are voids.
If you notice that any part is coming off, you should disconnect it, remove the glue and glue it on again. Try to wait longer than what is written on the package. This way you can be sure that the coating is stuck and you can walk on it.
Low temperature
When the temperature decreases, the drying time increases significantly. Zero or minus on the thermometer will cause the solution to freeze and, as a result, it will swell.
Before installation, you will need to warm up the surface with a heat gun, without turning it off until complete hardening upon completion of installation work.
What happens if humidity is high
This factor also significantly affects how long the tile will take to dry. It is impossible to predict the time required for drying. If the humidity level has only slightly exceeded the permissible level, you can try to correct the situation using the same heat guns.
If the floor on which the tiles were just laid turns out to be completely covered with water, there is nothing left to do but completely dismantle the covering and lay a new one.
But only after a certain time, when the base is completely dry. The glue absorbs moisture very quickly and even after drying it deforms the floor surface.
Specifics of grounds
A simple base is considered to be concrete, brick, cement, blocks, which are not afraid of deformation.
The list of complex substrates has been expanded:
- Plastic;
- Wood;
- Plasterboard;
- Metal;
- Glass;
- Old tile raw materials.
In complicated cases, they operate with a dispersed or epoxy composition.
Why wait until the glue is completely dry?
You can often hear advice that you can grout the seams of floor tiles without waiting for them to dry completely. Professional builders do not recommend doing this, since there is a high probability that the adhesive mixture has not completely set in some areas and stepping on the tiles can move the row. This can only be corrected by dismantling the entire section.
We also recommend watching - Mapei tile grout: application features
The thickness of the mortar layer under the tile is uneven, and if there is a load on the place of insufficient application, there is a high risk of damage or breakage of the facing material.
The need for quality drying
Even if the glue sets, there is a risk of damage to the ceramic. The strength characteristics of the floor are acquired gradually.
The layout is as follows:
- The masonry work process takes about an hour.
- Hardening without gaining strength takes two days, after which grouting is allowed.
- Final fixation with the possibility of arranging furniture is achieved after a week, which is confirmed by professionals.
Of course, I want to finish the renovation as quickly as possible, but haste is a bad advisor. If you fail to meet the technological deadline, you will disrupt the adhesion, causing detachment, and this is a guarantee of unexpected expenses and a blow to the family budget.
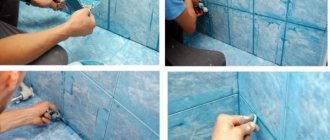
Signs of hardening
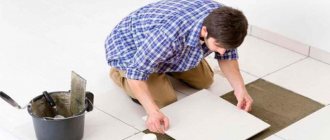
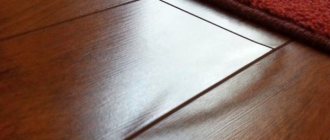
Laying tiles on the floor
The tiles are laid, I want to know how long it will take to grout and clear the seams, install the toilet, and start walking.
But first you need to make sure it grabs.
The easiest way to check this is by clearing the seams on the tiles from the edge where they were laid.
They remove the crosses and when clearing the seams, look to see if it is hard everywhere, or if there are areas that feel earthy to the touch. If the glue is dry at the edges, they move on slowly, cleaning the seams, and so on until the end.
As a rule, tile adhesive becomes lighter after hardening, and if the adhesive taken out from under the seam is dark, it means that it has not yet hardened, and you should wait another half a day. But you shouldn’t wait too long with clearing.
When the glue gains strength, it will become problematic not only to clear the seam from its beads, but also to simply remove the crosses and wash the tiles from dirt.