Self-leveling floor and concrete screed
The difference between a self-leveling floor and a concrete one is the more liquid consistency of the former, as well as the presence of small particles that penetrate deep into the cracks. Substances that improve its fluidity, hardening, and strength are added to the mixture for self-leveling flooring. How long does it take for a self-leveling floor to dry? Usually 3-4 hours are enough for you to walk on it and do light work. Complete hardening takes about a week.
Interesting: An ideal surface can be formed with a thickness of 2-3 mm of liquid floor.
Factors affecting drying
The process of waiting for the floors to be completely ready is divided into two stages: setting and hardening. Hardening begins 30 minutes after pouring and lasts from 2 to 12 hours. It is at this stage that you should not walk on the floor.
Curing is a finishing process that can take up to two to three weeks. But at this time you can already walk on the floor and that’s all. Full operation is possible only after complete drying.
What can affect drying time? In fact, there are a lot of factors. First of all, this is the type of mixture that we discussed above. Drying is affected by the thickness of the layer and their number.
Manufacturers usually indicate the drying time on the packaging, but this time refers to ideal drying conditions, so usually add another day or 12 hours to the time indicated on the packaging. 3D surfaces take much longer to dry than normal ones. You need to estimate approximately a week's time. When using quick-drying mixtures, it will take 3-4 days to harden.
Purchase of materials
In order not to run to the hardware store every day, it is worth purchasing basic equipment. Useful:
- wire brush, solvents, broom or vacuum cleaner (for removing debris);
- level, tape measure and marker for marking floor thickness;
- self-leveling mixture;
- deep penetration primer or contact concrete;
- 2 clean containers of 80-100 liters for priming and mixing the solution;
- a mixer with a nozzle or any device for mixing the solution;
- primer roller;
- needle roller and smoother (usually a squeegee);
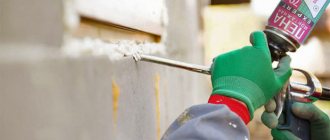
- sealant for surface preparation;
- damper tape;
- shoe linings.
How to achieve good quality self-leveling flooring
If the mixture is applied incorrectly or carelessly to the base, the drying of the self-leveling floor may result in unexpected results. For example, the presence of cavities, depressions, bubble structures. To avoid troubles after drying and additionally guarantee the correct drying time of the self-leveling layer, you will need:
- dilute the mixture in accordance with the recipe specified in the manufacturer's instructions;
- apply the finished composition in a thickness not exceeding the maximum;
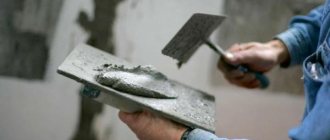
- You shouldn’t expect that the floor will level itself after pouring. The solution must be evenly distributed over the surface with a long spatula;
- To ensure that bubbles or cavities do not appear in the mixture layer after drying, it is necessary to perform degassing. This, in particular, is part of the answer to the question of how to level the surface of a self-leveling floor correctly. It is rolled with a needle roller, while it is necessary to apply gentle pressure and ensure that the mixture does not form sagging.
Mixture calculation
To determine the amount of solution, you must:
- Find the highest point, design using a level and place beacons. The largest difference plus the height of the new floor layer is the thickness of the screed.
- Calculation formula.
To fill 1 m2 you need 1 liter of mixture with a screed layer height of 1 mm. If a 30 mm layer of self-leveling floor is required for pouring, then for every square meter you need 30 liters of solution.
On a note. Manufacturers can indicate their mixture consumption for pouring 1 m2. It is worth following these recommendations.
For a room of 12 m2, 360 liters of mixture will be required with a screed thickness of 30 mm. Calculation of self-leveling floor
Briefly about the main thing
The drying of the self-leveling floor is a parameter that determines when you can begin laying the finishing floor covering. The parameter consists of two parts: drying itself and strength gain; they allow you to determine when you can walk on the screed and when you should start laying tiles or parquet.
Manufacturers indicate approximate terms, since the process depends on external factors. To speed up drying, it is important to ensure optimal conditions in the room and protect the screed from the sun and drafts.
Ratings 0
Surface preparation
In order for the self-leveling floor in an apartment to last for more than a dozen years, it is worth properly preparing the subfloor. The concrete slab must be well cleaned, free of paint, oil stains and other foreign substances.
Attention! To determine its degree of readiness, you need to draw perpendicular lines on the stove with a regular coin with maximum effort. If the cross turns out smooth, without fringe, you can start cleaning and priming.
If there are peeling areas, cracks or holes, they need to be expanded a little (if they crumble) and filled with quick-drying mixtures. The gaps can be closed with several types of materials:
- Mastic.
- Powder mixtures.
- Film or roll membranes.
To remove crumbs and debris, use a vacuum cleaner or broom. Dirt and paint can be removed with a brush or solvents.
Applying primer
The primer is necessary for adhesion of the solution, better dust removal from the surface of the subfloor and protection from moisture (otherwise the liquid from the self-leveling floor solution will be absorbed).
Note!
Laying quartz vinyl tiles with your own hands step by step: instructions, subtleties, methods, features, installation, “Click-Drop”
Suspended ceiling Armstrong (125 photos): device, plate sizes, types, installation, calculation and installation
Textured paint for walls: types, how to apply it yourself, instructions, composition, varieties, photos of new designs
If the base of the subfloor consists of a concrete floor, a special type of primer is suitable - contact concrete. If there is a concrete screed underneath and the base is rough, deep penetration primers are usually suitable.
Attention! After priming, at least 3 hours must pass. After this, check the quality of the work: pour a little water on the primed surface and wait 5-10 minutes. If water has been absorbed, priming should be repeated and the floor should be re-tested for absorbency.
Damper tape
Damper tape is a separating layer between the floor and walls, since concrete can expand due to temperature changes.
Installation of damper tape
Damper tape does not need to be used if the floor thickness does not reach 0.5-1 cm or more.
For a screed of 1-2 layers, a tape 10 cm wide is suitable, and for prefabricated structures - from 15 cm. It is convenient to use a tape with special markings on it to remove excess.
The tape is glued to the subfloor, which is dry. If you plan to have a warm floor, the tape runs between the vapor barrier and the heating elements.
Installation of beacons
Beacons are necessary as a guide to the floor pouring level. They can be marked on the wall around the perimeter of the room, connecting with a solid line around the perimeter.
The principle of installing beacons:
- At any convenient height, it is worth marking a line along the perimeter of the room using a regular or laser level. For example, 20 cm from the floor;
- Find the highest point on the subfloor using a tape measure. To do this, use a tape measure to look for a high point near the wall from the floor;
- when the high point is found, add the desired height of the self-leveling floor to it (for example, 15 mm). This will be the height of the floor;
- measure the distance from the line laid level to the height of the floor and lay this distance along the entire perimeter of the room.
Attention! For small rooms (kitchens, bathrooms) a regular level is suitable. For larger rooms, it is better to purchase a laser level, which will not allow you to make mistakes in measurements.
Note!
Choosing a heated floor: water, infrared, film, rod, cable, resistive, self-regulating, pros and cons + instructions
Kitchen renovation in Khrushchev (155 real photos): new designs, layout options, furniture placement and zoning of a small kitchen
Decorative plaster: types for interior wall decoration, design photos, instructions for application and combination in the interior
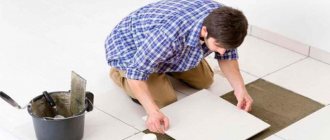
Pouring self-leveling coating
Every beginner who has started a renovation should have knowledge about the drying time of the floor after pouring, be it a private house or an apartment.
Recommendations:
- If a gypsum screed is poured in a bathroom, the hardening time will be about 3 days or more. Everything largely depends on the operation of ventilation.
- If you plan to lay parquet boards, laminate, linoleum on a gypsum coating, then installation is allowed only after 7 days.
- It is cheaper and better to use cement-based mortars for tiles rather than pouring gypsum. But unfortunately, in this case they dry out the longest. If the layer is not thick, then you will need to wait from 8-14 days, but if the layer exceeds 10 mm, then the drying time increases significantly to a month.
In general, the curing time largely depends on how well the filling work was carried out. If the solution was distributed unevenly over the base, local areas can harden quite quickly, but to dry other areas you will need to wait longer for 10-12 hours.
Remember! If for some reason you plan to pour a very thick layer, it is recommended in this case to pay attention to lightweight solutions, due to which the load on the base will be significantly reduced. But such a screed will take a little longer to dry.
Types of mixtures
To avoid purchasing a counterfeit, you need to study the current certificates from the seller and know the manufacturer’s protection against counterfeiting.
Worthy brands of mixtures for self-leveling floors are Eunice, Horizon, Knauf, Ceresit.
Attention! If the self-leveling floor begins to peel off or crack, you can try to file a complaint with the manufacturer. Leading brands try to meet customers halfway.
Manufacturers of mixtures for self-leveling floors use gypsum or cement as a base. Gypsum screed is good for use in rooms with large uneven areas. But for wet areas it is better to choose cement as the base of the mixture.
Drying conditions
There are many factors that affect how quickly a self-leveling floor dries. The main ones are the following:
- Type of dry mixture;
- Number and thickness of layers;
- Additives used during installation;
- Type of finishing material (laminate, linoleum, tile);
- Humidity and temperature in the room.
After complete drying, the liquid floor, if it was used as a rough coating, can be decorated with various finishing materials.
In order to speed up the polymerization of self-leveling floors, certain conditions must be met:
- The mixture should be evenly distributed over the base. Although the floor is called “self-leveling,” it still needs help. To ensure that the level of the solution is the same, use a short or long (as necessary) spatula. To remove air bubbles from the solution, use a needle roller.
- The optimal room temperature should range from 22° C to 25° C. Temperature jumps are unacceptable, otherwise hardening will take more than 14 days.
Compliance with pouring technology is the key and guarantee of the quality of the future surface. Distributing the mixture with a spatula is one of the installation stages. This operation allows you to align the layer and set its thickness
- For quick drying, the humidity level should be 60-65%.
- The surface must be protected from direct ultraviolet rays. To do this, an hour after pouring, the floor is covered with a special film.
- Six hours after pouring, a protective varnish is applied to the floor.
- After 12-14 hours it will be possible to walk on the surface, and after a week it will be subject to maximum load.
How to prepare the solution
Use a construction mixer with an attachment to mix the solution in a clean container, and strictly follow the instructions on the package. To distribute the mixture evenly, you need to periodically stir the lumps along the bottom of the container with a spatula. After the mixture has become homogeneous, you need to wait 3-5 minutes, mix again and start pouring the floor.
After each batch, it is worth cleaning the container, otherwise large fragments can ruin the filling.
Drying times from different manufacturers
You need to specify the drying time of the fill before it is permissible to move on it and subsequently lay the decorated coating from the manufacturer or sales consultant (information on the packaging). But on average, the most common mixtures guarantee the drying times indicated in the table below.
Mineral self-leveling floors - Characteristics table
| Characteristic | Quick-hardening self-leveling floor “Starateli” | Ceresit CN 175 Super | Skorline FK48 R "Osnovit" | Volma "Nivelir-express" | LITOLIV S5 |
| Recommended layer thickness: | |||||
| -minimum, mm | 5 | 3 | 3 | 5 | 1 |
| -maximum, mm | 10 | 60 | 80 | 100 | 5 |
| Possibility of technological passage, h | In 4 hours | No earlier than 4 hours later | In 4 hours | After 4–6 hours | After 4–5 hours |
| Flooring installation | After 7 days | After 7 days | Ceramic tiles – after 3 days | After 7 days | After 12–24 hours |
| Laying parquet, laminate, linoleum, carpet – after 7 days | |||||
| Compatibility with heated floors | Yes | Yes | Yes | Yes | Yes |
How to influence the curing time of self-leveling floors
Considering what factors influence the drying time of a self-leveling floor, it is important to create favorable conditions to speed up the process. Most manufacturers give their own recommendations on dry mix packaging. However, most of the requirements can be reduced to basic rules:
- do not exceed the recommended layer thickness. If there are unevenness or cracks on the base for pouring that increase this thickness, it is necessary to seal them with a repair compound BEFORE pouring and wait for it to completely cure. The same applies to a significant difference in height across the area of the room. If the difference in height in different corners (near the walls) of the room is more than 10 mm, it is advisable to first perform leveling using a cement-sand screed to compensate for this difference. If a sufficiently large area is “filled up,” you can add one more layer to the planned number of self-leveling floor layers, filling the existing depression and only then applying the composition to the entire area of the room;
- provide the necessary temperature and humidity conditions. Average indicators for different manufacturers are 20...25 degrees Celsius, humidity 20...60%, no zones of intense heating or cooling. It should be remembered that mineral compositions are more demanding in terms of humidity and temperature. To ensure their uniform hardening, it is better to cover the entire flooded area with a polymer film for the first hours. This will protect the composition from drying out in spots. This recommendation is especially significant for a base layer with a pronounced difference in thickness;
- To make it easier to maintain the required regime, it is better to choose a season for carrying out work with minimal fluctuations in temperature and humidity. So, it is not rational to fill during a strong thaw in winter or a sharp cold snap in summer: the duration of such periods is short, a significant change in the weather will complicate maintaining the desired temperature and humidity;
- It is impossible to introduce a system of “warm” floors to speed up drying - this will lead to partial hardening and cracking of the surface in the future.
Polymer self-leveling floors - Characteristics table
| Characteristic | Teping Floor 205 transparent | EPOXITEK (EP-2331) | QTP 1130 | Elakor-ED | MONOPOL 5 EP |
| Thickness of the applied layer, mm | Up to 20 | Up to 2 | Up to 5 | Up to 5 in one pass | Up to 5 |
| Viability of the finished mixture at T +20 °C, min | 30 | 20 | 60 | 30 | 15 |
| Drying time | 24 hours | At least 10 hours | From 5 to 16 hours | 10 hours | At least 6 hours |
| Mixing proportions | |||||
| -component A | 1000 g | 5 parts | 1000 g | 750 g | 25 kg |
| -component B | 588 g | 1 part | 600 g | 100 g | 5 kg |
| Consumption | 1.1 kg/m² with a layer of 1 mm | 1.5 kg/m² with a layer of 1 mm | 1.54 kg/m² with a layer of 1 mm | 1.63 kg/m² with a layer of 1 mm | 2–3.5 kg/m² with a layer of 1.5–2 mm |
Advantages and disadvantages
The technology described above for producing a perfectly flat surface has obvious advantages:
- To level the base and level out differences, you will need a thin layer of self-leveling self-leveling floor - a few millimeters will be enough.
- The leveling layer does not affect the weight of the floor structure and does not require reinforcement.
- You can achieve a leveling layer with a thickness of just under 1 millimeter, while maintaining the unique strength of the coating.
- When pouring the leveling compound, absolutely all irregularities and voids on the surface of the base are filled, and only after that a horizontal plane is created.
- One of the main advantages is the availability time. If a traditional screed will be ready only after 28 days, then the self-leveling floor is ready for use in 2-3 days, and some coatings can be walked on just a few hours after pouring.
- Most compounds, due to their technical characteristics, create a waterproofing barrier on the floor.
- When drying, the self-leveling floor shrinks minimally.
- Modern manufacturers are ready to provide self-leveling floors that differ in composition and performance properties, which allows you to select the necessary material for any conditions and premises.
- If the technology for manufacturing self-leveling floors is followed, the process occurs quickly and is not associated with contamination at the site.
- There are compositions that are used as a finishing floor covering, and various methods of decoration allow you to create unique interior solutions.
This coating also has disadvantages that you need to know about in advance:
- It is important to strictly follow the technology for manufacturing the self-leveling floor and the requirements for preparing the solution in accordance with the recommendations indicated on the packaging. The recommended fill layer is also indicated there, which guarantees the strength and durability of the coating.
- High-quality adhesion of the composition to the base and the strength of the coating are positive characteristics, but it is worth considering that certain difficulties may arise when dismantling the coating. In other cases, laying a new floor covering can be done directly on top of the existing self-leveling layer.
- It is not recommended to use self-leveling compounds when making floors with a slope.
- Self-leveling floors are much more expensive than a traditional screed, so if there are significant uneven bases in the room, it is better to level them with a screed, and only then bring its surface to perfection using a thin layer of self-leveling floor.
Filling principle
The liquid floor is poured in stages; the maximum depth can be filled up to 14 meters. The space is divided by formwork with an area of up to 25 m2 when pouring manually and up to 70 m2 when pouring by machine.
Attention! The viability of the finished solution is up to 30-40 minutes. Don't delay filling the floor.
Note!
How to update the tiles in the bathroom without changing them or removing them: step-by-step instructions, stickers, painting, decor (140 photos)
Do-it-yourself Venetian plaster walls: types, application instructions, photos of beautiful wall decoration, colors
How to unclog a toilet if it’s clogged: step-by-step instructions, a review of the most effective methods for removing a blockage with your own hands
It is worth pouring the composition evenly, trying to distribute the solution evenly over the area. If you pour the mixture into one point, it will not be evenly distributed.
Once the mixture has completely covered the area, use a needle roller to go over the surface. It will distribute the liquids evenly and remove air bubbles.
Attention! The height of the roller needles should be 2 times the thickness of the floor being poured.
Stages of hardening of mineral mixtures
Self-leveling compounds based on cement or gypsum, after mixing with water, gain strength in two stages:
- Hydration and adhesion. The mineral binder, after reacting with the liquid, is converted into a colloidal gel-like mass. The plasticity of the mixture at rest decreases, and the viscosity increases. After 30-60 minutes, called pot life, the solution sets. Until this moment, you can only walk on the surface with paint shoes or shoes with high spikes. To release air bubbles that entered the composition during mixing, deaeration is carried out - rolling with a needle roller. After 2-12 hours, irreversible changes begin, characterized by the formation of crystals.
- Durability set. Upon completion of hydration, the crystals grow together to form a framework. The dough is compacted and strengthened. Manufacturers allow walking on self-leveling floors. But it’s too early to start finishing work associated with increased loads. Under normal conditions - temperature +20°C and humidity not lower than 60% -65% - the solution gradually hardens.
When dry, the surface becomes lighter and loses its shine.
Usually, after 7-14 days, the compositions gain 60%-75% of the design strength, and on the 28th day - 100%. Friends, an article was recently published about how to fill a self-leveling floor with your own hands, be sure to read it, and yesterday we wrote about the thickness of the self-leveling floor, you can quickly find all the information by following the links.
How long does it take for a self-leveling floor to dry?
There is no clear guideline for how long it takes for a self-leveling floor to dry under laminate or other coatings. The hardening time depends on:
- from the composition;
- room humidity;
- temperature;
- layer thickness.
How long does it take for a self-leveling floor, for example Horizon brand, to dry? With a floor thickness of 1 cm, you can walk on it and carry out work within 3 hours. It dries completely in 3-7 days at a temperature of +20 degrees and a humidity of 65%.
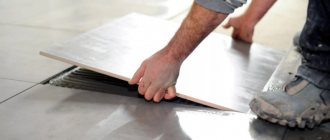
After the floor has completely hardened, you can lay laminate, tiles, other materials, or leave it as is (if this is a warehouse).
What determines drying time?
The information that mixture manufacturers place on the packaging is an average value calculated for standard conditions. In reality, the drying time of the self-leveling floor depends on various external circumstances. The following reasons have the greatest impact:
- Type of composition. One group includes screeds (rough levelers, cement-based). The second group is self-leveling (self-leveling) mixtures, what is usually called self-leveling floors. These include epoxy, polyurethane and other polymer floors.
- Quality of the dry mixture (brand, proportions of additives and polymers included).
- Layer thickness and number of layers applied. Obviously, the thicker the layer, the longer it will take to harden. The pouring time for multi-layer floors also increases.
- Working conditions: air temperature and humidity.
Classic interior with self-leveling floor Source wp.com
Self-leveling 3D floors
The sea with exotic fish underfoot, a forest lawn with flowers: it is possible to decorate the floor with a decorative pattern. There are self-leveling floors based on epoxy resins. They form a smooth surface, and dyes can set any color to the floor or even a mix of them. If a design is needed, then a white backing is applied, followed by a decorative design and a transparent protective layer. How long does it take for a self-leveling 3D floor to dry? The layers can harden within 10 minutes, and complete drying will occur in several days.
You can fill self-leveling floors yourself if you follow the manufacturer’s recommendations and remember the subtleties described in the article. This is also an excellent finishing option, since after just 4 hours you can carry out simple work on them.
The influence of the composition on the drying time of the self-leveling floor
A comparison of polymer and mineral dry mixtures shows: polymer-based compositions harden faster. This is due to the fact that reactions in polymer compositions occur faster.
Cement self-leveling floors, which are usually called self-leveling, are characterized by a pattern: the higher the percentage of cement to other components, the longer the drying period. The pattern is based on experimentally confirmed data on the hardening (“maturing”) of pure cement:
- the setting period is 2...12 hours from the moment of mixing the “cement dough”. During this period, hydration of minerals occurs, a colloidal (adhesive) gel is formed and the solution loses its plasticity. Due to thixotropy - an increase in viscosity at rest and a decrease when moving - the solution spreads on its own for some time and can be leveled by mechanical means. After the initial setting, the surface acquires such hardness that it allows people to move;
- period of initial strength gain. Cement reaches 60...80% of the declared strength (depending on the brand) in 7...14 days. At this time, most of the crystalline structures are formed;
- the final strength gain (up to design 100%) occurs for pure cement on the 28th day.
Thus, the drying time declared by the manufacturers depends on how much pure cement and what brand is present in the solution. Plasticizers and modifiers have a shorter setting period, therefore, when specifying curing times, they are guided specifically by cement. Most popular compositions gain final hardness in 14...28 days.
Gypsum and gypsum-cement self-leveling mixtures depend on the brand of gypsum and the additives added more than cement ones. Accordingly, drying times also vary - from 7 to 14 days.
For polymer formulations, the curing time depends on the reaction rate of the base polymer. For epoxy, polyurethane, methyl methacrylate mixtures, the hardening speed is different (more detailed information is presented in the article “Self-leveling floor: instructions for pouring it yourself”).